steve2286w
Well-Known Member
- Posts
- 5,229
- Location
- monkeyangerland
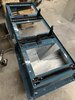
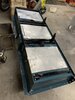
They look good like the idea of popping into existing holes cheers
Thanks, pop over kettles always on mateHi mate, the build looks awesome! I'll have to pop round and check it out some time...
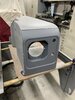
Thanks for the info Steve, dont have any glass nor a cutter so plan ‘b’ I’ll order one fromComing on nicely
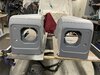
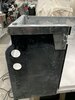
The glass block on mine was missing so I found a piece of glass same size cut it on my tile cutter machine and used some araldite epoxy for glass stuff.
Welcome To LandyZone, the Land Rover Forums!
Here at LandyZone we have plenty of very knowledgable members so if you have any questions about your Land Rover or just want to connect with other Landy owners, you're in the right place.
Registering is free and easy just click here, we hope to see you on the forums soon!