You are using an out of date browser. It may not display this or other websites correctly.
You should upgrade or use an alternative browser.
You should upgrade or use an alternative browser.
Series 3 SWB Nut and Bolt rebuild
- Thread starter UpandOver
- Start date
This site contains affiliate links for which LandyZone may be compensated if you make a purchase.
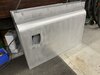
New door skins and galv door tops arrived today from sp4x4. Bonded the skins to the original door frames that had been blasted repaired and painted. Hammered the edges over then a quick once over with 240grit DA. All ready for epoxy ali primer
Attachments
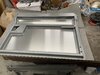
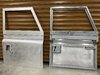

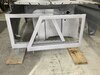
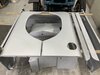
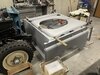
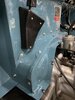
Well a very productive day, epoxy primed all the doors, sills, new door hinges and gave the wings another coat they’re all ready to go with the bonnet for some marine blue. Auxiliary dash panel refurbished, sanded and painted then found a replacement plastic cover strip with no damage on the net, ebayed a new brake warning light holder and a pull fog switch.
Just sat down with a beer and contemplating wiring in the dash …….
Just sat down with a beer and contemplating wiring in the dash …….
Attachments
steve2286w
Well-Known Member
- Posts
- 5,229
- Location
- monkeyangerland
That’s a cracking day deserve a few more beers, my task today was to stop the clanking exhaust by making a spacer for the clamp never got round to it , spent half a day cleaning out one cupboard
Can you show some pics of the landy as is please
Can you show some pics of the landy as is please
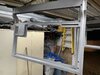
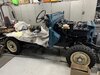
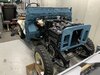
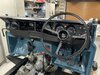
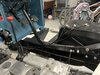
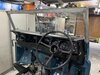
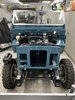
Thanks Steve I’m very pleased with the progress this week. Here’s some piccys fresh from the man cave !
Attachments
steve2286w
Well-Known Member
- Posts
- 5,229
- Location
- monkeyangerland
Incredible job you’re doing and not far away now, wiring up looks a bit of a headache, looks like you labelled up the old one which will help a lot
adrianhartopp
Active Member
- Posts
- 93
- Location
- Rugby, UK
Fantastic progress. Also, pleased to see you're looking after your physical health with the gym equipment in the background.....................
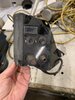
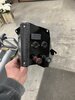
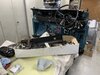
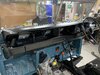
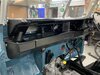
This weekends tinkering include , finishing off the wiring, fiting the dashboard. Glad to say that most things work, fitted new modern flasher relays, and I need a new dash light toggle switch, and the jury is still out on the fuel sender unit …. With so little fuel in the tank its hard to tell.
Attachments
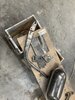
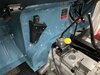
This evenings handy work was fitting the windscreen and the handbrake. Although I messed up a bit while fitting a stainless rivet into the handbrake ! Doh ! Hammered the rivet thats half way down that holds the small triangle piece that connects the rod from the button just to realise that the rivet hadnygone through the triangle bit that it was suppose to hold ?!! Retard !
Attachments

steve2286w
Well-Known Member
- Posts
- 5,229
- Location
- monkeyangerland
That looks so good, brand new complete with the speedo with zero miles on too
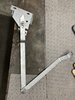
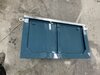
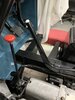
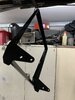
A few hours in the garage today got the bonnet stay back together and the galv back panel rivited onto the rear tailgate.
Made the centre rivet on the stay was made by grinding a flanged m8 bolt to a rivet shape, heated it up red hot then hammered it flat and mushroomed the end.
Made the centre rivet on the stay was made by grinding a flanged m8 bolt to a rivet shape, heated it up red hot then hammered it flat and mushroomed the end.
Attachments
Last edited:
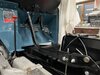
Gearbox tunnel fitted, handbrake complete with new clevis and pins
Attachments
steve2286w
Well-Known Member
- Posts
- 5,229
- Location
- monkeyangerland
BikerB
Well-Known Member
- Posts
- 7,068
- Location
- Far up North
I used them, drilled a hole and then put fresh paint in it. Used a punch to hit the clip in the middle. The hole needs to be a fairly tight fit to make sure they don't come out again. However for the pipe to the rear I used the zinc plated clips with the self tapping screws
Similar threads
- Replies
- 274
- Views
- 48K
- Replies
- 7
- Views
- 2K
- Replies
- 19
- Views
- 4K
- Replies
- 36
- Views
- 6K
- Replies
- 6
- Views
- 4K