Introducing Sergeant Cash

This site contains affiliate links for which LandyZone may be compensated if you make a purchase.
Steering Wheels .............

Loosen the nut but leave it on there, grasp the Wheel, and rock it to and fro on the spline with one hand pushing down down as the other pulls up (both directions) with hands at 9 o'clock / 3 o'clock ................ Never had one fail to come off on any car.

Whacking the Column is not a good idea, more so on newer stuff ;)

Craddocks, pah, don't get me started there, also they are too bloody expensive compared to others :( .................

Some good progress here :)

This is advice I'm very glad I was given before my first steering wheel removal. It's common sense once someone's pointed it out!
 
Now then, where was I?
Ah yes....winter came along and play stopped. Yeah yeah, I am such a wuss. :)

Anyway....got the steering wheel off, and removed the bulkhead, and that was about it until yesterday. Warmish, dryish day so tidied up the driveway and set about fitting the gearbox. As previously mentioned, Cash came with 3 gearboxes of which I know nothing at all, but I was told which one had most recently been fitted...so....

Gearbox refitted.JPG

that is the one I fitted. Bit of a struggle, mainly because I struggle with that sort of weight in my dotage, but it is in!!!

So today's job was the propshafts....or so I thought. Front one isn't too much of an issue:

Fronr prop.JPG


but the rear prop is going to have to wait until I do a full replacement job on the handbrake. Not sure why I had 2 pivots:

handbrake pivots 2.JPG


but the adjuster and expander were both seized, and the shoes had stuck---only to delaminate when the drum finally gave. Drum is about the only reusable part!
Dead handbrake 1.JPG


Dead handbrake 2.JPG


so rear prop is abeyance.
:)

Still waiting confirmation regarding the new bulkhead!!!!
:(
 
Rear prop is now attached...handbrake is rebuilt.
rear prop.JPG


handbrake.JPG

Usual sort of nonsense that defines my life....couldn't find the rod and pivots connecting the handbrake lever to the expander, so I ordered new ones....and found the old the next day!!! Shrugs...its only money! :rolleyes:

Front end painted and /or waxoiled:

front end 1.JPG


New bumper obtained and painted...bumperettes tarted up to match

bumper and bumperettes.JPG


And so to the bulkhead. Have finally given up on Pegasus....endless excuses and missed deadlines so I cancelled and asked for my deposit back. Deathly silence since then! Section 75 applies.....:mad:

Sheilder one being ordered tomorrow....:(

Oh...and still waiting for one of the boys at work to weld the rear crossmember :rolleyes:
 
OK, bulkhead take 2 ordered.

Handbrake linkage now done....except....can anyone tell me where on the transfer box the spring hanger goes, along with the spring?
A pic would be handy.
Cheers
:)
 
Unusually productive day, between the showers. In addition to bulkhead ordering and handbrake connecting I have replaced the clutch master and slave cylinders,
clutch slave.JPG
clutch master.JPG


remounted the seatbox:
seatbox.JPG


and mounted the front spots:
front spots.JPG


I actually have a feeling of getting there....strangely
:)
 
Unusually productive day, between the showers. In addition to bulkhead ordering and handbrake connecting I have replaced the clutch master and slave cylinders,
View attachment 265719 View attachment 265720

remounted the seatbox:
View attachment 265721

and mounted the front spots:
View attachment 265722

I actually have a feeling of getting there....strangely
:)

Really coming on now - great work!
That sounds really poor from Pegasus…… Have Shielder been more responsive? Are they similarly priced?
 
Really coming on now - great work!
That sounds really poor from Pegasus…… Have Shielder been more responsive? Are they similarly priced?

Obviously the death of the husband has thrown things out of kilter at Pegasus, but even before that they had a record of obfuscation. A shame really, coz their product had a great rep
The Shielder one has been bought through their retail company : Terraintech. Quality so far unknown, but can't complain about the speed. Will be delivered on Tuesday which represents 2 days for them to dispatch, and 5 days for haulage company to ship it the length of the country - and includes the weekend. Biggest disappointment is that I will have to butcher it to fit the Rocky engine, whereas Pegasus were making it bespoke. :(
Price wise I will save £400 plus cost of collecting from Pegasus :)

Roll on Tuesday :D
 
Front diff oil changed. Just the engine oil to go now.
I have started investigating the work-lights wiring. One external at rear, one inside the tub, and one in the cab
rear work lamp.JPG tub work light.JPG light switches 2.JPG
:)
 
OK, found a little mystery. The frontal drainage channel on the existing bulkhead has been cut off about 8 inches from the off-side and there is a definite change of paint colour behind the brake servo. The servo had not been attached when I got the vehicle:
Brake servo.JPG


any suggestions as to what might have been behind the servo....and why???

o_Oo_Oo_O
 
And so the rebuild commences. Bulkhead painted and mesh grills transferred. Wiper gubbins sited, and washers plumbed. Just wondering how far I can go with the bulkhead reassembly before fitting it. A balance between the convenience of being able to access all areas easily, against the weight of the damn thing when refitting.
rebuild 2.JPG


meanwhile things like brake pipes are also ongoing:
Brake pipes.JPG


:)
 
And so the 1700 pound question - does it fit????

New BH interior 1.JPG


New BH Engine bay 1.JPG


Yes!!
Happy days!
Now the pedal boxes...
Pedal boxes.JPG


and the heater/fan...
heater & fan.JPG


and on with the wing....
NS wing 1.JPG


and that is as far as that part goes until the timing belt is changed.

On with the bird's nest of wiring and the jigsaw of dash in the meantime.
:)
 
Well the enforced cancellation of the Norwegian Cruise means I have time on my hands for many things Landy - but of course I need the parts that I had expected to be here waiting for me when I got back. :(
but Tuesday's delivery of the timing belt happened today, so that is one ongoing aspect. :) Now I just need to get the damn crankshaft bolt undone:mad:

Metal aspects of the dash got treated - wire wheel, kurust, satin black :)
Will see if I can acquire some back2black once I get back to work.

This evening's task is to try to remember/find out what order the bits go back on in. o_O

Pics tomorrow....between showers!
:)
 
Major drawback with all things galvanised - ie bulkheads, chassis, etc....they cut the holes to size in the original metal...then they galvanise it and then I paint it - several coats - and guess what? The holes are all too small now :mad: Things like plastic inserts for screwing into to hold the upper and lower dash on don't fit no more....unless you scrape out the paint and the galve....so what was the point ?? o_O

However:

top and bottom.JPG


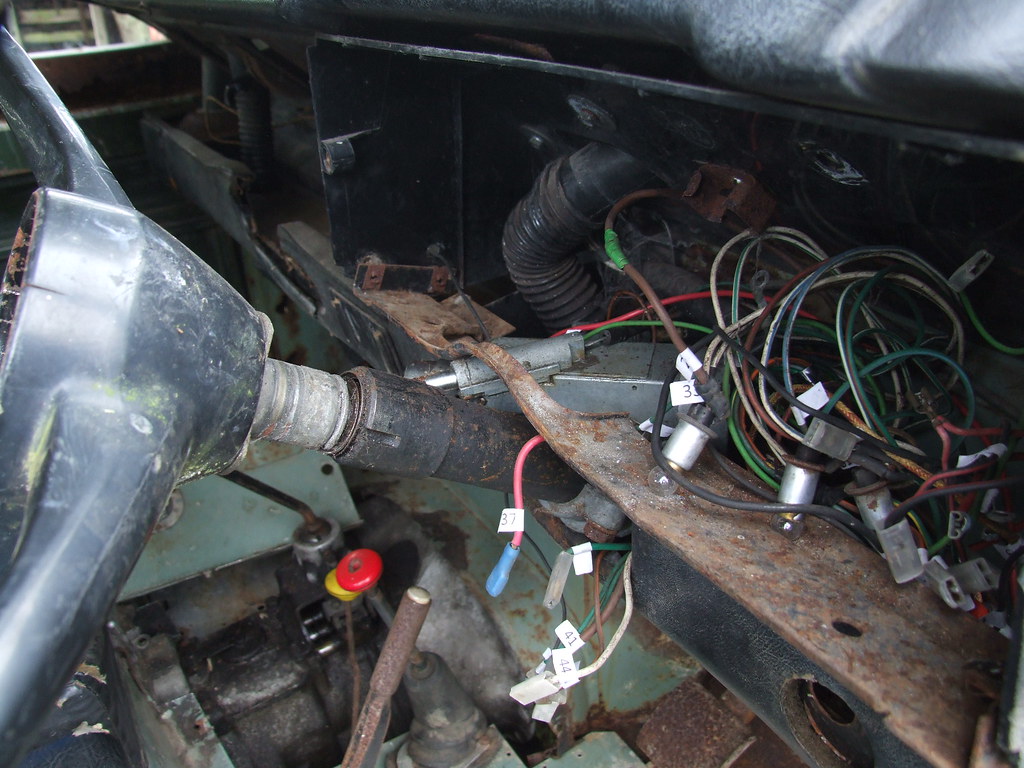
The metal bit lying on the driver's seat base - damned if I can remember where and how it fitted. Round steering column obviously, but... Any hints??

Have also fitted the new under-wing section on the NS: Heater pipe arriving today :)

NS Wing Inner.JPG

but still struggling with this little bu66er! :mad:

Crankshaft.JPG
 
Cheers for that. Thought it must be something like that, just couldn't get the holes to line up with anything. Will try again in the morning. Looks like I might have been a bit previous with the lower dash
:)
 
Back
Top