Smileys 110 Rejuvenation Thread

This site contains affiliate links for which LandyZone may be compensated if you make a purchase.
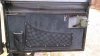
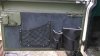
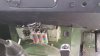
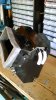
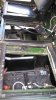
Some thought has been put in to whats needed on the doors. 110's dont have much storage room in the cab and with a big tour coming up the tea flask is essential! as is water bottles and just somewhere to put useful stuff.
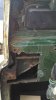
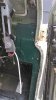
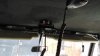
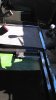
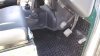
We are using the same carpet / soundproofing throughout the 110 so all will match in....now sounding like piggin Lawrence Llewellyn-Bowen :)
No scatter cushions will be used...
 

Attachments

  • DSC_0108.JPG
    DSC_0108.JPG
    515.4 KB · Views: 98
  • DSC_0109.JPG
    DSC_0109.JPG
    204.5 KB · Views: 104
Note on last pics reinforcing added to ensure pocket stitching wont pull through.
She is now fabricating cargo nets to add too.
Pics will follow as they progress :)
 
Cut the glass fuse holders out and fit blade fuse holders- did that to mine
 
Last edited:
Mrs Smiley has done a great job on the custom door cards!
Note passenger side has the big flask pocket :)
Pics just show cards in place, need to paint doors and add bottom fixings but reckon these will help reduce noise a bit and provide useful storage.
 

Attachments

  • DSC_0135.JPG
    DSC_0135.JPG
    179.5 KB · Views: 142
  • DSC_0136.JPG
    DSC_0136.JPG
    162.3 KB · Views: 100
Now back to the stripped dash, needed to repair sections of rot where some #### had thought mastic under screw heads was a better plan than just replacing really cheap gaskets!
Passenger side was worse and needed to cut metal away so we could add rust preventer to the inner sections then paint over prior to welding in new sections.
 

Attachments

  • DSC_0128.JPG
    DSC_0128.JPG
    259.3 KB · Views: 94
  • DSC_0125.JPG
    DSC_0125.JPG
    103.7 KB · Views: 73
  • DSC_0121.JPG
    DSC_0121.JPG
    367.6 KB · Views: 82
Note on last pic, some filler is added to smooth out welding dips (fair cop didnt use gas MIG) but once rubbed down and painted it looks a bit neater.
Used hammerite paint, its shiny so reflections make it look worse than it is.
Had to swing the wiper motor out the way but gave me chance to clean up the earths as motor sometimes ran slow.
 

Attachments

  • DSC_0130.JPG
    DSC_0130.JPG
    293.3 KB · Views: 104
Then repeat for drivers side, though this wasnt as bad, but someone had used metal epoxy as a repair instead of welding which just meant the rust had crept under the bodge.
On both repair plates we made cardboard templates so that holes for door retainer brackets and the passenger side windscreen clamp could be pre-drilled prior to welding.
 

Attachments

  • DSC_0127.JPG
    DSC_0127.JPG
    123.1 KB · Views: 88
  • DSC_0129.JPG
    DSC_0129.JPG
    375.2 KB · Views: 85
  • DSC_0131.JPG
    DSC_0131.JPG
    477 KB · Views: 83
Ended up welding in a few more small plates on the side of the footwells.
Plans were to replace both footwells as have the sections already but time is short and really want to get the engine out and wings off to do a proper job, so this will wait.
Now the dash can go back in :D
 

Attachments

  • DSC_0132.JPG
    DSC_0132.JPG
    177 KB · Views: 70
As I was fitting the dash, decided to replace the old mod fuse panel as mentioned in earlier post.
Quite straight forward job, added 3 8 way holders, so have a whole holder just for carrying spare fuses and also have spare positions on the others.
One position is used for the CB radio that I am fitting and another for cigar lighter sockets / USB charger being mounted at the rear of the load space.
I also ran in a spare cable and left it behind my new switch plate I made..just in case.
 

Attachments

  • DSC_0134.JPG
    DSC_0134.JPG
    148.7 KB · Views: 120
  • DSC_0114.JPG
    DSC_0114.JPG
    163.5 KB · Views: 117
The new heater matrix arrived so fitted it into the box and also replaced the big rubber seal as the old one was falling apart.
This also helps seal the noise out!.
On the inner dash I also mad a new seal that keeps the airflow up from the fan unit to the internal vents.
Also fitted back on some split plastic pipes that protect the new heater pipes from wearing against the housing (this caused the last leak)
 

Attachments

  • DSC_0122.JPG
    DSC_0122.JPG
    417.9 KB · Views: 106
Finally the dash is all back in.
Spent out on a new instrument rear cowling, stupid money at £39 for a plastic bracket but the old one was smashed so everything vibrated around.
Really pleased as I also replace loads of missing screws so alls nice and secure now.
Also fitted a 12v socket multi point in case more stuff requires power while on the move.

Just started carpeting the roof out so will fit CB mount tomorrow :D
 

Attachments

  • DSC_0138.JPG
    DSC_0138.JPG
    160.5 KB · Views: 108
  • DSC_0139.JPG
    DSC_0139.JPG
    140.7 KB · Views: 111
Well first bit of roof lining carpet in, so fitted the CB.
Made some spacers so that I could fit a small power connector on a mount so its simple to fit and remove the Radio when needed.
 

Attachments

  • DSC_0143.JPG
    DSC_0143.JPG
    197.6 KB · Views: 98
  • DSC_0140.JPG
    DSC_0140.JPG
    150.3 KB · Views: 101
Now for the rest of the roof carpet.
This should help prevent condensation dripping on us when sleeping in the back, and also be part of the sound deadening / reducing attempts!
 

Attachments

  • DSC_0144.JPG
    DSC_0144.JPG
    165 KB · Views: 108
  • DSC_0147.JPG
    DSC_0147.JPG
    107.3 KB · Views: 80
After I refitted the dash thought it was time to sort out why the diff lock light on the dash wasnt working.
Had removed the centre console unit, the base plate (where the centre seat would go), then removed the gearbox tunnel section.
Got the trusty meter out and found the switch contacts were just oxidised.
Cleaned them up and presto! dash light works :)
Re-greased all selector rod joints too.
Decided while all the panels off a clean was needed
 

Attachments

  • DSC_0142.JPG
    DSC_0142.JPG
    467.6 KB · Views: 71
Now the putting back together! re-painted seat box covers and frames, and started adding in all the sound proofing kit that had been sat in the shed for months!
 

Attachments

  • DSC_0145.JPG
    DSC_0145.JPG
    335.8 KB · Views: 83
Fitted soundproofing around the bulkhead, under the rubber covers on the gearbox tunnels, over centre plate and in foot wells.
Then used main foot plate sound proofing material as templates for cutting BIG rubber mats that cover the entire sections.
All fitted in ok :)
 

Attachments

  • DSC_0146.JPG
    DSC_0146.JPG
    144.5 KB · Views: 105
What adhesive have you used for the carpet? Hopefully not spray adhesive. As it's ****e & ya carpets will be hanging off the roof in a couple of months at the most

Yep, fell for that one when first fitting soundproofing under the bonnet!.

Used Evostick Timebond from a tin, seems great stuff as paint it onto each surface as normal but you get a brief chance to re-peel and align if needed.
This stuff seems to work ok......if it fails will post and let ya know :)
Didnt glue in footwell sections as may need to remove later. :)
 
Back
Top