Smileys 110 Rejuvenation Thread

This site contains affiliate links for which LandyZone may be compensated if you make a purchase.

SmileySteve

Well-Known Member
Posts
1,423
Location
Dumfrieshire
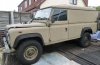
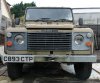
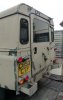
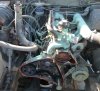
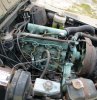
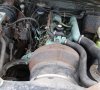
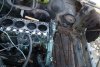
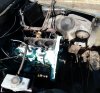
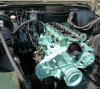
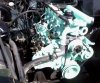
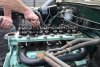
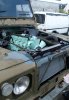
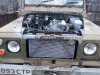
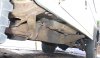
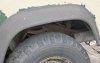
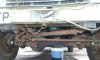
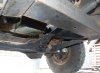
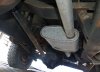
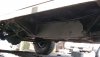
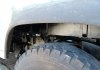
Well as I stated on my data page, we have got a 1987 110 ex MOD NA Landy that although seemed pretty dam good we want to make sure its in great shape to be used and enjoyed.

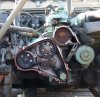
This isnt a full rebuild but have and am going to go into some detail over time and hope this is of some interest and help to others.
I will include costs (when I remember!) as this can also be of help.
If anyone has any questions or wants any extra info feel free to ask, thats what all these threads are about, and I have enjoyed looking at loads!

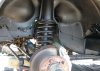
So less waffle and more pics :D:D
 

Attachments

  • 110-1.jpg
    110-1.jpg
    316.5 KB · Views: 391
  • 110-2.JPG
    110-2.JPG
    267.8 KB · Views: 405
  • 110-4.JPG
    110-4.JPG
    340.5 KB · Views: 402
  • 110-5.JPG
    110-5.JPG
    221.3 KB · Views: 376
Initial purchase price was £1900 not bad.
Was being sold by family as owner had passed away, so couldnt get all the info you would normally ask, but it did come with some history and apparently had a doting owner.

110 came with 105,000 on the clock, 12 months MOT, new front calipers and a recent clutch, plus list of lots of little bits done, not a bad start, but with the history came a garage note about the cambelt, but no receipt so hence the start of the strip....
 

Attachments

  • Engine-4.JPG
    Engine-4.JPG
    447.1 KB · Views: 355
  • Engine-3.JPG
    Engine-3.JPG
    434.9 KB · Views: 365
  • Engine-2.JPG
    Engine-2.JPG
    441.6 KB · Views: 360
  • Engine-1.JPG
    Engine-1.JPG
    417.5 KB · Views: 403
As can be seen the cambelt turned out to be fine, it had been done and looks like a new tensioner too, but how long ago?
As I was in this far I thought I would replace the belt anyways, and also found a bit of play on the water pump too, so thought I would replace this as a matter of course.

Thing is where do you stop?...not here as thought well, why risk an unknown head gasket so get that off as well and re-lap the valves etc:D
 

Attachments

  • Engine-5.JPG
    Engine-5.JPG
    426.1 KB · Views: 354
  • Engine-6.JPG
    Engine-6.JPG
    303.4 KB · Views: 341
As can see in the last pics the injection pump has been removed.
This was working fine, but as soon as I slackened the timing belt off a trickel of fuel started leaking into the timing casing!!!
Now maybe it had a slight leak before as there was some gunk in there but nothing obvious.
Anyways while serching for new seal I found a whole new pump for £50 + vat and postage from a Land rover parts supplier!! Bargain or what so bought it and will re-furb the old one for a spare.

The head turned out to be good and found on the MOD plate that new pistons, big ends and liners had been fitted at 77,000 miles...a good find!
re-lapped the valves, fitted new seals as part of the kit and added new fuel pump and water pump.
 

Attachments

  • Engine-6.JPG
    Engine-6.JPG
    303.4 KB · Views: 318
  • Engine-7.JPG
    Engine-7.JPG
    395.6 KB · Views: 321
  • Engine-9.JPG
    Engine-9.JPG
    423.5 KB · Views: 356
The engine paint came from stationary engine parts and not cheap at around £18 for 0.5 litre, but its great stuff and sticks to the motor well after a clean with white spirit.
I missed the pic where where we decoked the pistons, not that they were bad at all so will add this on in.
When removing the core heaters, found one was knacked, probbaly why it fluffed on one cylinder briefly while starting.
Also found that the cone washers were missing under the injectors!
The head kit form Paddock (about £12) came with new everything needed so new cone and copper injector washers were fitted.
 
Fitted new timing belt, as although old one looked new, had no idea about the age.
The tensioner also looked new and was smooth to turn and no signs of age or wear so re-fitted.
As stated in all manuals, alligned the timing marks, (not "F" on the injector pump, used the dot as thats where it was originally) and set the belt tension.
Turned twice and then slackened off and repeated another couple of times as this takes the initial stretch out of a new belt.
Also found that none of my new timing tool parts fitted the flywheel!
I locked the cambelt pully with two kit bolts but you can use some of the timing cover bolts.
You can also not bother locking the injector pump, although I did, it rotates such that o long as you allign its marks it fine.
So could of saved £30 on the pointless timing kit.
 

Attachments

  • Engine-11.jpg
    Engine-11.jpg
    201.1 KB · Views: 310
  • Engine-10.JPG
    Engine-10.JPG
    340.3 KB · Views: 274
  • Engine-8.JPG
    Engine-8.JPG
    346.2 KB · Views: 293
I managed to shear 2 water pump bolts when getting the old one off.
This can be usual so by all means swear but you wont be the first or the last to do it.
As the ones that I sheared were between other fixing positions, I decided to drill them out and re-tap a bit smaller and hope...
Turned out fine.
Didnt paint the new £30 water pump in case it leaked....I do trust Paddocks..honest..
I had also ordered a new lift pump...it was the wrong one...thats a story aletr in the thread
 
Checked all the rocker gear and no signs of wear at all, again a nice find, so cleaned and re-fitted and re-set tappet clearances.
Have to admit this Landy is just a fab throwback to my youth, you open the bonnet and can do stuff, you open the bonnet on a new car and WTF!! do you call a friggin plumber or an electrician?..this is definitely fun. :)
 
Obviously while getting to the head and timing covers the rad was removed.
Now there wasnt any obvious signs of any probs, when I picked it up it was a 15 mile drive home and the temp gauge was fairly static but went up a tad after 10 miles but then stayed in same position.
When checked the water level again once home it was low.
No leaks could be seen but when I pulled the hoses the colour was ****e, dont reckon the anti-freeze had been done for a while, but the 110 did seem to of been serviced "regularly"
Drained it got the rad out and....bit corroded, new one was £120 not cheap yet better than getting this far and compromising the whole reliability thing...
First pic is the old one (for those not wearing but needing glasses) second pic is Paddocks (britpart) one with cleaned up cowling on it
 

Attachments

  • Rad-1.JPG
    Rad-1.JPG
    639.6 KB · Views: 261
  • Rad-2.jpg
    Rad-2.jpg
    198 KB · Views: 293
Engine together and new rad in place.
Had bought a service kit for about £12 as basic stuff for any ploy to get ya vehicle in good shape.
Found the original fuel filter and airfilter to be clean so guessed that yep the guy did get it serviced but not built up a good idea yet about the garages used.
Yep stuff had seemed to be listed and done yet not sure the garage was a Landy fan yet.
Anyways back to point, it was ready to prep for starting up :D:D
 

Attachments

  • Engine-12.JPG
    Engine-12.JPG
    317.9 KB · Views: 285
  • Engine-13.jpg
    Engine-13.jpg
    212.9 KB · Views: 305
FUEL TRAUMA
Now I have read several posts about priming probs on here.
Now I got this first hand.
Worked the little manual lift lever........for a long time.......f*** all fuel.
Finger over the hose, felt pressure so whats wrong???
Rocked the landy and listened at the filler end...splosh but not big splosh so was the gauge wrong? it had run up to the point of stripping the pump out.
Ok get 15 litres of fuel.
Pumped...nothing..pumped held finger on pipe..got fuel (bit like brake bleeding).
Attached fuel lines....pumped more, checked the filter drain...f*** all!!!!
Now back to that new lift pump from Paddocks...yep they sent the wrong one...inlets and outlets wrong place....
Took the old one apart and found one valve loose (check my other thread on quick fix)
Anyways doctored it, re-fitted and bingo, fuel in seconds, filter bled, injector bled (important this bit as was a new pump so had oil in it not fuel)
Slackened off cylinder one injector pipe and span engine until fuel appeared.
Tightened union, added some heater time (about 10 secs) and started no probs.
Ah yes I mentioned the crap original heater on cylinder 1 earlier, so replaced them all at about £4 each (Paddocks doing well out of us!) overall money well spent
 
Ok, so the motors sorted now looking at the underside.
Obviously checked carefully prior to buying and all looked good, but as we all know its not until you really get in there that you can find anything.
Luckily its all still good just needs a wire brush and and some waxoyl.
Basically just suface rust on stuff including the brake discs, these would clean with use but wanted to get some protection over the chassis.
 
Nothing really bad at all, no repairs anywhere except floor pans, still all good there, but plan to cut them out and replace as dont want patches.
The Chassis and outriggers including rear cross member are completely solid, no flaky bits at all am amazed.
There is a small hole on the passenger side around the door stay, have looked in detail here after removing the dash and will be an easy repair to be done later.
Anyways heres chassis as found...
 

Attachments

  • Chassis-3.JPG
    Chassis-3.JPG
    226.8 KB · Views: 292
  • Chassis-2.JPG
    Chassis-2.JPG
    207 KB · Views: 331
  • Chassis-1.JPG
    Chassis-1.JPG
    263.7 KB · Views: 329
Notice the wet area on the front axle seal.....I hadnt given this enough attention at the start, its not really bad but I should of ordered a new seal for this right at the start, I didnt so this will be taken care of later in thread ina few days time.
At this point both axles were drained, fluids not bad but required changing.
Swivel joints drained...yep the garage does the obvious stuff but the "fluid" from both swivels was thick black treacle..
LT77 oil clean, but will replace, transfer box, cleanish but already replaced.
Swivels filled, cleaned and no leaks.
Props checked and re-greased no apparentplay anywhere, will checked thoroughly when I do the axle seal.
 
Always wanted a waxoyl spray kit but was too tight to buy one...now I know theres nothing as good as a professional job, but thats about £500 and not local so £30 for 3 litres & spray kit plus another £30 for a further 5 litres has seen this well on its way, covered the whole underside and most internal sections, but will use a few more litres on the internals with the 360 degree attachment just to make sure.
Driven in the rain etc for over 100 miles and it still looks clean, so gathering if I do this every year for the next 10 years its still cheaper than one professional application and you also get to check everything underneath at the same time :D:D
 

Attachments

  • Chassis-7.JPG
    Chassis-7.JPG
    262.8 KB · Views: 352
  • Chassis-8.JPG
    Chassis-8.JPG
    172.8 KB · Views: 282
  • Chassis-9.JPG
    Chassis-9.JPG
    241.2 KB · Views: 276
  • Chassis-10.JPG
    Chassis-10.JPG
    324 KB · Views: 322
Yep I know I missed a bit here and there but it aint finished yet :) also the sump isnt yet painted as I suspected a leak and now the motor is spotless I can see where it comes from.
Theres a tiny leak from the vacuum unit, and a tiny seep from the sump gasket, both will be sorted soon as have the gaskets.
I think there is also a small leak from the rear crankcase seal.
Again, garage was in there sorting the clutch, few more bolts and could've sorted the piggin seal! thats why i dont use garages..though to be fair some do go the extra mile and this may have pointed out to the previous owner as something to sort as some point.
Well that point is coming as I am setting the challenge of a leak free landy to myself and all on the forum! ....yep that sets me up for some grief and cutting replies...:)
 
Back
Top