Smileys 110 Rejuvenation Thread

This site contains affiliate links for which LandyZone may be compensated if you make a purchase.
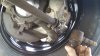
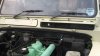
While awaiting the UJ to turn up I replaced 2 track rod ends, old ones came apart quite easily, but the pigging steering drop arm was a total utter twunt!!!
Managed to get the ball joint split and with gurt socket and arm got the securing nut off that holds the arm to the steering box but even my puller failed to get it off the shaft so after wasting a couple of hours I finally gave up.
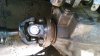
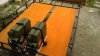
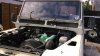
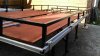
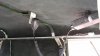
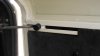
Meantine got the final UJ in place so fitted the front prop.
Note new ball joints have grease points, useful :)
 

Attachments

  • DSC_0186.JPG
    DSC_0186.JPG
    164.9 KB · Views: 141
  • DSC_0189.JPG
    DSC_0189.JPG
    230.5 KB · Views: 106
So after giving up with the drop arm joint until I get a better puller, we took her for a wee test drive...NICE... tyres felt nice and grippy and the drive was smoother with less clunks.
There was an irritating swishing type noise that has also now gone, reckoned this was either the failing UJ or hand brake drum which I found was badly adjusted.
So overall very happy with the wheels and tyres and the extra carpeting throughout has made a massive difference to the sound deadening :)
She is now ready for a repaint, roof rack fitting and the new spare wheel putting in place.
 

Attachments

  • DSC_0190.JPG
    DSC_0190.JPG
    113.7 KB · Views: 96
Have been planning out the roof rack.
This was a £50 Fleabay bargain so now we dont mind spending a bit on it to make it really usable.
Missed out on a Brownchurch expedition rack but that was over £300 so reckon with stuff to hand and a B & screw down the road we could make something good.
Got loads of ally rail left over from a job and got loads of jerry cans for free that were lounging in the 11o when we bought it, and we need some spare fuel for our trip so.....
12mm exterior ply and some tie down loops etc
 

Attachments

  • DSC_0191.JPG
    DSC_0191.JPG
    184.9 KB · Views: 99
The rail is a perfect mount for the cans....yes roof racks not the best place for fuel cans but figure put a bit less in them....dont want them in the vehicle and other than the rear door (Legal??) its the only place for them.
Using more rail made some clamp plates that clamp the cans to the rack, very solidly cushioned on some left over rubber matting.
This and the straps make it a totally solid set up, yet simples to use.
Will fit locks to cans too.
Last pic shows final coat of preservative to the boards. :D
 

Attachments

  • DSC_0193.JPG
    DSC_0193.JPG
    202.1 KB · Views: 100
  • DSC_0194.JPG
    DSC_0194.JPG
    197.1 KB · Views: 90
  • DSC_0196.JPG
    DSC_0196.JPG
    223.8 KB · Views: 101
Had this really well made steel box kicking around, was owned by my mums first boyfriend making it over 70 years old, guess he isnt coming to claim it so its getting a clean uop new paint and will be mounted on rack to carry hopefully unneeded spares :)

Notice on the last pics of the rack the 2 silver rails mounted across it?
this is to take tent poles that can be slid in either side to take......shower curtain to make the solar shower units user friendly....over the top? well useful and made Mrs smiley happy :)
Pics will follow to show the set up when finished
 

Attachments

  • DSC_0195.JPG
    DSC_0195.JPG
    364.7 KB · Views: 116
Made use of the good weather so stripped out vent seals and bonnet seal, and rubbed down the paint for another coat.
Want to get it all one colour so as we had plenty of paint leftover now was the time so we can then get on with fitting the roof rack.
Also sealed up the rear door that had various holes in it!
 

Attachments

  • DSC_0197.JPG
    DSC_0197.JPG
    179.8 KB · Views: 100
  • DSC_0198.JPG
    DSC_0198.JPG
    276.6 KB · Views: 138
  • DSC_0199.JPG
    DSC_0199.JPG
    183.8 KB · Views: 122
  • DSC_0200.JPG
    DSC_0200.JPG
    126.4 KB · Views: 146
All cleaned up and repainted, vent seals and bonnet seal a good fit so stand a chance of working.
Also cleaned up the vent pins and added a bit of copper grease to them before re-fitting.
The coach paint covers well and sets quite hard, its not cheap but its good stuff and will paint a 110 at least 3 times (5 litres)
Re-blacked the wheel arches and front bits, now makes the bumper look ropey may re-do that :)
 
Heres the pics, now ready for the new spare wheel and cover + we can now fit the roof rack, but running out of time this week so maybe next week before we can finish off :)
 

Attachments

  • DSC_0204.JPG
    DSC_0204.JPG
    105.8 KB · Views: 153
  • DSC_0203.JPG
    DSC_0203.JPG
    158.9 KB · Views: 95
  • DSC_0202.JPG
    DSC_0202.JPG
    124.9 KB · Views: 134
  • DSC_0201.JPG
    DSC_0201.JPG
    169.8 KB · Views: 112
Bit more work done on the rack, so added a pull out frame that will support a home made tent that will hang beyond the rear door.
Used yet more of that left over ally rail and made some sliders and stops using some plastic shelf supports and ally plate.
The frame simply pulls out until it hits its end stops, just clip in the upper centre rail and drop on the yet unmade tent.
The rear door can be opened and closed with tent in place making a useful area for getting dressed / cooking storage etc.
Simple plan hope it works! will keep pics coming as Mrs Smiley sews the tent part :)
 

Attachments

  • DSC_0205.JPG
    DSC_0205.JPG
    177.5 KB · Views: 98
  • DSC_0206.JPG
    DSC_0206.JPG
    277.9 KB · Views: 131
Have removed the roof rack boards to give a good sealing of varnish, so thought its time to bolt the rack onto the 110.
Also fitted the roof ladder that came from Paddocks...its ****e, but will do the job.
Maybe they are all the same but the finish is terrible, loads of bumpy sharp bits under the galvanising, anyways not too bothered and its on now and does the job.
Pulled out the tent frame to check and all works so Mrs Smiley can now start sewing :)
 

Attachments

  • DSC_0212.JPG
    DSC_0212.JPG
    175.7 KB · Views: 114
  • DSC_0215.JPG
    DSC_0215.JPG
    326.8 KB · Views: 104
Had to refit the light bar by drilling and tapping part of the two front rack mounts but all nice and solid, including the two new rack clamps I had to make...sadly I needed to make three! doh!.
Also fitted the new spare wheel and cover, but had to cut some rubber mat to sit under the wheel clamp to get it to hold the wheel tight and the cover looks great until you drive...as it balloons so will add some straps.
so its getting there!
Will take for a test camp once the tents ready, then its time for a full service in prep for our trip :)
 

Attachments

  • DSC_0216.JPG
    DSC_0216.JPG
    352.7 KB · Views: 145
  • DSC_0214.JPG
    DSC_0214.JPG
    156.3 KB · Views: 141
  • DSC_0213.JPG
    DSC_0213.JPG
    150.4 KB · Views: 137
Nice idea with the rack :) And cheaper then the off the shelf solutions.

Cheers :)

Just hoping it works!, though tbh Mrs Smiley is damn good at sewing stuff so reckon it will be very usable.
As stated earlier its a landy extension and aiming for quick and simple .....and yes save a small fortune! :D
 
Test drive proved that the CB MIC mount wasnt the best as a few big bumps and could work its way out of the clip.
Solution was a simple vertical plate, this keeps the cables clear of the dash and gear sticks.
Also fitted a plate to mount the fire extinguisher on so its out the way but can be grabbed from the load space or the cab :)
 

Attachments

  • DSC_0217.JPG
    DSC_0217.JPG
    142.8 KB · Views: 105
  • DSC_0218.JPG
    DSC_0218.JPG
    126.6 KB · Views: 89
Picked up some net pockets at the last landy show and Mrs Smiley reinforced them and added carrabiner clips, so these are fitted both sides of the 110 to keep stuff in for when we sleep in the back.

Other little addition is that I get p**** off with the doors swinging shut when they need to stay open, so made up some simple slide locks that just adjust to where you want the doors to stay...simples :)
 

Attachments

  • DSC_0219.JPG
    DSC_0219.JPG
    217.8 KB · Views: 91
  • DSC_0220.JPG
    DSC_0220.JPG
    103.7 KB · Views: 115
Those slide locks are such a good idea, how did you make them?

Cheers Flat!
I used a couple of nylon DIY shelf / cupboard support blocks bolted together to create the plastic slide that sits in the runner.
One of these has a fixed M6 nut in it.
I then turned some Delrin rod I had and drilled and tapped it one end.
Cut off the head of an M6 bolt and screwed it into the Delrin "knob" the other end screws into the runner so when its tightened it simply clamps the runner in the chosen position. :)
 
Back
Top