Defender bodywork rebuild...

This site contains affiliate links for which LandyZone may be compensated if you make a purchase.

discomania

Well-Known Member
Posts
6,947
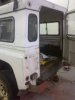
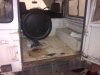
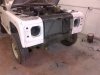
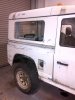
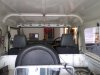
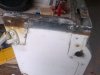
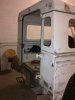
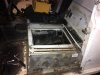
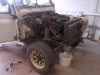
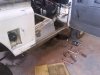
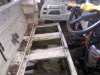
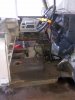
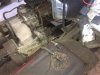
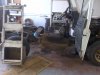
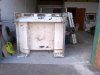
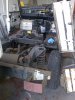
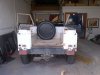
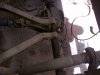
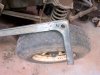
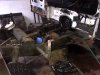
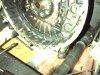
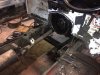
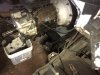
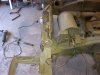
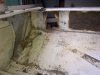
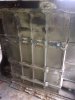
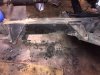
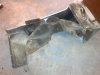
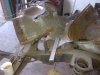
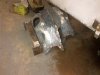
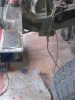
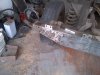
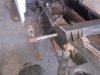
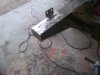
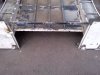
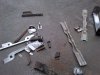
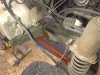
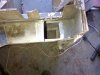
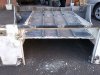
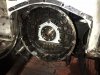
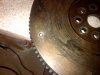
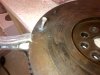
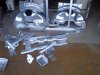
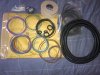
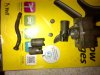
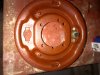
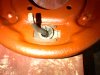
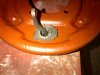
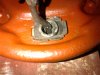
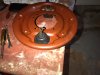
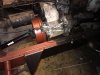
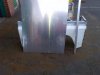
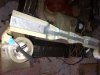
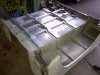
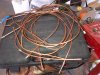
Well, I decided to paint the 90, but I decided to sort out the body work in general first... I need to do the rear crankshaft oil seal and transferbox input seal - so might as well make it easy! I'll make this a picture thread, we all love pictures!

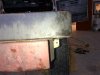
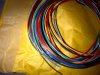
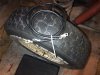
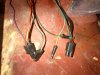
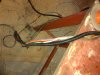
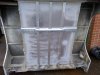
Electrical stripdown, interior carpet etc... has already been done and quite a lot of sanding.
 

Attachments

  • IMG-20120411-00010.jpg
    IMG-20120411-00010.jpg
    827.1 KB · Views: 1,328
  • IMG-20120411-00014.jpg
    IMG-20120411-00014.jpg
    290.6 KB · Views: 1,261
  • IMG-20120416-00026.jpg
    IMG-20120416-00026.jpg
    336.2 KB · Views: 974
  • IMG-20120418-00047.jpg
    IMG-20120418-00047.jpg
    859.4 KB · Views: 957
  • IMG-20120421-00058.jpg
    IMG-20120421-00058.jpg
    312.5 KB · Views: 939
Tub cappings off, and a test fit of the new ones I got, the rivet holes all need welded up and ground down, then put back onto the tub, redrilled to suit and then sent away for re-galvanising. I am also going to incorporate some tie down points to the interior so I will weld in some nuts on spreader plates to allow for these to be fastened in once I have refit the interior.


Also, they came in 5 pieces: back sections, sides and internal bulkhead. What was the idea behind them being separate? I was going to test fit them, and then weld the sides and back together like the old ones I took off, just a water ingress/dirt trap in my eyes.


At the door end the new ones have a little lip that comes out further than the edge of the tub to the inside of the cab, does anyone know what these are for? I assume something to do with older 90's or even series tubs with a tilt. I'll take a photo tomorrow and get it posted. I will probably just cut them off before they go for a redip but I want to make sure I am not cutting off some useful appendage!
 

Attachments

  • IMG-20120505-00158.jpg
    IMG-20120505-00158.jpg
    295.8 KB · Views: 947
  • IMG-20120505-00157.jpg
    IMG-20120505-00157.jpg
    330.6 KB · Views: 964
  • IMG-20120424-00070.jpg
    IMG-20120424-00070.jpg
    687.7 KB · Views: 897
  • IMG-20120424-00068.jpg
    IMG-20120424-00068.jpg
    273.8 KB · Views: 986
more...
 

Attachments

  • IMG-20120505-00160.jpg
    IMG-20120505-00160.jpg
    326.5 KB · Views: 826
  • IMG-20120505-00162.jpg
    IMG-20120505-00162.jpg
    305.9 KB · Views: 766
  • IMG-20120505-00164.jpg
    IMG-20120505-00164.jpg
    331.8 KB · Views: 852
  • IMG-20120505-00165.jpg
    IMG-20120505-00165.jpg
    752.5 KB · Views: 796
  • IMG-20120505-00169.jpg
    IMG-20120505-00169.jpg
    314.6 KB · Views: 785
This is where I am as of now, more work on it tonight/tomorrow.

I'll possibly do some fabrication on my new bumper tonight - I want it to go for galvanising so need to get all the metal work done first before I can even start the rebuild as I will send away the gearbox crossmember, gearbox brackets etc...
 

Attachments

  • IMG-20120505-00173.jpg
    IMG-20120505-00173.jpg
    287.3 KB · Views: 677
  • IMG-20120505-00172.jpg
    IMG-20120505-00172.jpg
    361.9 KB · Views: 798
  • IMG-20120505-00171.jpg
    IMG-20120505-00171.jpg
    796.8 KB · Views: 729
  • IMG-20120505-00170.jpg
    IMG-20120505-00170.jpg
    316.6 KB · Views: 831
Not a lot to see from this weekends progress. I got the tub cappings lined up, welded all the old rivet holes up, ground them down, test fit them to the tub and redrilled to suit my tub, as well as welding the 2 pieces together to make them into a single piece. I got the rear ball joint off too, it had excessive play - will i do the A frame bar joints too!?!??! So easy at this stage!

Got the rear chassis crossmember seam welded along the top to stop water getting in and rusting the two parts apart. I am going to extend the bolt tubes and put plate on the areas outside of the main chassis rail as well as cap the very end to top muck getting thrown in and sitting there. I might drill some bigger drain holes in the bottom too. I need to work out a fix for the unused tow bracket bolt tubes as they seem to sit full of water all the time.

I got the transfer box off and can confirm the input seal was dinked and there was a trace of oil running out it, while it's off I'll pull off the bottom plate, check it all out, and seal it all back up again. If I find it to be iffy I'll be giving Dave a call I think!

I need to take the main box off now to replace the rear crank oil seal. I want to try and get the 300tdi as leak free as possible, I'll do the vac pump and lift pump gasket and oil filter housing gasket and hopefully that will bring an end to the majority of the leaks! I'm tempted to pull the sump off and re-silicone it but it was done a couple of years back and I think it's OK and the oil is just stuff that's leaked out everywhere contaminated the whole bottom end. I guess it it turns out to the sump it's not a big deal to do that at a later date.
 

Attachments

  • IMG-20120512-00176.jpg
    IMG-20120512-00176.jpg
    328 KB · Views: 971
  • IMG-20120512-00181.jpg
    IMG-20120512-00181.jpg
    373.9 KB · Views: 877
Guys, what do you think about extending the front inner wings? It seems to me that they stop a bit short and if they were to continue down a bit more water spray could be stopped from hitting the foot wells, and the tops of the outriggers?!?! I am sure your all well aware of the blast of water you feel hitting the foot wells and often coming in when you drive through water. I am getting them galvanised so might as well make all and any mods now. I am also going to weld captive nuts to the underside for the shocker access panels so I can use small bolts instead of using self tappers.
 
My arches have rubber sheet riveted to them, it does a pretty good job of keeping water etc out. The only problem being that when it is sunk in deep clay, mud still builds up there and then is not accessible with the pressure washer later.
 
Yes - this was a concern of mine too - I'll think of something but would certainly like to see them extended.
 
Right, here is where I am with the strip down now - the other night I got the mainbox off and pulled the clutch and flywheel and the crank oil seal got a lot of welding done last night, seam welded all the open seams on the rear crossmember and filled in some small holes, where looking at the other side the fabricator had simlpy got bored welding that bit and moved to something else.

I am also modifying my bumper, I cut and rewelded the base at the ends of it to taper them down, then I will follow this angle with a piece of metal down to the mouting plate location, then I will go straight across in it's new deeper profile to the other mount then come back up. I am also going to mount it slightly further out from the vehicle, maybe 15mm so I have cut out the brackets (rusted to hell anyway) and will make some slightly longer ones. I am also contemplating then taking a slice out the ends and bending them in every so slightly.

I have also got about 80% of my metal work stripped that is going for galvanising.
 

Attachments

  • IMG-20120517-00198.jpg
    IMG-20120517-00198.jpg
    269.9 KB · Views: 644
  • IMG-20120517-00196.jpg
    IMG-20120517-00196.jpg
    296.9 KB · Views: 687
  • IMG-20120516-00191.jpg
    IMG-20120516-00191.jpg
    352.3 KB · Views: 672
  • IMG-20120516-00189.jpg
    IMG-20120516-00189.jpg
    424 KB · Views: 702
  • IMG-20120516-00188.jpg
    IMG-20120516-00188.jpg
    363.5 KB · Views: 898
  • IMG-20120516-00186.jpg
    IMG-20120516-00186.jpg
    319.8 KB · Views: 806
Also, when I took the rear crank oil seal off it looked like the leak was actually mainly coming from the back of the seal housing and leaking past the gasket - it was sealed only with RTV. What's the take on refitting this seal, RTV or use a gasket with a smear of hylomar?
 
Didn't get as much done this weekend as I ended up changing the water pump on my brothers car during my "spannering" time on Saturday.

Anyway, I picked up a new boot floor and supports on Friday after work, so I had a little tinker with the tub, steel crossmembers are now off and the floor is much closer to being taken out. I removed the cappings from the back and cut out the corroded aluminium on the front crossmember ready for welding in some new plate.

I got the rear crossmember seamwelded and dressed up along the top, and I started fabricating my new front bumper. This is now a priority as I need to get all the stuff to the galvanisers before I can even start things like putting the gearboxes back on.
 

Attachments

  • IMG-20120518-00210.jpg
    IMG-20120518-00210.jpg
    375.4 KB · Views: 656
  • IMG-20120518-00203.jpg
    IMG-20120518-00203.jpg
    411.6 KB · Views: 610
  • IMG-20120518-00202.jpg
    IMG-20120518-00202.jpg
    866.6 KB · Views: 633
Didn't get much visible stuff done last week/ weekend, lots of welding to the front inner wings. They looked OK, started to give them a clean up for galvanising and the holes starting to show!

I'll be buying in a load of grinding/flap discs to clean up the welds then I hope that's them done, they are a pain to weld as the steel has thinned considerably in some areas.

Looking forward to getting back onto welding my front bumper, 3mm new steel!

I also started removing the waxoyle from the exterior of the chassis - a scraper seems to remove it well, just lean into it and it comes off like an orange peel. Heatgun/thinners (maybe not at the same time though -BOOM) may be needed to help in some areas.
 

Attachments

  • IMG-20120521-00231.jpg
    IMG-20120521-00231.jpg
    445.6 KB · Views: 620
  • IMG-20120521-00232.jpg
    IMG-20120521-00232.jpg
    361.7 KB · Views: 564
  • IMG-20120528-00247.jpg
    IMG-20120528-00247.jpg
    340.3 KB · Views: 634
  • IMG-20120528-00249.jpg
    IMG-20120528-00249.jpg
    305.5 KB · Views: 538
Last edited:
This has got to be the most boring job... I cleaned them both up yesterday, galvaniser said the acid will strip the old zinc off but I was aware there was what looks like waxoyle near the bases of them - I don't remember putting it on the inner wings but maybe I did. I don't want to be turned away from the yard for having metal unfit for dipping.

Has anyone else welded their inner wings up to repair holes and things? They are a real pain in the backside. They are now basically finished, all the big holes have been repaired, they feel a lot more ridgid now as well. Tonight I am going to weld an extension onto the bottom of the back section to reduce spray onto the footwell/outrigger.

Then I need to make up a bath of caustic soda and dip all the other bits like the gearbox brackets and things to strip all the old paint off. Tub crossmembers should just need a light wire brush to clean them up a bit.
 

Attachments

  • IMG-20120529-00253.jpg
    IMG-20120529-00253.jpg
    402.8 KB · Views: 625
  • IMG-20120530-00254.jpg
    IMG-20120530-00254.jpg
    306.2 KB · Views: 494
Last edited:
I hope you all had a good long weekend, those who didn't get the holidays here is a photographic treat for you...

I got a fair bit done and all the hard work lead to me being able to take all my metal work to the galvanisers last night! The local shotblasters wanted £85 + VAT for the bumper! So needless to say I was not prepared to take the bumper, my rock sliders etc... I cleaned them all up myself with caustic solution then wire cups and flapdiscs.

I took the bulkhead brackets off and the steering column held it in place well so no need for some sort of wooden jig to hold it in place while the brackets were away being galvanised.

Chassis has been stripped back where needed and twice red oxide primed, paying particular attention to the top of the rails, around bolt holes, rear crossmember etc... some areas will just get a rub down and then coated with black paint as the original powdercoat is still good. Rear axle red oxide primed too.

I got the rear crossmember capped at the ends and seam welded along the the area behind the wheels to stop water ingress.
There was a small crack in the bellhousing so I welded that. I also welded my tub; sorted the huge holes where the seatbelt bracket was up against the ali and the rear crossmember where the chassis brackets bolt on. The 6th photo shows the damage, and the last photo shows it repaired.
 

Attachments

  • IMG-20120602-00263.jpg
    IMG-20120602-00263.jpg
    973.4 KB · Views: 707
  • IMG-20120602-00264.jpg
    IMG-20120602-00264.jpg
    403.4 KB · Views: 823
  • IMG-20120602-00265.jpg
    IMG-20120602-00265.jpg
    355.3 KB · Views: 628
  • IMG-20120602-00268.jpg
    IMG-20120602-00268.jpg
    406.8 KB · Views: 650
  • IMG-20120605-00283.jpg
    IMG-20120605-00283.jpg
    433.8 KB · Views: 675
  • IMG-20120605-00285.jpg
    IMG-20120605-00285.jpg
    463.7 KB · Views: 724
  • IMG-20120605-00284.jpg
    IMG-20120605-00284.jpg
    372.3 KB · Views: 665
  • IMG-20120604-00282.jpg
    IMG-20120604-00282.jpg
    392 KB · Views: 667
  • IMG-20120604-00281.jpg
    IMG-20120604-00281.jpg
    446.7 KB · Views: 703
  • IMG-20120604-00273.jpg
    IMG-20120604-00273.jpg
    434.1 KB · Views: 727
Last edited:
Not got a lot done as the stuff is still at the galv yard.

I did the rear crank seal (write up in Engines - 300tdi). Removed a broken bolt from the flywheel where someone had fitted the clutch cover minus a bolt and refit the main gearbox.

The image shows the bolt tack welded on, I was lucky enough that it wasn't that stuck so I was able to simply bend the bolt straight and wind it out by hand. The heat helped too.
 

Attachments

  • IMG-20120607-00304.jpg
    IMG-20120607-00304.jpg
    306.9 KB · Views: 579
  • IMG-20120609-00314.jpg
    IMG-20120609-00314.jpg
    367.7 KB · Views: 359
  • IMG-20120609-00315.jpg
    IMG-20120609-00315.jpg
    319.4 KB · Views: 426
I got the galvanising on Monday night, pretty pleased with it. There are one or two bits where I didn't get the paint out of some difficult to clean areas and the galv has gone slightly odd. Not a biggy, the zinc will still protect the steel as it will offer anodic protection anyway, but I'll blast some zinc paint over it.
 

Attachments

  • IMG-20120611-00322.jpg
    IMG-20120611-00322.jpg
    380 KB · Views: 1,298
Got a fair bit done but not a lot to show for it, cleaning brackets up, painting things etc...

Gearboxes are back on (photo's of all that to follow), LT230 input oil seal replaced, handbrake assembly stripped down, cleaned up and rebuilt, I need to get some nylon washers and things to make some anti rattle system for the linkages as they drove me crazy sitting at lights rattling away.

All my cable arrived from VWP today so I can get the rear loom sorted out. I stripped out the rear tank pump/sender electrics and I am going to extend them alongthe main loom into the tub and use these for rear door electrics and as spares etc... I've traced them at the bulkhead and will modify the wiring so I can connect into them.

I am also going to upgrade the purple permenant live to 30amps so I can have some 12v sockets in the back. I'm going to get rid of the stupid reverse light setup; the wires come down to the gbox, then run up to the bulkhead plug into the rear loom then run all the way down back past the gearbox loom again, yet the diff lock wire comes from the rear loom! So that gets rid of another connection and will let me tidy up the bulkhead wiring. I am also going to use the electrics that did feed the tank pump circuits and use them as a ign switched live to switch on relay power for other electrics.
 

Attachments

  • IMG-20120620-00359.jpg
    IMG-20120620-00359.jpg
    143.3 KB · Views: 303
  • IMG-20120620-00358.jpg
    IMG-20120620-00358.jpg
    158.4 KB · Views: 332
Hand brake back plate off while it was easy, cleaned it all up, rebuild the expander, little paint, fitted it - job done.

Also did wiring last night - on the fuel tank loom there are 5 wires, only 2 are needed in my setup (diesel) just the two for the fuel level sender. So these were incorporated into the main rear loom alongside the difflock wire and reverse wire (which now only has one wire going up to the bulkhead as the split is done down at the loom). They split off before the loom enters the chassis. Completed pictures to follow.

Also got my battery cables back with the required lugs crimped on, 8mm for starter terminal and 8mm stud on my battery clamps and 10mm on one end of the negative so I can put that onto a gearbox bolt, and a 3rd cable with 8mm as a gearbox-chassis negative.
 

Attachments

  • IMG-20120618-00351.jpg
    IMG-20120618-00351.jpg
    304.8 KB · Views: 454
  • IMG-20120621-00360.jpg
    IMG-20120621-00360.jpg
    320.8 KB · Views: 365
  • IMG-20120621-00362.jpg
    IMG-20120621-00362.jpg
    325 KB · Views: 355
  • IMG-20120621-00363.jpg
    IMG-20120621-00363.jpg
    311 KB · Views: 312
  • IMG-20120621-00364.jpg
    IMG-20120621-00364.jpg
    342.5 KB · Views: 354
  • IMG-20120621-00366.jpg
    IMG-20120621-00366.jpg
    288.3 KB · Views: 340
  • IMG-20120621-00372.jpg
    IMG-20120621-00372.jpg
    282.8 KB · Views: 316
  • IMG-20120621-00367.jpg
    IMG-20120621-00367.jpg
    419 KB · Views: 427
  • IMG-20120621-00371.jpg
    IMG-20120621-00371.jpg
    295.1 KB · Views: 331
Got the loom finished in as much as I added the extra wires, stripped out the rear unused tank connections and extended them so they can be used for rear door electrics, alarm electrics etc. I've put it into conduit and combined it with the gearbox and fuel tank looms - looks much better.

The loom is the same as the one they use for the 110 so it's too long, I will wait till the tub is back on then I'll pull it into the tub and cut all the wires to the required length before soldering on all the new connections.

I got the tub floor rebuilt last night - didn't have the lazy-tong and used a hand riveter to put in the 4.8 x 14mm rivets as used in LR tub construction - that was hard work! All the galv supports were coated in sealer before I put them into place to stop galvanic corrosion, even though they are adjacent to each other on the anodic index and corrosion of zinc in the presence of aluminium is only increased by 1%. I then etch primed the ali and galv supports ready for paint tonight.

I also got my brake lines made up and now have the N/S/F brake calliper pipe running along the front rather than up along the bulkhead to try and reduce clutter - the T piece is now down on the back of the foot well - pictures to follow.

The two front wings have been fully prepped and acid etched where needed - they are ready for paint - I may do the wings tonight when I do the underside of the tub.
 

Attachments

  • IMG-20120622-00373.jpg
    IMG-20120622-00373.jpg
    346.6 KB · Views: 429
  • IMG-20120625-00383.jpg
    IMG-20120625-00383.jpg
    342.5 KB · Views: 451
  • IMG-20120702-00411.jpg
    IMG-20120702-00411.jpg
    331.7 KB · Views: 440
  • IMG-20120702-00412.jpg
    IMG-20120702-00412.jpg
    287.1 KB · Views: 413
  • IMG-20120702-00413.jpg
    IMG-20120702-00413.jpg
    350.1 KB · Views: 488
  • IMG-20120630-00402.jpg
    IMG-20120630-00402.jpg
    477.2 KB · Views: 445
Back
Top