Hi guys so i thought id make a post about my build im doing, so basically ive always wanted a classic in Plymouth blue mainly due to the famous essex boys one (marmite subject i know)
Anyway when i was looking even the cars upto 10k needed work so i decided id just build my own. Now im no mechanic by any means but my friend is a welder and has done alot of car restorations in the past and ive done afew motorbike engine conversions in quads ect and i maintain all my other vehicles so apart from outsourcing the paint and interior retrim the project will be done by us on weekends and the odd evening here and there.
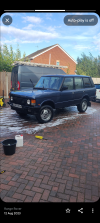
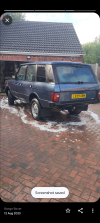
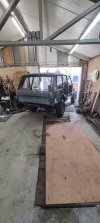
The car we picked looked great on the surface and was running and driving with an mot just had abs issues so we bought it and got it home and after a wash it looked even better.
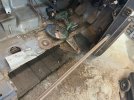
Then we looked more into it and found more and more rust and dodgy repairs so we decided to make a start so i ordered most of the parts i could get hold of new prior to starting which included
Disks, pads, calipers
Servo and master cylinder from a non abs disco 1
Upgraded Springs and shocks
Upgraded anti roll bars and drop links
Full polybush kit
Body mounts
All lights, indicators, fog lights
Steering damper
Full stainless exhaust system with headers
Full pioneer speaker package with headunit
Engine rebuild gasket kit
Uprated cam
Megasquirt ms2x injection system
Spark plugs
Enclosed air box
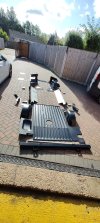
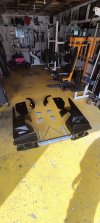
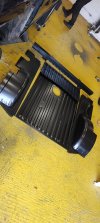
Every available body repair pannel with cross members ect (see pics)
Grill and lower bumper vallance
Aftermarket central locking kit
The used parts i bought were
Disco 1 door handles as i prefer black to chrome
A full set of doors as spares to nick sections to repair rusty bits
Rear wings
I then went to the upholstery shop and have the seats booked in for a retrim in leather with perforated center inlays
The paint shop is also sorted as we know someone
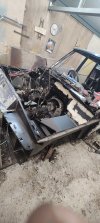
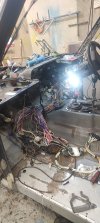
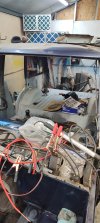
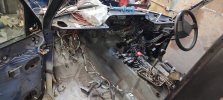
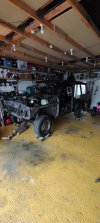
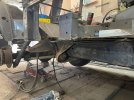
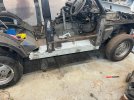
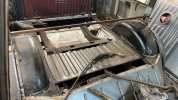
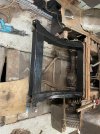
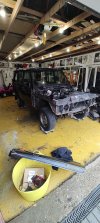
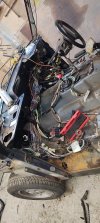
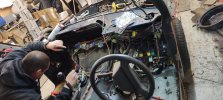
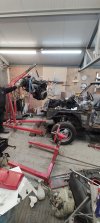
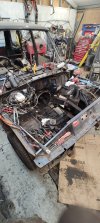
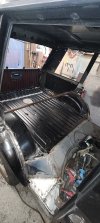
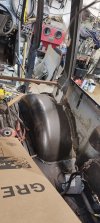
We then started by stripping down and making a start at the rear, il attach some pics but where it stands at the moment is we basically have the rear sections in and the drivers side sill and footwell pannel, we then turned it around to get to the other side sill ect and then removed the engine and started going through the wiring ect to make it as minimal as possible to help with getting it out the way to cut the pannels out ect there's still alot of patching it odd bits ect but we wanted to get the big stuff out the way first to get it somewhere near bieng solid, im hoping i can lean on you guys if i come across anything as theres already been plenty of scouring google ect to find any info on things so yea thats where we are at current and il try and update as progress happens
Anyway when i was looking even the cars upto 10k needed work so i decided id just build my own. Now im no mechanic by any means but my friend is a welder and has done alot of car restorations in the past and ive done afew motorbike engine conversions in quads ect and i maintain all my other vehicles so apart from outsourcing the paint and interior retrim the project will be done by us on weekends and the odd evening here and there.
The car we picked looked great on the surface and was running and driving with an mot just had abs issues so we bought it and got it home and after a wash it looked even better.
Then we looked more into it and found more and more rust and dodgy repairs so we decided to make a start so i ordered most of the parts i could get hold of new prior to starting which included
Disks, pads, calipers
Servo and master cylinder from a non abs disco 1
Upgraded Springs and shocks
Upgraded anti roll bars and drop links
Full polybush kit
Body mounts
All lights, indicators, fog lights
Steering damper
Full stainless exhaust system with headers
Full pioneer speaker package with headunit
Engine rebuild gasket kit
Uprated cam
Megasquirt ms2x injection system
Spark plugs
Enclosed air box
Every available body repair pannel with cross members ect (see pics)
Grill and lower bumper vallance
Aftermarket central locking kit
The used parts i bought were
Disco 1 door handles as i prefer black to chrome
A full set of doors as spares to nick sections to repair rusty bits
Rear wings
I then went to the upholstery shop and have the seats booked in for a retrim in leather with perforated center inlays
The paint shop is also sorted as we know someone
We then started by stripping down and making a start at the rear, il attach some pics but where it stands at the moment is we basically have the rear sections in and the drivers side sill and footwell pannel, we then turned it around to get to the other side sill ect and then removed the engine and started going through the wiring ect to make it as minimal as possible to help with getting it out the way to cut the pannels out ect there's still alot of patching it odd bits ect but we wanted to get the big stuff out the way first to get it somewhere near bieng solid, im hoping i can lean on you guys if i come across anything as theres already been plenty of scouring google ect to find any info on things so yea thats where we are at current and il try and update as progress happens
Attachments
-
 IMG_20230923_103512115.jpg344.7 KB · Views: 204
 -
 IMG_20230921_142753410.jpg283.1 KB · Views: 224
 -
 IMG_20230920_184021485.jpg205.3 KB · Views: 200
 -
 Screenshot_20230928-232433.png3.4 MB · Views: 211
 -
 Screenshot_20230928-232436.png3.7 MB · Views: 196
 -
 IMG_20230919_210530357.jpg223.2 KB · Views: 227
 -
 IMG-20231021-WA0034.jpg419.2 KB · Views: 215
 -
 IMG-20231021-WA0035.jpg365.3 KB · Views: 224
 -
 IMG-20231021-WA0040.jpg151.6 KB · Views: 227
 -
 IMG-20231007-WA0006.jpg233.3 KB · Views: 221
 -
 IMG-20230926-WA0001.jpg663.9 KB · Views: 214
 -
 IMG_20230919_174605001.jpg313 KB · Views: 219
 -
 IMG_20230920_154435576.jpg329.5 KB · Views: 211
 -
 IMG_20231107_195127508.jpg315.7 KB · Views: 175
 -
 IMG_20231107_193150920.jpg258.7 KB · Views: 186
 -
 IMG_20231106_191739796.jpg191 KB · Views: 185
 -
 IMG_20231106_193300750.jpg252.4 KB · Views: 181
 -
 IMG_20231105_112107864.jpg220.7 KB · Views: 195
 -
 IMG_20231104_155216603.jpg249.7 KB · Views: 193
 -
 IMG_20231022_144655793.jpg251.3 KB · Views: 219