Other what have u done on ur disco today

This site contains affiliate links for which LandyZone may be compensated if you make a purchase.
This was a couple of weeks ago when the forum was playing silly beggars and I couldn’t upload the photos but;
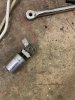
I changed these;

C5D12941-C6F4-4FDC-872C-8B80AAEA1006.jpeg


For these;
167A2D91-16C8-429D-BC6C-A8DF4D962333.jpeg


I know they are Chinese knock-offs but I can’t help but think their plastic will last longer than the crapalloy the originals were made of..... not to mention at £35 for the pair including P&P, I thought I’d take the chance....

I’ve also added these to the front to compliment those at the rear;

F749BE44-226E-4C2D-A055-18171BE3EBF5.jpeg


Amber strobes for when out with my local 4x4 response group and helping out the odd unlucky motorist when needed.

Also, and perhaps the most important modification, all be it temporary until the end of the month;

057942A0-97F9-48D8-94A9-34F87EA9EDE5.png


With another on the back window.
 
but then I realise I never use the front fogs, so put it off to another time

I don’t use them often either but the Somerset levels are prone to thick pea soup at this time of year so I wanted to have them working but quite frankly, the old ones let down the look of the front end so it’s more about the looks than function if I’m truly honest.
 
The plastic lenses on my headlights tend to go dull and get covered with a sort of brownish oxidisation and road filth over time, so I got out the Greygate plastic polish and scrubbed them up a bit. All nice and shiny again. Followed that with a quick polish with some wax to try to keep the muck off, so everything is all nice and clean ready for the dark nights. I also took the opportunity to fasten a car poppy on the grille, for this week.
It goes in on Wednesday for the rear right hub to be replaced ..... yeah, I know I could do it myself, but to be honest, I don't have anywhere to do the work, and if the truth were known, I'm just a bit long in the tooth to try to do that sort of job at the side of the road these days. Been there, done that and got the tee-shirt, so now I'll pay somebody to do it for me.
 
As I said in my last post, I'm a bit long in the tooth for rummaging about at the side of the road fixing wheel hubs, and judging by the repair report from the garage, I would have had trouble anyway. I don't have the kit suitable for breaking the locking goo that LR used to stick the hub to the halfshaft when it was first assembled, and anyway, it been slashing it down all day.
Anyway, it's done now, so goodbye to the 3 amigos ....... until the next time.
 
Been replacing drivers side steering ball joints. Getting the ball joints out and in wasn’t as bad as I thought it was going be. It was the Driveshaft nut that was a nightmare ended up buying a Torque Multiplier to get nut off after my breaker bar shattered. Threads on CV have also stripped so new one ordered and Brake pad carrier as had to cut that of as heads on nuts had corroded to nothing.
0539FAE7-EE28-4DAD-B529-348F61EEDBA2.jpeg
12E9753A-083E-4714-9235-60C26C4D5957.jpeg
0B01F9D0-07A4-40B9-8DAE-4FC8F5E2D164.jpeg
Also managed to mangle two new axle half shaft seals :( Oh well beer o’clock
 

Attachments

  • D9C30EB9-F7E9-4475-8749-D9FC4F01257F.jpeg
    D9C30EB9-F7E9-4475-8749-D9FC4F01257F.jpeg
    488.9 KB · Views: 118
Been replacing drivers side steering ball joints. Getting the ball joints out and in wasn’t as bad as I thought it was going be. It was the Driveshaft nut that was a nightmare ended up buying a Torque Multiplier to get nut off after my breaker bar shattered. Threads on CV have also stripped so new one ordered and Brake pad carrier as had to cut that of as heads on nuts had corroded to nothing. View attachment 162489View attachment 162491View attachment 162492 Also managed to mangle two new axle half shaft seals :( Oh well beer o’clock

Sounds like you had fun, nut torque is a right PITA if you do not have kit big enough to handle it.

What kit did you use to press the old ball joints out?

Cheers
 
Sounds like you had fun, nut torque is a right PITA if you do not have kit big enough to handle it.

What kit did you use to press the old ball joints out?

Cheers

Yeah was fun.......NOT!!! Lol

I used this kit from Amazon it worked brilliantly had use a bit heat on bottom ball joint to get it moving top one was no problem
21PCS Ball Joint Service Auto Repair Remover Adapter Master Tools Kit Set 450757 Amazon product

And this is the Torque Multiplyer I also got from Amazon it was totally effortless cranking by hand I rested the reaction arm on an axle stand did lift the car a tiny bit before but broke loose but all good

EWK Torque Multiplier Wheel Nut Remover Truck HGV Tyre Labor Saving 1" Dr Amazon product


Thanks, I have one of those kits the clamp is also useful if needed for UJ;s, I have a 700Nm torque wrench I use on mine when I change the hubs.

Cheers
 
Thanks, I have one of those kits the clamp is also useful if needed for UJ;s, I have a 700Nm torque wrench I use on mine when I change the hubs.

Cheers

I’m going have to see about a bigger Torque wrench my one only goes to 295nm and wouldn’t want to use the Torque multiplyer as no way of telling how tight the nut is
 
Fired it up after been sat for 4 and a half months after repairing the rear chassis,straight through exhaust fitted,fired up straight away which was pleasing.the list is getting smaller to do ready for mot
 
Added 10 litres of waxoyl into/onto chassis/underbody.not a nice job to do on ya back but a job done.
The finish line is nearing....
 
Took daughters Discovery 2 for its first MOT since we bought it and it passed with no advisories. The tester was very impressed says it’s the best looking chassis he’s seen on one for a long time :D:D
9EBC0BA3-98AF-485F-98D6-0B4EB989604C.jpeg
 
Came out first thing to replace another doggy starter motor only to find it sitting on its ar$e :(
Started it up then waited for a moment for it to raise up with no joy so I hit the dash button to
raise it up...…. nsr went up to the max & the os stayed normal drove it to my unit round the corner
took off the sensors jacked it up let the air out ect still the same then I heard a slight hiss osr is like
a tea bag loads of little holes I was wondering why the rear sat a little low on one side when left for
more than two days :rolleyes:

Two new bags & two ride height sensors on the menu ah well il be using my defender this week :)
 
Back
Top