Smileys 110 Rejuvenation Thread

This site contains affiliate links for which LandyZone may be compensated if you make a purchase.
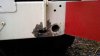
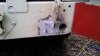
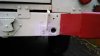
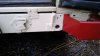
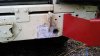
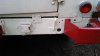
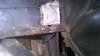
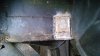
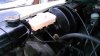
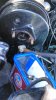
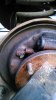
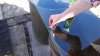
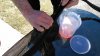
MOT coming up and need to sort brakes and attend a bit of temporary patching to passenger floor pan and cross member.
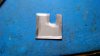
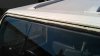
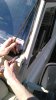
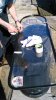
I have complete new floor pans to fit for both sides but will do this when weather isnt so ****e as will also be stripping the dash to tidy internal bulkhead.
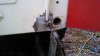
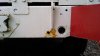
The Xmember is actually really good but this bit of corrosion first showed as a small rust line, should of sorted it earlier, but its still solid all around.
 

Attachments

  • DSC_0001.jpg
    DSC_0001.jpg
    143 KB · Views: 160
  • DSC_0002.jpg
    DSC_0002.jpg
    210.2 KB · Views: 140
So usual attack with the angle grinder to see whats going on then cut a bit of plate to fit.
The plate I used is zinc plated so quite rust resilient.
My weld clamps were to short but valve spring compressor held it in place nicely :)
 

Attachments

  • DSC_0003.jpg
    DSC_0003.jpg
    109.3 KB · Views: 155
  • DSC_0004.jpg
    DSC_0004.jpg
    315.5 KB · Views: 122
  • DSC_0005.jpg
    DSC_0005.jpg
    164.5 KB · Views: 123
Had to use the trusty old gas-less MIG which in most cases can do some nice seam welds, especially with thicker plate but had to have power down a bit as used my shed sockets to power it.
Result was strong welds but not as neat as I like so ground down and fill a bit.
 

Attachments

  • DSC_0006.jpg
    DSC_0006.jpg
    162.9 KB · Views: 187
  • DSC_0007.jpg
    DSC_0007.jpg
    189.5 KB · Views: 124
Rub down, paint and repeat, its not perfect but strong repair and will be tidied up in the summer when the 110 is getting another coat of paint and some other attention that needs decent weather.
 

Attachments

  • DSC_0012.jpg
    DSC_0012.jpg
    111.3 KB · Views: 140
  • DSC_0011.jpg
    DSC_0011.jpg
    198 KB · Views: 117
  • DSC_0010.jpg
    DSC_0010.jpg
    194.3 KB · Views: 145
Now the floor pan.
Cut a plate, started welding and found the bit I was welding to along the bottom of the new plate was disappearing rather than welding!.
This meant unbolting the floor plate and adding another bit of plate to get to the good metal.
 

Attachments

  • DSC_0008.jpg
    DSC_0008.jpg
    186.8 KB · Views: 151
  • DSC_0009.jpg
    DSC_0009.jpg
    200.1 KB · Views: 104
Can see from the last pics that the pans have already had some crap repairs, so looking forward to stripping the lot out over the coming months and fitting my new sections.
If weather ok its new Brake master cylinder and rear brake adjuster set replacement tomorrow :D:D
 
Good job, I am going to sort a couple of bits on my xmember and floor pan this year. Only tiny repairs but would rather do them before they get massive!

The bits I want to do are on the back of the xmember that Re like split between the 2 seams of metal. Going to cut it out and flush weld in a single plate rather than 2.

Good job dude :)
 
Good plan Flat, if you can get a flush welded plate in its easier grind fill and make it look like its not been done, bit more fiddly but worth it. :)
 
Managed to get window of opportunity to strip old master cylinder out, replace and bleed all the brakes through.
Seems to of fixed the sinking pedal feeling but not had chance to do full road test.
Old one was getting bit nasty where the servo / piston applies the pressure.
 

Attachments

  • 018.jpg
    018.jpg
    168.5 KB · Views: 122
  • 015.jpg
    015.jpg
    204.1 KB · Views: 133
  • 014.jpg
    014.jpg
    369.1 KB · Views: 133
Master cylinder was an easy job, other job I wanted to do was fit new brake adjusters as one side of the nearside drum wasnt adjusting.
Being an idiot I didnt buy new shoes, the old ones dont look too bad but if ya going to the trouble of taking the old ones out why not fit new ones!
Anyways pic shows old adjuster on one side, turns out they both worked but I replaced the worst side anyways...it still didnt adjust the shoe because the shoe adjuster spigot on the shoe itself is worn!!! doh!
I could of shimmed the adjuster up, but sod it.
Tomorrow I will get new shoes and not be so tight :D
 

Attachments

  • 017.jpg
    017.jpg
    418.7 KB · Views: 117
Well she passed the MOT! luckily the garage while picking at some flaking on the front brkae pipe caused it to start leaking!!
Glad it happened there, though of course I couldnt then drive it home to fix myself but at least its sorted.
They also noticed a the seats on one bolt per side instead of two so that I could tilt them, Nope thats illegal so I will have to make a plunger so I can easily tilt them and lock them back.
Advisories but all stuff I want to do anyways so will shortly be renewing all brake linings and want to replace front shocks and steering joints.
Maybe do the wheel bearings too, nothings knacked but want to stay ahead on stuff.
Will be also be stripping out the dash to get to inner buklhead and replacing both floor pans and adding sound proofing.
Big list but bit at a time, at least shes solid and safe with a years ticket :)
 
nice one :)

I am a firm believer in the approach of sorting stuff whilst in the 'general area' to save taking stuff on and off repeatedley. 2 birds with one stone as it were
 
nice one :)

I am a firm believer in the approach of sorting stuff whilst in the 'general area' to save taking stuff on and off repeatedley. 2 birds with one stone as it were

Too true Flat, bit of lateral planning may seem to take tad longer but the result does save time overall and gets a result! :D
 
Awaiting delivery of some new front springs and brake pads, she has a new MOT but I want to sort out the list of stuff that needs doing before things actually fail.
BUT suns out so its time to replace the windscreen seal that is totally cracked up and leaking. Not done this before but what can possibly go wrong!

Pics show how badly perished the seal is.
New ones are less than £20
 

Attachments

  • DSC_0018.jpg
    DSC_0018.jpg
    567.8 KB · Views: 111
  • DSC_0021.jpg
    DSC_0021.jpg
    153.8 KB · Views: 121
First thing is to get the windscreen out without breaking it, so found easiest way was to cut the old seal from the out side following the indent line on the seal.
This can then be peeled away showing the windscreen edges.
Then its a case of just carefully pushing it out from the inside.
Its a 2 man (well me and mrs smiley) job, reckon its impossible on your own.
Once the screen was safely the edge of the lip could be checked and cleaned up, dont skimp get all crud off so that the new seal can fit well against a clean surface.
 

Attachments

  • DSC_0022.jpg
    DSC_0022.jpg
    189.4 KB · Views: 155
  • DSC_0020.jpg
    DSC_0020.jpg
    191.5 KB · Views: 114
  • DSC_0019.jpg
    DSC_0019.jpg
    516.2 KB · Views: 187
Next job was to really clean the screen up well, used glass cleaner as lubricant then scraped with clean stanley blade, then wiped clear with cloth.
Used some washing up liquid / water as a lube to fit the new seal, again its good to have someone supporting the seal as you fit it to the screen :D
 
Although supposed to use masking tape to help hold the seal on, it was fairly pointless as didnt stick too well and needed clearance to the other groove to run the cord in.
The cord is vital to pull the beading over the edge when you fit the screen back in the Landy.
 

Attachments

  • DSC_0027.jpg
    DSC_0027.jpg
    219.2 KB · Views: 125
  • DSC_0028.jpg
    DSC_0028.jpg
    245.4 KB · Views: 108
  • DSC_0029.jpg
    DSC_0029.jpg
    521.7 KB · Views: 117
Back
Top