puffin1
Active Member
- Posts
- 172
- Location
- St Blazey, Cornwall
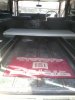
Great looking paint Job , Well done.
")
Liking the colour, you have done a realy good job on that. Keep the pics coming.
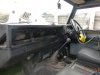
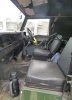
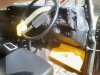
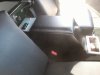
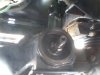
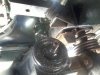
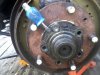
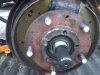
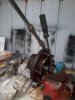
appreciate the comments, will post inside pics soon also about to do some oil seals on the diff and rear axle, bit harder now as using most days:car:looking good Steve. Same setup as mine. it's great been able to just crawl in the back and not have to faff about putting tent up.
Was good to meet you at B&W show as well
Thanks guys! was good putting faces to the names, was a fun time:5biagree: with him on both counts
Thanks guys! was good putting faces to the names, was a fun time
Reckon we will all meet again at future shows!
Stick ya name down for Eastnor in August. I'm hoping to have a new bed base I think you'll like.
I remember when I had my MOD 109 Ambulance with very low, 15,000, miles as soon as I started driving daily all the oil seals needed replacing. Obviously gone hard sitting around waiting for an accident or in reserve. Surprised my Puma does not have the same problem. Ex-RAF standby 30 months old and 1,800 on clock!
Looking good...
its comin on ok, and loving working on it though think the neighbors may think my language a bit unsavoury while getting broken studs and ignorant obstinant oil seals out!.Welcome To LandyZone, the Land Rover Forums!
Here at LandyZone we have plenty of very knowledgable members so if you have any questions about your Land Rover or just want to connect with other Landy owners, you're in the right place.
Registering is free and easy just click here, we hope to see you on the forums soon!