emalou2
New Member
- Posts
- 41
- Location
- Worcestershire
Hi there,
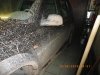
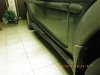
I appreciate that there have been a few threads started re these but id like a bit of advice. I bought these Land Rover Freelander Side Steps on eBay (end time 06-Feb-11 19:57:35 GMT)
And then bought the fittings also from ebay.
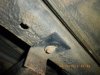
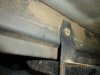
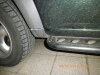
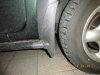
Can anyone please explain how they are fitted and where the bolts go. I see its not advised to weld them on which is fine but we could do with the idiots guide to fit them pleeeease of somebody.
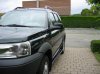
Also does anyone have photos of them fitted on here they could provide so we know when we've done them correctly.
Many Thanks guys
Emma-Louise xx
I appreciate that there have been a few threads started re these but id like a bit of advice. I bought these Land Rover Freelander Side Steps on eBay (end time 06-Feb-11 19:57:35 GMT)
And then bought the fittings also from ebay.
Can anyone please explain how they are fitted and where the bolts go. I see its not advised to weld them on which is fine but we could do with the idiots guide to fit them pleeeease of somebody.
Also does anyone have photos of them fitted on here they could provide so we know when we've done them correctly.
Many Thanks guys
Emma-Louise xx