My disco build thread.

This site contains affiliate links for which LandyZone may be compensated if you make a purchase.
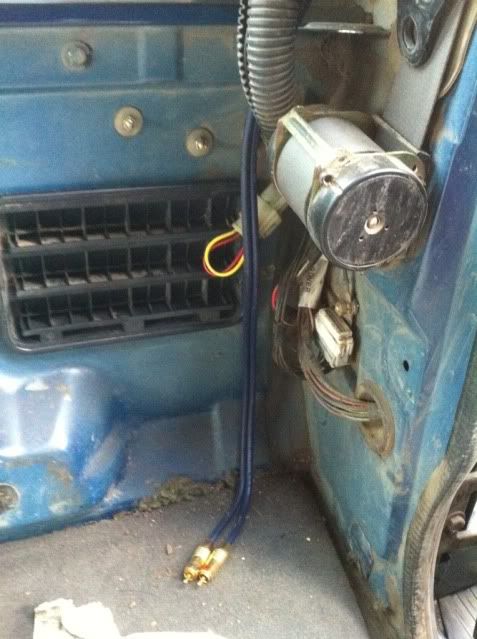
Interior progress has slowed down as I had a nasty rattle, was pretty scared to even look what it mite be. but feel better now I know engine is still all fine so gearbox but this isn't

5cce2b5f.jpg


You can just see the bearing casing broken here.

Untitled-3.jpg


center bearing out of the double jointed prop today and a pile of bits left.

380d88e6.jpg


Got the prop rebuilt today and back on tonight for got to take any pictures of it rebuilt as i was running out of time at work to thought i better take some of it refitted with new nuts and bolts, #

Sorry about the poor pic's all took on my photo but with poor lights and flash.

38058096.jpg


http://i175.photobucket.com/albums/w148/steves24v/7c677338.jpg[/img

While its on ramps I couldn't help me self but offer up my new diff guards I got for my birthday.

[img]http://i175.photobucket.com/albums/w148/steves24v/6a0aa0b2.jpg

I was only looking at resealing the front diff as I had a slight leak but while I was waiting for the oil to drain I'd found i'd fitted the rear guard in a few mins.

297462f4.jpg

:tup:]

Also been sorting out my front diff guard while waiting for parts, I had to make a spacer to get the guard to fit better also took a few tweeks in the vice, so not overly impressed with it, May be should of gone for bolt on not weld on.

4c8483b7.jpg


e0d6e189.jpg


Offered up to check fitment and see where i need to clean up to weld.

007f572a.jpg


Tab's were welded on friday night and primed,

c92cd452.jpg


ad84bfc6.jpg


As you can see I gave the old welds on the axle a wire brush down and paint to as they were a bit rusty as can be seen in my last post.

Ooooo look how clean that engine is [cool2.gif]
eb9ba143.jpg


49d5181e.jpg


All done

119fc7a8.jpg


e9d3d9e4.jpg
 
I don't know if it works but thought i'd give the disco some etc sound proofing while the interior was out, it did mean I had to take the front seats, center consol and carpets out to do the gearbox tunnel but I needed some of it out to fit my wiring looms I won on ebay for my front seats, also wax oil front foot wells too,

269707ea.jpg


Cleaned and keyed in
5f0bca2b.jpg


sound proofing
ad676a94.jpg


be234299.jpg


469557de.jpg


b2429973.jpg


Then the wiring loom and carpets back in

12948a43.jpg


4907ee20.jpg


New air flow meter on today and it rev's up from cold better but haven't left the drive yet to test properly.
Also replaced the decompession valve, (breather thing between the rocker cover breather and intake air pipe.

As I have been slacking on getting the disco done due to my other cars, I thought I'd post a pic to show its getting used.

After billing.
928b8c8c.jpg


running great now, but would like little more power. been adding some goodies lately.

D3D2FCA4-71E5-4F79-B85C-8EB3238A2AC9-11729-000015CEB3437F9A.jpg


43B8266D-4584-446E-80AA-AAE84E23769F-11729-000015CEAC5153A2.jpg


Finally got time to take the old roof lining out :tup: more dirt up there too, also removed the foam protection around the top ot the door / windscreen, washed them all and washed map pockets too, then on good advice removed roof bars and resealed for protestion against leaks on the new roof lining and fitted my new cb aerial mount.

0B4256EF-88C3-48E9-BE1C-A0E71EB4BDFB-2811-0000063314028F65.jpg


98539A8B-601A-4573-A301-1D0440F0DB04-2811-0000063324D35283.jpg


5D478BE3-2285-4370-A5D7-B8D4D169DD72-2811-000006331BE3B71A.jpg


9C694670-55A7-4740-8BDC-BDD392F899F5-2811-000006332CEDE734.jpg


9CE8DF81-B8D2-4F82-A365-FAAA9EDF30D9-2811-000006330B918BCF.jpg


EF072AC1-3711-4801-8268-4B4713979A43-2811-00000633338FA933.jpg


9CE6B892-332D-4A80-8904-D589AFF23F50-2811-000006333D750F34.jpg


8FB4844D-F3FE-4483-B05B-51C041EAF2BF-2811-0000063342C9F90C.jpg


DA0F9481-38F5-46D2-BFB5-E4D7F758ACA1-2811-00000633490384F6.jpg


Ordered roof rail extensions today !!!! Always been on my mind and nows the time to do it if I'm going to, so ordered a new set of extensions.


First place let me down showed in stock but then rang me to say there on back order so placed another order, fingers crossed they come up with the good's wanna get my roof lining back in on sat, so if there's a delay I may have to forget the idea.

Dust all gone now just the refitting of new parts so all fun. Well apart from the cleaning of some of the used parts.

I've just be running some wires in for err stuff lol,

I've put in 4 gage power wire 2 the back from the not yet fitted second battery positon to power relays and 7 core for switch wires, a pair of phono leads for reverse camera and cb aerial wire you've seen. now some thin speaker wire for my led amber recovery lights x4 when my dad brings the wire round, and power for my lights in my make up mirrors lol, see my other thread on sun visors.

Thought I'd add the pic's not that there is much 2 see, All the cables run along the gutter line in the roof out of the way of being damaged and with the original looms

Cb power and aerial wires
19198F9E-C1AF-40F8-B678-3F120C5367BA-4473-0000096DAF84F9A7.jpg


phono / rca cable to o/s/r for camera(s)
5EB3DF49-9121-4E48-92FC-9D4D91A3BB7F-4473-0000096DBD387F02.jpg


Main live power cable (blue) and 7 core switched lives (black) N/s/r
620E5F0F-0672-4C98-81ED-47683259126F-4473-0000096DB5C8D293.jpg


Fitted my roof lining back in, cleaned the plastics as i went,

before
B5C02A1E-0F58-4E03-895F-FFD6ACEFA836-4657-00000A4280724C05.jpg

above doesn't really show it well you can make out the black out line

after
9FEA6A0C-246E-4721-B1D0-E0C5BE9B3AC6-4784-00000A524270253E.jpg


put in and conneted wires for sun visor lights

40A3E6EE-ECB9-4F0A-A356-F4BC7FC6492B-4657-00000A4276B9597A.jpg


9EF1A4E3-80FB-4ABE-8008-B1DC654753AC-4657-00000A426F697209.jpg


and cleaned my rear bench seat ready to fit soon !!!!!!!!!!!!!!!!!!!!
 
Good Job!!!! really enjoy your thread,

Cheers thought I better up date the tread lots happening over the lats few months.

Rear bench seat in but no pic's sorry, was too busy working on my cb radio installation. happy with the result too.
BAFC5E7B-7319-42A6-90AD-4D673DA17E37-4784-00000A7558FDF9D6.jpg

0AC98B1B-68BA-4BE1-A546-4CE2D786E78B-4784-00000A7553DD6065.jpg

6A868C63-8D0B-4F67-A9CA-4C834F1CA781-4784-00000A754E3034B6.jpg

Cut this hole was scray even though I knew it was under the trim
1F34801F-803B-42EE-9059-1A3D02B4F792-4784-00000A754864A663.jpg

Was pretty dark when fitting
0D50748C-0E79-4233-9790-275ED4C77322-4784-00000A75424E1AD9.jpg
 
Well been busy the last couple if days cleaned up more plastics, modded my D1 sun visors as they didn't fit level on my D2 (see pic's) made up a little wiring for my new door cards as these one's have tweeters in them :tup: :tup: and the connector the the main speaker is different which I thought was odd.

D545A26D-6480-4C3B-A1D8-FEEE7412FE2B-1126-000001DE98BDDD69.jpg


C9EAF047-E90A-4E62-B07B-B31E9C7733D7-1126-000001DE919AC124.jpg


9EAAB323-E6A0-4410-9A77-94F516DE78F1-1126-000001DE8CA103BA.jpg


Also bought some stainless screws for the trims along the door shuts and trims around 6th and 7th seat mounts.

9AC4CF68-FA28-41BE-B393-90C3A2DD52BB-1126-000001DE8626862D.jpg


lastly this turned upo a week and a half later

A912F0C6-D0BE-4755-956C-06E1F9F7D08C-1126-000001E070C6D5F1.jpg
 
More pic's so prove it getting back together,

Rear seats
21540489-8DCB-45AD-9E19-EE1F45AE13EA-1126-000002D7DE19D865.jpg


door cards (i like these)

C4669516-4A0C-4742-BE78-81274B9D0FDE-1126-000002D7D774E3A9.jpg


and even gave it a quick wash, need a propper going over but will do the paint work once the interior is finished.

F84C4054-5AA1-4D5F-828B-682A989EB5F8-1126-000002D7D19B2AF0.jpg

Sorry about poor pic sun was in the way lol

3284AC31-BB12-4A96-BD4D-F598DBBF8509-1126-000002D7C887D67F.jpg
 
It came from a farm but how it got right up in to the roof lining I don't know.

The second lot of roof rails came this week WITH the fittings this time on and looking good.
 
Yes it was a farm truck from a year old, then sat in a barn for a year before I got it.


Hi Steve this is a great thread and I reckon you are doing a superb job.

Just one thing though, I can't remember if you re-sealed your sun-roofs? I would hate the idea of rain mixing with that CB radio??????
 
Where did you get your roof rail extensions from? Quite fancy some of those

I got mine from duckworth landrover they do mail order on line, they did take longer to come and first lot were missing bits and they said they were on back order then so wasn't the greatest buying experience.
 
Hi Steve this is a great thread and I reckon you are doing a superb job.

Just one thing though, I can't remember if you re-sealed your sun-roofs? I would hate the idea of rain mixing with that CB radio??????

Don't worry it's a non sunroof / leaking roof model :p:p:p

Thanks for all the great comments got more updates to do when I get time.
 
Recently I've just replaced the turbo waste gate valve def go more go up the rev's and it stays in the power range when changing up now so a great improvement, still go too much turbo lag for my liking but I think everyones is the same with out a remap.

cards stripped, and the paint is drying over night let's see how they turn out tomorrow.

B1A1652E-3C7D-43F2-B175-A188D337D1A4-3441-00000613F445CA58.jpg


Primed
DF05EDE9-AA1E-491A-A7AE-885DFC0199F6-3441-00000613E1B92FA2.jpg


4F30025B-A54C-4711-810B-48051768FB74-3441-00000613EA722EA5.jpg


let the pics do the talking

D17CDCA7-7AA0-4AF6-BD75-FA58419FC8BD-4452-00000905E6EF4AC4.jpg


D0FF5687-2F57-4F42-8640-DABDA7CCCD43-4452-00000905C711D811.jpg


1760BE67-F9EE-4C31-B79E-73A9F74CEDDE-4452-00000905D97E5219.jpg


Really really happy with the out come its so pleasing doing your own thing. there all built up but not on yet will get a pic of them when there back on.
 
Then decided to colour code the trim just about the glove box

Hold clips up level with cut outs

69920904-F933-45B8-9F4D-EB4B1E666846-2142-000004C47D7B0C35.jpg


This then allows you to open open the glove box fully

8D4E1677-D6D8-4C46-B1BF-43D0FBF03737-2142-000004C48A22126F.jpg


then use 10mm socket on quarter drive (the extension is only needed for the far left nut)

16240B0F-8A51-4C65-AB90-4B71C9B82F16-2142-000004C48EDE378A.jpg


Trim is then off less than 10 mins including working out what tools I needed and walking from the work car park to my tool box to get them twice. lol

C542FDCF-733F-4727-BE04-8A02354BE7CF-2142-000004C494A847DC.jpg

68DAC2E1-E2A1-4B7C-BECB-DA666CED113E-2142-000004C49B71B28D.jpg


Also stripped a mid range speaker so i can do some more painting

DF4773E0-E8F7-4F80-9015-B0BCDD3CD1FE-2142-000004C46F486E32.jpg


All painted now

8D61ED21-617D-4E16-8761-E5DE080E0BC2-2630-000005BB2FF31515.jpg


Also started fitting my cross overs for the front door speakers, I wish I could have got then behind the door card but there just isn't enough room on a D2 and didnt want them to get wet in the doors so this was my only option, but will get boxed in, in time.

29B274E8-E39F-46E2-9A78-BBBB51F14453-2630-000005BB23104096.jpg


63464090-0011-490E-B910-90A5D835926E-2630-000005BB2B66BBA9.jpg
no good putting them in my side pockets they were full of water the other wekk:D
 
Were they, not mine.

some odd bits been going on pic's are better then typing / reading

CEB3631B-28E7-4894-AB1A-8FBF83CD8F15-1378-0000012DB50AA6C1.jpg


0B068CD0-34D6-423A-9D5F-8EA9C04122E6-1378-0000012DAD57E777.jpg


DDCF50E6-7F45-47F4-AE90-D36E9A933AF6-1378-0000012DBB1D39CD.jpg


fitting s trailer socket as needs to be wired up before i do the rear interior.

drilled an extra hole

17E56047-1E4B-46D7-8869-8272628914A8-1378-0000015A4342E396.jpg


cut off the original hole re- shaped (ok bent it)

DD861BD7-B622-4B4B-AC0E-DA19EDAED576-1378-0000015A90FCA1FE.jpg


fitted

54283020-F37A-4F4C-8C08-59A8EE505ACC-1378-0000015ADB83124C.jpg


06536B6E-9F4E-4E7D-A870-942001D747CA-1378-0000015A9BE69E48.jpg
 
Last edited:
Back
Top