Well that was a f&£in great start to the 10 days of festive landy fun, reverse camera isn’t compatible with the android head unit, so amazon your getting the head unit back.
Grr…. Have to skip to job 4 on the list seat re-trim it is then, what could possibly go wrong ?
Some time later …………… so far so good
……………….I haven’t shouted, thrown the tin of adhesive or cracked open a can so its a good start
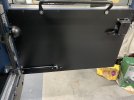
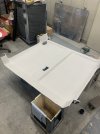
Grr…. Have to skip to job 4 on the list seat re-trim it is then, what could possibly go wrong ?
Some time later …………… so far so good
……………….I haven’t shouted, thrown the tin of adhesive or cracked open a can so its a good start


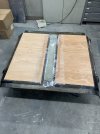
 expensive parts 0 - chaper alternative that takes hours to make 1
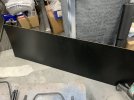


")