Spent the day grinding back the welds, then sanding it back, getting it flush as I could.
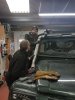
Test fit, looks quite good!
View attachment 143766 View attachment 143767View attachment 143768
First coat of Buzzweld CIO, had *just* enough left to give one thin coat on both sections. Got more en route, I did contemplate using some high build primer to fill in and small nicks but considering its going to be hit by branches a lot I decided against it.
View attachment 143769
The black certainly helps it blend in better!
View attachment 143770
Left the honeycomb mesh bare for the time being, make it stand out a little + matches the matte black / stainless theme throughout. I'll shine it up a bit then lacquer it when the rest has had its 3 coats of CIO.
View attachment 143771
Certainly no lack of air now!

I bought the parts, and "designed it" while all the welding and fitting was done by the brilliant
MC AutoCentre in Uckfield.