110 Project

This site contains affiliate links for which LandyZone may be compensated if you make a purchase.
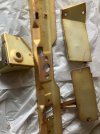
Finished stripping the steel parts from the tub today. So far, small remedial work only required except the B pillar and seat belt mountings.
IMG_8815.jpeg

IMG_8816.jpeg


B pillar YRM patches etc will be ordered soon.

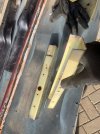
The rear corner cappings are a mixed result. The RH is reusable and will be stripped & plated but the LH is too rusty to bother with. The good news is the LH one on the other body looks sound.

Progress on the new wings too with the LH now stripped. The headlights are in much better shape than the original and the Deutsch waterproof fasteners swapped over with new bezels fitted. They are ready to go back on...but we are some way off that.

In the next few weeks I hope to get Izzy out of the garage and lift the roof, side panels and soon to be defunct tub off. The grandson has been advised there are many tasks waiting for half term.
 
Occasionally you find things and think "What made you think this was a good idea?". This looked like a act of automotive electrial self harm.

One of the headlight wires had a "splice" cut into it...I say splice but it struggles to qualify. It was wrapped in a piece of blue insulation tape:

IMG_8822.jpeg


It looked like the remains of one of those awful plastic splices. Along with the bullet crimpts it had to go.

Result with fresh harness wrapping, adhesive shrink wrap and a decent connector:

IMG_8825.jpeg
 
A few rear body replacement YRM panels turned up today. They were supposed to arrive Thursday but Fedex seemed to think finding the actual delivery address just too much trouble.

The seat belt and B post lowers both needed attention. So the lower and upper panels were dropped into place and a few mounting holes drilled for a trial fit:

20250407-0001.jpg

G clamps plus a Guiness.
20250407-0003.jpg

20250407-0005.jpg


Now the garden shed has been assembled and the greenhouse bits moved there is finally space in the car port for the body.

20250407-0004.jpg

So its under cover and can be worked on whatever the weather.
 
The B pillar lower sections were not in great shape:

20250409-0001.jpg


The spot welds make a nice popping sound when the fail. It did feel brutal and running the slitting wheel that close to good bodywork did raise the stakes. The wooden wedge idea came from YRM:

20250409-0002.jpg

And with the gash bits out of the way the replacement section was cut and offered up:
20250409-0003.jpg

Then went back to sorting the seat belt mounting points. Decided to mark out the rear most sets of holes, on account of not being able to get the drill in square to the metal. Not used blue marking fluid for 40 years:

20250411-0004.jpg


And finally managed to get a coat of paint on the inner wings:

20250411-0005.jpg


That car port is so useful...how did I ever get by in life without one?
 
The seabelt points on the rear tub are now drilled and ready for final fit:

20250418-0001.jpg

20250418-0002.jpg

And the LH B pillar is done too:
20250418-0003.jpg

Just need an hour or three to get a clear run as the sealant wont give us a second chance.

Time for a few patch repairs on the front wings. Both are in great shape for 35+ years old but a couple of corroded patches are needed.

First up the RH wing has seen metal moth around the side and indicator lights, so a little patch or two is needed:

20250421-0004.jpg

20250421-0005.jpg

20250421-0007.jpg

Not really happy with a) using self tappers or b) how close the rivnuts are to the hole. For now we live it with it until a better idea comes along.
The LH wing had a spot of corrsion where the inner wheelarch bolts on:

20250421-0009.jpg

So it now has a rivetted patch:
20250421-0010.jpg


The donor sheet of aluminum has been hanging around as leftovers from a trailer my mate and I built in 1994 to take two trials bikes to the French Four Day. Two house moves and 30 years later and its still coming in handy:

20250421-0008.jpg
 
Back
Top