You are using an out of date browser. It may not display this or other websites correctly.
You should upgrade or use an alternative browser.
You should upgrade or use an alternative browser.
'74 S3 SWB - project down-under
- Thread starter Tim_AM
- Start date
This site contains affiliate links for which LandyZone may be compensated if you make a purchase.
- Posts
- 10,746
- Location
- A bit sarf of Dorking
I love it - but then I would, because that's what I'm doing in mine!
Don't get me wrong - it does look posh.I love it - but then I would, because that's what I'm doing in mine!
Tim_AM
Well-Known Member
- Posts
- 113
- Location
- Sydney, Australia
Very nice - but are you turning it into a boat? Where are you going with this project? (!)
I get that it's not for everyone, but hey I wanted some storage in the back but didn't want a carpeted draw set like everyone else, especially as I have a canvas roof that is often rolled up,this looks a bit more fitting/different!
- Posts
- 10,746
- Location
- A bit sarf of Dorking
My excuse is that I'll be keeping an inflatable dinghy in mine for most of the summer. So boat-like it is.
Tim_AM
Well-Known Member
- Posts
- 113
- Location
- Sydney, Australia
Made some progress today,
Cutting in around the rear lights
Coming together
Top of the storage cabinet cut to size and offered up

Offering up the template for the storage box lid
Bottom frame of the storage box in place

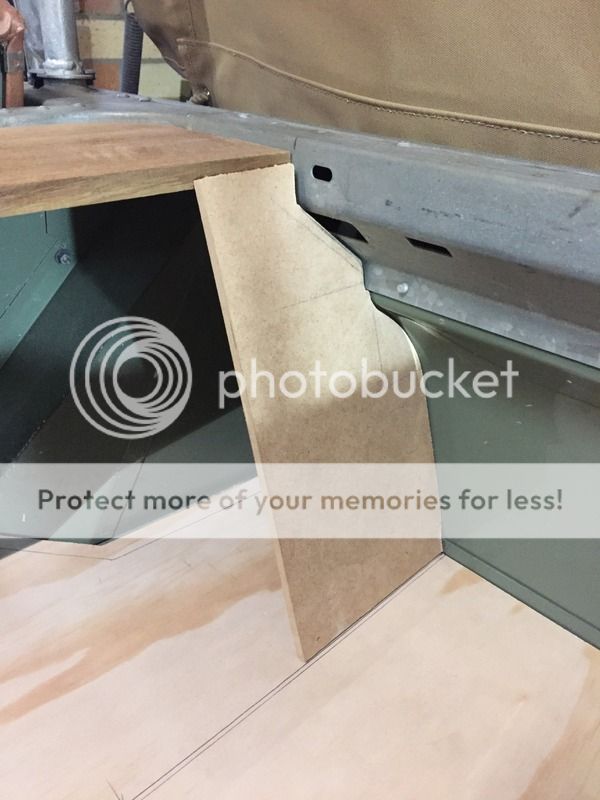
Forming up the sloping side and cutting out a template
Cutting in around the rear lights
Coming together
Top of the storage cabinet cut to size and offered up
Offering up the template for the storage box lid
Bottom frame of the storage box in place
Forming up the sloping side and cutting out a template
Tim_AM
Well-Known Member
- Posts
- 113
- Location
- Sydney, Australia
Next up is the rest of the frame work!
LincolnSteve
Well-Known Member
- Posts
- 1,224
- Location
- Lincoln
That looks great. You're inspiring me to try something similar. I love it.Made some progress today,
Cutting in around the rear lights
Coming together
Top of the storage cabinet cut to size and offered up
Offering up the template for the storage box lid
Bottom frame of the storage box in place
Forming up the sloping side and cutting out a template
Tim_AM
Well-Known Member
- Posts
- 113
- Location
- Sydney, Australia
do it!!! whats stopping you!
LincolnSteve
Well-Known Member
- Posts
- 1,224
- Location
- Lincoln
Well at the moment the tub is upside down dangling off my engine hoist, but in the fullness of time.......
Tim_AM
Well-Known Member
- Posts
- 113
- Location
- Sydney, Australia
Today was fairly productive:
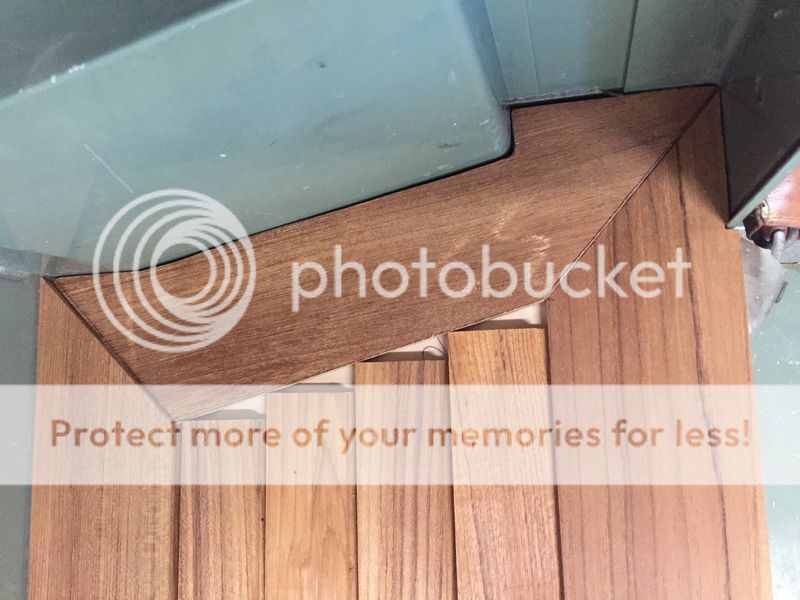
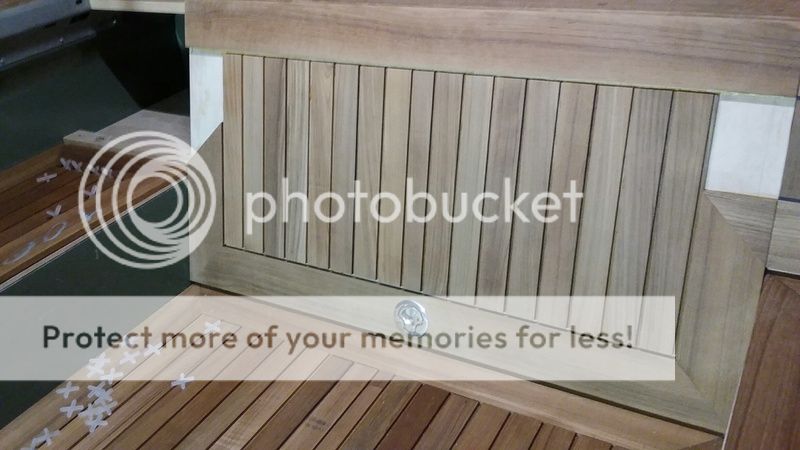
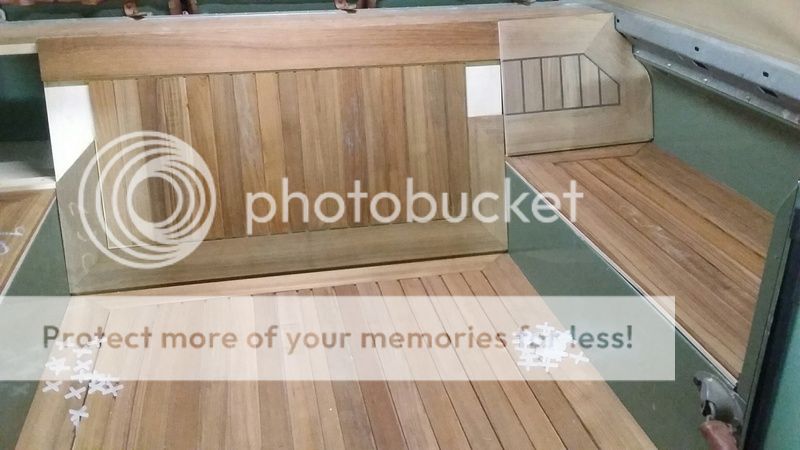
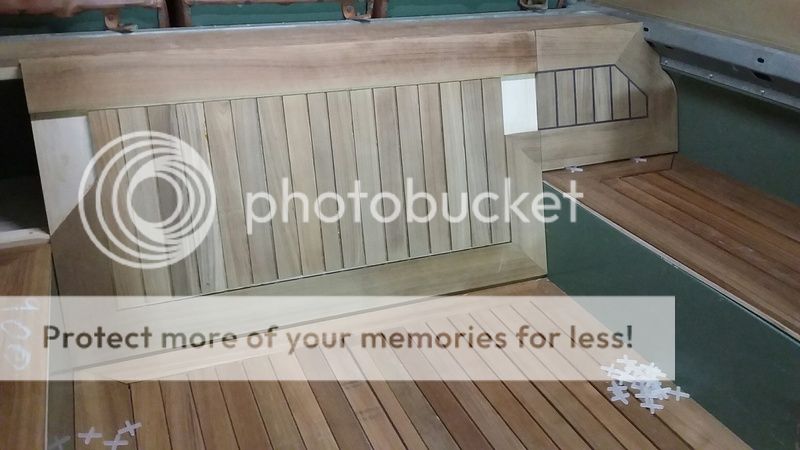
test fit with 5mm tile spacers where there are not rebates:
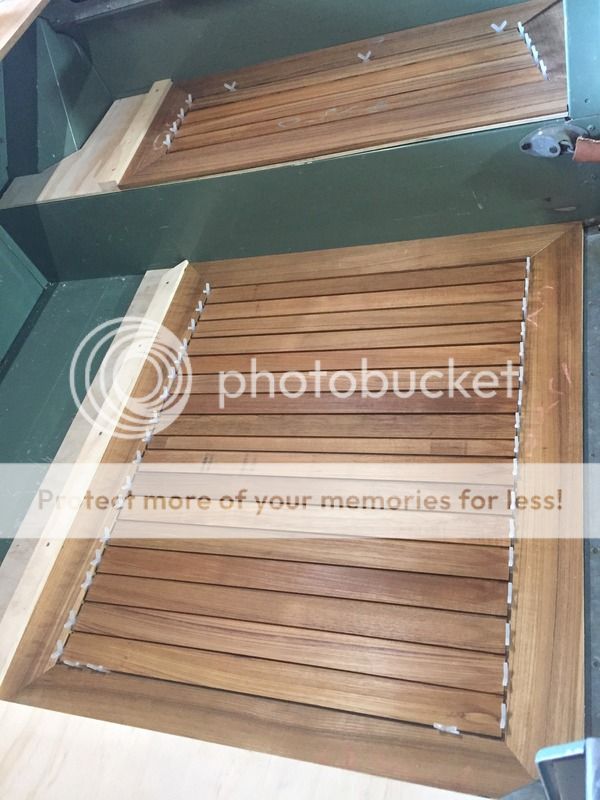
top section in place and left side board cut to shape ready for teak
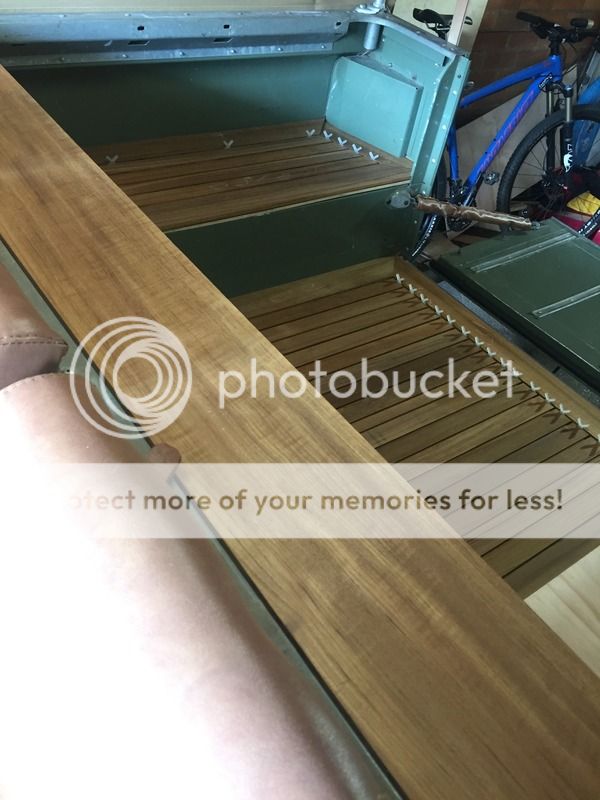
teak boarder cut and laid out
Teak for the left side offered up, centre slats yet to be trimmed down
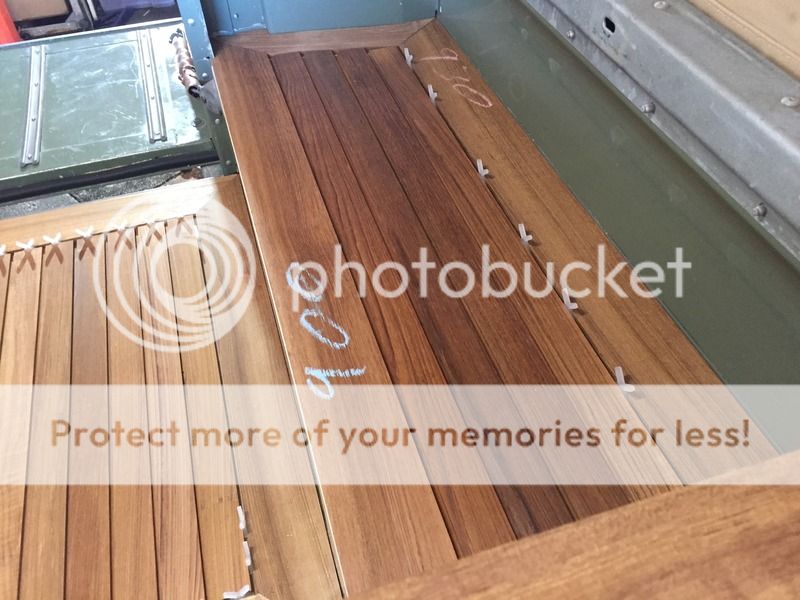
all trimmed to size and laid out
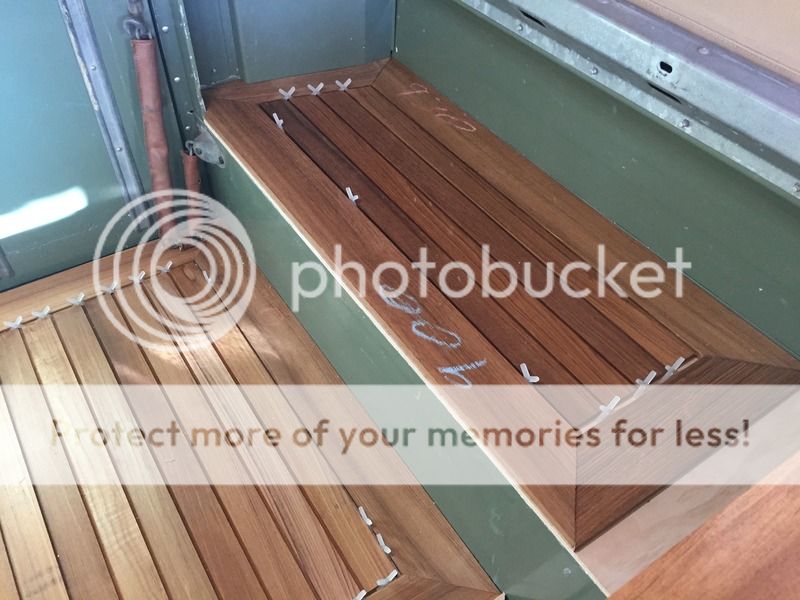
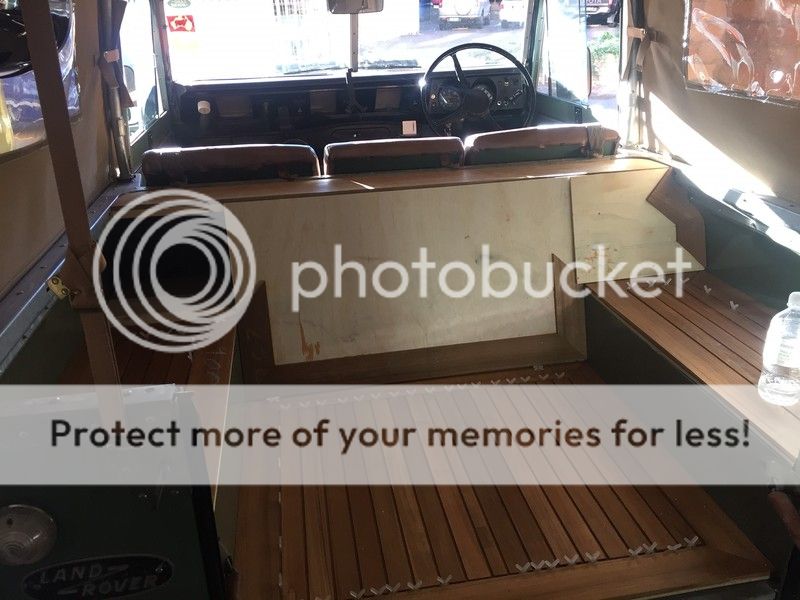
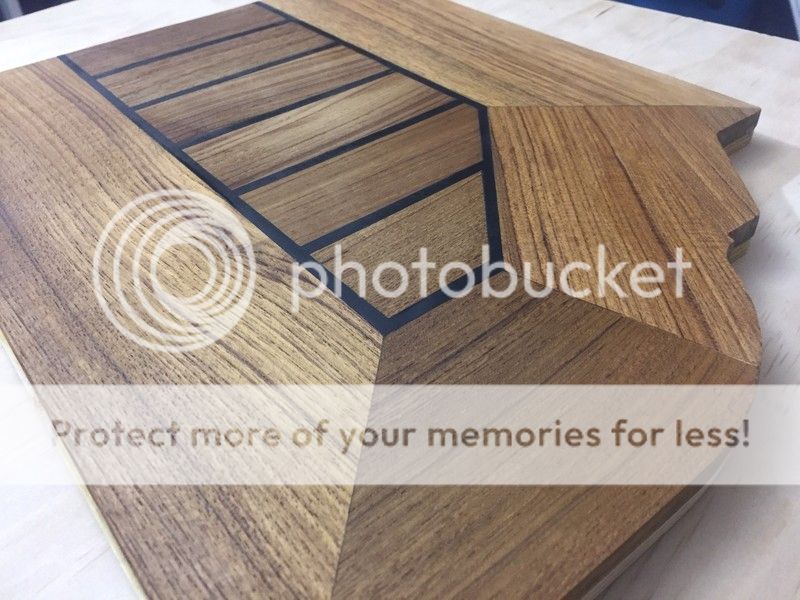
this gives a good idea of what it will look like when finished, (apart from the tile spacers and lack of caulking!)
next to build the box,
I’ve still not quite decided how to do this… the face of the box will be the part that opens, not sure weather or not to have it hinging from the bottom opening at the top, or hinged at the top opening at the bottom?! thoughts on this?
i figured that if it hinges from the bottom i can access it from the drivers seat, where as if it opens from the bottom i would need to be in the back to get in there!
feedback please!
test fit with 5mm tile spacers where there are not rebates:
top section in place and left side board cut to shape ready for teak
teak boarder cut and laid out
Teak for the left side offered up, centre slats yet to be trimmed down
all trimmed to size and laid out
this gives a good idea of what it will look like when finished, (apart from the tile spacers and lack of caulking!)
next to build the box,
I’ve still not quite decided how to do this… the face of the box will be the part that opens, not sure weather or not to have it hinging from the bottom opening at the top, or hinged at the top opening at the bottom?! thoughts on this?
i figured that if it hinges from the bottom i can access it from the drivers seat, where as if it opens from the bottom i would need to be in the back to get in there!
feedback please!
- Posts
- 10,746
- Location
- A bit sarf of Dorking
If you want the whole face to open then it has to be hinged at the top - but hinging at the bottom is much better for all the other reasons... And that means that as it can't be full width you'll have a couple of nooks in the top corners. They could be handy, or not. Split it into two full width compartments, each with a bottom hinge - the top one having chains as on the tailgate.
Have you considered having two (admittedly short) drawers? Or a combination of the two?
Have you considered having two (admittedly short) drawers? Or a combination of the two?
Tim_AM
Well-Known Member
- Posts
- 113
- Location
- Sydney, Australia
If you want the whole face to open then it has to be hinged at the top - but hinging at the bottom is much better for all the other reasons... And that means that as it can't be full width you'll have a couple of nooks in the top corners. They could be handy, or not. Split it into two full width compartments, each with a bottom hinge - the top one having chains as on the tailgate.
Have you considered having two (admittedly short) drawers? Or a combination of the two?
now i like the idea of draws! i will certainly give that some thought!
as for hinging at the bottom, you are right i would have just the center section opening with a cubby either side, that would be the most practical, although i would have to think how to match in the teak decking so it looks like one piece, mmmm
I think ill hold off in building any more until i have worked this all out!
i need to find some nice latches too....
- Posts
- 10,746
- Location
- A bit sarf of Dorking
Tim_AM
Well-Known Member
- Posts
- 113
- Location
- Sydney, Australia
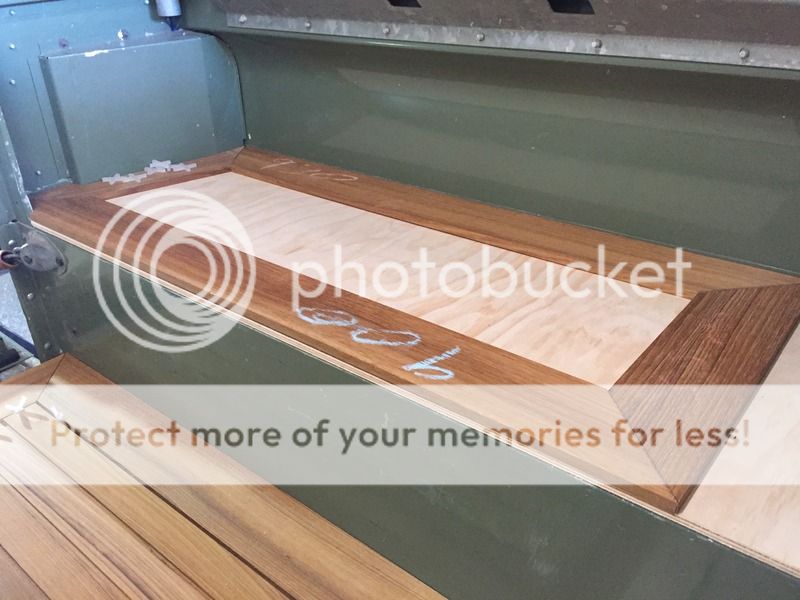
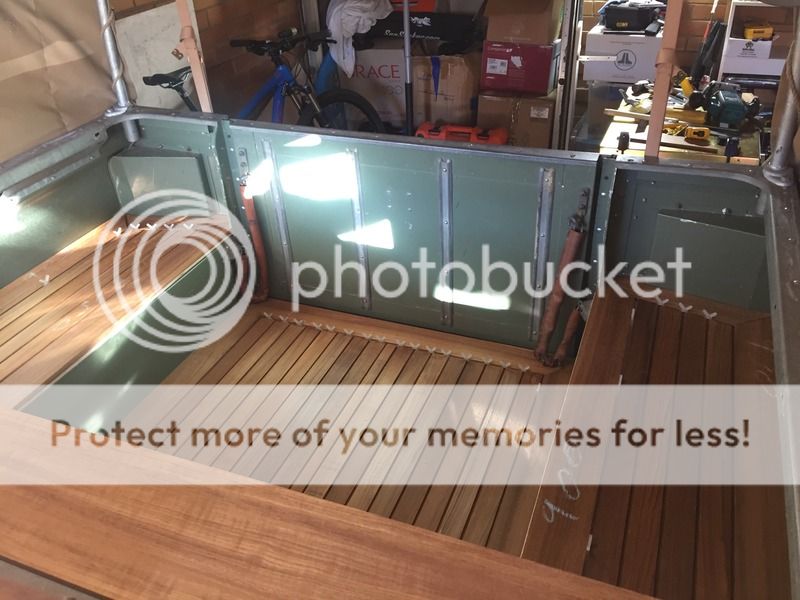
OK so it has been a while since I did an update on progress with my storage project…
i decided to stick with just a locker and not complicate things with draws!
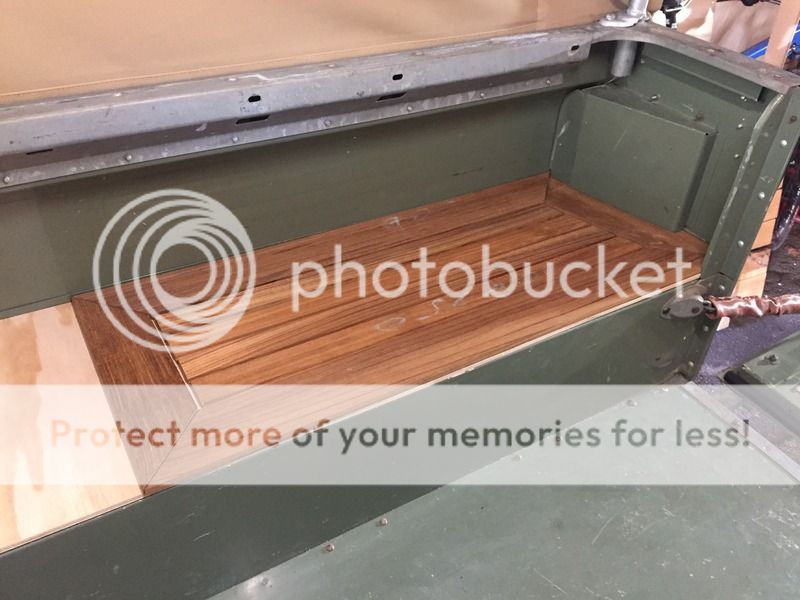
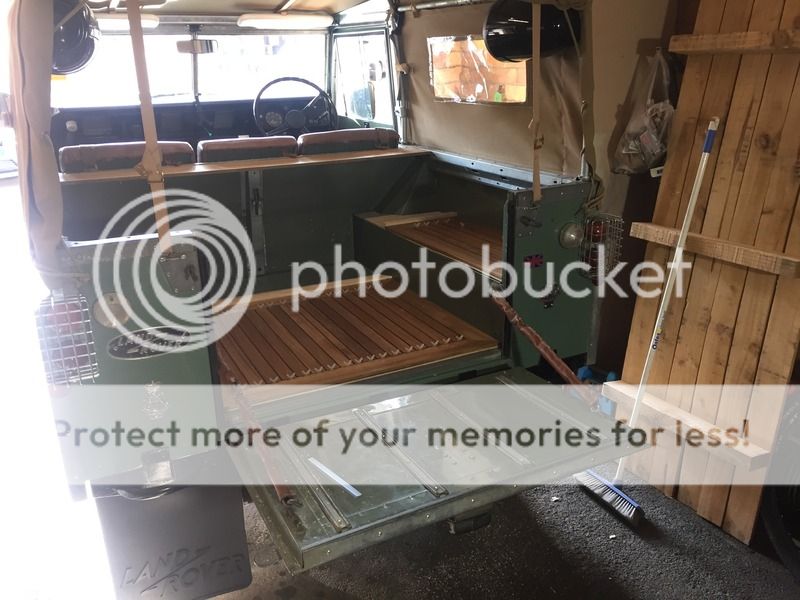
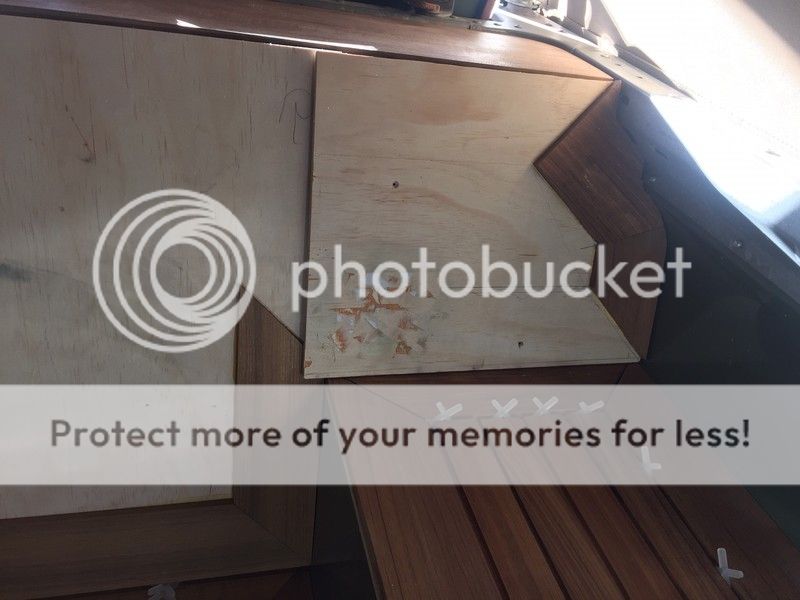
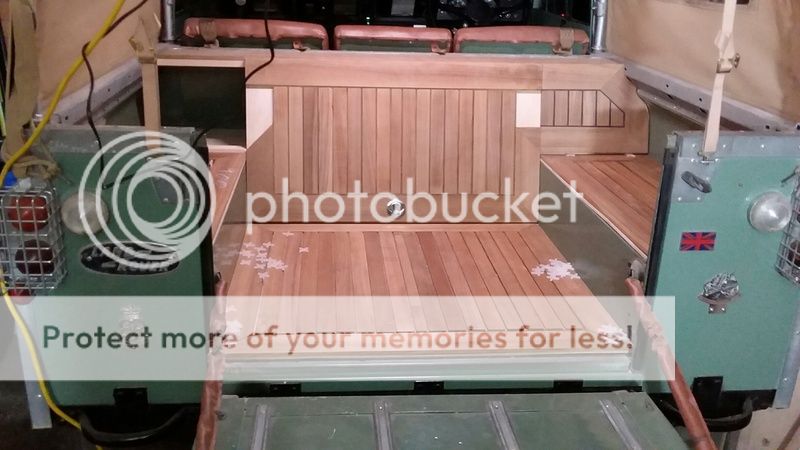
The flooring is all cut and shaped to fit and currently dry laid, the top section of the storage unit is now in place and I have partially framed up the supports for this…
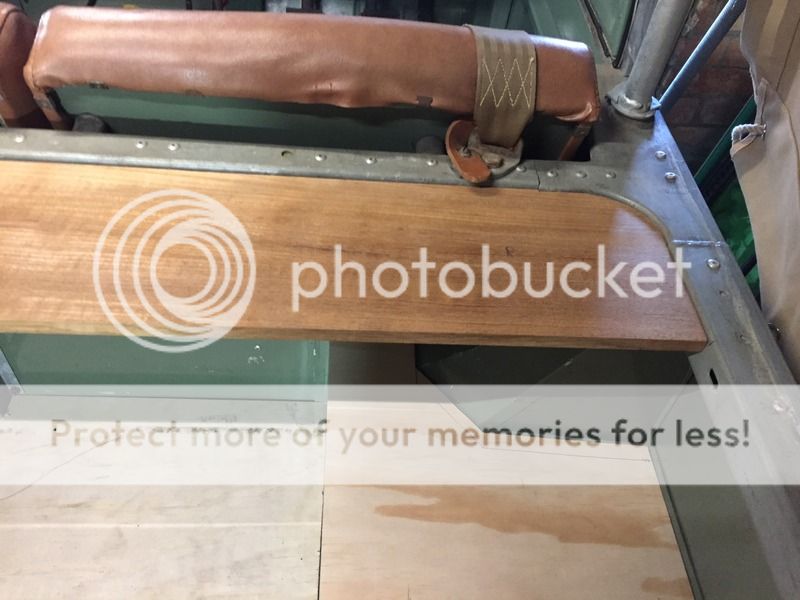
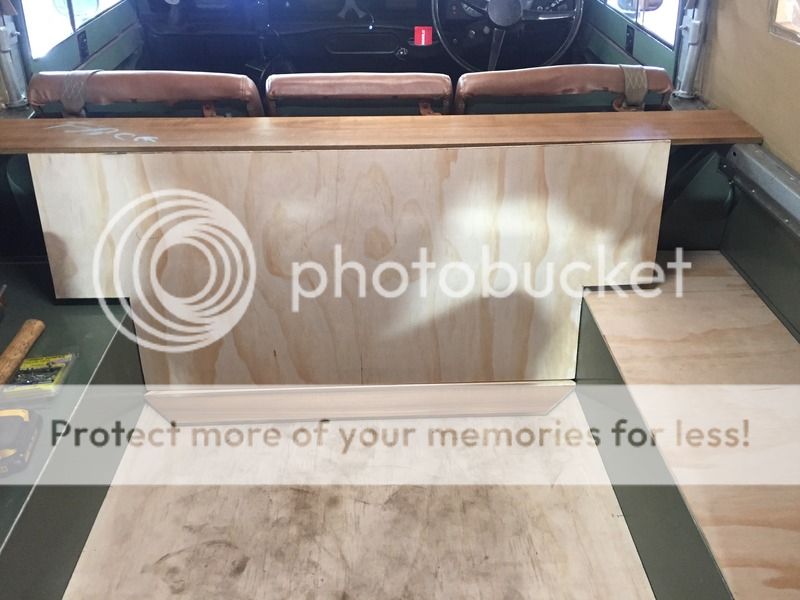
Locker lid offered up and edge trim going in…
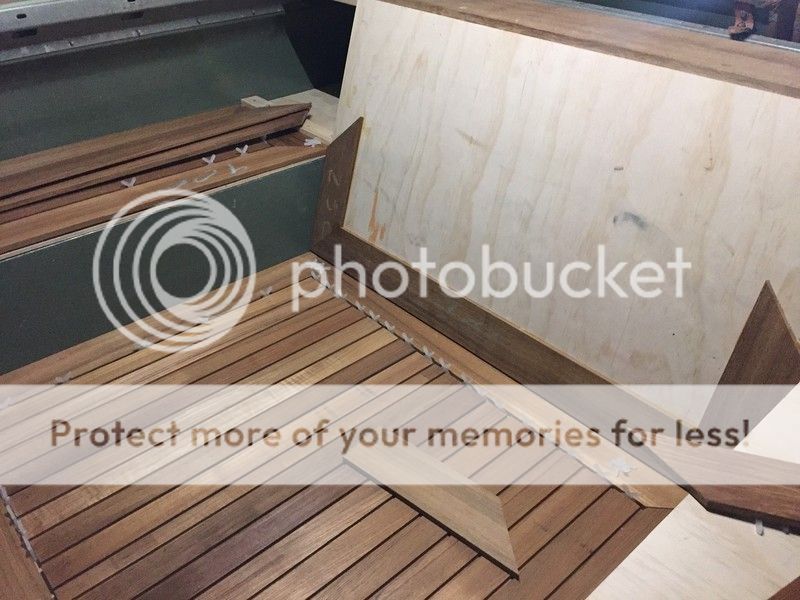
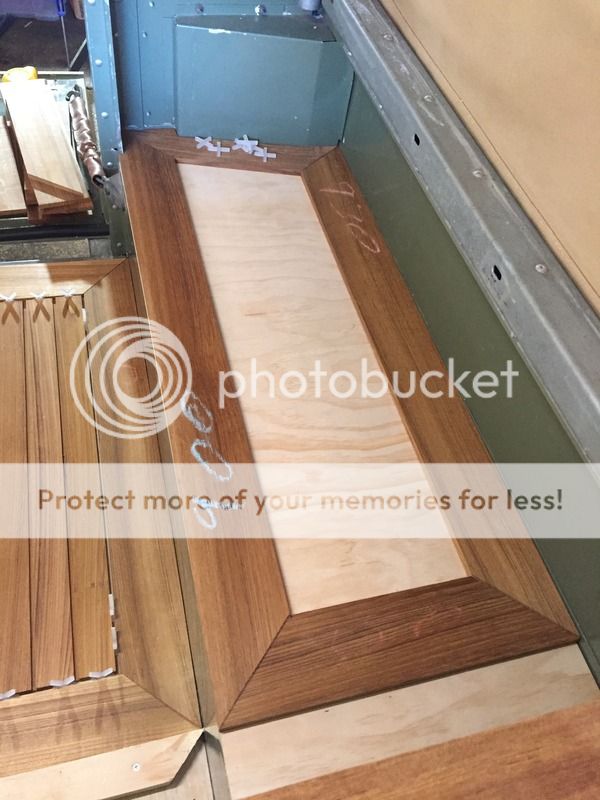
Drivers side section ply cut to size and shaped to fit contours, now to cut teak to match…
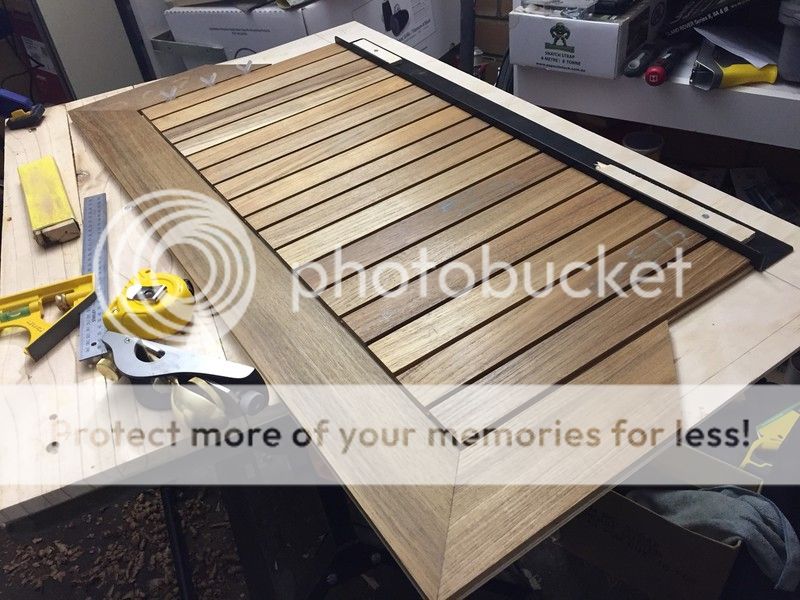
Laying out and cutting down the slats for the locker lid…
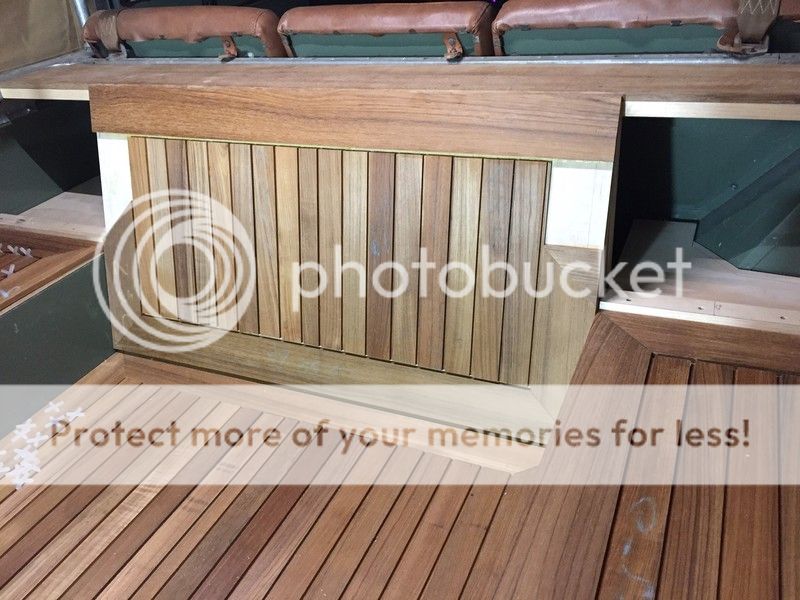
Storage lid in place, still working out weather to put alu trim in the shadow gap at the bottom of the lid or not?!
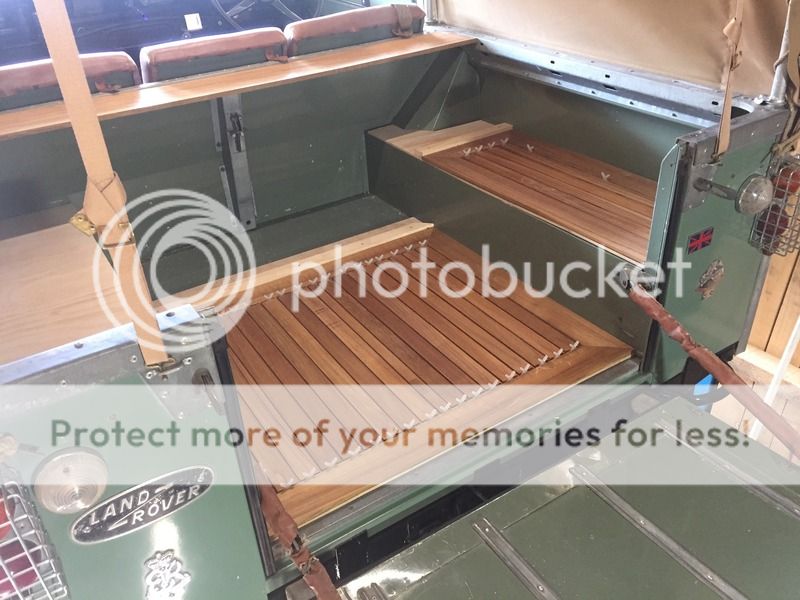
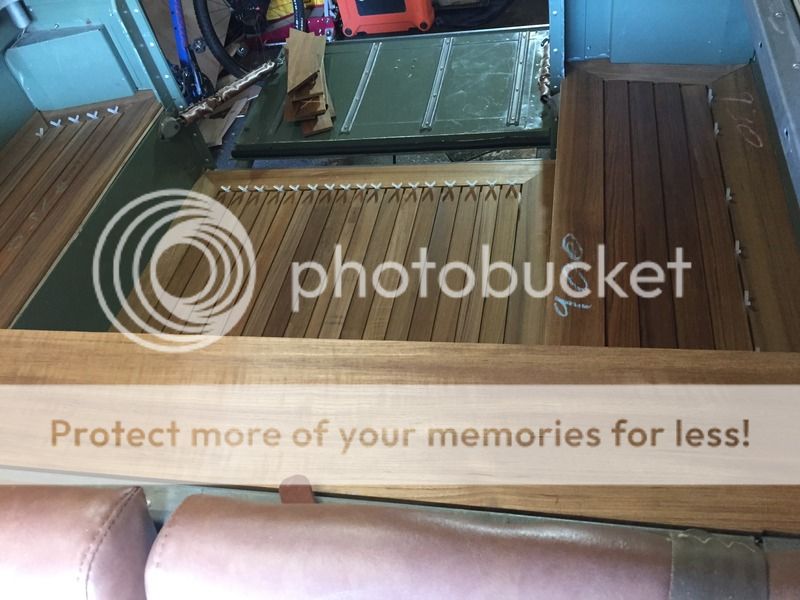
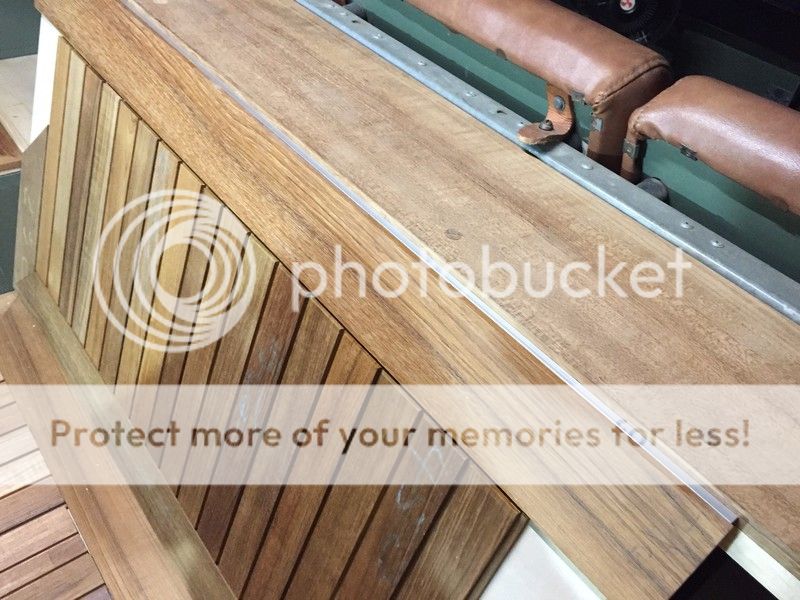
165 Degree cabinet hinges installed onto storage cabinet lid,

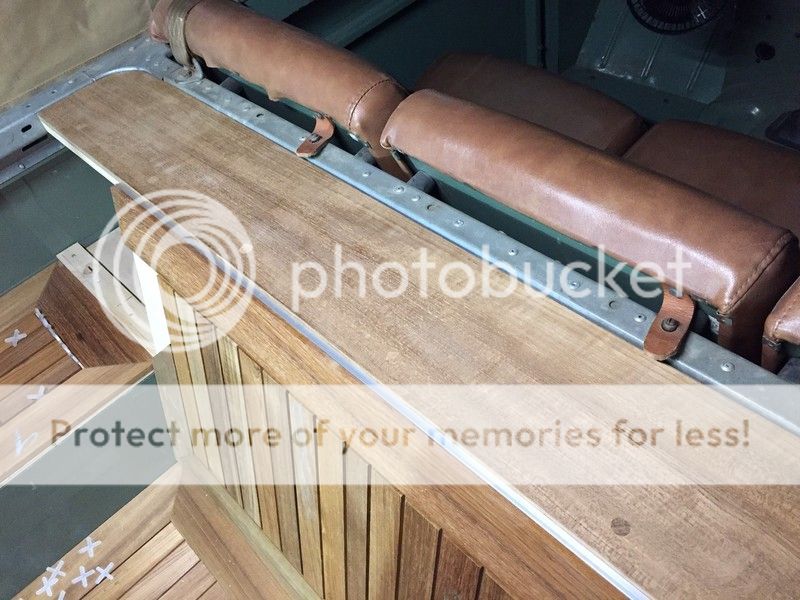
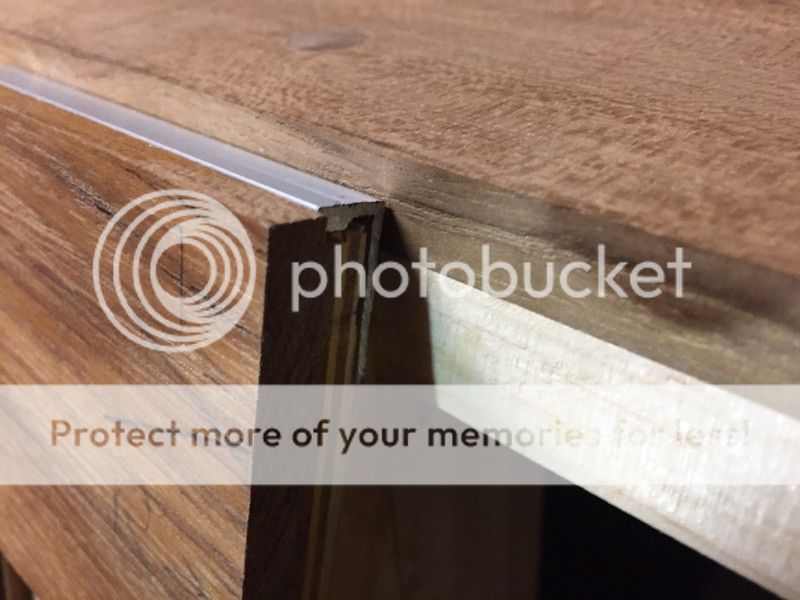
Aluminium Strip installed flush with teak to cover the edge of the marine ply,
i decided to stick with just a locker and not complicate things with draws!
The flooring is all cut and shaped to fit and currently dry laid, the top section of the storage unit is now in place and I have partially framed up the supports for this…
Locker lid offered up and edge trim going in…
Drivers side section ply cut to size and shaped to fit contours, now to cut teak to match…
Laying out and cutting down the slats for the locker lid…
Storage lid in place, still working out weather to put alu trim in the shadow gap at the bottom of the lid or not?!
165 Degree cabinet hinges installed onto storage cabinet lid,
Aluminium Strip installed flush with teak to cover the edge of the marine ply,
Tim_AM
Well-Known Member
- Posts
- 113
- Location
- Sydney, Australia
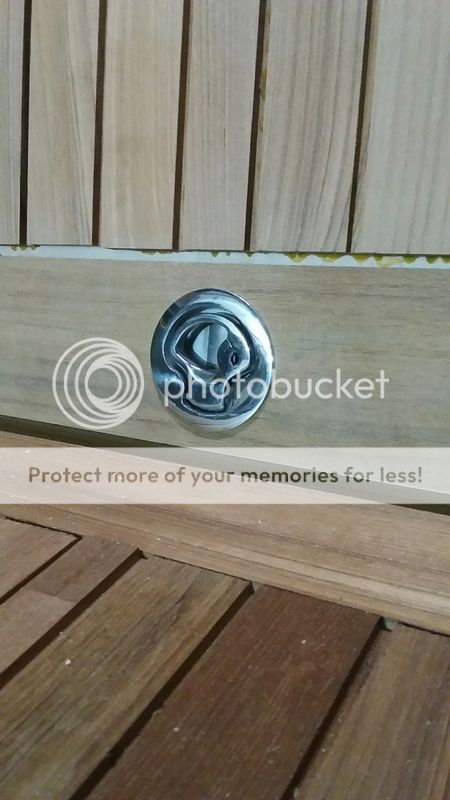
Marine grade, Stainless Locking catches cut in to the storage lid; shadow gap below locker lid,
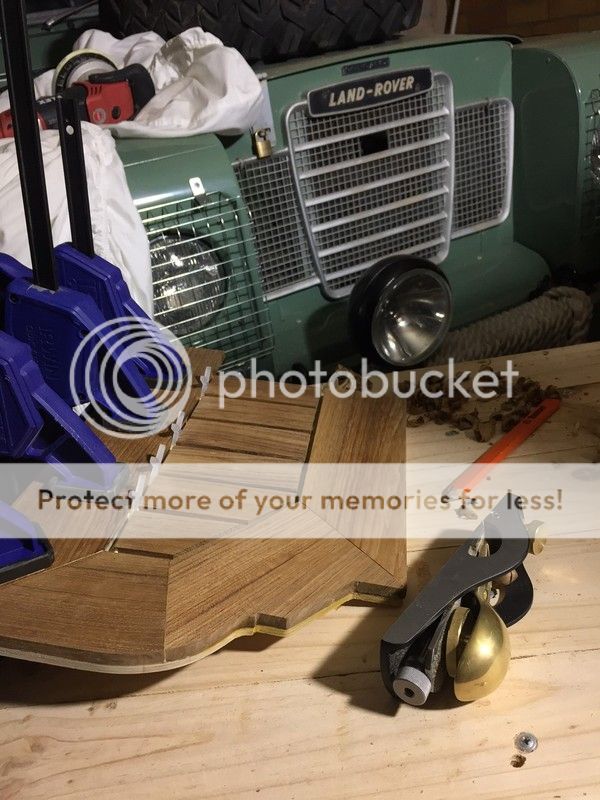
Gluing up the drivers side section… oh and my shiney new plane..
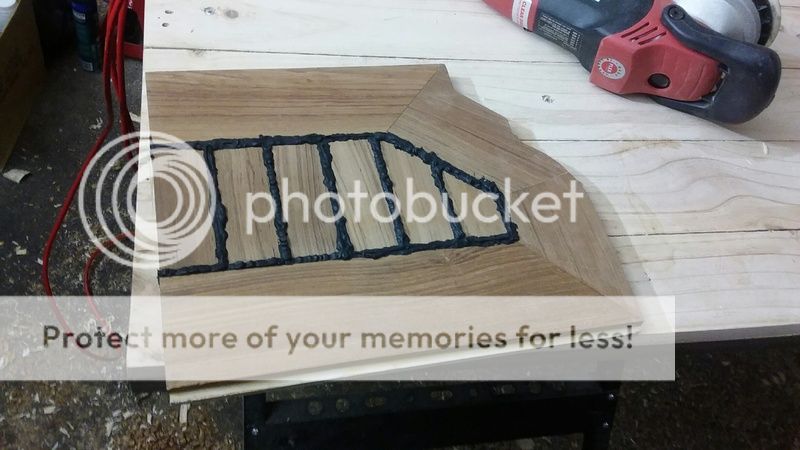
Caulking done on the first section, ready to be sanded back to flush…
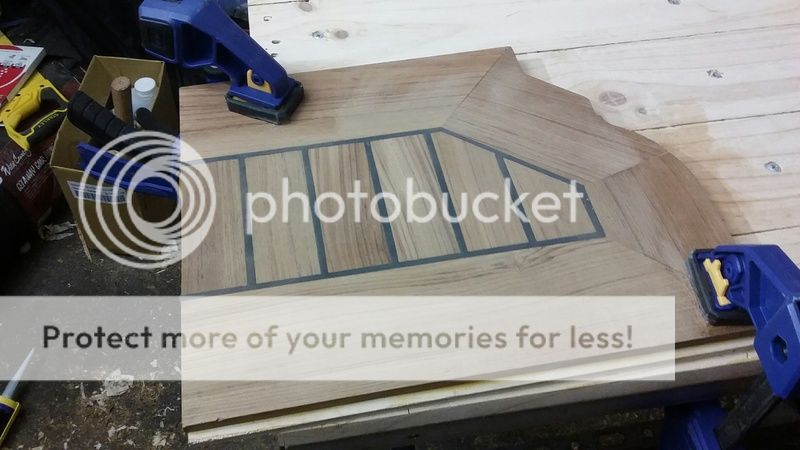
Part way through the sanding off process, down to a 120 grit, soon to be 240…
Sanding completed and first layer of Tung oil applied
Lid in place along with right side panel, making small adjustments to make it fit…
that's it for now, hopefully more progress over the weekend...
Gluing up the drivers side section… oh and my shiney new plane..
Caulking done on the first section, ready to be sanded back to flush…
Part way through the sanding off process, down to a 120 grit, soon to be 240…
Sanding completed and first layer of Tung oil applied
Lid in place along with right side panel, making small adjustments to make it fit…
that's it for now, hopefully more progress over the weekend...
Tim_AM
Well-Known Member
- Posts
- 113
- Location
- Sydney, Australia
Absolutely amazing!! Is woodworking your profession?
Thanks Roga that's very kind, nah I'm not a carpenter! I'm a project manager for a fire company!
LincolnSteve
Well-Known Member
- Posts
- 1,224
- Location
- Lincoln
Totally, completely, utterly gorgeous! I love it. Unique and you get the pleasure of telling people when they ask where you bought it from, 'No, I made it myself actually'.
Tim_AM
Well-Known Member
- Posts
- 113
- Location
- Sydney, Australia
Thanks Steve, I know, I'm looking forward to that!
Can't wait to get it caulked and oiled up...
Can't wait to get it caulked and oiled up...
Similar threads
- Replies
- 8
- Views
- 2K
- Replies
- 5
- Views
- 1K