TD5 Stripdown and rebuild

This site contains affiliate links for which LandyZone may be compensated if you make a purchase.

markomate2

Well-Known Member
Posts
898
Location
Bedford and Tallinn
Following on from my "TD5 cracked head" thread, I thought I would start a new one, as its turned into a complete rebuild!

I plan to put together a downloadable write up giving more info, when I get a min!

So background, again, TD5 ran away in Scotland two months ago, managed to stop it, quick note on what to do if it happens to you:

A run away is when the engine starts running on its own oil/fuel mix, you cannot stop it by turning off the key! Other threads talk about grabbing your CO2 extinguisher etc, most cars only have dry powder, by the time you stop, find it, open the bonnet, undo the air filter, use it..... the engine would have blown up or seized up.

If you have an auto, you probably wont be able to stop it, it which case pull over somewhere safe, get out, and call for help, it will cause a lot of smoke! There are plenty of vids on Youtube

If your on a motorway, move to the hard shoulder, DO NOT put it in neutral, just keep your foot hard on the brake pedal until it stalls, or your clutch breaks.

I just managed to stop mine before a lot of damage was done.

The run away was caused by a cracked injector pocket, No1. Its rare on a 15P, probably caused by too small a gap on the injector roller but that's just my theory.

Head off and sent for repair, more pics later.

When the head was off I found this:


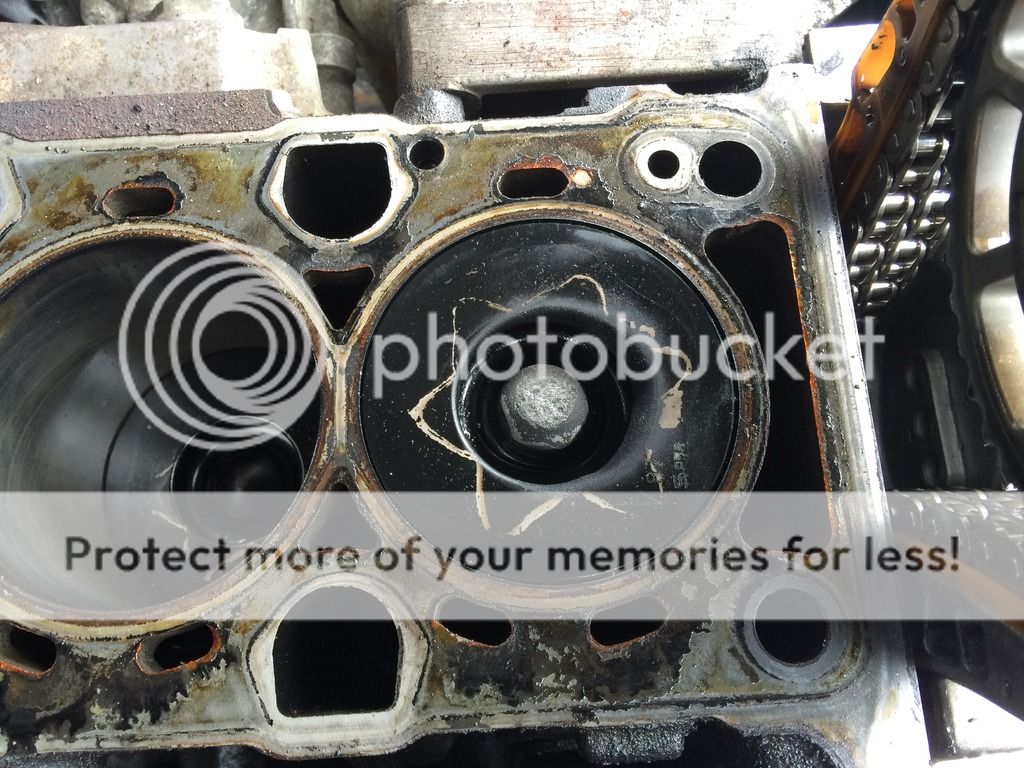
As you can see, No1 piston had started to melt! So my early plans to repair the head went out the window!
Choices?:
Scrap car.... on paper its worth £4K very good chassis etc
Break for spares, not easy no where to do it
Engine from scrap car, £1.5K ish and a big unknown (but hindsight may prove me wrong)
Repair, Budget £1K...decided to repair.

Engine out: Remove as much as possible first, also loosen the crankshaft pulley bolt


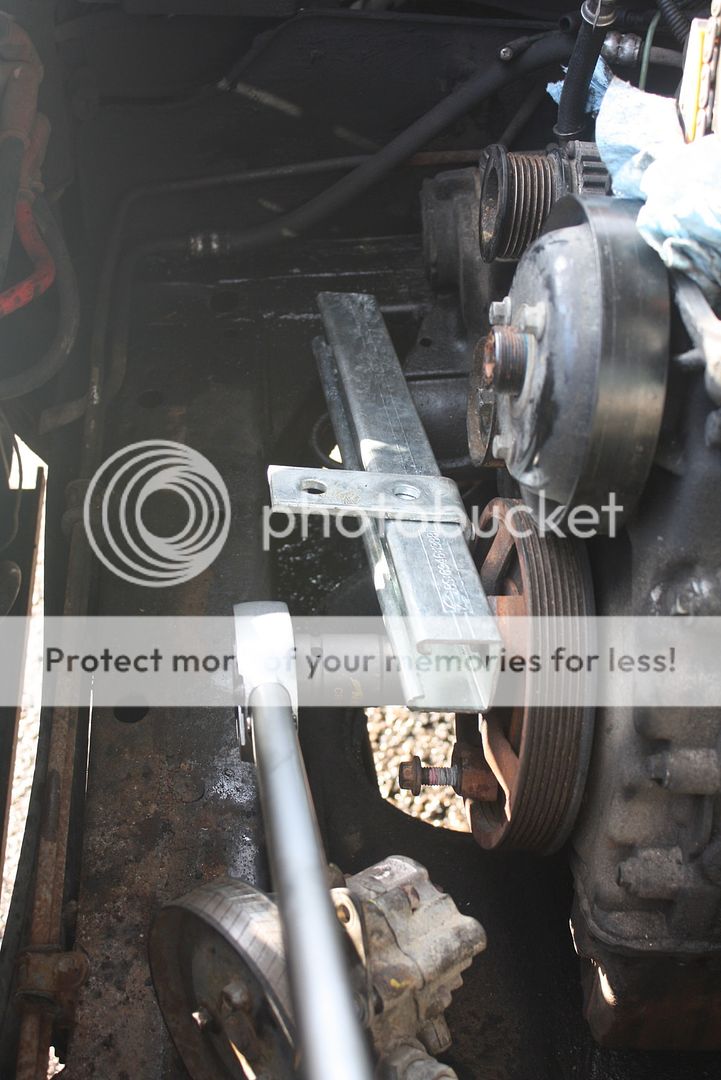
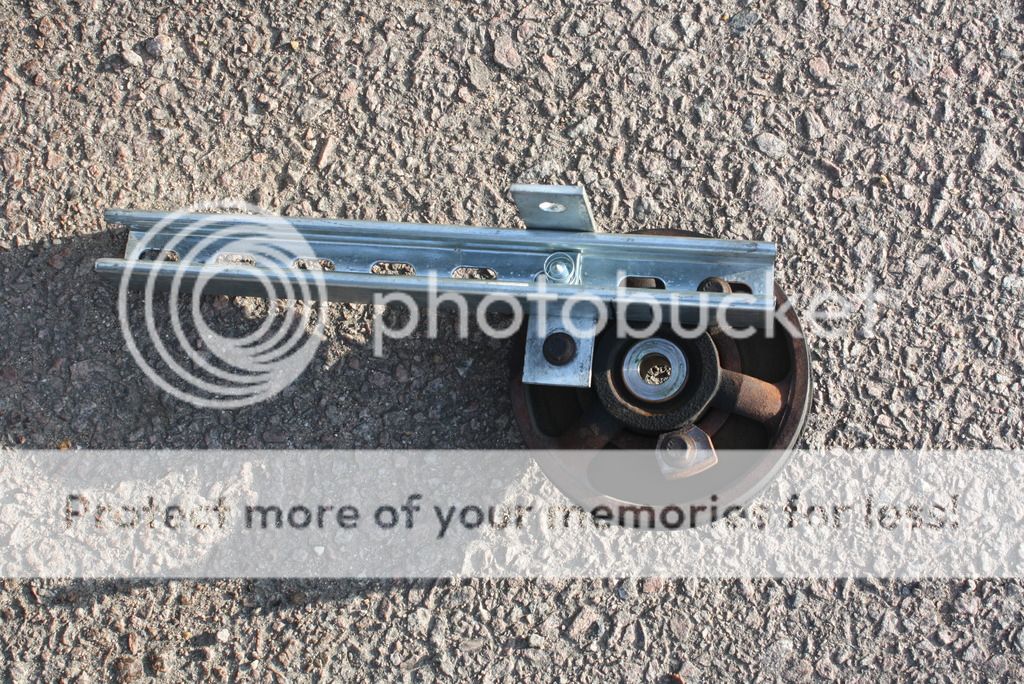
I made my own lock bar with some Unistrut bits, I use it at work, its dirt cheap.
Pic of pulley off so you can see the bar


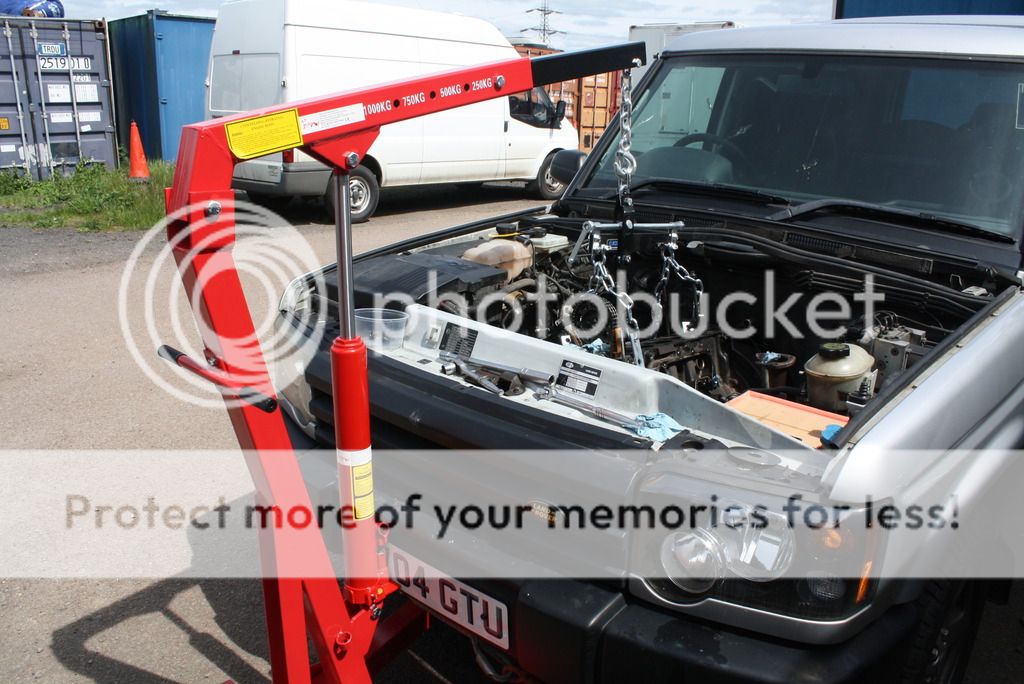
Bought a new engine crane online, SGS, £120 Used the old head bolts but left way too much slack! Anyway it worked ok.
Remember the engine is not vertical, so you have to offset the lift chains.

NOTE: Some people seem to have had huge probs removing some of the engine/bell housing bolts, I dont know why! Just do the most from under the car, use a 30cm extension, mine came off quite easily.


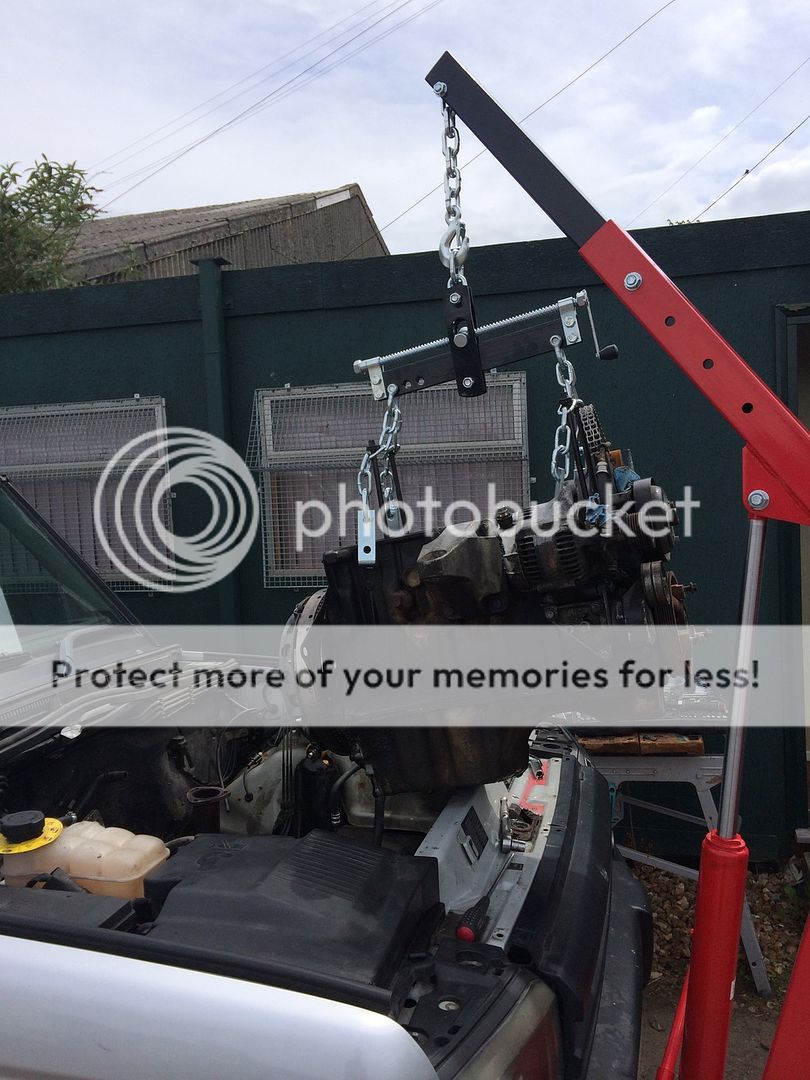
You don't have to cut away the front panel!

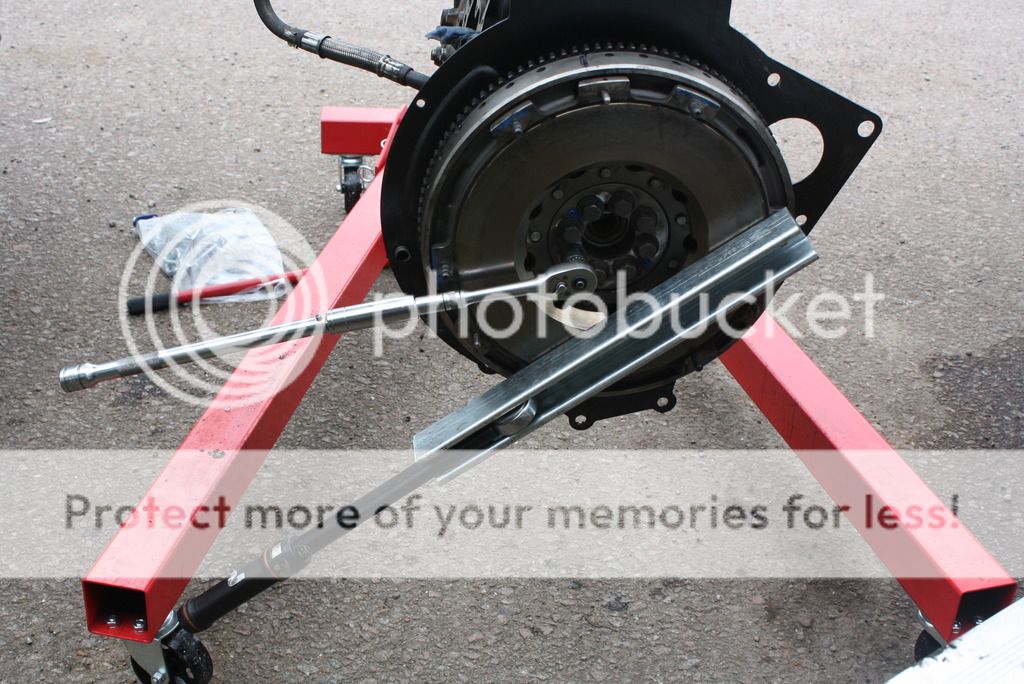
So engine out, you have to remove the flywheel to mount the block on the stand. Another Unistrut brace with a torque wrench slotted inside, I didn't have a breaker bar, so I used the usual trick of making one with an extension and a socket to fit over the handle of the short wrench.


More to follow!
 
Last edited:
A quick list of tools you will need, either buy, borrow or hire!

Decent socket set, I have a 15 year old Halford Pro set, and I swear by it!
The Landy has some odd socket sizes, so I bought 15mm deep sockets and a few more.
3/4" drive impact socket for crankshaft pulley, set from eBay £65
3/4" Torque wrench, for when you refit the pulley eBay £ 100
Engine hoist 1 Tonne, SGS £ 120
Engine stand SGS £40. (how do they do those prices?!)
Smaller torque wrenches, 2 off £60 EA from Halford
Circlip pliers £5
Piston ring pliers £,7 more later, the ones I got were junk! AMPRO Make, made of cheese!
Valve spring clamp. £22, Halford, should have been £45! They had put it on the wrong price hook and charged me for the cheap one even though I said it they didn't have too!
Piston ring clamp £15

I'll add more later!
 
Last edited:
Engine leaks and stripdown
After the flywheel was off, pretty easy, just remove bolts and pull off, its heavy though!, flywheel was good, new clutch was installed 1000 miles ago.

Views inside bell housing, some oil, rear seal getting changed anyway


Crank pulley oil seal clearly gone!


Last edited:
Initial cleaning
Engine mounted onto its stand
You can use the long bell housing bolts, the big nuts are M12 as I didn't have any washers, I used M10 studding for the other fixings.


I used spray Jizer to get rid of most of the heavy oil. Its not good to do this in the road without catching the waste, road water can get into water courses, so I use a big cement tray from Home base, its £20 and when your done you can drain the water into old oil cans etc and take it to your local waste oil disposal site.


Use a squeezy water bottle to wash off the waste
 
Notes on strip down.
Firstly if your going to do this you MUST be organised! And methodical.
I can tell you now I'm neither!!!! Usually, just ask anyone who knows me!
BUT its a discipline to learn and even at 51 its never too late!

My last full engine strip was in 1984, it was a Mini engine, hmmm, another English engine!!! I did that in my bedroom, thanks Mum!

The TD5 is a whole other level of complication! It uses MANY different fasteners, you must keep them all organised along with the other bits, so..the first thing you do is preparation... get on YouTube and watch.... some episodes of CSI!!!!

Then go to Sainsbury and buy: Lots of freezer bags, medium sized and the big ones with plastic zips, sandwich bags, maker pens, microfiber cloth, gloves.

Like gathering evidence, every part that you remove goes into a marked bag, and I mean every part, even if you think you will remember where it goes, bag it and mark it!

I use a two bag system, dirty stuff in cheap sandwich bag, when its been cleaned put it in a new freezer bag, DONT be cleaning stuff during re- assembly.

Example pics


Cleaning stuff
Try to have separate areas for clean and dirty bits, if you can't, just clean down the area before doing assembly work, remember:
50% OF ENGINE FAILURES ARE CAUSED BY FOD (FOREIGN OBJECT DAMAGE)
US Army report
I tried using Green Gunk, its pants!
Cleaning regime:
Heavy dirt clean: Jizer, washing up brush, repeat!
Lighter clean: Jizer, Non metal abrasive pads
Final clean: Parts: IPA/Meths, LINT FREE cloth (microfiber)

Messy cleaning area!
 
Last edited:
Jumping ahead to the sump..cos I'm proud of it!
Before

After


What did I use? Well some may hate me for it! But BBQ cleaner is ok, BUT, spray on, wait 15 seconds, wash off, DONT used it on critical parts like: Head, Pistons, Timing cover, or any internal parts with mating faces.


Inside, just elbow grease but it was (as it should be!) pretty clean.

This is the little "well" that stops you draining all the oil sludge, even if you want to!
 
Last edited:
Dismantling the bottom end
Keeping your CSI hat on!
Take pics of everything and mark everything!
I use a normal drill to remove small long bolts


Note: According to RAVE this should be an O ring not a gasket, RAVE is wrong!


Con Rods marked with number and direction


NOTE: If your going to remove the crank you should also mark the positions of the big end caps! The TD5 has no locating lugs for the bearing caps or the bearings. The bearings are positioned by jig during assembly and by eye in rebuild.

Before removing the crank or rods check the end float of the crank and the side clearance of the rods, here I'm using a DTI, its was just out of spec but I'm changing the thrust bearings anyway. The rods were ok.


Remove the bearing cap bolts, put in the "to be scrapped bin" they are stretch bolts so cannot be reused.
Screw in two M6 bolts to help you remove the caps


Keep the pistons etc together, we will come back to them later.


Mark up the bearing shells as you remove them, like this. Its so you can inspect them later, but they are not to be reused.


Main shells look ok.
 
Last edited:
Pistons!
No1 was already known to be toast!
The others were carefully checked, pre cleaning pic. NOTE: The star shape, its an indication of leaking injectors/late ignition.


To check properly the rings must be removed, pin removed, very thorough cleaning, reassembly then gap checking, re-assembly. Mark one end of the pin so you can refit in the same end, they are fully floating but I like to keep the ends matched.


This is what came off the lower ring grove!


This is the oil control ring, mark the top so you can put it back correctly


After cleaning, give all the parts a final spray with IPA then seal into a clean bag


Pistons! Clean the ring groves, I used a small screwdriver then finished with 600 grit wet n dry, the grooves MUST be spotless!


After you do the cleaning, put the lower stepped ring and oil control ring on, then use a feeler gauge to check the gap, mine were all in spec.

Also refer to the excellent guide books produced by the piston maker, more info coming!
 
Last edited:
Documentation

Everything you need to carry out a good rebuild is available online.

There are loads of links for the Rave manuals, the annoying thing being that the Disco 2 manual is V8 only, to get the TD5 manual just download the Defender manual.

For info on assessing the condition of your bearings, pistons and rings just do the following Googling:

MSI Guide on Piston Damage (s) Google: Part Number 50 003 973 02
MSI Guide to piston rings Google: Part number 50 003 958 02
MSI do lots of guides including, tabless bearings etc

Bearing condition guide: Google Clevite CL77-3-402
 
Last edited:
Bearing inspection
Using the Clevite guide, King also do one. King make the TD5 bearings.

Check the condition of your bearings, none are being reused, it will give you a guide to the condition of the engine.

As we know, this engine ran for a lot of miles with highly diluted oil, in fact I drained ,over 12 litres of the diesel/oil mix from the sump. The runaway was caused by the oil being forced back up into the cam cover then into the engine via the turbo.

But many TD5s have been run on an oil/fuel mix for 100s of miles with no real damage until (typically) the injector seals are changed, then after an oil change they are all good.

And of course 1000s of 2 Stroke engines never see any oil on the bearings apart from that in the fuel mix!

So fuel/oil mix is not a disaster, its better than no oil at all! But in my case the runaway caused extra load on No1 and slightly bent the rod and melted the piston.

Bearings on No1 rod, before removal, the bearing has "picked up", its the precursor to breaking up and failing.


The damage is on one side, so its indicative of a slightly bent rod, I renewed the rod just to be safe.

Other bearings
Mains


Other big ends. The "copper" spots are just light reflections! Theses are the original bearings with different surface materials on upper and lower ones.


Good news was all the other bearings were fine, ish! They were slightly polished which indicates rapid wearing. All new ones being fitted anyway.

Crankshaft: Checking for damage with a finger nail!


Note about Big ends: The assembly of most engines these days is automated,. Because of that, tab less bearings and fracture fit con rods are common, the TD5 has both.

Here is a close up of a fracture fit big end, I will comment later about installing new ones.


Three things to be aware of:
Don't ever fit them together the wrong way round!
When you take them apart mark them carefully, The numbers on the side of mine were done at the factory, so even they have double checks
Finally, when you take them apart look for bits falling of the joint, this applied more to new ones, as I found out!
 
Last edited:
Oil pump checking
The TD5 oil pump doubles as a stiffener plate, its a big assembly which is lots of pennies to replace. Here it is, sorry for the pants pics, SLR mem card full!


To check it you have to remove the pump cover, then mark the position of the rotors, then remove them, check for damage, reinstall, use feeler gauge to check outer rotor clearance and inner rotor lobe gap., Mine were spot on!


NOTE: I wanted to check the oil pressure relief valve, to do this you unscrew the big hex nut on the pump, I went to do this only to find it was loose!!!
No pics but I checked the spring length, and valve, all ok, refitted.
 
Block checking
The bores must be checked for wear and damage.

Remove any ridge from the top of the bore with a knife, the guide from Kobelschmidt tell you to do this. Check the bores with a torch, look for scratches/damage. Mine still had the honing marks.

Then take a cleaned up TOP piston ring, insert it 30mm down in the bore and check the gap within a feeler gauge. Mine were in spec, just!

NOTE: I'm not giving specs or torque figures in this write up, its too easy for me to get it wrong!

I did have a pic of doing this but can't it at the min!

block pics, face cleaned with plastic scraper, then 600 wet n dry with a block.


Final clean, only to be done JUST prior to assemble, use IPA, new paint brush and a torch. NOTHING must remain inside the block.


Lint free cloth


Last edited:
Piston Ring Assembly

New piston and rod bought from Turners, they sell the Kolbenschmidt pistons which are the OEM pistons for the TD5.


The rods are not marked Front, like many rods are, instead RAVE says the small "knob" at the bottom should be facing forward, but all the rods I removed had it facing backwards, pic below shows new and old, so I assembled it like the others.


For assembly, remember, keep it clean!

Lay out the parts on a lint free cloth, have your bag of clean parts ready, have the RAVE page, or the new piston handy, so you can get the rings on correctly. After assembly double check the ring orientation. You will align the rings just before insertion in the block so don't worry about it at this stage.


NOTE: Fracture split rods. I mentioned before that you had to be careful with disassembly/re-assembly of old ones, BUT, also check new ones.

Here is a brand new rod
You cant even see the join! Loosen the bolts, which are blooming tight! Then gently tap the rod apart, after run your nail carefully over the fracture surfaces, what you are checking for are loose bits! A couple of bits fell off mine, if they fell off during assembly it would be a serious headache!

 
Last edited:
Start off assembly!

Again, check everything is clean, including you! Clean your hands, don't wear dusty/dirty clothes!, Wash you hair... ok you don't have to do that, I'm a baldy so no probs there!

Most important..... don't be distracted, turn off your phone, lock the door!
Its too easy to miss a step, especially when doing up bolts to correct torque.

Recheck your block, then fit the main bearing shells. I use Millers assembly lube. Nice and sticky, good for me because its going to a few weeks before this is running.


Again, note that there are no tabs or locating spigots for the shells, just place by eye in the middle of the block. Don't forget your thrust washers!!!

Quick Note on the crankshaft, I did polish the journals with 800 grit wet n dry with WD40, to remove the very small ridges from No1 big end and the front rear oil seal surfaces.

After rechecking your previously cleaned crankshaft. Lower it onto the block, its heavy so be careful not to damage anything including your fingers or your back!


Thrust washers


Refit the caps after lubing the new shells. Torque up in order shown in RAVE.


Finally check the crank rotates easily, by hand! Don't spin it just check it moves by pushing on one of the counter balance weights.
 
Installing pistons..Finally the fun part!
Align your piston rings as per RAVE, keep the ring gaps away from the thrust side of the pistons and offset the gaps 120 Deg (try doing that and not having a gap on the thrust side!)

I decided to install my pistons with the block on its side, its a lot easier than having to rotate it each time you install a piston.

Remember the fracture split rods, the ends are very sharp, perfect for scoring your cylinder walls! So protect the ends!

Here is what I did, seemed quite logical! More freezer bags, thick ones!


Lube the rings and the piston. Use a ring compressor and then very carefully push the piston into the cylinder, you really should not have to hit it with anything, if you do, just use a wooden handled hammer shaft and hit the hammer head with your fist.

When you have pushed the piston in, use a pair of long nosed pliers to pull the bag away...BE CAREFULL, not to catch the oil injection tube, mine went fine.


After you install each piston check the crank rotates ok, again you should be able to move it easily even with all five installed.

So that's all for now folks!

I'm travelling for a few weeks so no more work for now.

But I will be uploading some more stuff about the cylinder head, got to cook dinner now, hungry four year old getting angry!!

Comments very welcome!

Mark
 
Last edited:
Back
Top