TD5 Stripdown and rebuild

This site contains affiliate links for which LandyZone may be compensated if you make a purchase.
Thanks great write up :)

Crank, bores & pistons were all in spec then ?

Can't wait for the next bit :5blurk5:

Hi

Yes, crank/pistons/gudgen pins all checked with a micrometer, side clearance on big ends all ok as well.

Feeler gauge check on the bores using a new top ring 30mm down from block deck confirmed all ok.

Piston ring gaps ok.

All dims were near top tolerance but the engine has done 178K miles so not too surprising!

I'll update more on the head work soon, I found No1 inlet valve was bent, very strange as the piston has no impact marks, all other valves ok.

Re-discovered my old method of checking valves (if you don't have a lathe) just gently put the stem in a slow drill and watch the end, bent valves wobble very nicely! I did a video showing the bad one and a good one, ill have to upload when I'm back in the UK.

Sadly when its all back together and running (and I'm going to run it for at least 500 miles after) its going up for sale, hopefully I'm getting another car (Landy)to replace it, and the run around I'm using at the moment.

But its been fun doing it, but I swear I'm dreaming about working on it!

Mark
 
Last edited:
I thought I would a bit more about the "culprit"... the cracked head!
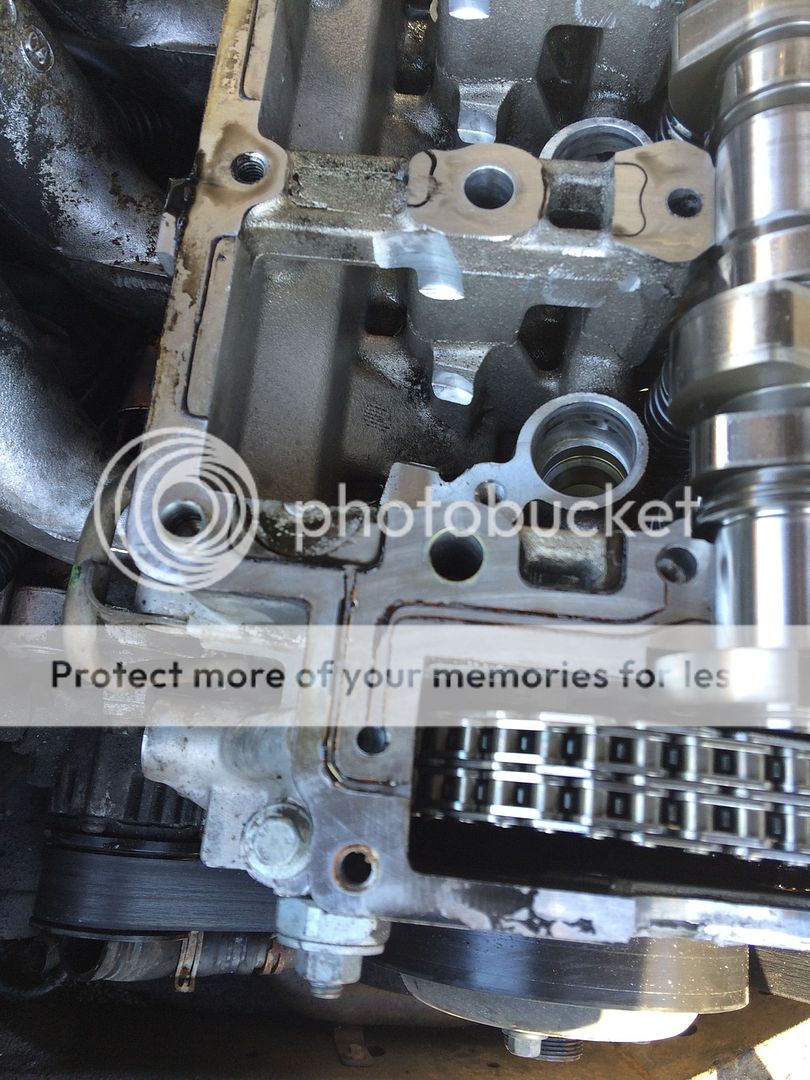
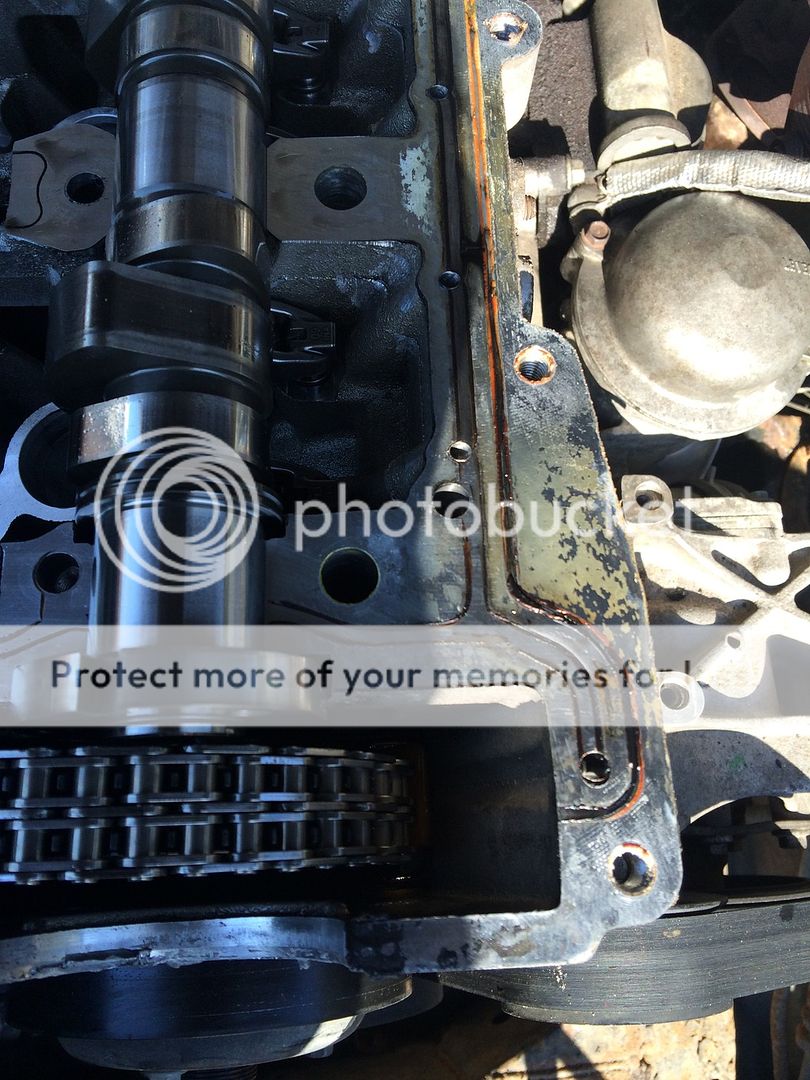
Here is a pic midway through strip down. The cam carrier has been removed, note the residue of the sealant used between the head and the cam carrier


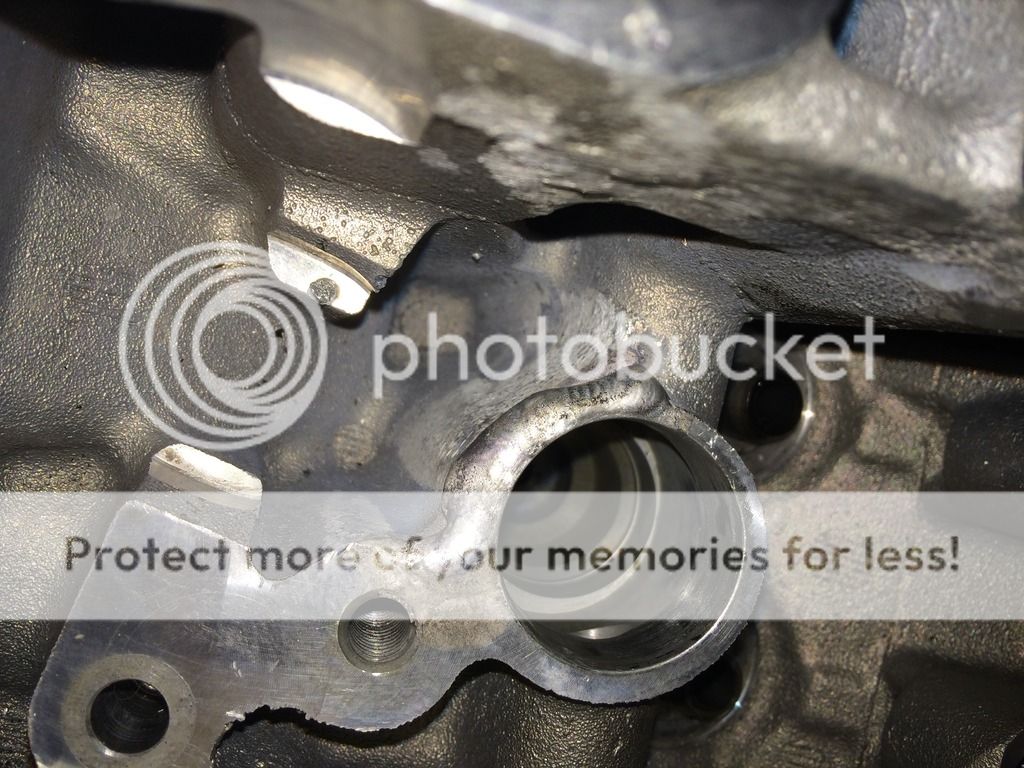
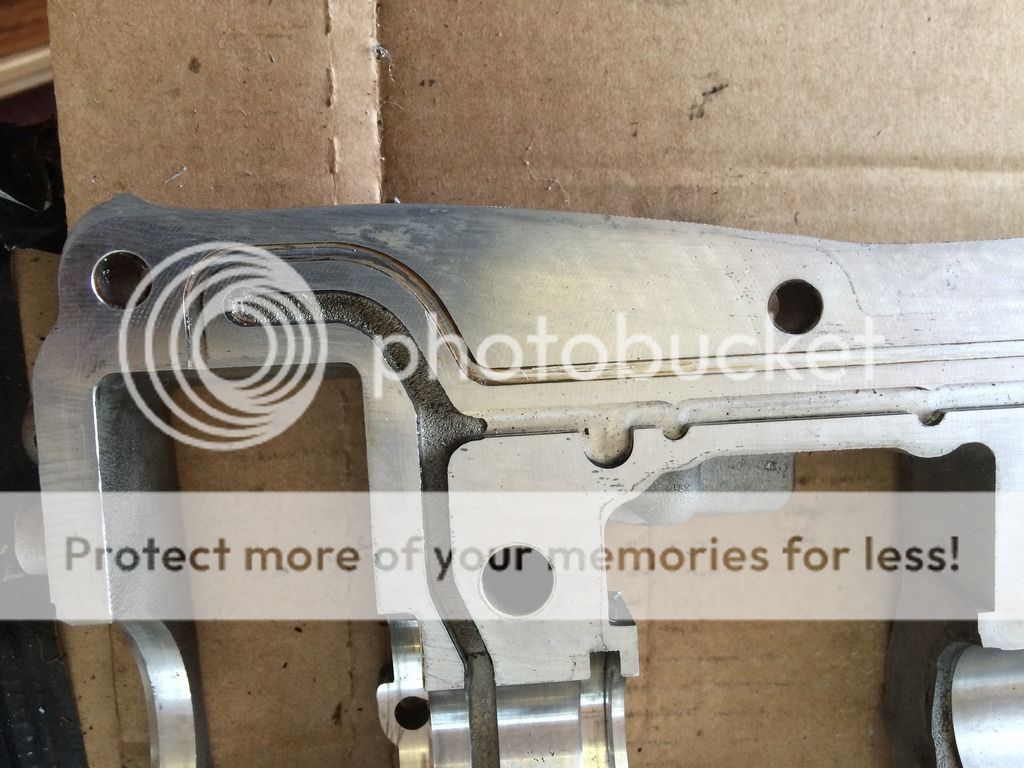
Now a close up of the injector pocket showing the crack circled in red.
You can also see some black witness marks inside the pocket showing that the injector had been in contact with the pocket just where the crack happened.


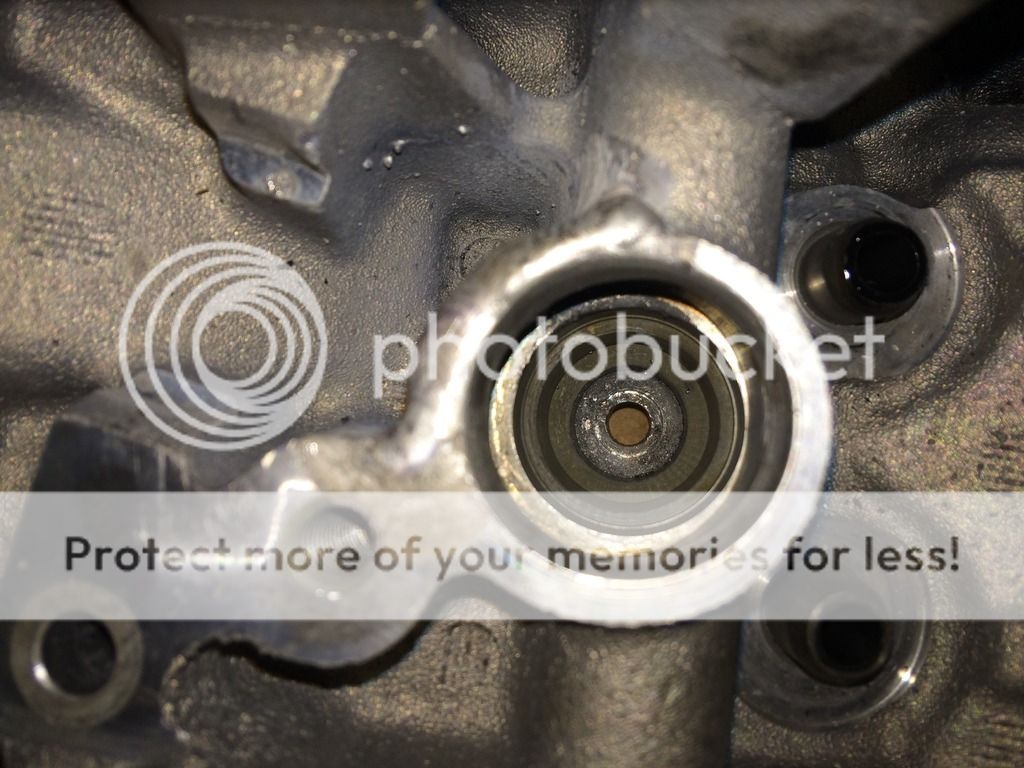
So the head went away for repair, the crack was quite deep, and a lot of welding was needed, after welding the pocket is machined out and the head is pressure tested, the injector clears the weld on top of the pocket.


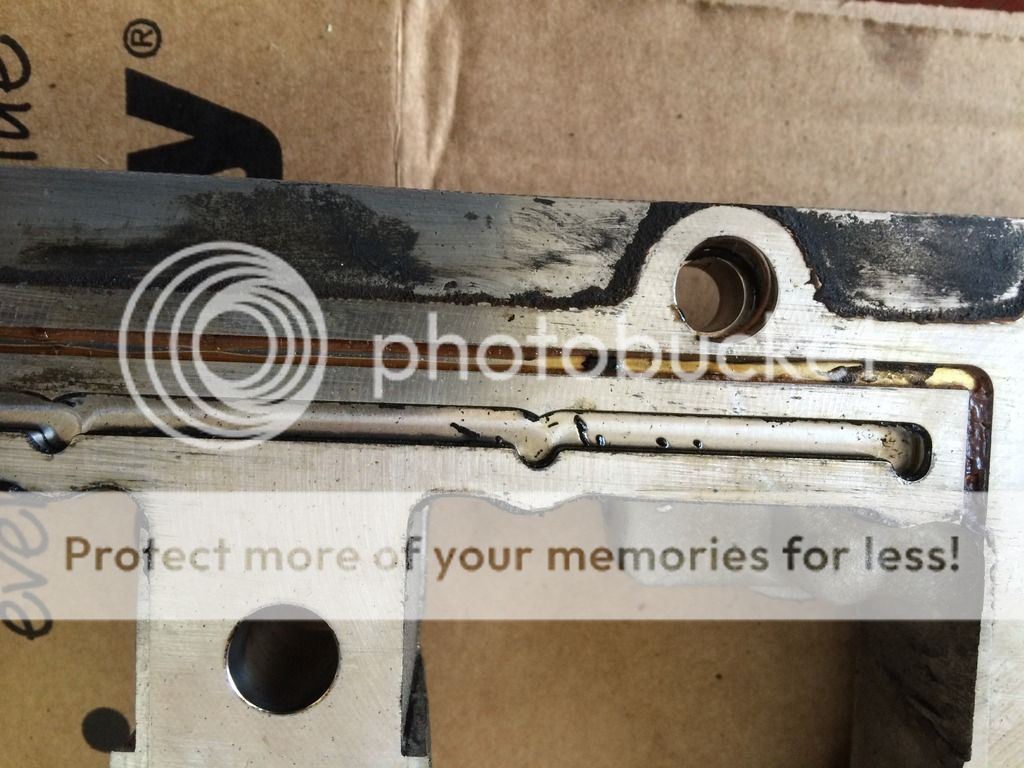
I have a bit of cleaning up of the pocket to do!


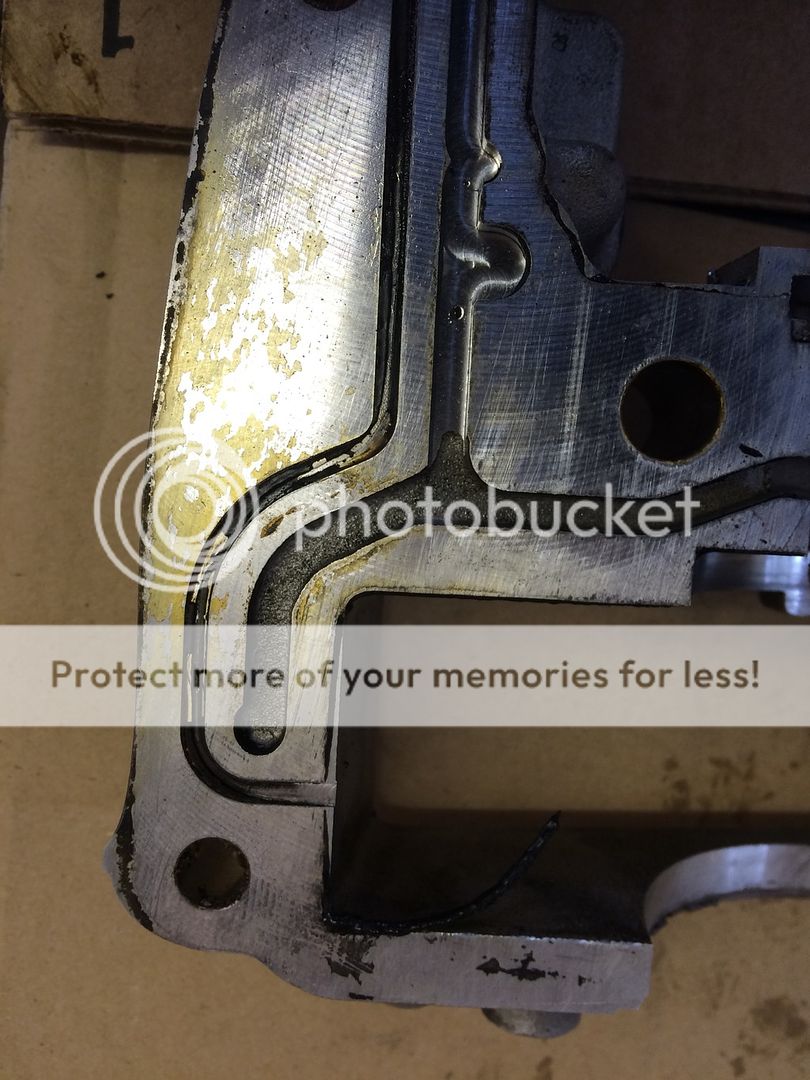
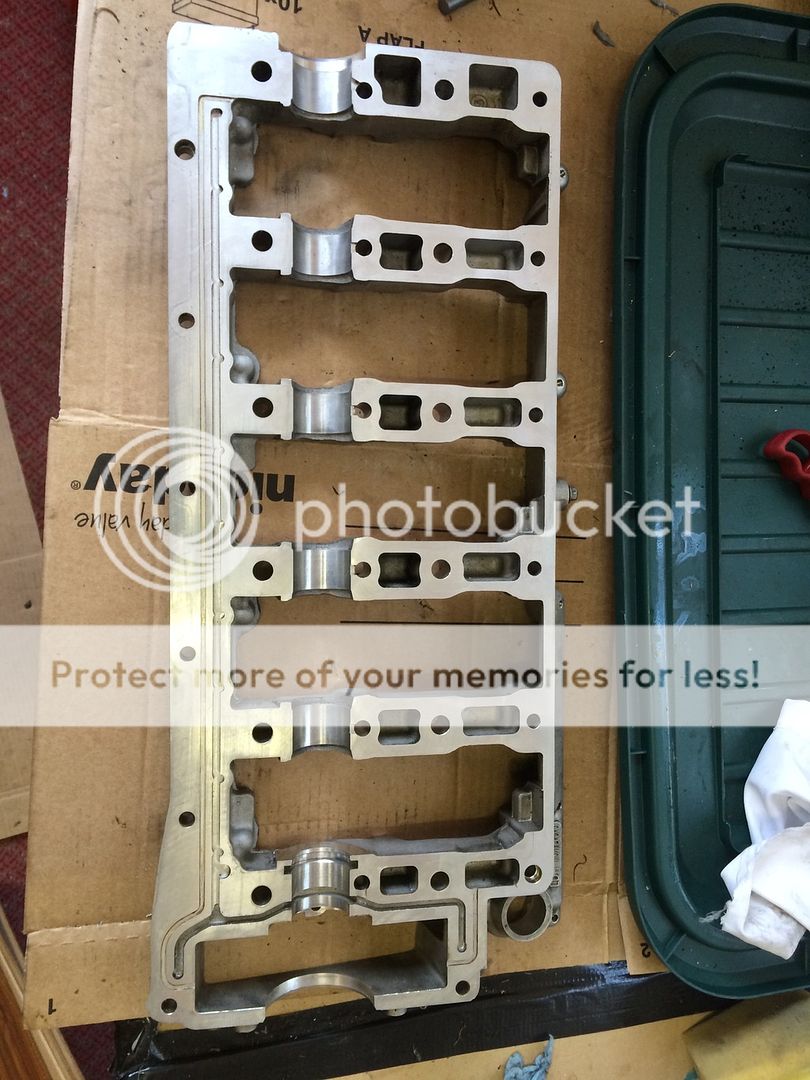
A few before and after pics of the head and carrier. The sealant was in some of the small oil ways but that's how it came out of the factory and its been ok so far!


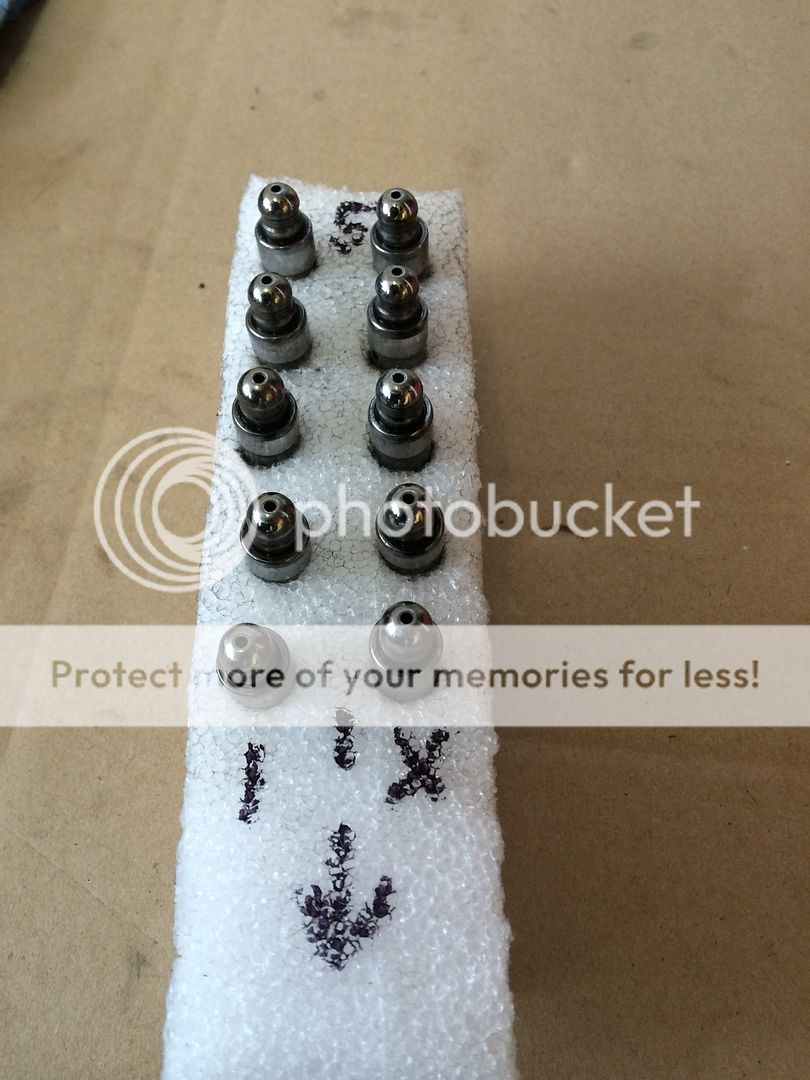
When you do a full strip down its good practice to keep everything in the same order that they were. These are the hydraulic lash adjusters, RAVE says "keep upright and in order"
"I" = Inlet, X=Exhaust, 1 - 5 Cylinders
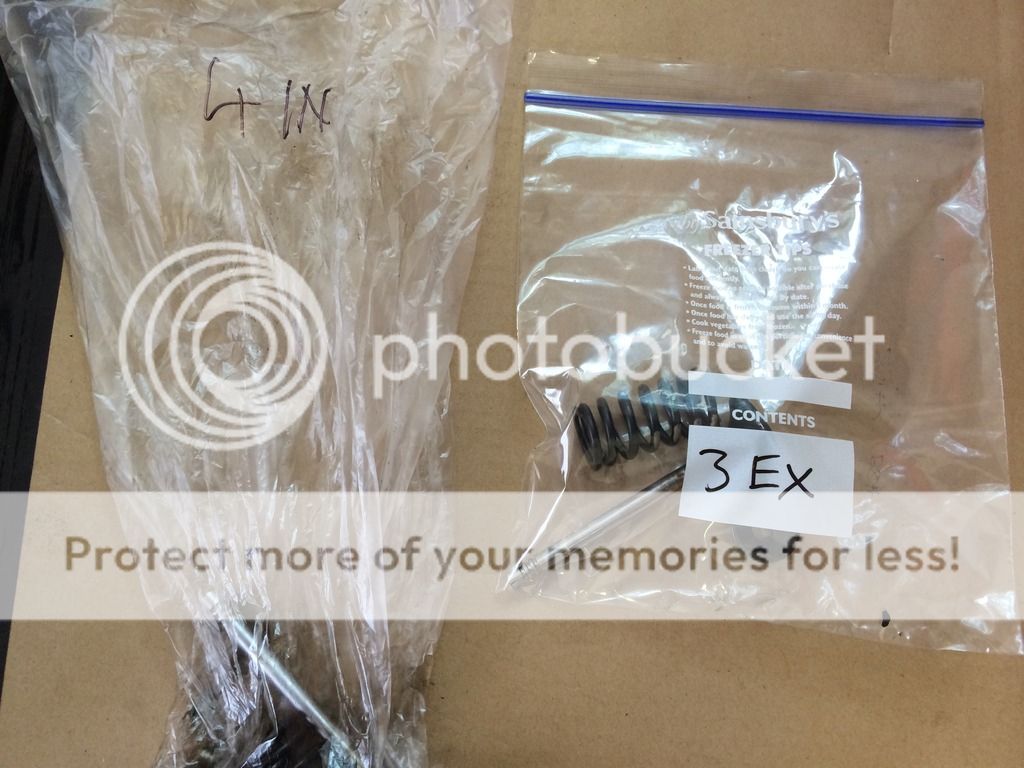

Dirty bag/Clean bag


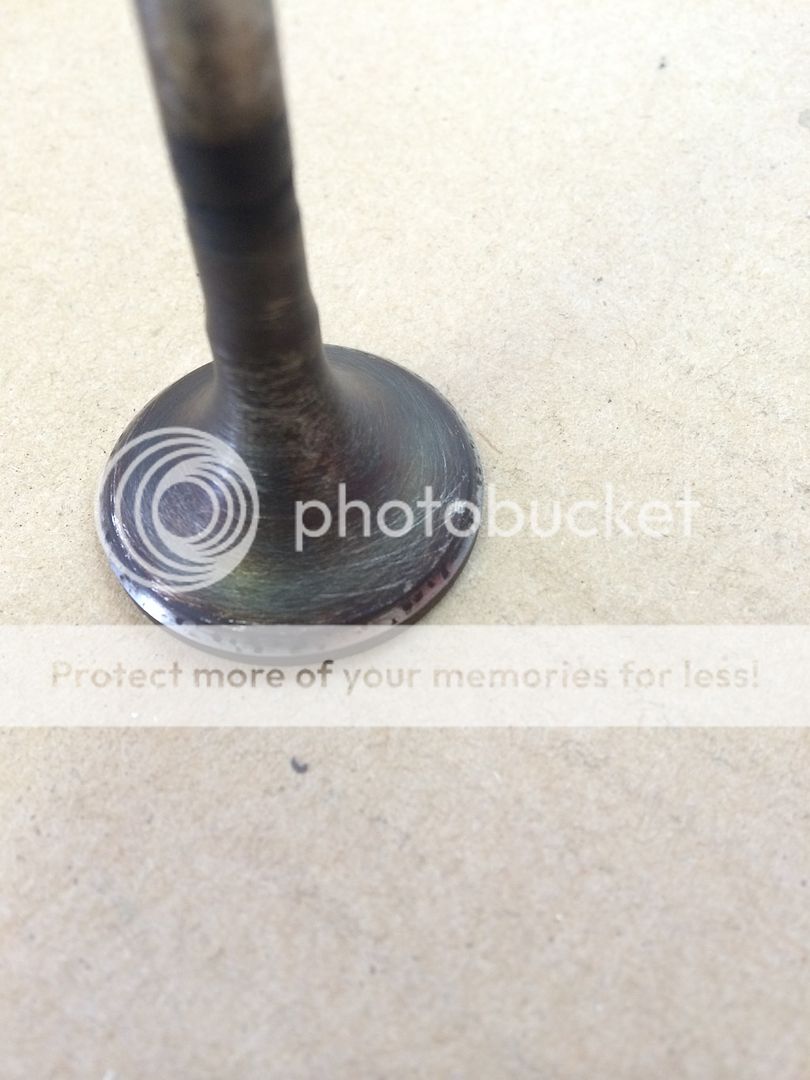
One of the valves, pre cleaning/lapping. Under a x20 mag the face was pretty pitted


Note: The leak was very easy to spot! Heres what I did:
Remove cam cover
Clean area around each pocket
Turn on ignition (remembering not to start it!)
Wait for the fuel pump to start
Use a torch and look at the area around each injector
Mine started weeping after just 1 minute I estimate the leak rate was very roughly 10ml/min, so that equates to 0.6 litres and hour, so it doesn't take long to fill your sump with diesel!
 
Last edited:
Great thread
I have to do my head at some time soon as I have a scored cam and its interesting to see stuff like this and try to pick up tips.
That is very interesting to see the marks inside the injector pocket, looks like the injector has been moving in there, also noticed a mark on the place where the injector clamp locates on the head in the last picture here , could the clamp have bee working loose and fretting as the injector moves about?
Did you use the guy who advertises on E-Bay to do the welding and machining? I hope I never need him but I am curious to hear from anyone who had this done and hear what they think.
Hope it goes well and keep posting.
 
Last edited:
Great thread
I have to do my head at some time soon as I have a scored cam and its interesting to see stuff like this and try to pick up tips.
That is very interesting to see the marks inside the injector pocket, looks like the injector has been moving in there.
Did you use the guy who advertises on E-Bay to do the welding and machining? I hope I never need him but I am curious to hear from anyone who had this done and hear what they think.
Hope it goes well and keep posting.

Hi Raywin

Yes he is on eBay, just search td5 head repair, he is based near Newark, I chatted to him a couple of times before and after it was done. He has been doing it for a while and apparently has customers Worldwide.

I think the crack was worse than ones he normally does but he was happy to let me have it back after pressure testing.

To be honest if I had some spare cash I would have got a new head from Turners, they do have the odd recon ones at £650+ and new ones at £1000+ but its just not feasible at the moment.

My view is that the injectors should not touch the sides of the pockets, the O rings do the sealing.
 
Yes that's the one I saw on E-Bay.
Yes the injector should not touch the sides it should locate in the bore at the bottom biting into the copper washer, and seal on the O ring in the top part.
I know what you mean with the new heads, my defender had one fitted about 18 months ago just before I bought it, not sure where it was sourced but I know its not OEM, but when I replaced the injector harness I saw that it has a scored cam and a damaged rocker ( put in a second hand rocker in March to delay the work, and it is looking good still)
Looking at your thread I am tempted to wait a while and take the engine out and give it a big overhaul, crank bearings and rings, doing the head at the same time.
It has 115K miles on it and after a bit of buggering about it now runs sweetly, but I am thinking of trying to bring it to a state where it should be good for another 70K and I will no longer be worrying about motors.
 
Last edited:
Yes its a tough call, keep it going or give it a big overhaul!

I didn't have a choice with mine but the job certainly got bigger and bigger!

Its not just the parts cost, you have to factor in your time, so far its taken me 8 full days of time, putting new/clean stuff together is easy compared to stripping down and cleaning, there is def an argument to say just buy a complete recon engine, it will prob set you back £4k but you will then have no worries for the rest of the vehicles life, fingers crossed!

Ive spent around £1700 so far on tools/parts/repairs, incl the injector test/repairs.

Once you start its knowing/deciding when to stop! Also if you do what I did and start polishing the sump, then expect it all to take a lot longer!

But at the back of my mind is the thought that an engine should last the life of the car, this is the first rebuild Ive done for over 30 years and in that time Ive owned over 70 cars, many with higher mileage!

But its been an interesting exercise!

Couple of lessons that I will take away with me:

After 10 years of driving company cars with much more modern engines I got used to 18K service intervals.

Check oil levels weekly or at the start/end of a long trip, mine had done 500 miles the day it blew up.

Change oil/filters at 8000 miles, I think that's a compromise between the book and lower figures.

Set the adjustment screw for the injectors 1 1/2 or even 2 turns back

Use a good parts supplier who doesnt mind giving out advice, Frida at Turners has been great!
 
Forgot to add, my job is selling instrumentation to measure flow/level/pressure.

Ive been looking at some sort of automatic warning system, about either oil dilution or sump level, at the moment its sump level that's the favourite, but it only works when the engine is stopped, a simple pressure sensor in the sump will work but getting the sensitivity at sump temperatures is not easy (read affordable!) but its pretty simple.

The other way is to use ultrasonic sensors to measure the oil dilution, I sell these for the oil industry BUT at £5K its not cheap!

Anyway it will be an interesting project to look at.
 
Cant see you selling this after all the bonding you have done with it.
I drive a modern car but I love tinkering with my Landy its become a hobby now.
 
Great write up, very similar to my own experience last summer. My head had a crack in number 1 exhaust port which DIDNT get picked up by pressure test so I had rebuilt the engine only to have to go back and fit an AMC head.

Some nice tips here I wish I'd known about when doing mine, you can read about it here -> http://www.landyzone.co.uk/lz/f8/bennehboys-d2-adventure-254514-19.html

It's a bit of an epic and goes on for a lot of pages :D

Hi, yes read your thread, very interesting!

I'm really torn at the moment about shelling out another £700 ish for a recon head from Turners. I'm sure my head will be ok but after finding No1 inlet valve bent, I suspect that the seat may also be damaged.

I'm now planning a 2000 mile round trip in Sept, so, despite the excitement of "will I make it" id rather not breakdown on a Polish motorway:), so it may be a new head, add to it new chain and guides, cos it would be daft not too.
 
As promised here is me checking the inlet valve and finding No1 bent1
Its held lightly in a slow drill. Already got a new one, re-assembly this week hope to get it back in and running by the end of the weekend!
 
Latest update! Thought I would make the most of this great weekend to try to finish the Disco, didnt quite make it but a lot closer!
Firstly lets finish the head!
All valves were lapped in, I find the best way is still to use a wooden "stick" with the sucker, I only used fine paste, course is too rough, even the pitted valves only took a few mins each.
Finished valve.

Gave the head a final clean up


Did the ports as well

Ill finish update later, Photobucket is driving me mad!!!!! They have changed how you get link codes and its a right PITA!
 
Last edited:
Looking much better now, keep it up.
Would be interested to know how you find the head bolt tightening, I have read the procedure and it looks fairly clear but just wondered how fiddly it is with the angle tightening process, I expect you need to be very careful when you do the last couple of pulls and the bolts are already tight.
I fitted a clutch - flywheel on my defender last year and I just torqued up the flywheel bolts to the first number then marked up the bolts then put a mark on the outside of the socket and one on the flywheel at 90 degrees then I used my impact gun to tighten up until the two marks align.

Hi Raywin
Well im pretty sore after two days work on the beast!
But the engine is back in.
Ill post up more when I sort out a new photo hosting site.

Yes the head was fun, 5 tightening steps, my trick on angles is to put my finger where the extension bar should end up and to do the 180 deg step 90 degs at a time. You need a long bar to get the torque!

Hope to have it completed weekend after next.

Mark
 
Last edited:
Hi Mark
Yes I know it well, when I did the clutch last year was the first time I had worked on a vehicle in years, made me feel old, and last weekend I changed the front swivel left me with a stiff shoulder, but its a great feeling when its done and it works.
I still love to know that I did it, so I can trust that everything was done as it should be, and of course you can do it much cheaper.
 
Ok finally back online.
Starting with pics of the final build up of the block
Oil pump/stiffener assembly being fitted, new bolts installed as per RAVE but it seems most people reuse the old ones, not the bolts (genuine LR) are supplied pre-coated with thread lock. Also shown is the oil pressure relieve valve, this was removed and the spring length checked, the plunger was also cleaned. RVAE says in big bold type DO NOT REUSE OLD SCREW PLUG, fine if they supplied a spare but they never have! Old one cleaned and refitted.

There is a sequence to follow for the bolts, one of the bolts doesn't exist according to RAVE.


Next the cam oil pump, cam chain and guides go on, I replaced all the chains/gears/guides but actually they were not too bad, as shown on some of the new/old pics. Finally the chain cover goes on, use the same sealant you use on the cam carrier, and roll it to a thin layer, pics on head build up.


Back
Top