Steve's unexpected Series 3 rebuild.

This site contains affiliate links for which LandyZone may be compensated if you make a purchase.
New swivels arrived. One of them is exactly as bad as the others were. The other is better but not right. The better one is covered in oil whereas the other ones had a waxoyl type coating. Either way there is something on the chrome that I can't easily remove. And so it goes on......
 
You would think after all the trouble, the replacement parts would have been spot checked before being shipped!
I was told that the new swivels would be checked before they were sent but they arrived taped up as from the manufacturer. The guy from Britpart said it was overspray and I dismissed this. He said I would be able to remove it with a light scratch using my nail. There was no way it could be removed that easily but by experimenting I have found that xylene thinners will, eventually, remove it. So I hate to say it after getting on my high horse but it might well be overspray. The rust where the half shaft bearing seats is definitely 100% rust though. We are away on holiday next week and i'm working 9 out of the 10 days in the run up so I'm not going to get much done anyway. The guy at Craddocks promised to contact me yesterday to give me an update but nothing so far. I have officially run out of bothered with this now so probably won't get it sorted until after holidays. The thread may go a bit quiet for a couple of weeks now but I will update you all when I know more. NEWSFLASH!!!!! As I was typing this Craddocks called. Apparently when the guy from Britpart found out that the latest swivels had been sent out without being checked he has gone bananas. Someone at Britpart will be on the naughty step by now. Another new set will be with me tomorrow. This is better drama than Downton Abbey! Stay tuned for the next installment. I'm going for a lie down.
 
I have finally got a pair of swivels that are up to the job. It's so nice to have a pair of balls that I can be proud of.o_O
Anyway I managed to get an hour to myself tonight and fitted the railko bushes. Starting to build up the new parts is so satisfying. Having never done this stuff before I do a lot of reading and youtube-ing before I tackle anything. Then when it all happens like it's supposed to it's a really good feeling. When I had a look in the old swivels tonight there was no sign of the thrust washer in either. I'm guessing they must have just worn away over time but the steering should be so much better by the time I get it back together.
 
Here's a quick question. I'm rebuilding the swivels at the moment and I have got as far as mounting one of them back on the axle casing. The thing is the gasket that comes in the swivel kit and goes between the swivel flange and the axle casing is the thinnest gasket I have ever seen. I've used a thin smear of hermatite silicone gasket sealer on both sides and when I've tightened it up I got the little bit of it squishing out the sides which I expected but also the gasket itself has squished out a little. My concern is will it now seal or do I now need to remove it and start again. Then do I get or make a thicker gasket or just use the silicone gasket sealer. Also I can't see a torque setting for the nuts and bolts for the swivel flange to the axle casing. It would be really difficult to get a torque wrench in there anyway but it is a safety critical area so I was expecting one. Also the nyloc nuts are brand new but if I remove them have I got to get new ones again or could they be used a second time. All thoughts appreciated.
 
Here's a quick question. I'm rebuilding the swivels at the moment and I have got as far as mounting one of them back on the axle casing. The thing is the gasket that comes in the swivel kit and goes between the swivel flange and the axle casing is the thinnest gasket I have ever seen. I've used a thin smear of hermatite silicone gasket sealer on both sides and when I've tightened it up I got the little bit of it squishing out the sides which I expected but also the gasket itself has squished out a little. My concern is will it now seal or do I now need to remove it and start again. Then do I get or make a thicker gasket or just use the silicone gasket sealer. Also I can't see a torque setting for the nuts and bolts for the swivel flange to the axle casing. It would be really difficult to get a torque wrench in there anyway but it is a safety critical area so I was expecting one. Also the nyloc nuts are brand new but if I remove them have I got to get new ones again or could they be used a second time. All thoughts appreciated.
I was surprised by the thinness of the gasket on my front axle too. I'm pretty sure those thin gaskets are original so I wouldn't be going for a thicker gasket just yet. As the gasket has moved I'd remove and refit the part: Make sure the mating surfaces are spotlessly clean. If you have too thick a layer of RTV (or what ever) you might also be pushing the parts apart during assembly. If this happens a second time try the spray on Hylomar gasket dressing.
 
Just in case you've ever wondered what 'knackered' actually looks like here it is.

I had to bolt the swivel to the piece of wood and stand on it to be able to undo the top and bottom nuts/bolts.

It wasn't looking good.

A lot of degreasing, scrubbing and wire brushing later,

I finally got the good set of swivels. Here's the old and new.

In the end it looks good. I made a real song and dance of shimming the swivel trying to get the magical pull on the steering arm of between 8 and 10 pounds. I really faffed about for ages but i'm sure I've got it right in the end. It does feel a bit stiff, especially with the new swivel oil seal in but it's all new and it will no doubt loosen with a bit of wear.

Like everything else the half shafts were tired. The bearing inner race was pitted and grooved so it had to go.


The universal joints had really had it. This came out of the long half shaft on the passenger side. Drivers side was not quite as bad but was cracked and just about to give up.

These were loose inside the hub when I opened it up. The rollers plus broken bits of bearing and silicone 'bogey'.

As I mentioned earlier I mounted the whole lot back onto the axle casing but the gasket squished out of the bottom. I decided I didn't want to risk it not sealing so I removed it and refitted it with a new gasket and hylomar sealant instead of the silicone I used first time round. As it turns out I need not have worried. The silicone had done such a good job that even with all nuts and bolts out the swivel flange remained glued to the axle housing. The silicone alone could comfortably hold the weight of the whole assembly and took some getting off. Good stuff.
 
A little more progress to show you. But only a little.


This stuff takes soooooooooooo long.
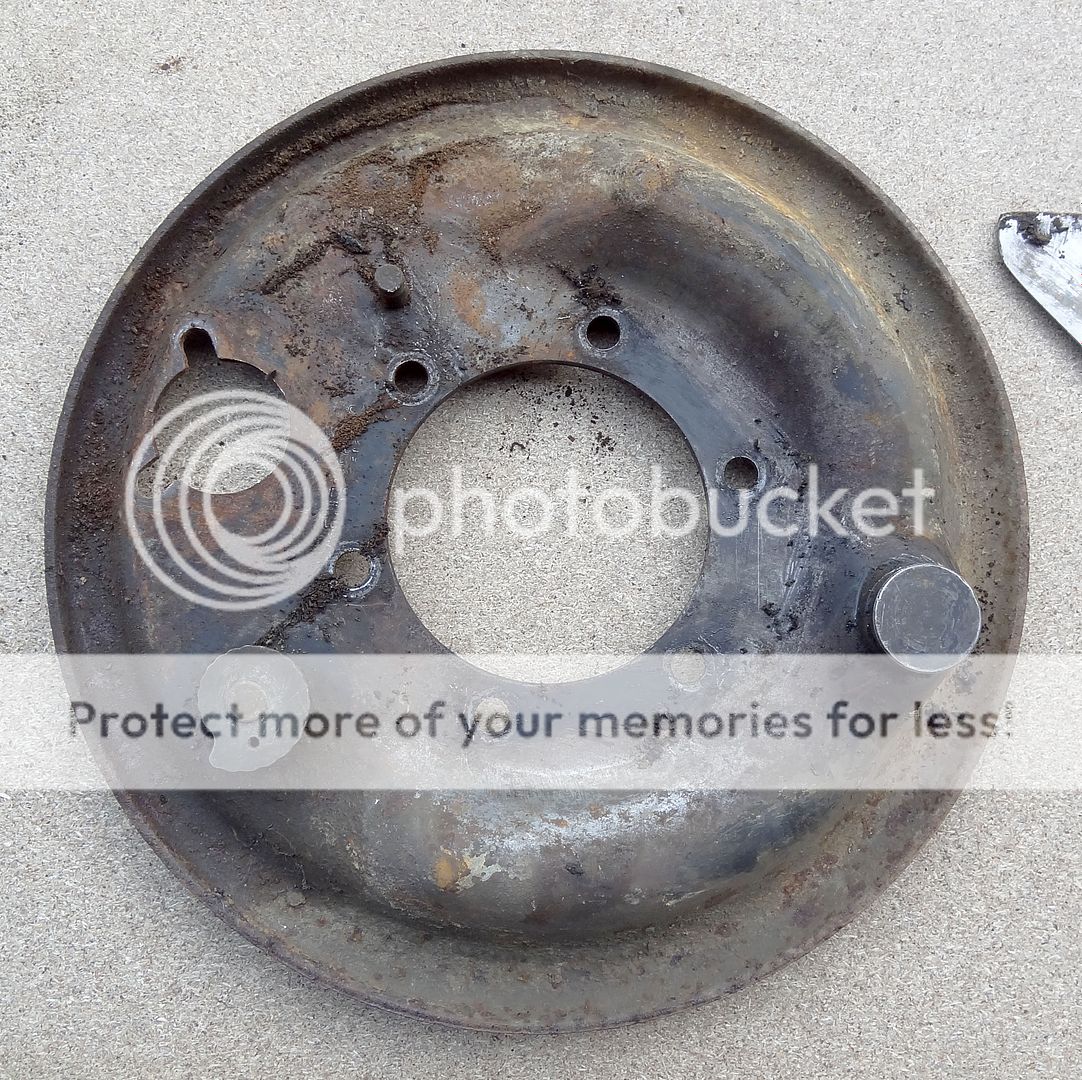
The collar on the stub axle for the hub oil seal was looking nasty.

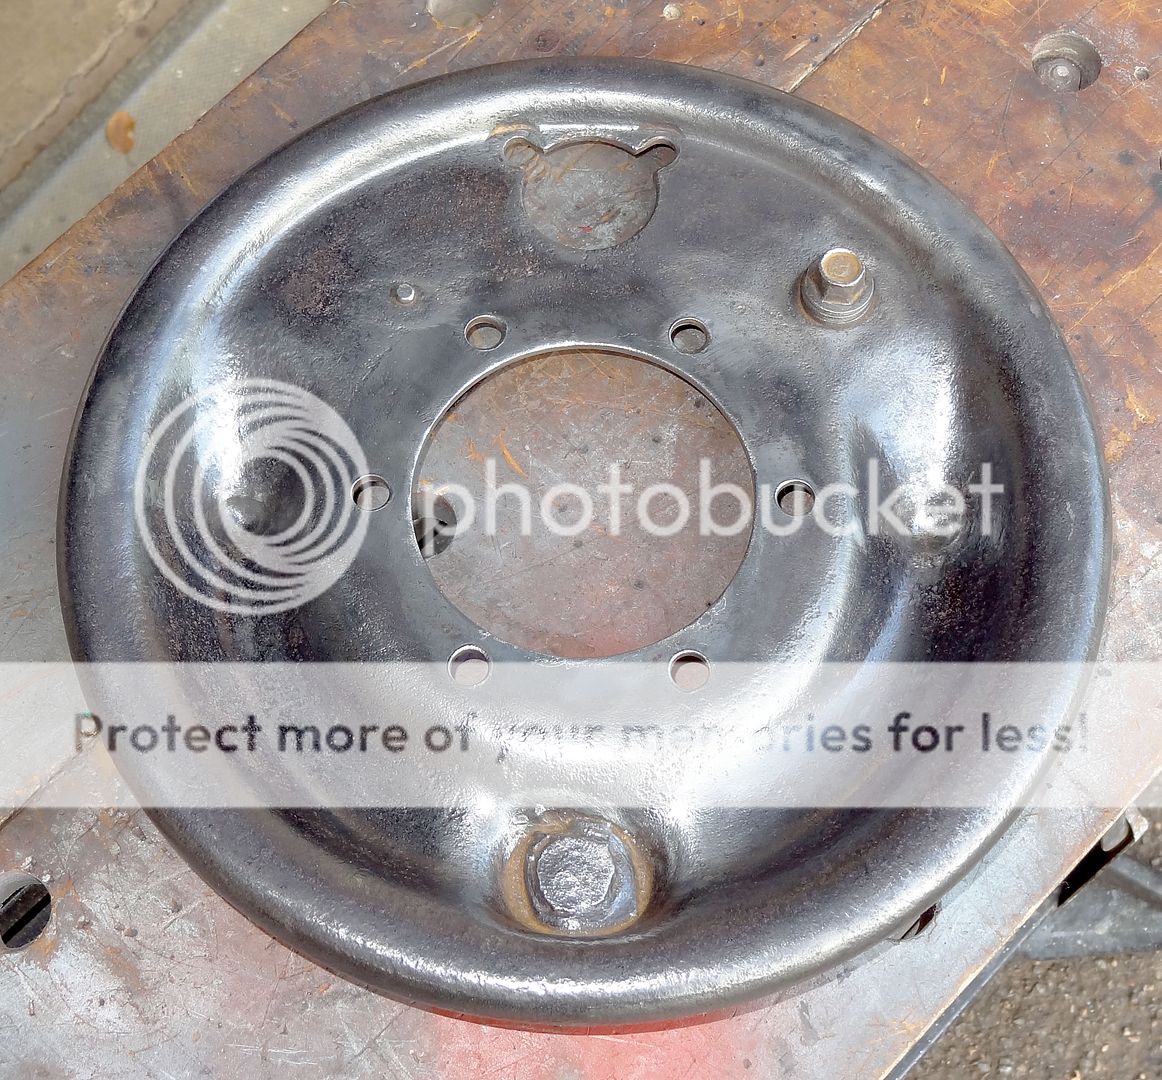
The new one looks nice though.

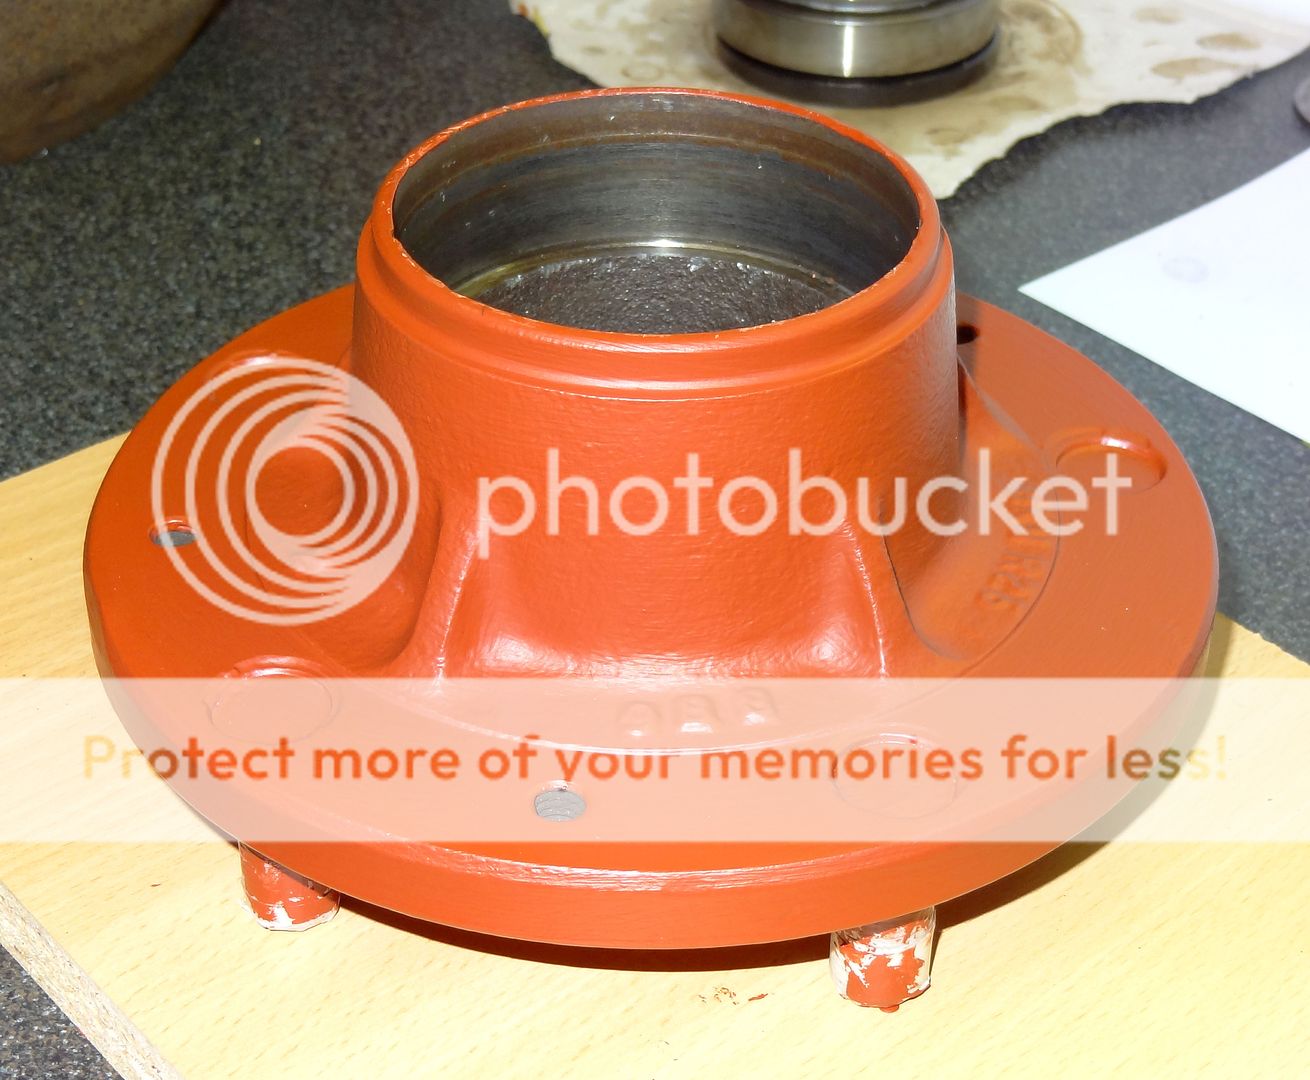
The first of the hubs gets the treatment


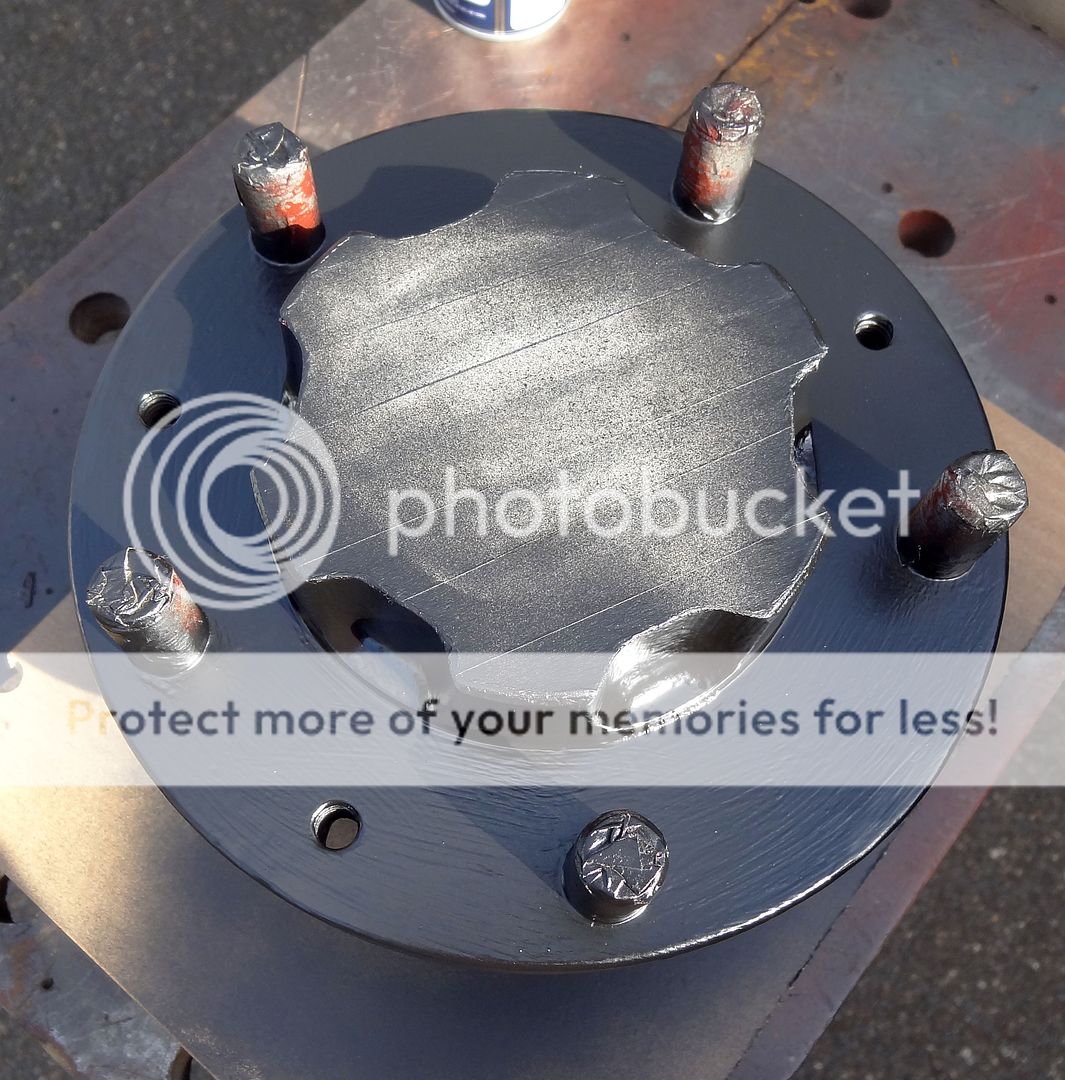
Brand new drums in heat resistant paint

and the shiniest hub caps ever!

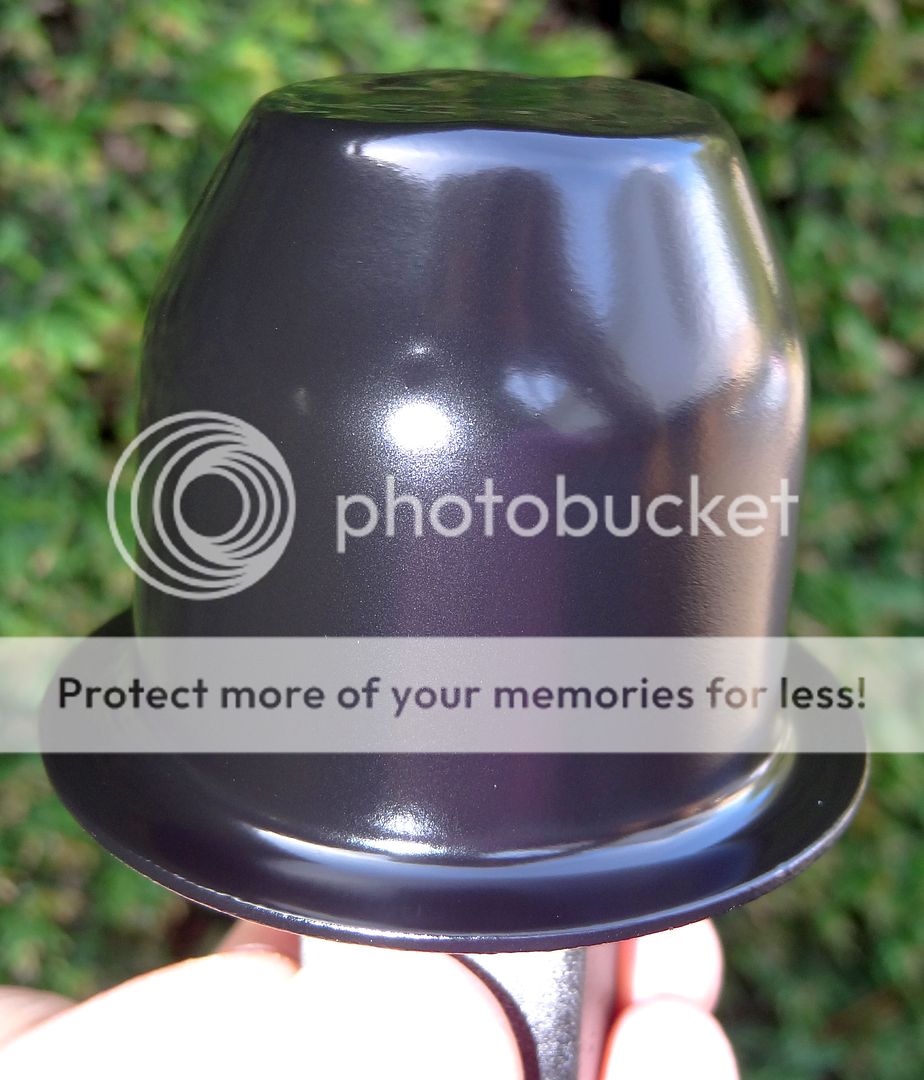
This is more like it.

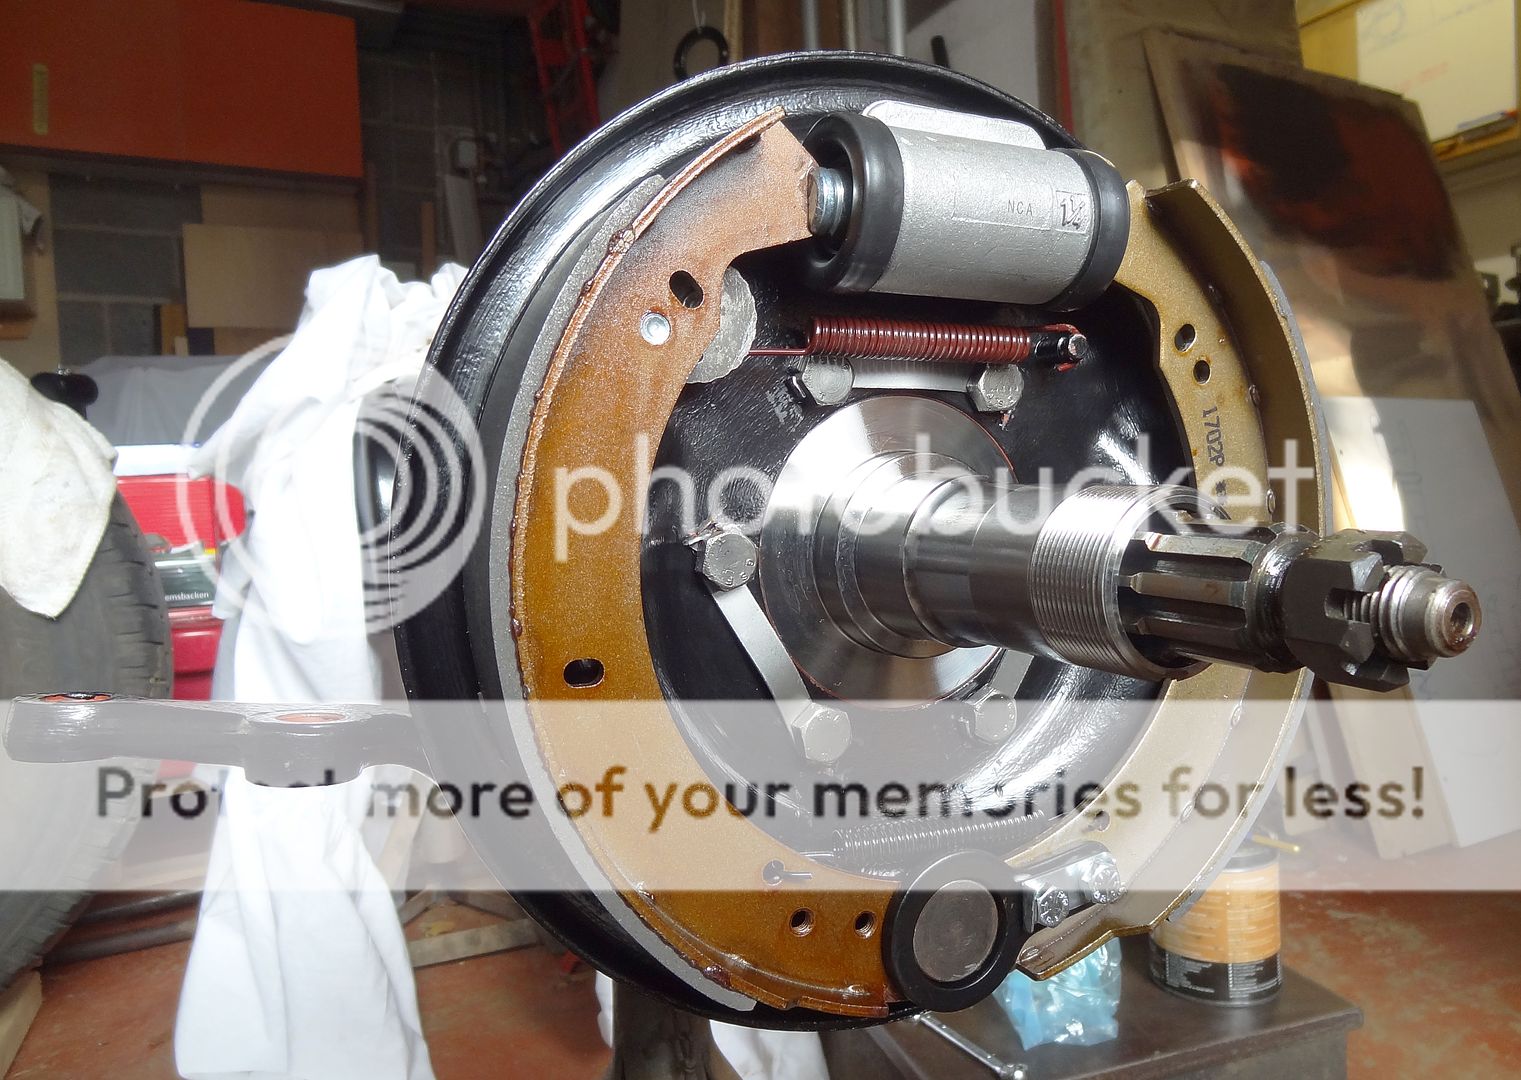
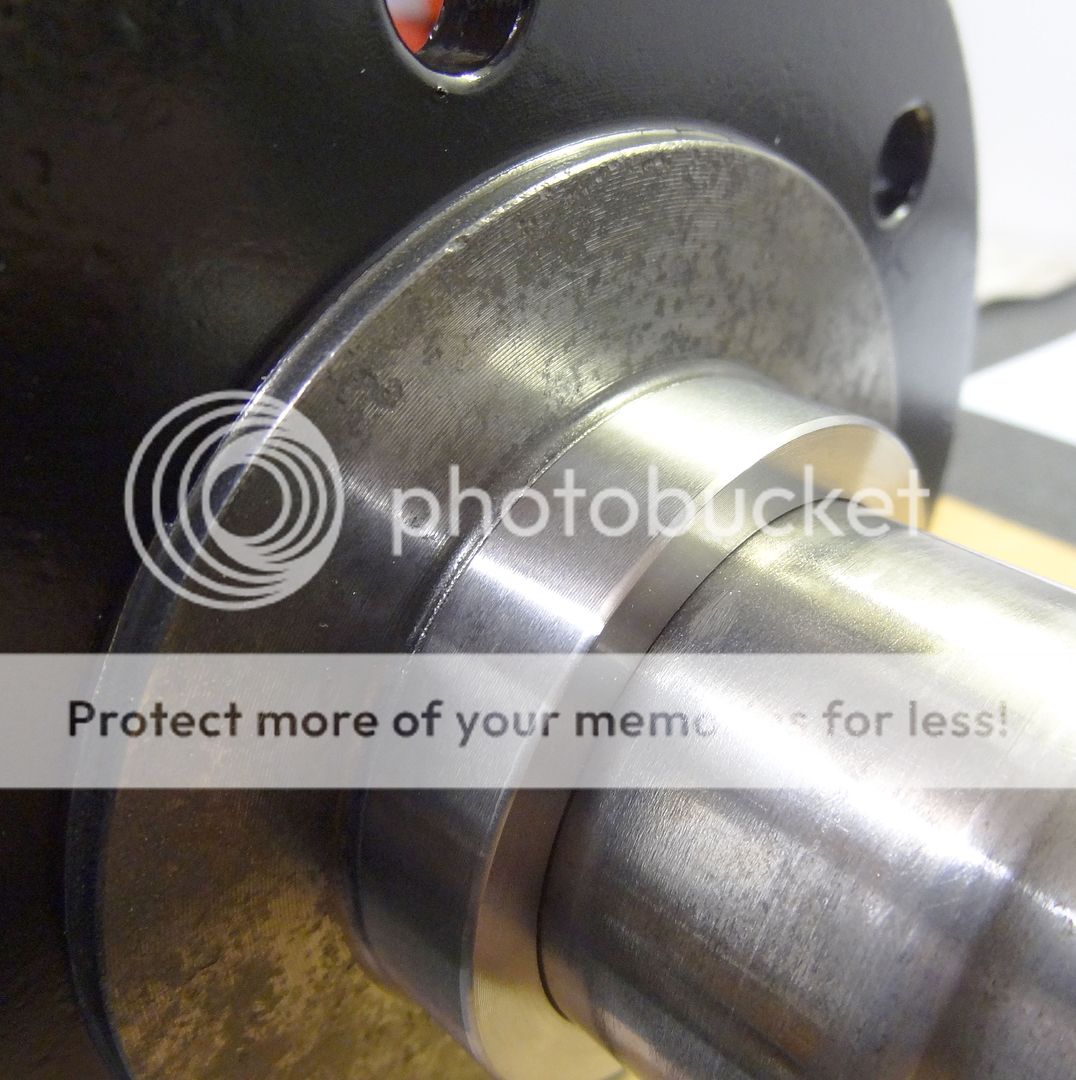
Now that stub axle you can see there is not the one from earlier. I had to get a new one as the thread was ruined and there is bad pitting and scoring where the bearings sit. It seems you can't get the early type stub axles any more so you use the later type where the oil seal collar is not removable. Now I thought that was the only difference but it seems the the shaft is a different size and you also need different bearings and hub. There is more about this on a separate post of mine if you are interested. But it does mean that i'm now searching for a good, second hand, old style (part no 599826) stub axle and all this lot is going to have to come to pieces again. I really hate getting something together nicely and then having to take it to pieces again so there was plenty of grumpy swearing done at the time.
Then thank heavens something that isn't axle related.

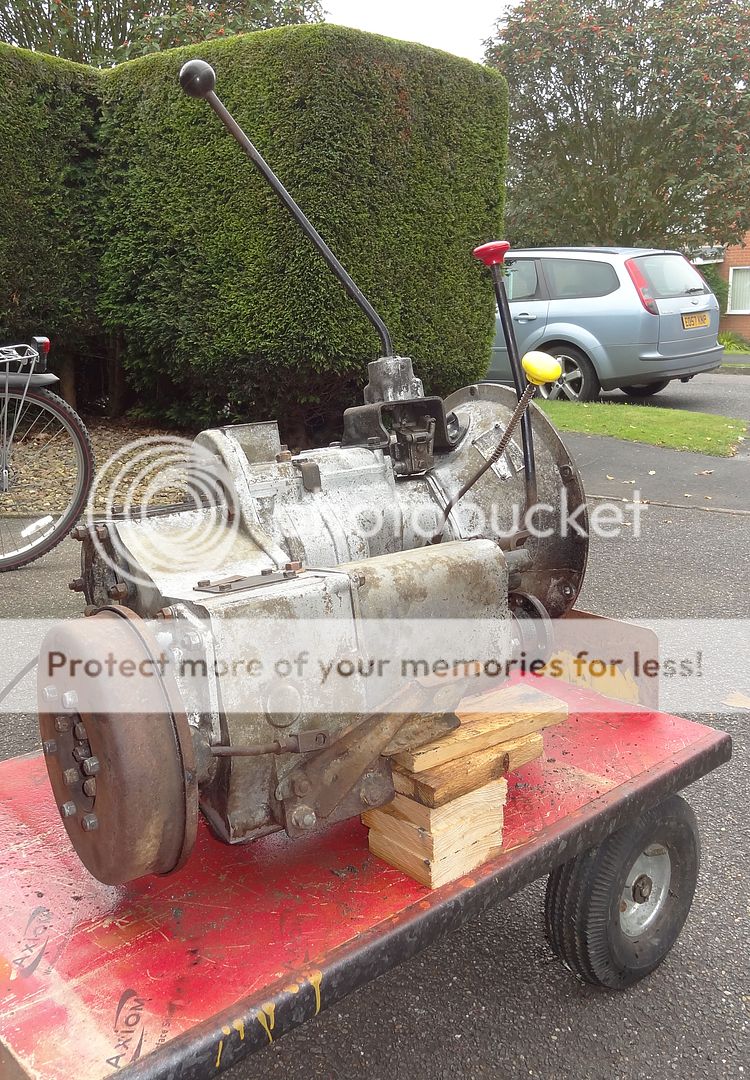
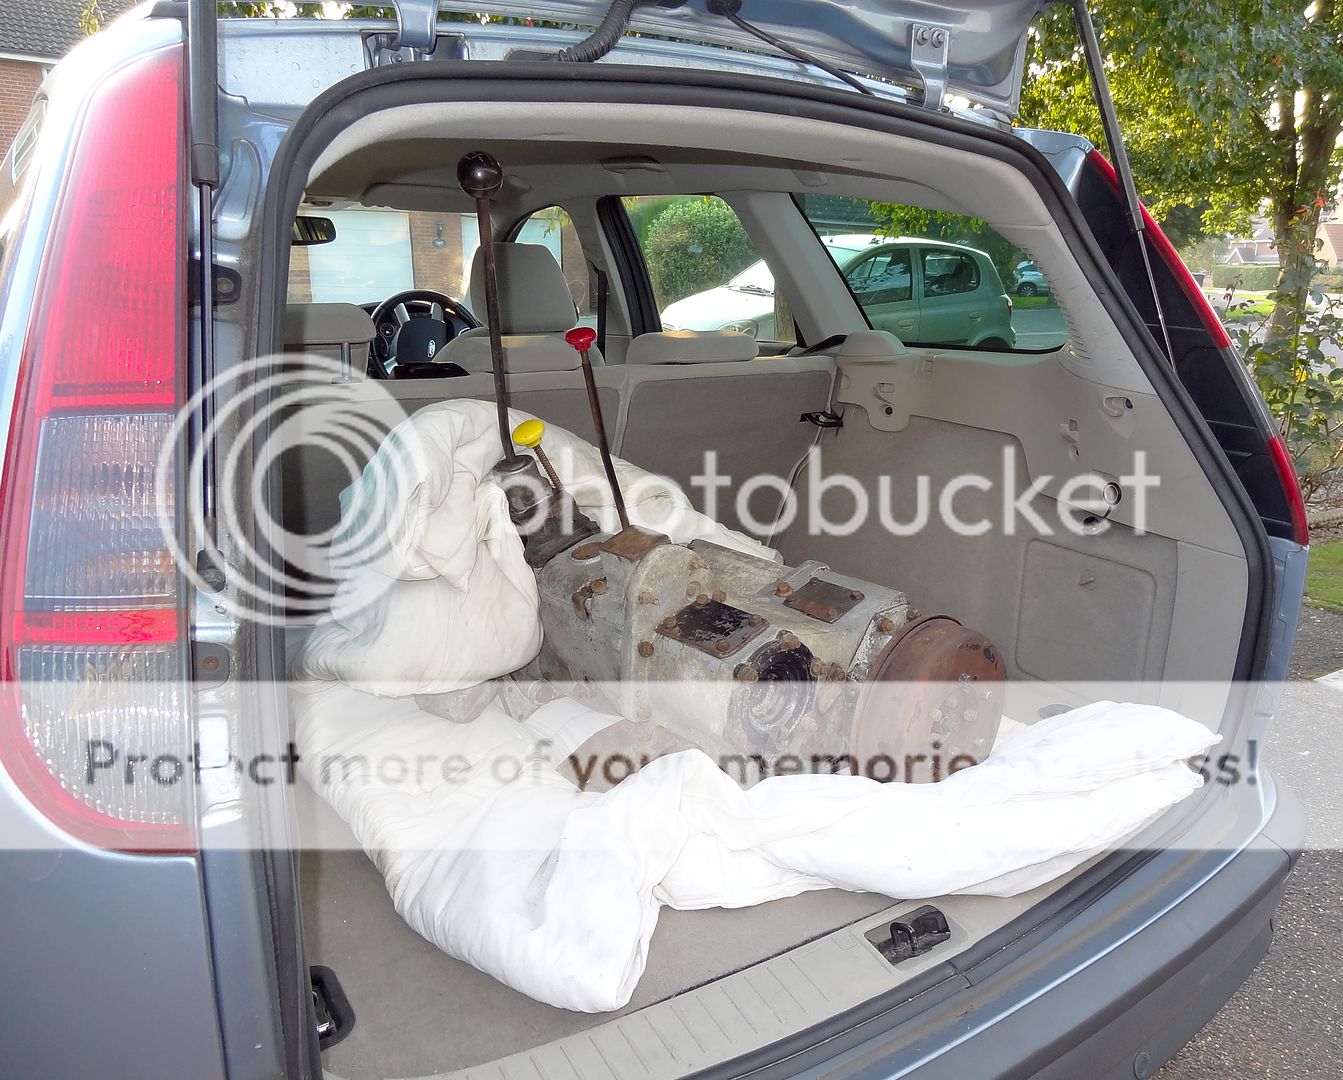
I retrieved the gearbox from storage ready for a trip to Aztech engineering. I was off to collect the second refurbed diff and took the gearbox for an assessment and look over by a skilled eye.
As I was degreasing it I found this.

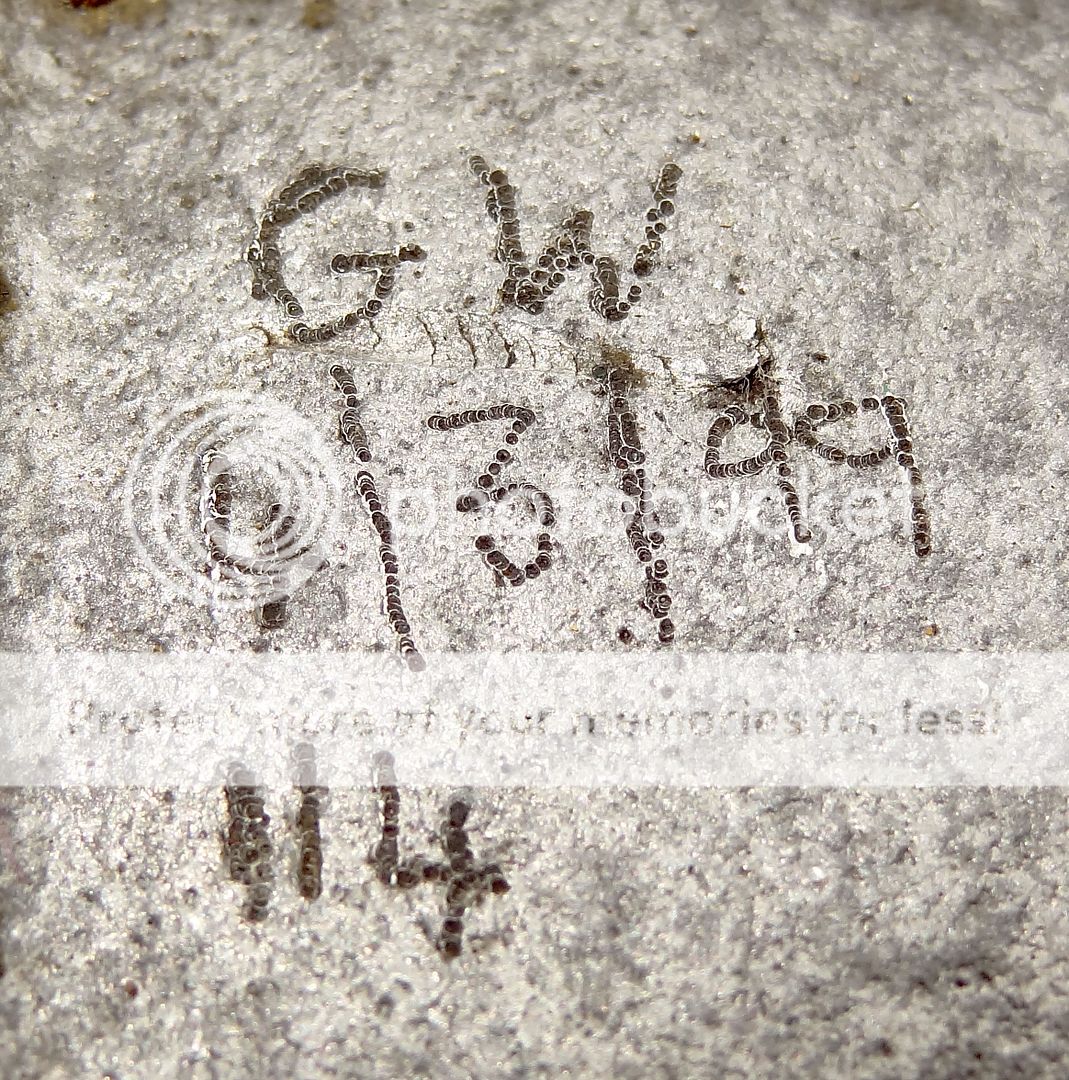
So lets hope that back in 1999 GW was right at the top his game and did a good job refurbing my gearbox.
Here it is all wrapped up and ready for it's day out.

So that's all for now. Darker evenings are already stopping me getting on quite so well.
Next month I will have been at this for 2 years and look how far I have to go.
Enthusiasm is still good at the moment, let's hope it lasts.
Going through cash like a goodun though. Let's hope that lasts too.
 
just read the whole thread doing a outstanding job there ihave just got back in the fold after defecting to vw campers lol now have a series 3 again i see brit parts are still **** are there not any better manufacturers out there keep up the good work atb pete
 
OTE="ronnie12, post: 3825801, member: 86947"]just read the whole thread doing a outstanding job there ihave just got back in the fold after defecting to vw campers lol now have a series 3 again i see brit parts are still **** are there not any better manufacturers out there keep up the good work atb pete[/QUOTE]
Thanks for the kind words. There are better makes out there but i'm a cheapskate. Welcome back to the world of stinky, leaky land rovers!
 
Back
Top