- Posts
- 83,310
- Location
- Embasinga stocæ
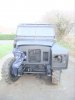
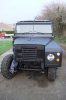
cold, wet and windy, on the drive and it not doing a lot to inspire me
That just says it all

cold, wet and windy, on the drive and it not doing a lot to inspire me
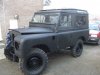
I tried to keep it as original as I could, even if it meant hours of cleaning, de rusting etc.A lovely sympathetic biuld. Love it. No 'monster truck' or chequer-plated croc dundee nonsense, and disfigurements. Modulars rims etc etc.
If there's mods they look liek they're going to be subtle. Nice. tasteful recognisable series.
I want it. Well done
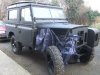
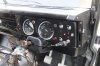
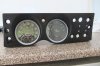
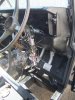
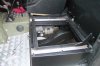
Also had a go at putting the clocks in too, quite a task getting all the wires stuffed in.
I decided to keep the grey surround on the clocks, break up some of the black.
The red LED mounted too, thats for the Toad immobiliser I fitted.
The direction indicator lights are a bastard to keep from spining around,
mine are the wrong way at the moment, but as the clock surround is all loose still, ill take it off and twist them.
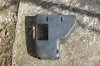
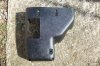
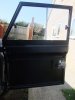
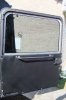
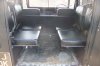
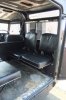
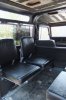
Wow it makes a change to see lots of different coloured wires behind someone's clocks and not all blue:doh::doh: like mine lol!!!!Just a few added shots, Inside drivers door, and rear door with panel I made, bit of plywood and some vinyl from local hardware store.
You can see the tint on rear door is not too dark..
What door tops are they, never seen them type beforeDoor tops from here..
Hey treeman, yeh, when done we can meet up, or stop in next time you go to TragoLooking good we will have to have a meet some time.
Where you taking her for MOT East Cornwall Re-pare Garage in Antony are good and Land Rover friendly
.Welcome To LandyZone, the Land Rover Forums!
Here at LandyZone we have plenty of very knowledgable members so if you have any questions about your Land Rover or just want to connect with other Landy owners, you're in the right place.
Registering is free and easy just click here, we hope to see you on the forums soon!