Northern Irelander
Well-Known Member
- Posts
- 2,890
- Location
- N. Ireland
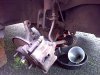
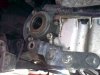
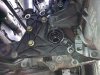
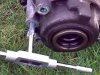
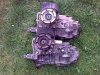
I just spent the guts of a day getting the IRD out and refitting, it should really only take a few hours but lets face it there are big issues with the design. Its a
b!tch of a job.
Some pics:
b!tch of a job.
Some pics:
Attachments
-
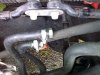 0 IRD coolant hoses blanked.jpg43.7 KB · Views: 2,227
 -
 1a Driveshaft nut removed.jpg38.2 KB · Views: 1,744
 -
 1 strut - hub bolts.jpg36.2 KB · Views: 1,729
 -
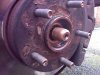
 2 Hub bolts, oversized.jpg37.8 KB · Views: 1,762
 -
 3 Driveshaft popped.jpg42.8 KB · Views: 1,954
 -
 4 RHS driveshaft on IRD.jpg35.5 KB · Views: 2,488
 -
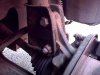
 5 IRD to gearbox bracket.jpg44.3 KB · Views: 3,814
 -
 6 IRD bolts retap.jpg42.9 KB · Views: 1,821
 -
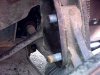
 7 Double Trouble.jpg66.5 KB · Views: 1,940
 , and 5 bolts for the tie bar. ITS OVERKILL!