Freelander 1 FL1 TD4 P1E30 code turbo underperforming - updated

This site contains affiliate links for which LandyZone may be compensated if you make a purchase.

Jayridium

Well-Known Member
Posts
1,402
Location
Pedronapper (Peterhead)
After significant work on the hippo, which turned from a project to a saga because of COVID restrictions limiting workshop time, I've been battling a lack of power on it. My Delphi Diagnostics Fault Code reader gives me the P1E30 code, Turbo/supercharger performance, so I hit the prime suspect, intercooler hoses, nope, nothing visible, I then pressure tested the intercooler and its two hoses to 45psi, held pressure for 10 mins, not them either, the rigid boost pipe from turbo that runs around back of engine and over bellhousing was off as part of the previous workscope and needlegunned, kurusted, hammerited, and refitted, no holes on it, the hose from turbo to that rigid boost pipe is a silicone hose with new jubilee clips on it, I'm frankly stumped, well almost, but it's definitely a case of clutching at straws now.

To eliminate the possibility that the anemic performance was related to the synergy and pierburgh maf, I've removed them and fitted a new copycat standard. I get silky smooth performance below two grand, and mildly improved performance above three grand on the tacho but still anemic and its flat as fook between tao and three grand. So I'm currently thinking its not transitioning from low rpm to high rpm VNT positions? My next port of call is the boost control solenoid, double checking it's piped up correctly, and check the vacuum lines. I've relocated the vacuum vent filter to beside the ABS block with an extended vacuum line running along the inner wing, would that cause problems?

I've got an old turbo on the shelf from a hippo I broke a few years ago, but it's outlet was full of oil, and its VNT ring needs a gentle tap with a brass drift on a hammer to the operating arm to move it, so that's no good. As such I've stated stripping it thinking if I can free up that ring and put a cartridge in it, then I could swap turbos over in a day, but I'm loathed to do that as the turbo is a pain to get to and I only put a new cartridge in the existing turbo ~6,000 miles ago.

So what I'm asking for is other likely candidates for the P1E30 / 1E30 error code that aren't a burst ose, or intercooler, or pipework. Could the vacuum valve / vacuum piping cause this error? Could it be a MAP sensor? (forgot to record live data for MAP on last test drive)
 
Thanks Andy, I'll check the wiring next time I'm having a play with it, have a look at live data for MAP values, and in extremes lever open my wallet and spring for a MAP sensor. Those things are fifty quid! (And I'm a stereotypical tight "jock")
 
This is turning into something of a saga, as I said before the freelander was lame, really down on power, dead at 50mph and struggling on hills...

...At first I thought it might be MAF/Ronbox related, so I played with settings and ultimately removed the ronbox and went to a new, cheap, standard MAF*, cleared the codes and did a couple of test drives and ran the delphi fault code reader on it, came up with P1E30 turbo under performing. Then checked the hoses for visible damage, and I pressure tested the intercooler to 45psi. Ran it again, still the same, from previous work on the freelander I know the hard boost pipe is sound. At which point I reached out to the forum, and Andy gave me a couple of pointers, so acting on Andy's suggestions did a test drive with the delphi tool again, this time reading the MAP sensor in real time, and only ever seeing ~95-105kpa on the sensor, I thought it might be a duff sensor, so I took the manifold off, removed the MAP and found this:
upload_2020-12-26_16-46-12.png


upload_2020-12-26_16-46-46.png


Eeewww! Mega icky!! It appears that the 5% of sludge I didn't clean out of the manifold earlier this year had congregated around the MAP sensor:
upload_2020-12-26_16-49-25.png


So I cleaned the manifold again, this time a bit more thoroughly, cleaned the MAP sensor with WD40's brand of electrical contact cleaner, which has the straw nozzle, and jetted the fluid into the sensor and reassembled the motor, took it for another test drive, again watching manifold pressure, still showed the same range of pressures, ggrrrr! :mad: 
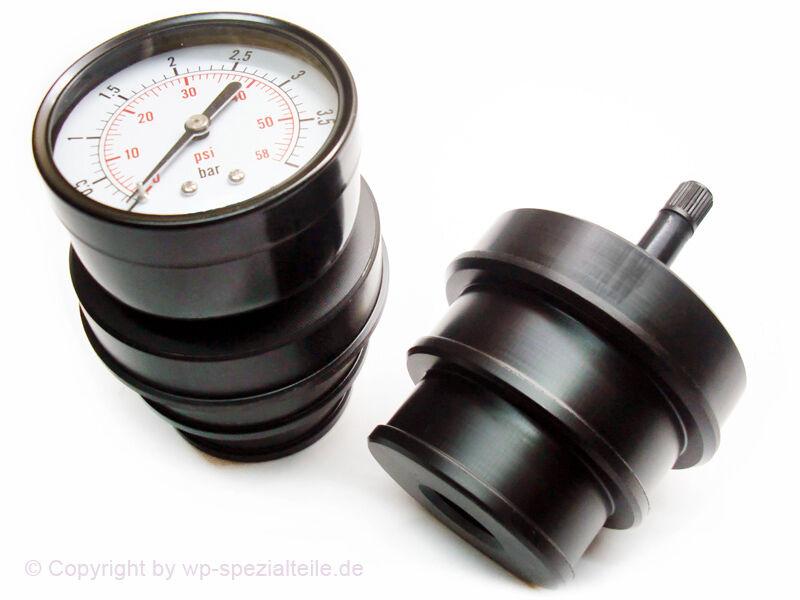
So it was back to the workshop, manifold off again, hit t'interweb for more info on the sensor and discovered its max pressure is 250kpa = 2.5bar, so I fired up the compressor, regulated its output down to 2.4bar, and set up a test with the sensor plugged into the vehicle, the delphi laptop reading the MAP sensor, and a dust gun blower tool plugged into the regulated airline, silicone hose from the nozzle of the gun to the inlet port on the sensor, and injected it with 2.4 bar, and the laptop showed 237kpa.

So I then put the sensor back in the manifold, refitted it, put the pressure testing tool onto the elbow hose that joins the plastic ducting to the intercooler pipes, with the electronics still reading the map, I quickly pressured up the inlet manifold to 1.5bar on the tyre gage, seen 148kpa on the senor, so I'm now confident in the manifold / MAP sensor / intercooler / pipework, it just seems the turbo isn't even trying. So I went to visit the turbo...

My first port of call was to manually move the actuator and thus stroke the VNT bellcrank, stiff, but it moves, but I'm certain it's only stiff because of the spring in the actuator, rather than an internal problem with the slotted ring/nozzle fins, as when I released the force it quickly springs back to rest position. So I now wondered was it a duff actuator? To prove or disprove this, I removed the hose from the actuator to the solenoid, and put a hose from the actuator to a depressed 150ml syringe, pulling the plunger on the syringe back pulled the actuator back, which was looking promising as it indicated if the actuator sees vacuum it will stroke the VNT and spin up the turbo. I then removed the solenoid, and swapped it for another (used) one I had in stock, double-checked the hoses were connected to the correct ports and went for a test drive watching the MAP sensor, no boost. Time to interrogate the solenoid...

Came back, checked the wiring to the solenoid by putting multimeter probes in the plug and with the ignition on, engine off, I was getting seeing somewhere in the region of 8.5-9.0 volts which I read on another thread was about right. So I then checked the vacuum output by putting the vacuum out from the valve to an extended 150ml syringe, started the engine, and it was pathetic how slowly the plunger was pulled in. So I then took the vacuum supply from the valve to the plunger, still slow, ergo it's a vacuum supply problem. This might be somewhat of my own making , as I had repiped the vacuum hoses with 3mm silicon hose, and on the long run across the bulkhead replaced a section of the hose run with cunifer brake pipe cable-tied to the vacuum to servo pipe. Maybe this was causing a restriction? After doing that modification I had read it's meant to be 4mm vacuum hose, and I had ordered and since received 4mm silicon "vacuum hose", I parenthesized the words there as I think the hose is too thin-walled for this purpose, but it has a better cross-sectional area and it worked for the syringe to actuator test, however it will be replaced with better quality thicker sidewalled vacuum hose after the holidays. Time to play vacuum-pneumatics tech...

So first test to prove the engine's vacuum system was to take the 4mm hose and put it onto the vacuum reservoir on one end and the 150ml syringe at the other, start the engine, and low and behold the syringe plunger is pulled in at a rate speedy gonzales would be proud of. This proves the vacuum pump is working and pulling vacuum. So inspired by the "Underry Underry, Ariba Ariba!!" pump test result, I then removed the 3mm vacuum hose, replacing it with the new 4mm hose, and removed the cunifer brake pipe section, and made a replacement for it out of 6mm OD 4.5mm ID copper. But as it's copper, rather than cunifer, I was aware it would tarnish, so to protect it, and make it look OE, rather than botchee, I sleeved it in black electrical heat-shrink:
upload_2020-12-26_17-20-41.png


upload_2020-12-26_17-21-39.png


upload_2020-12-26_17-22-26.png


Then I connected it up with 4mm silicone, trimmed the cable ties and turned their buckles out of sight:
upload_2020-12-26_17-23-19.png


upload_2020-12-26_17-24-35.png


Pretty! And hopefully it performs much better than the 3mm silicone and 4.75mm brake pipe that it replaced¿ But it was at this point I stopped, calling it night at ~20:30 on Christmas Eve. So I killed the lights, locked the doors, came home, scrubbed up, set up the kids with a movie on their TV's, and their new Christmas pyjama's, and poured the first of the festive beers. Tomorrow, or whenever day it is that COVID/Christmas nonsense allows me back to the workshop, I will:
  • put the 150ml syringe on a hose connected to that copper/heatshrink pipe, start the engine and ensure that the new pipe doesn't introduce any restrictions which will be indicated by the speed at which the plunger is drawn in
  • set up the delphi laptop to read the MAP sensor, put the 150ml syringe onto a hose onto the actuator, and with the engine running extremely GENTLY pull the syringe, and thus the actuator, back and hopefully see an increase in MAP pressure reading as the actuator strokes the VNT bellcrank arm and thus the turbo is forced to spool up. I stress the word gently as I really don't want to get cackhanded and overspeed the turbocharger's internals. This could go one of two ways:
    • If I see boost (increased MAP reading) as a result of directly applying vacuum to the actuator and thus moving the VNT arm, then I know the problem has to be connected to the solenoid
    • If I don't see boost the problem is within the VNT mechanism and I might be looking at surgery on, or replacement of the turbocharger and the air will not be full of festive spirits blue expletives
  • assuming I get boost from the syringe to actuator test, I'll then remove the current solenoid and fit the original one which I have tested on the bench using the syringe and a CB radio powersupply to generate vacuum and power on/off to toggle the valve and confirm which ports are connected
What a bloody saga this has turned into, chasing one ambiguous fault code associated with the freelander being a lame-duck has had me crawling all over the engine bay... I've been on the front of the engine bay with the intercooler and pipework, been on top of the engine with the manifold, I've been under/behind/right side of engine bay groping about with the vacuum stuff. *shaking my head*:(
 
Last edited:
I was thinking, this motor has really been dragging me through the mill, she's went right through the scope of the term "problem child" and is not well into "spoilt brat" territory :mad:

Anyways, After the last update last night, I ordered Samco 4mm vacuum hose estimated delivery 7th of January, yay teuchterville postcode + festivities, but the samco stuff has a much thicker sidewall, so will be better for vacuum functions, and I'll probably relegate this thin wall stuff to use as windscreen washer hose.

I went to the workshop for a couple of hours today, the syringe to actuator test made almost no difference to the map sensor reading at tickover, but I didn't want to try to rev the engine, read the tacho, work the syringe and read the laptop at the same time. So I decided to see if the vacuum pipe upgrade I mentioned in the past post had made any difference in the real world, the only way to find out that was a test drive. So I refitted the front right wheel, put a hose from the actuator to the solenoid, left the solenoid's atmosphere port open (ie: not connected to the longish run of 3mm vacuum hose to the filter which has been relocated to besides the ABS block), and went for a test drive with the delphi laptop hooked in, and I was finally getting some positive pressure on the inlet manifold. :) I stressed the word SOME as it wasn't MUCH - the sensor was reading ~135kpa which works out as about 0.35bar or circa five psi of boost pressure, and even that was at three grand on the tachometer, a decent amount of throttle angle being consistently applied on a long reasonable uphill stretch, virtually perfect conditions for testing turbocharger load/performance. However the spoilt brat was "rolling coal" - definitely too smokey to be healthy, but given the discernable increase in performance, it was definitely an improvement, even if it is not fully fixed. So I headed back to the workshop and once parked up read the codes again, as I expected the P1E30 fault code was back again.

So my next port of call is going to be pressure testing from the turbocharger to the inlet manifold to try and find a boost leak. The outlet from the turbocharger is a smaller diameter than the smallest step on my pressure testing kit, which is like this:
s-l1600.jpg

But as y'all know the hose from the turbo to the boost pipe is an elbow that increases in diameter as it sweeps around:
s-l1600.jpg


I've got some 300tdi bits knocking around the workshop for doing a 300tdi engine conversion to my RRC, so I'm hoping that some of the 300tdi silicone intake filter/turbo/intercooler/pipework or radiator hoses will be the right diameter to go onto one the turbo end of the freelander's boost pipe, then I can blow pressurised air through that pipe, into the hose into the intercooler, through the intercooler, into the other intercooler hose to that stupid black plastic ducting, then into the elbow onto the EGR removal kit and block the end of the elbow hose that adjoins the EGR to the black plastic ducting. That first test will thus cover 90% of the intake system, if that doesn't catch it I'll remove the manifold, make blanks to cover the inlet ports on the head, refit the manifold with the egr delete kit connected to the elbow and use these blanks as the final endpoint of the pressure test, that should identify or eliminate the possibility of any boost leaks being a factor in this debacle. I didn't start pressure testing tonight as the engine was at 85° from its test drives, and the workshop was literally freezing:
upload_2020-12-27_19-15-9.png


The clock was a Christmas present, I'm going to need to rearrange wall ornaments to accommodate it, but simply hung it on a conveniently located pre-existing rawlplug in the wall to keep it out of harms road, which is why it's temporarily overlapping the land rover badge.
 
I was thinking, this motor has really been dragging me through the mill, she's went right through the scope of the term "problem child" and is not well into "spoilt brat" territory

I've got a Freelander 2 like that. :(

Hope you get to the bottom of your boost issue soon.;)
 
I stressed the word SOME as it wasn't MUCH - the sensor was reading ~135kpa which works out as about 0.35bar or circa five psi of boost pressure, and even that was at three grand on the tachometer
That's definitely too low. As boost pressure comes from the MAP sensor, which being an absolute sensor, will normally shows 100 kPa with engine off. So your turbo is giving just 35 kPa (~5psi) boost, which as you say, is way too low to be of any use. I'm sure my TD4 used to show ~250kPa under full load conditions.
Cheers John.

You're welcome.;)

Have you checked the resistance of the windings in the boost control solenoid? If you do this at the EDC plug, it'll test the whole wiring of that circuit. ;)
 
I hadn't checked the resistance of the windings, but I will now you've suggested it. When you say do it at the EDC plug, you mean the one in the back of the ECU? I'm guessing RAVE will have the pinouts so I know which pins to measure? I think the wiring is OK as I've "seen" 8.5/9.0v across the two pins on the solenoid plug with the ignition on but engine off, but it's certainly worth testing again.

*Edit: I had probed them with a meter, but only on the beep setting, so I didn't get a resistance value, but can confirm there is continuity from pin 1 through the coil to pin 2
 
Back
Top