Alibro
Well-Known Member
- Posts
- 7,026
- Location
- Northern Ireland
*** DO NOT SKIM READ THIS IF YOU PLAN TO DO THE JOB YOURSELF!!!!! ***
Read every word carefully and if you find something is wrong please let me know.
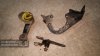
Hi Guys, I replaced the clutch in my TD4 recently and took note of the list of jobs to do. Not many photo's I'm afraid but hopefully enough. This was how I did it, I'm not claiming it is the right way or best way but it worked for me. It would be great if others shared their experience and maybe say where I could have done it better or easier. Make sure you have the Rave manual open (at page 627 I think) for the correct procedure.
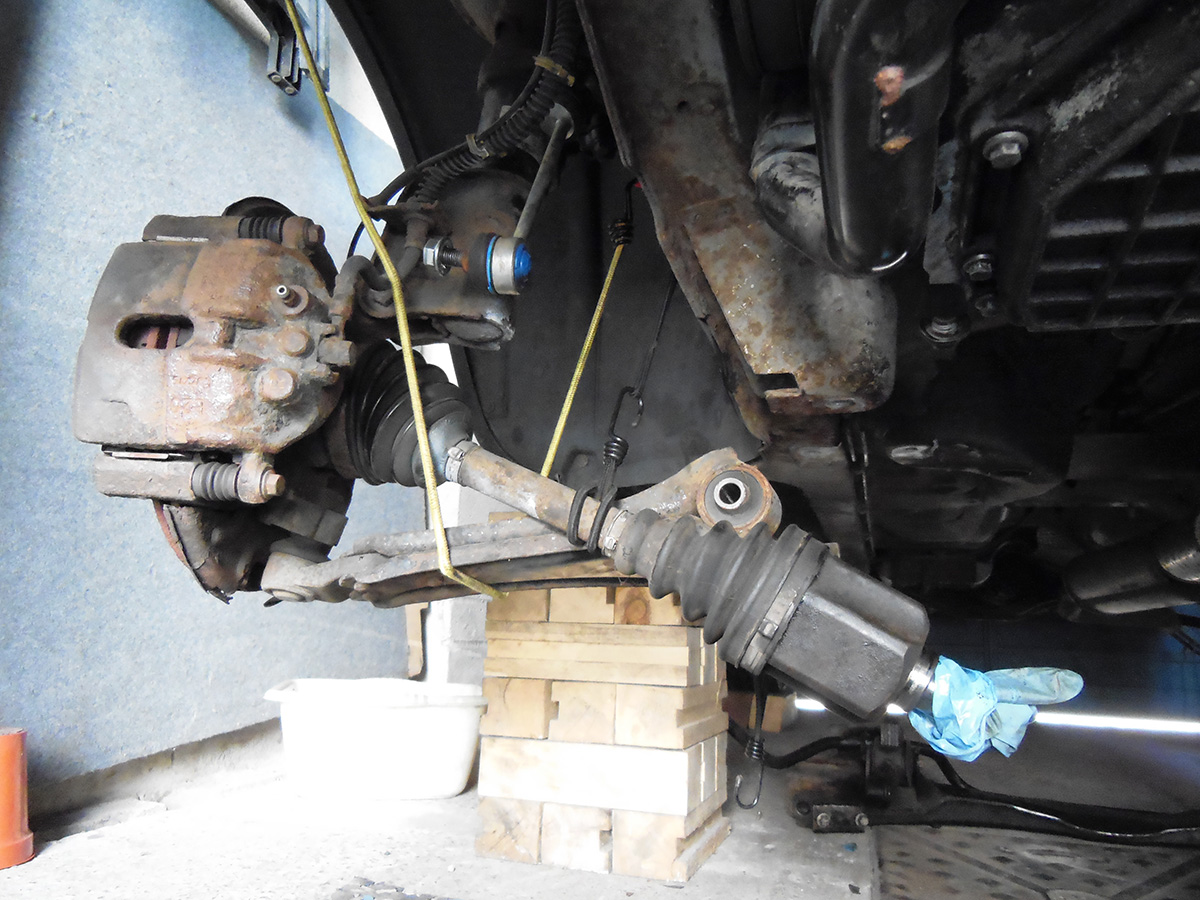
I didn't undo the lower ball joints on the wishbones as I didn't want to damage them and they didn't pop out by hammering the end of the strut so I unbolted the wishbones at the rear bush and front pivot bolt. This meant I could get the drive shafts out by pulling the whole strut out. It might have been easier if I had loosened the nuts on the top of the struts but it worked anyway.
If you're a skilled mechanic with the proper tools this could be done in a day. For the rest of us allow a full weekend and possibly longer if you run into problems. (My master failed when I tried to bleed the new clutch)
Watch this video before you start.
Now watch it again!
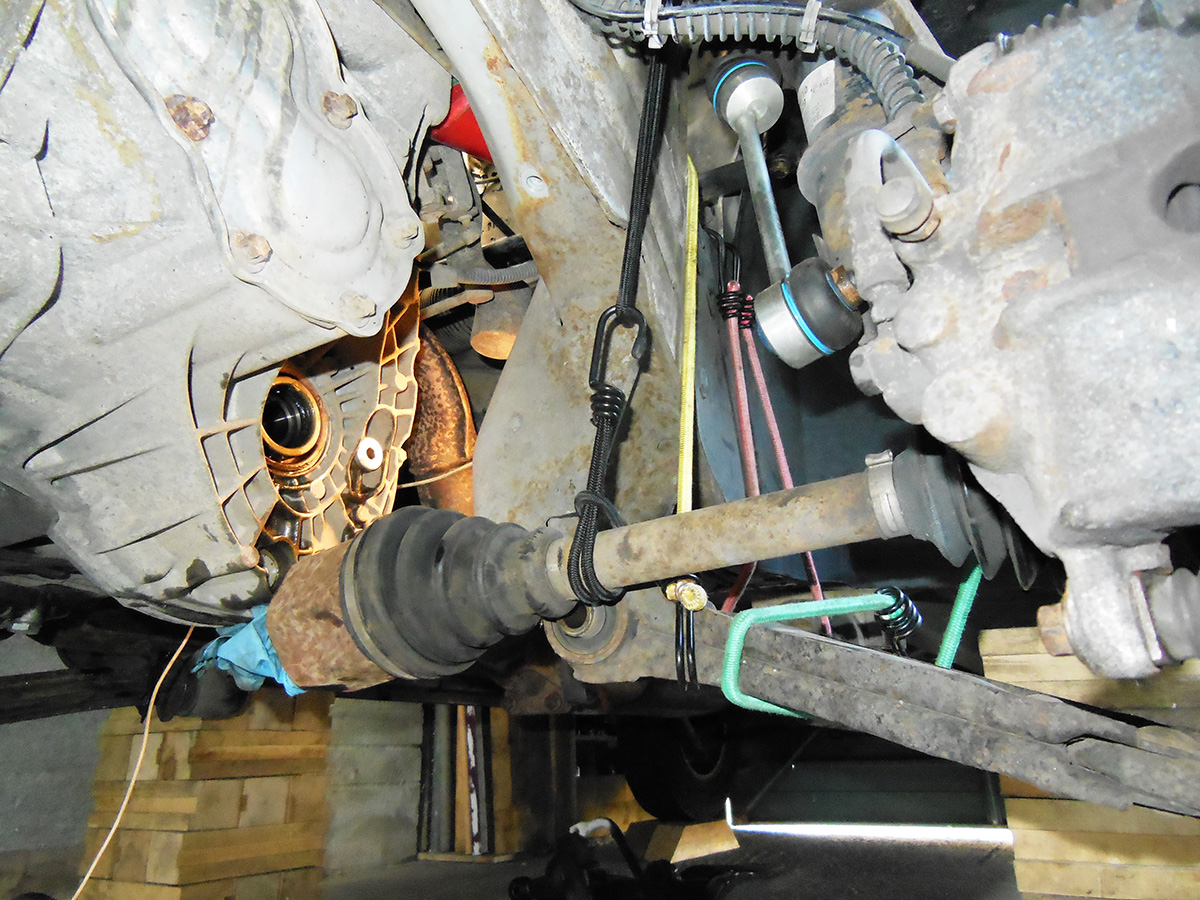
0. Unbolt propshaft from IRD and tie up. by removing the 6 Torx bolts where the propshaft's CV joint attaches to the IRD output flange and separate the CV from the flange. You may need to tap it to free it off, but they normally come apart easily. *** Not necessary if you can just tie up the IRD ***
1. Disconnect battery and remove, then unbolt and remove the battery tray.
2. Remove engine cover and air duct hose to the EGR.
3. Remove starter motor (I just took the bolts out and left it sitting loose.)
4. Jack the front of the car up as high as you can and get it on axle stands under the sill jacking points. Make sure the rear wheels are well chocked.
5. Take the front wheels off. (Hopefully you remembered to loosen the wheel nuts before jacking the car up. )
)
6. Take the under-tray and side panels off. (The side panels are held on by three bolts going straight up into the chassis rails)
7. Drain the coolant by loosening the bottom radiator hose. ***** NOTE If you can loosen the IRD and tie it up you will not need to do this. The guy in the video didn't *****
8. Drain the gearbox oil. Not sure if it must be done but I was intending to change the oil anyway.
9. Unbolt the wishbones front and rear supports and leave them still attached to the ball joints but supported on a bungie. (I find this easier than trying to separate the ball joints as it is easy to damage the ball joint rubbers. If your dropping the subframe anyway you might as well do it this way)
10. Unbolt the lower end of both drop links.
11. Remove the two remaining bolts holding the subframe and it should drop down. (Note I had sprayed around the rear wishbone mounts with paint earlier so that I could see where they should go when refitting but you'll probably still need to get a wheel alignment done when finished).
12. Using a pry bar pop the drive shafts out. The struts should swing out enough to let you get the drive shafts out of the way. MAKE SURE you turn the steering to get the track rod ends in the right position. This will let the wheels swing out a little more to give just enough space with a bit of tugging. Support the wishbones with a bungie or such and pull an old rubber glove or similar over the drive shaft ends to protect them from dirt. I also jammed clean rags into the drive shaft sockets.

13. Release the two coolant hoses on the IRD and catch what water is still in the system. (note this might be easier done after lowering the engine but this was when I did it)
14. Pull the breather pipe out of the top of the IRD. It's a long metal pipe that runs up the back of the engine.
15. Remove the bolts holding the lower engine tie bar support and remove the tie bar.
16. Remove the lower tie bar brackets and RHS IRD bolts. (There are 6 or 7 bolts to remove, the tie bar support bracket is an odd shape and on a TD4 goes half way around the drive shaft. (on a 1.8 K series it goes 3/4 around the drive shaft).
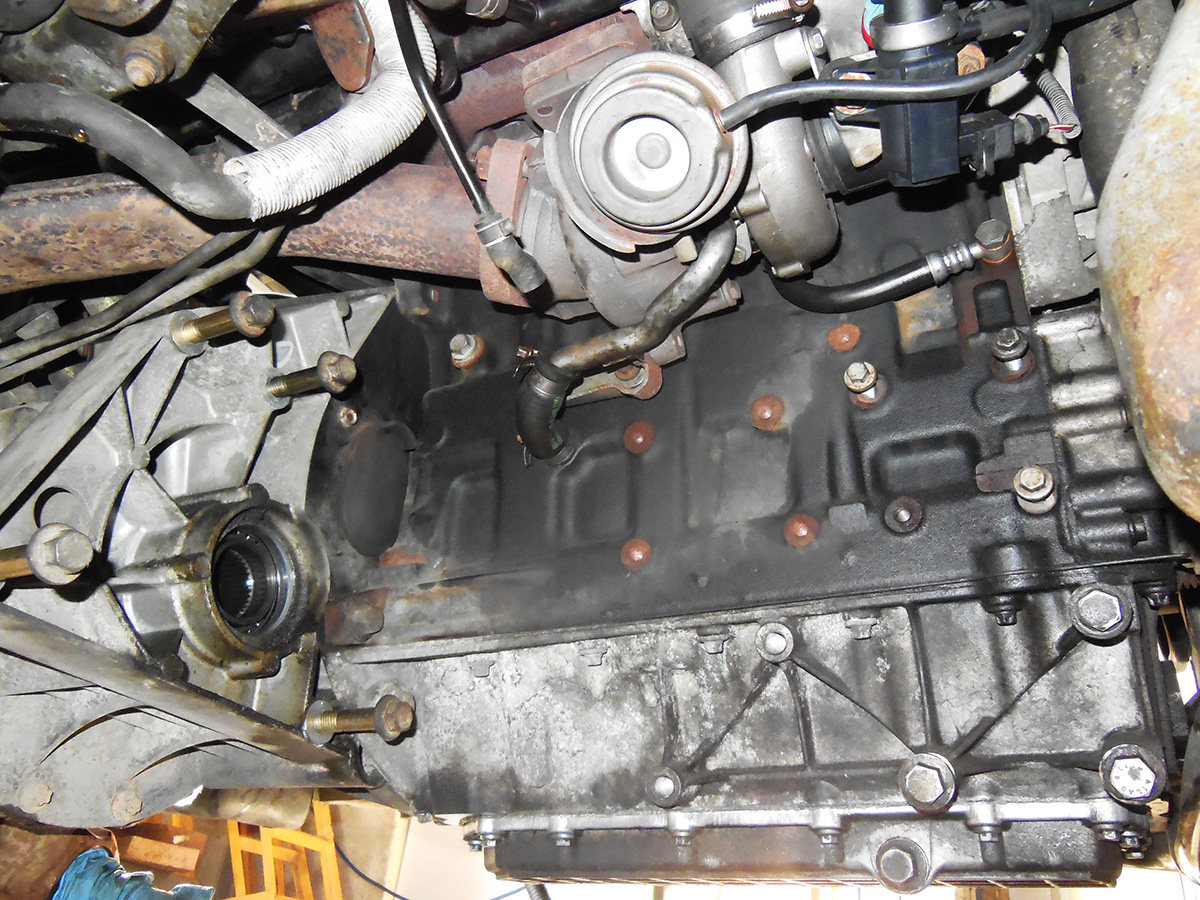
17. Remove the four bolts holding the IRD to the gearbox (the top two are very awkward and will need a swivel on a long extension bar) and wrestle it off the splines, it’s very heavy, be careful. (Note this is the order Rave says but it might be easier to lower the engine first)
Now would be a good time to drain the IRD oil if it hasn’t been done in a long time but MAKE SURE you can get the fill bolt out first as they're made of cheese.
18. Disconnect the clutch hydraulic line at the connection just above the gearbox. It has a plastic sleeve which slides in to release the connection and out to secure it (a bit like fuel line connections). I used very long nose pointy pliers to squeeze the sleeve in and release it.
19. Disconnect the first and reverse gear electrical sensor connections.
20. Pop the gear linkage ball joints at the gearbox end. I used a claw hammer for this which worked well, I didn’t take the linkage off even though Rave says you should. It made removing the gearbox a bit more awkward but still do-able and getting the linkage off is very difficult. As I had removed the subframe and dropped the engine a bit I had just enough room to get the gearbox out.
20a. Unhook the front two exhaust support rubbers. (Rave says to unbolt the exhaust from the manifold but I didn't need to)
21. Find some way to support the engine as the next step is to unbolt the N/S (UK, Japan, Australia etc OS in the new territories and mainland Europe) engine/gearbox mount. I used an engine hoist and lowered the sump onto a piece of wood that was on a milk crate but you could use a trolley jack.

I had the inlet manifold off too but this shouldn't be necessary, I was doing other stuff at the same time.
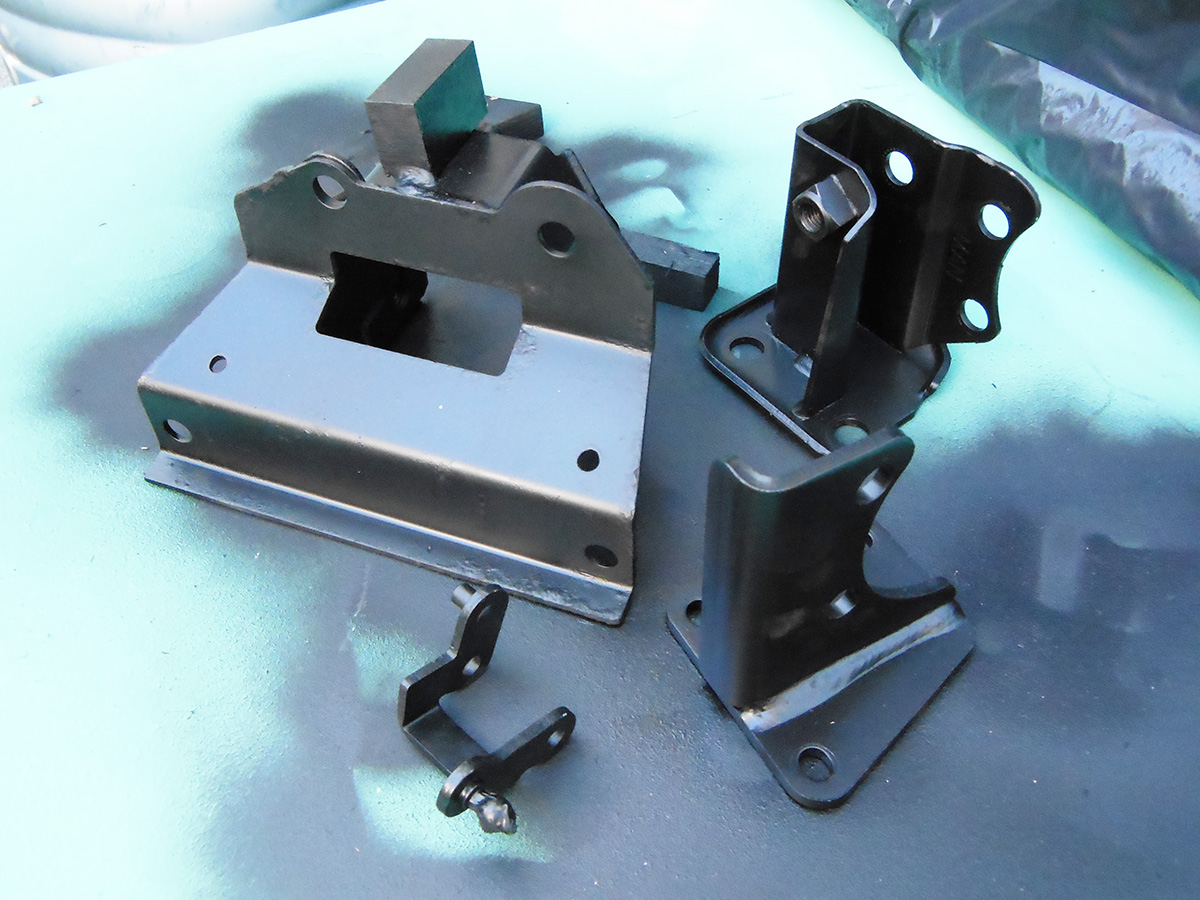
22. Remove the N/S engine mount and allow the engine/gearbox to sag down onto a support (approx 2-4 inches or 50mm to 100mm).
23. Remove the N/S engine support bracket from the gearbox.
24. Attach a hoist to the gearbox. (I used an eye on the top of the gearbox)
25. Remove the bolts holding the gearbox to the engine.
26. Remove the small bolt that was behind the IRD (10mm) holding the thin metal plate to the gearbox. I hadn’t done this and the plate caught on a dowel causeing a bit of grief until I realised what was happening..
27. Lever the gearbox off the engine and wriggle it out of the gap. The gear linkage will catch on the chassis leg but if the engine has been lowered enough it should come out with a bit of twisting and pulling. I used an engine hoist to support it and lower it down, If you don’t have one then you’ll need help.
28. Replace the slave cylinder and thrust bearing, greasing as appropriate
29. Remove the pressure plate and friction plate.
30. At this stage I cleaned the flywheel and scuffed it a bit with a wire wheel on a grinder. I didn’t replace the fly wheel, maybe I should have but it wasn’t showing any signs of failure and felt tight when I checked it. Time will tell if this was a stupid thing to do but I didn’t fancy paying out another £300 for a new flywheel. Some say the flywheel should last as long as two clutches, I hope they’re right.
Edit: two years later and I've had no issues with the flywheel.
31. Bolt on the new clutch parts making sure the friction plate is centred. I cobbled together a tool to do this using a roll of tape and a couple of sockets. Allan bolts should be 25Nm, don’t know if it was overkill but I used threadlock.

Once in and the bolts tightened a bit I double checked and treble checked the friction plate was centred by measuring from the centring tool I'd thrown together. (a 1/2" socket adapter with some tape wrapped round it

32. Refit everything in reverse order.
I used a trolley jack to lift the IRD into position before raising the engine and gearbox. I think it was easier to access the bolts with the engine still lowered.
I should have refitted the IRD breather too at this stage but forgot and only remembered while typing this up. Doh!
33. Bleed the clutch.
At this point hopefully you have a good working clutch, unfortunately my master cylinder gave up while bleeding so I'm waiting for a new one.
Edit: Jan 2019 and the car is still going well but with the clutch bite point still very low. If I were doing this again and the master cylinder failed I'd pay the extra for an OEM Master cylinder and so should you. It's not worth saving a few quid and having to 2nd guess why the clutch still feels like it needs bled. This is a VERY common complaint from folk who have replaced master cylinders.
The only reason I have't replaced it again with OEM is I don't drive the car often and SWMBO doesn't complain about it.
Read every word carefully and if you find something is wrong please let me know.
Hi Guys, I replaced the clutch in my TD4 recently and took note of the list of jobs to do. Not many photo's I'm afraid but hopefully enough. This was how I did it, I'm not claiming it is the right way or best way but it worked for me. It would be great if others shared their experience and maybe say where I could have done it better or easier. Make sure you have the Rave manual open (at page 627 I think) for the correct procedure.
I didn't undo the lower ball joints on the wishbones as I didn't want to damage them and they didn't pop out by hammering the end of the strut so I unbolted the wishbones at the rear bush and front pivot bolt. This meant I could get the drive shafts out by pulling the whole strut out. It might have been easier if I had loosened the nuts on the top of the struts but it worked anyway.
If you're a skilled mechanic with the proper tools this could be done in a day. For the rest of us allow a full weekend and possibly longer if you run into problems. (My master failed when I tried to bleed the new clutch)
Watch this video before you start.
Now watch it again!
0. Unbolt propshaft from IRD and tie up. by removing the 6 Torx bolts where the propshaft's CV joint attaches to the IRD output flange and separate the CV from the flange. You may need to tap it to free it off, but they normally come apart easily. *** Not necessary if you can just tie up the IRD ***
1. Disconnect battery and remove, then unbolt and remove the battery tray.
2. Remove engine cover and air duct hose to the EGR.
3. Remove starter motor (I just took the bolts out and left it sitting loose.)
4. Jack the front of the car up as high as you can and get it on axle stands under the sill jacking points. Make sure the rear wheels are well chocked.
5. Take the front wheels off. (Hopefully you remembered to loosen the wheel nuts before jacking the car up.
)6. Take the under-tray and side panels off. (The side panels are held on by three bolts going straight up into the chassis rails)
7. Drain the coolant by loosening the bottom radiator hose. ***** NOTE If you can loosen the IRD and tie it up you will not need to do this. The guy in the video didn't *****
8. Drain the gearbox oil. Not sure if it must be done but I was intending to change the oil anyway.
9. Unbolt the wishbones front and rear supports and leave them still attached to the ball joints but supported on a bungie. (I find this easier than trying to separate the ball joints as it is easy to damage the ball joint rubbers. If your dropping the subframe anyway you might as well do it this way)
10. Unbolt the lower end of both drop links.
11. Remove the two remaining bolts holding the subframe and it should drop down. (Note I had sprayed around the rear wishbone mounts with paint earlier so that I could see where they should go when refitting but you'll probably still need to get a wheel alignment done when finished).
12. Using a pry bar pop the drive shafts out. The struts should swing out enough to let you get the drive shafts out of the way. MAKE SURE you turn the steering to get the track rod ends in the right position. This will let the wheels swing out a little more to give just enough space with a bit of tugging. Support the wishbones with a bungie or such and pull an old rubber glove or similar over the drive shaft ends to protect them from dirt. I also jammed clean rags into the drive shaft sockets.
13. Release the two coolant hoses on the IRD and catch what water is still in the system. (note this might be easier done after lowering the engine but this was when I did it)
14. Pull the breather pipe out of the top of the IRD. It's a long metal pipe that runs up the back of the engine.
15. Remove the bolts holding the lower engine tie bar support and remove the tie bar.
16. Remove the lower tie bar brackets and RHS IRD bolts. (There are 6 or 7 bolts to remove, the tie bar support bracket is an odd shape and on a TD4 goes half way around the drive shaft. (on a 1.8 K series it goes 3/4 around the drive shaft).
17. Remove the four bolts holding the IRD to the gearbox (the top two are very awkward and will need a swivel on a long extension bar) and wrestle it off the splines, it’s very heavy, be careful. (Note this is the order Rave says but it might be easier to lower the engine first)
Now would be a good time to drain the IRD oil if it hasn’t been done in a long time but MAKE SURE you can get the fill bolt out first as they're made of cheese.
18. Disconnect the clutch hydraulic line at the connection just above the gearbox. It has a plastic sleeve which slides in to release the connection and out to secure it (a bit like fuel line connections). I used very long nose pointy pliers to squeeze the sleeve in and release it.
19. Disconnect the first and reverse gear electrical sensor connections.
20. Pop the gear linkage ball joints at the gearbox end. I used a claw hammer for this which worked well, I didn’t take the linkage off even though Rave says you should. It made removing the gearbox a bit more awkward but still do-able and getting the linkage off is very difficult. As I had removed the subframe and dropped the engine a bit I had just enough room to get the gearbox out.
20a. Unhook the front two exhaust support rubbers. (Rave says to unbolt the exhaust from the manifold but I didn't need to)
21. Find some way to support the engine as the next step is to unbolt the N/S (UK, Japan, Australia etc OS in the new territories and mainland Europe) engine/gearbox mount. I used an engine hoist and lowered the sump onto a piece of wood that was on a milk crate but you could use a trolley jack.
I had the inlet manifold off too but this shouldn't be necessary, I was doing other stuff at the same time.
22. Remove the N/S engine mount and allow the engine/gearbox to sag down onto a support (approx 2-4 inches or 50mm to 100mm).
23. Remove the N/S engine support bracket from the gearbox.
24. Attach a hoist to the gearbox. (I used an eye on the top of the gearbox)
25. Remove the bolts holding the gearbox to the engine.
26. Remove the small bolt that was behind the IRD (10mm) holding the thin metal plate to the gearbox. I hadn’t done this and the plate caught on a dowel causeing a bit of grief until I realised what was happening..
27. Lever the gearbox off the engine and wriggle it out of the gap. The gear linkage will catch on the chassis leg but if the engine has been lowered enough it should come out with a bit of twisting and pulling. I used an engine hoist to support it and lower it down, If you don’t have one then you’ll need help.
28. Replace the slave cylinder and thrust bearing, greasing as appropriate
29. Remove the pressure plate and friction plate.
30. At this stage I cleaned the flywheel and scuffed it a bit with a wire wheel on a grinder. I didn’t replace the fly wheel, maybe I should have but it wasn’t showing any signs of failure and felt tight when I checked it. Time will tell if this was a stupid thing to do but I didn’t fancy paying out another £300 for a new flywheel. Some say the flywheel should last as long as two clutches, I hope they’re right.
Edit: two years later and I've had no issues with the flywheel.
31. Bolt on the new clutch parts making sure the friction plate is centred. I cobbled together a tool to do this using a roll of tape and a couple of sockets. Allan bolts should be 25Nm, don’t know if it was overkill but I used threadlock.
Once in and the bolts tightened a bit I double checked and treble checked the friction plate was centred by measuring from the centring tool I'd thrown together. (a 1/2" socket adapter with some tape wrapped round it
32. Refit everything in reverse order.
I used a trolley jack to lift the IRD into position before raising the engine and gearbox. I think it was easier to access the bolts with the engine still lowered.
I should have refitted the IRD breather too at this stage but forgot and only remembered while typing this up. Doh!
33. Bleed the clutch.
At this point hopefully you have a good working clutch, unfortunately my master cylinder gave up while bleeding so I'm waiting for a new one.
Edit: Jan 2019 and the car is still going well but with the clutch bite point still very low. If I were doing this again and the master cylinder failed I'd pay the extra for an OEM Master cylinder and so should you. It's not worth saving a few quid and having to 2nd guess why the clutch still feels like it needs bled. This is a VERY common complaint from folk who have replaced master cylinders.
The only reason I have't replaced it again with OEM is I don't drive the car often and SWMBO doesn't complain about it.
Attachments
Last edited: