BennehBoy's D2 adventure

This site contains affiliate links for which LandyZone may be compensated if you make a purchase.
Bought some new bits:

_MG_9698.jpg


Armortek synthetic rope, hawse, superwinch snatch block.

Got fed up of waiting for the 2nd gasket to come so rtv'd the gearbox onto the winch :tup:

Got the grill off to see how much chopping would be needed to fit the winch in the tray:
_MG_9699.jpg

Took the opportunity to hose the Tong mud out of the rad

Had to grind some of the crossmember off (had to further extend it from what's shown here):
_MG_9700.jpg


Winch in:
_MG_9701.jpg


Wiring in:

_MG_9703.jpg


Dash isolation switch:

_MG_9704.jpg


Rope on:

_MG_9702.jpg
 
Front NSD drive shaft leaking again FFS!!! Pulled it so I could try and get to the bottom of the oil leak...

Here's the slick...
_MG_9711.jpg


Here's the reverse side of the seal after popping it out - looks like the seal caught on a burr and got a bit mangled:
_MG_9714.jpg


The interior face of the seal was perfect.

The shield that sits against the seal was a bit worse for wear though, lots of grooves, some pitting and corrosion. So, cleaned it up with some 250 grit wet and dry, then some scotch brite... (this is the before shot)
_MG_9713.jpg


Also cleaned up the lip of the seal land in the axle with the hope it would prevent the seal edge getting torn up.

Put it all back together, and after 5 miles driving there's no visible oil leaking.... fingers crossed! [anim_25.gif]
 
Leak came back, noticed the balljoints were on there way out so replaced those - man that's a ballache job!

If I NEVER see another balljoint again, it'll be too soon.

What an absolute b4stard of a job!

To be fair the balljoints themselves pressed out and in really easily with the help of some MAPP Pro.

The real struggle was getting the knuckle off, had to cut through the balljoints with a slitting disk in the end!

_MG_9720.jpg


Still leaked after that FFS!

Resealed the sunroofs, but forgot to take pics.
 
Refurbed my flaking roof rails

_MG_9715.jpg


And one with them finished and on - 2 coats primer, 2 coats black, 2 coats lacquer (thick coats!), Also got my stick on number plate on finally :tup:
_MG_9717.jpg
 
Front nearside hub let go with an almighty screech coming off the motorway so grabbed a new hub....

Here's the back side of the hub, the water shield is missing (found it spinning on the axle), and you can see all the bearing grease has carbonized...
_MG_9723.jpg


Here's a top view, the bearing actually started to pull out of the hub when I was using the three legged puller to get the hub off the half shaft:
_MG_9724.jpg


And a nice shiny new Timken one back on:
_MG_9725.jpg


Pretty straightforward really.
 
Forgot to mention that I warped the stainless steel manifold that my mate fabbed up in the space of 2 hours, so decided to give it some TLC... because I was getting a Stage 4 remap (hybrid turbo)!!


orting and Polishing of the Wild 4x4 SS manifold:

BEFORE:
IMG_20140108_133618.jpg

IMG_20140108_133635.jpg

IMG_20140108_133651.jpg


AFTER:
IMG_20140109_141342.jpg

IMG_20140109_141404.jpg

Not perfect, but oh well
IMG_20140109_141415.jpg

EGT port intrusion removed
IMG_20140109_141424.jpg

IMG_20140109_141739.jpg


Uprated Wurth studs:
IMG_20140109_141746.jpg


Cutting the manifold flange:
IMG_20140111_100031.jpg

IMG_20140111_101502.jpg

IMG_20140111_102544.jpg


Zadatech multiguage (EGT, Coolant, Boost)
IMG_20140115_102447.jpg

Test rig:
IMG_20140115_133325.jpg


Old turbo off:
IMG_20140117_121724.jpg


Alive Hybrid:
IMG_20140117_121731.jpg


And fitted - you can see why I am replacing the cast manifold:
IMG_20140117_130841.jpg


New sticker on the back:
IMG_20140118_101544.jpg


SS sports echaust:
IMG_20140119_133125.jpg


fitted:
IMG_20140119_144824.jpg


Zada Tech fitted in car - still need to make a mount for the screen:
IMG_20140122_152831.jpg


The control box:
IMG_20140122_152903.jpg


Boost nipple, silicon hose and sender:
IMG_20140122_153004.jpg

IMG_20140122_153014.jpg


Cast manifold off:
IMG_20140123_122807.jpg


Wurth studs in (2 stud holes knackered at this point):
IMG_20140123_132901.jpg


Manifold on and copper nuts fitted:
IMG_20140123_143450.jpg


EGT probe hooked up:
IMG_20140123_182029.jpg

IMG_20140123_182039.jpg

IMG_20140123_181946.jpg


Timsert kit to fix the broken stud holes... and some open ratchets....
IMG_20140124_143927.jpg

IMG_20140124_143810.jpg


A fixed stud hole:
IMG_20140125_153214.jpg
 
So a few weeks back I fitted an Alive sports exhaust.

Today I thought I'd have a quick look to see how it was holding up...

So wasn't terribly impressed to see this:
IMG_20140217_112337.jpg


On closer inspection it's oil residue, which got me wondering where oil could be getting thrown onto it from:
IMG_20140217_112327.jpg


Given that there's oil on the bottom of the brake shield it's a pretty sure guess that the drive shaft oil seal has failed.

Bought a few spares, but guess what I'll be writing up next!
IMG_20140217_114846.jpg


Also got a new SS hose clamp to stop my water elbow from leaking.
 
So, here's a quick write up about changing the top hose elbow clamp...

What you'll need...

New clamp
Pump pliers
Hose clamp tool, or flat bladed screw driver
Some OAT or water to top the system back up.

Here's my leaking original:
IMG_20140217_121920.jpg


You can see I've not got the acoustic cover on my engine, you might need to remove yours to complete this repair.

First of all, remove the cap from the expansion tank, this will de-pressurise the system and reduce coolant loss.
IMG_20140217_122144.jpg


Next remove the existing clamp, if it's the stock clamp you will need to use some pump pliers and remove the hose - you'll lose some coolant at this point. For speed and minimising coolant loss I did this as quickly as I could knowing that the new clamp could be completely unwound and slipped over the top hose whilst connected:
IMG_20140217_122151.jpg


Unwound new clamp ready to go on:
IMG_20140217_122206.jpg


Fit the new clamp and tighten it up - hose clamp tools are the fastest and best way to do this, and well worth the cost:
IMG_20140217_124850.jpg


Next you need to raise the expansion tank up as high as you can so that the top hose can be bled - I used a house brick :crazy1:
IMG_20140217_122604.jpg


Now loosen off the bleed screw on the top hose - again I use pump pliers, they grip better than my fingers!
IMG_20140217_122636.jpg


You'll see air bubbling out, to speed things along you can take the screw right out, but be quick to get it back in. I also manipulate the hose to make the bleed screw the highest point and squeeze to force air out. Eventually you'll get out pretty much all of it. Tighten the bleed screw back up, but be REALLY careful, they are quite easy to break if you over tighten!

Refit the expansion tank and top the level back up with OAT/water.

Refit the expansion tank cap - VERY tightly - again I use pump pliers to give it the final tweak.

I'd suggest going for a drive now to repressurise the system, then another quick bleed of the top hose without removing the expansion tank or cap so that the system pressure forces any remaining air out. Again, once done check the level and top up as appropriate.

Also, wash off any spilt OAT so you can quickly see if any further leakage occurs.
 
Another how-to, this time it's changing a rear driveshaft oil seal...

Things you will need:

Good ratchet.
12mm six sided socket - for the brake caliper
13mm 12 point socket - for the caliper carrier
15mm six sided socket - for the hub
BFH or rubber Mallet
Lithium grease
Copper grease
Kitchen roll or other cleaning material
WD40 OR Plus Gas OR other release oil of your choice
Slide Hammer OR Large Punch OR Sharp Drift - to get the hub to break off the axle (in order of preference)
Pry Bar - to lever the hub out
Wire brush - to clean up the hub and axle mating faces
Phillips screw driver - to remove the brake disk
75W90 Diff Oil in case you spill any (I use Casrtrol Syntrans)
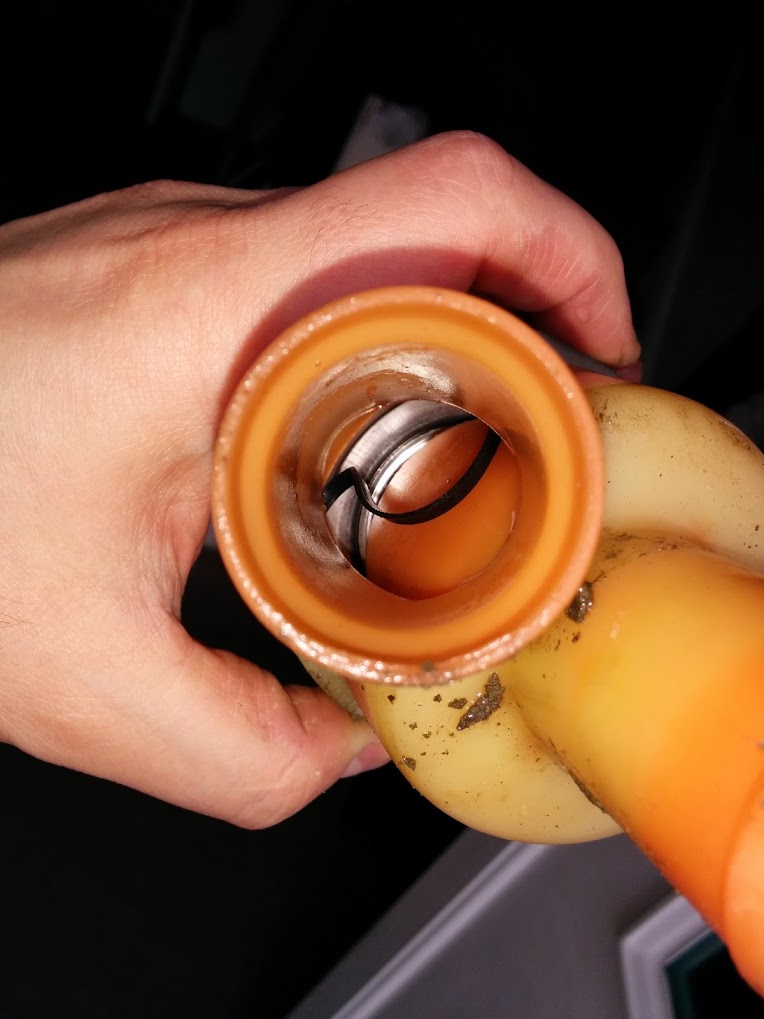
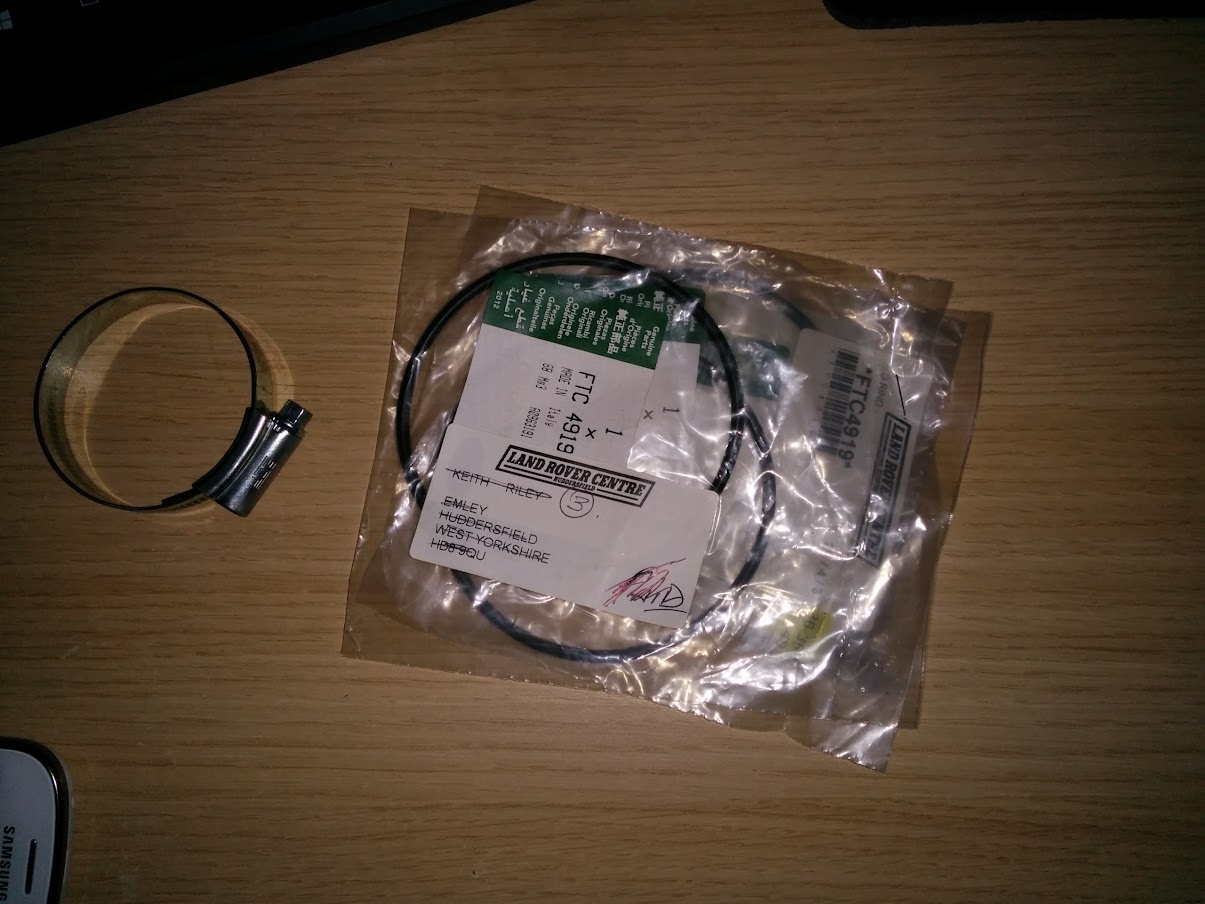
A new O-ring part number FTC4919
Something comfy to kneel on... some decent gloves... overalls.... etc

You may also need a dremel/small wire wheel to clean up the o-ring channel on the hub.

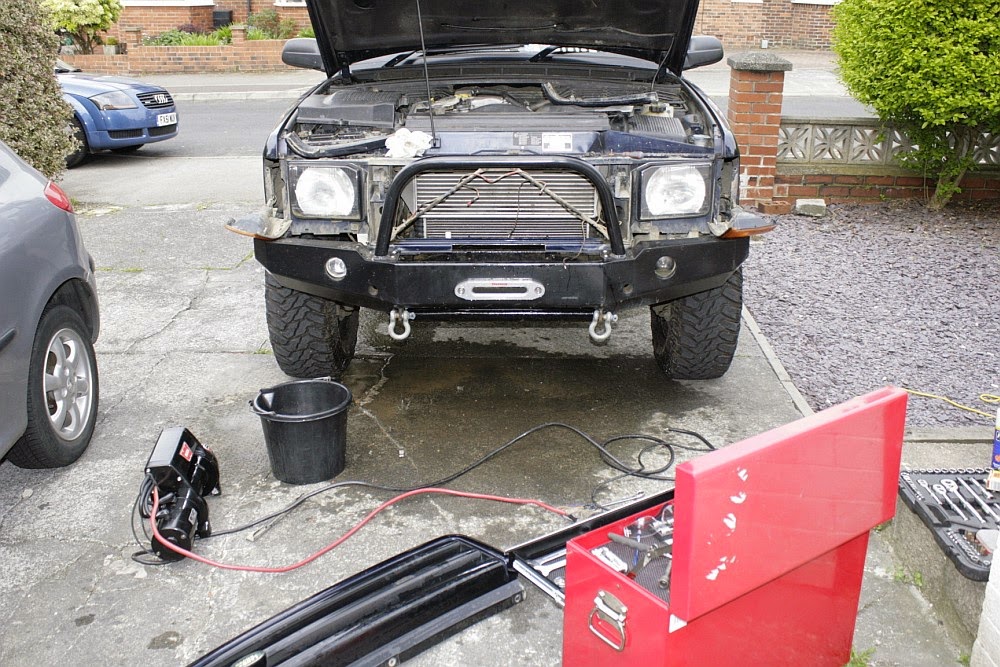
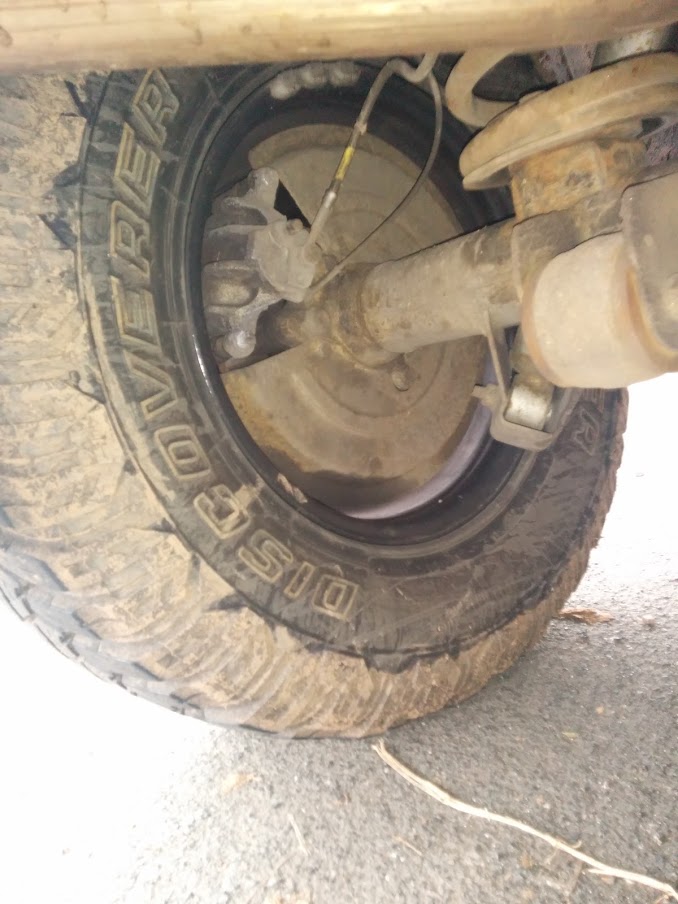
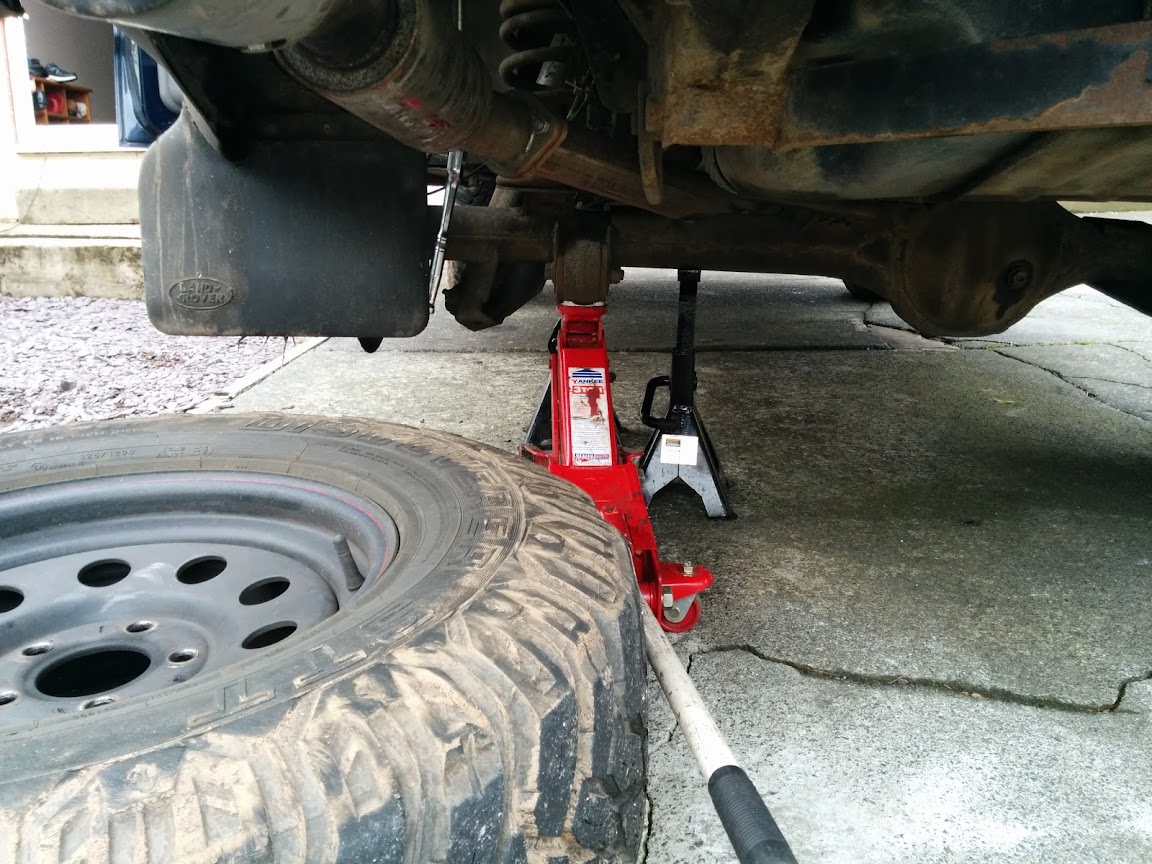
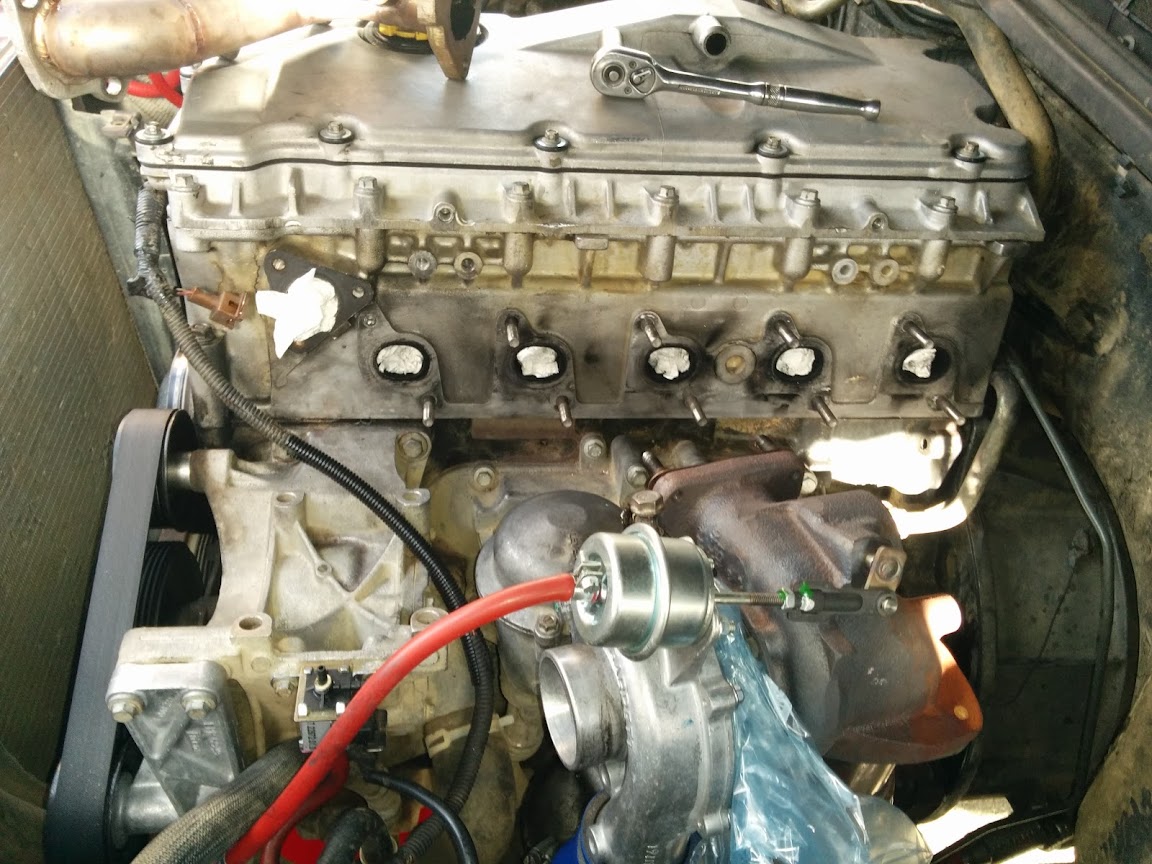
First thing is to jack the vehicle up as high as you can at the affected side, this will prevent most of the oil running out of the axle tube. The car is in gear, handbrake on, wheels chocked. Jacked on the trailing arm, with a stand under the axle and another under the trailing arm for safety. Once the wheel is off stick that under the back end for additional protection from the vehicle falling - can never be too safe imho.
IMG_20140218_114144.jpg


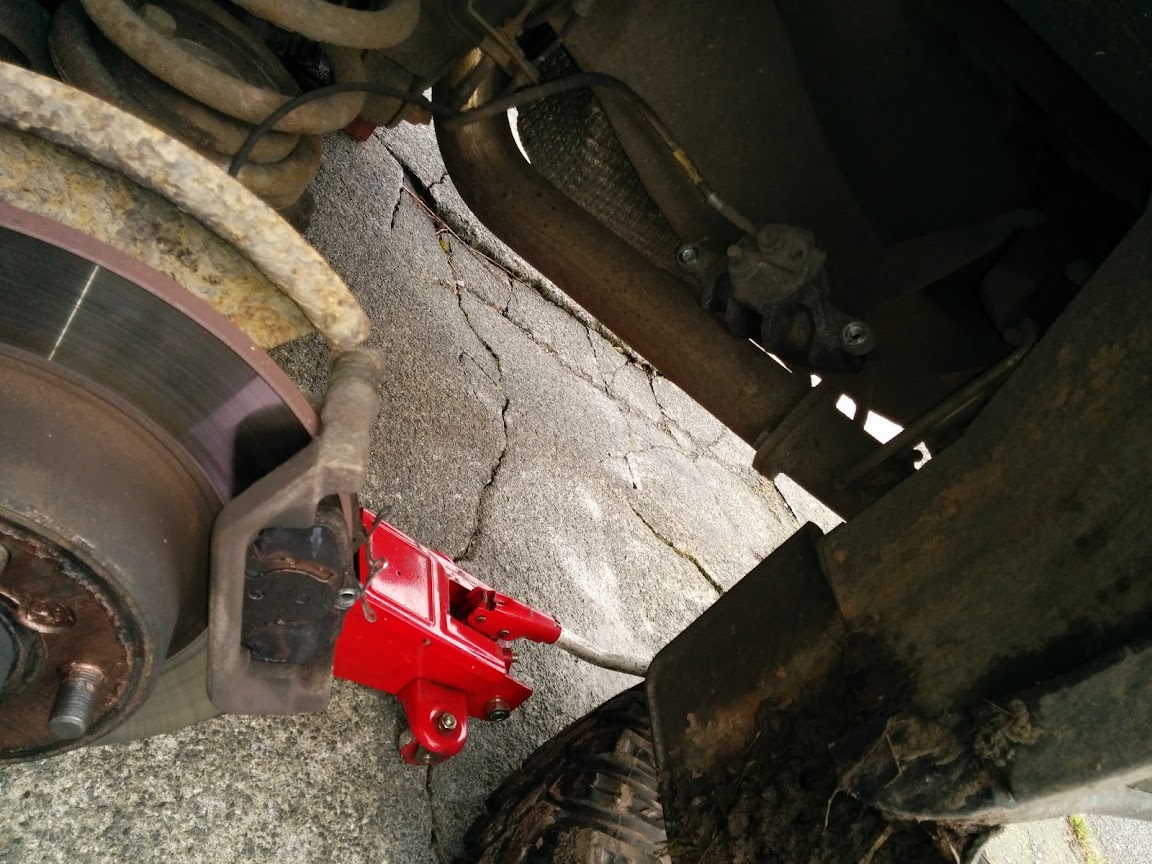
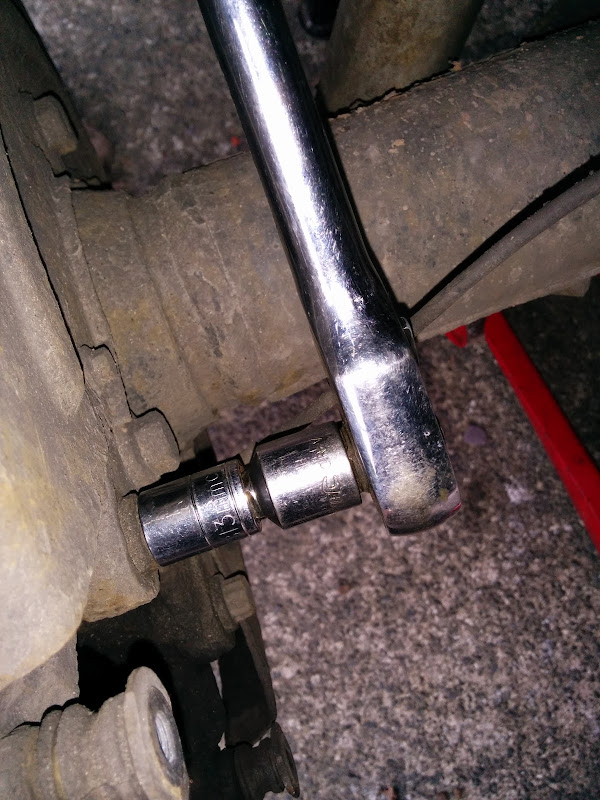
Once the wheel is off you can remove the caliper securing bolts with the ratchet and 12mm socket, crack them both off before fully removing them - makes it easier
IMG_20140218_114201.jpg


With the bolts removed I sat the caliper up on my exhaust - don't strain the brake line!
IMG_20140218_114350.jpg


Remove the pads - remebering which went where - easiest way is to put the outer one further from the vehicle

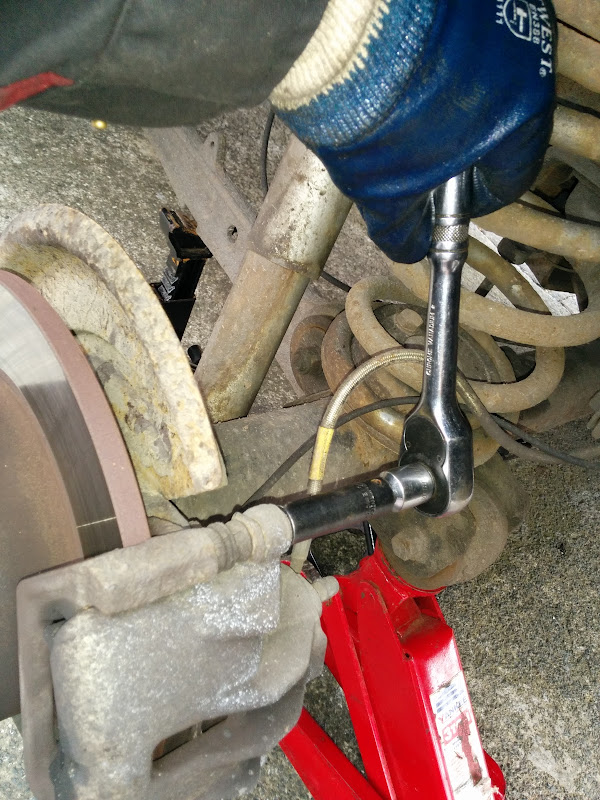
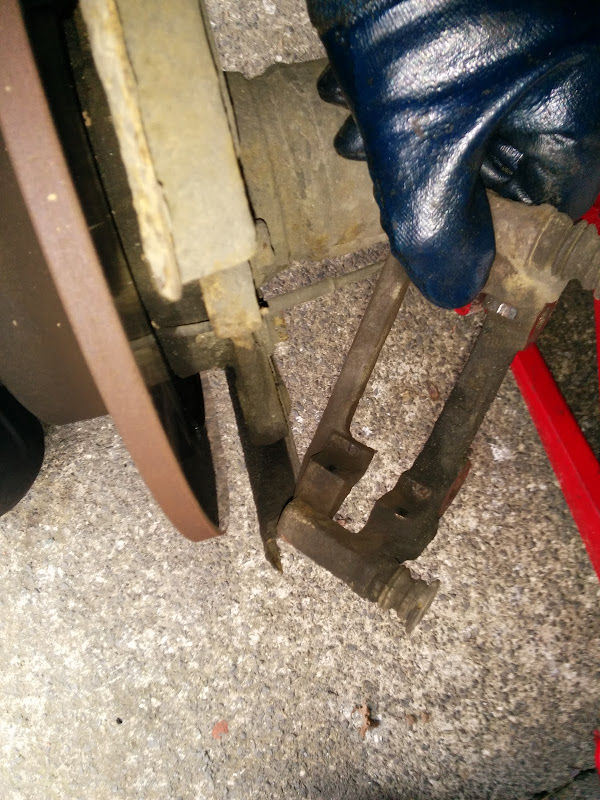
Now using the 13mm 12 point socket and ratchet remove the caliper carrier bolts - you might need to persuade them off with a breaker bar or the BFH. Mine came off easily because I'd recently overhauled the brakes. (feel free to use release oil)
IMG_20140218_114610.jpg

IMG_20140218_114746.jpg


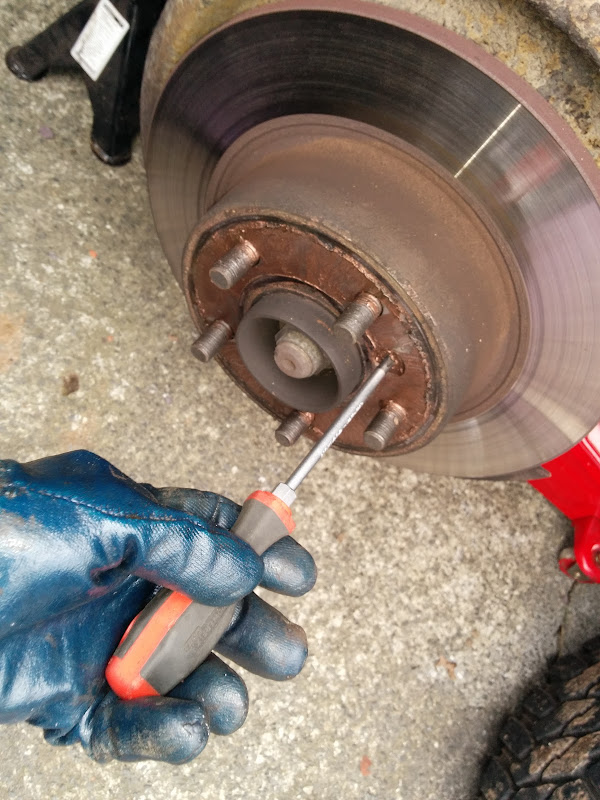
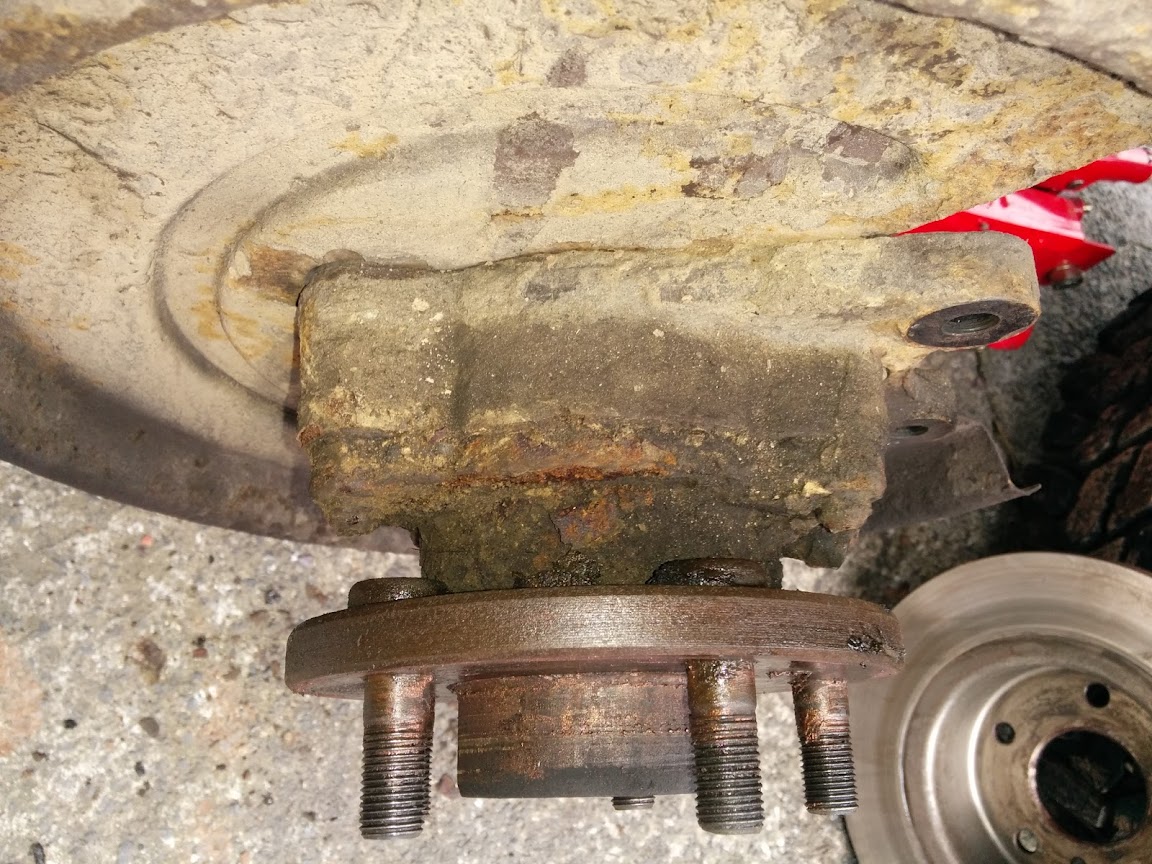
Remove the brake disk (rotor?) securing screw with a large philips/posi screwdriver, and pull the disk off - you might need to persuade it off with a mallet if it's been on a long time. (removing the break shield gives better access to do this, the hub won't spin with the handbrake on and the car in gear.
IMG_20140218_114859.jpg


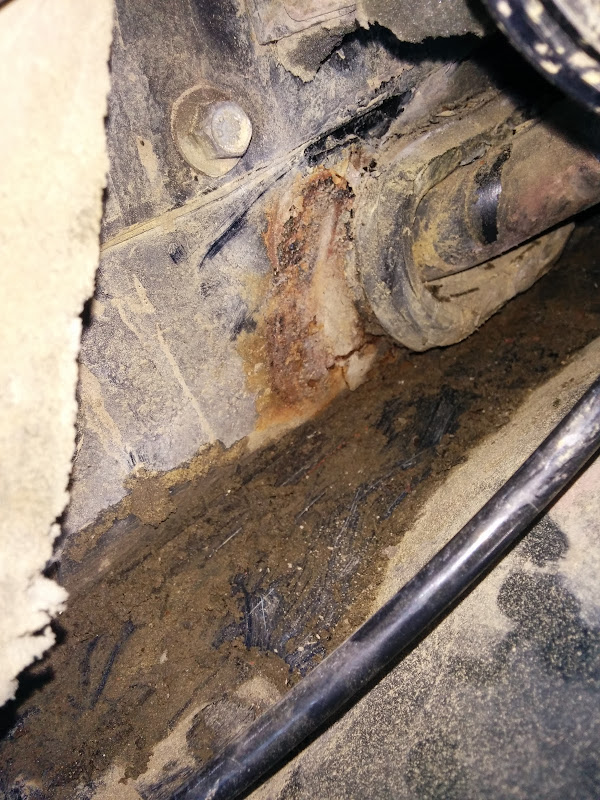
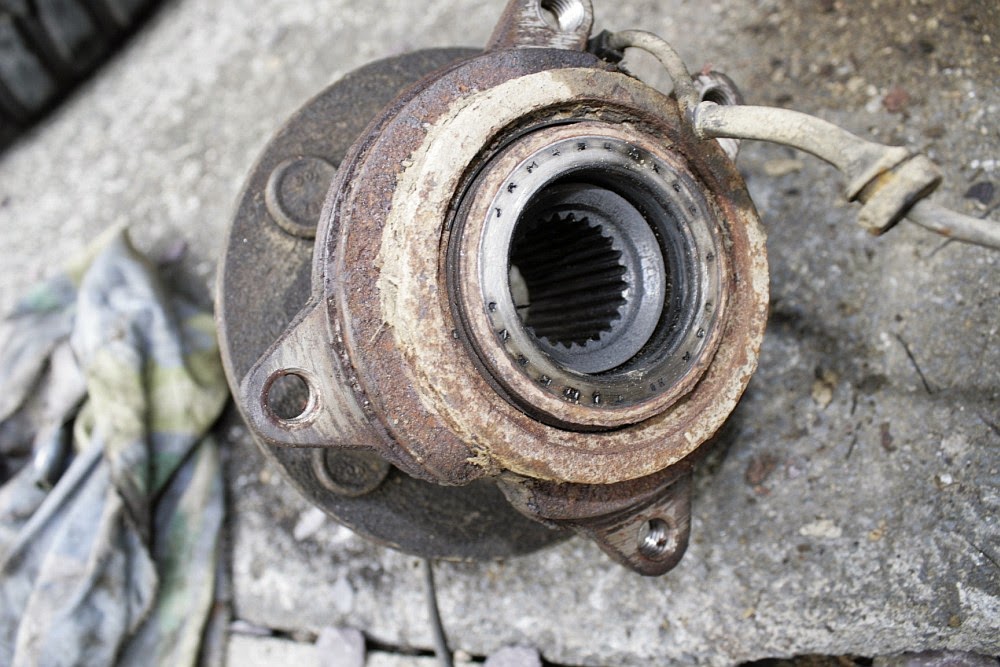
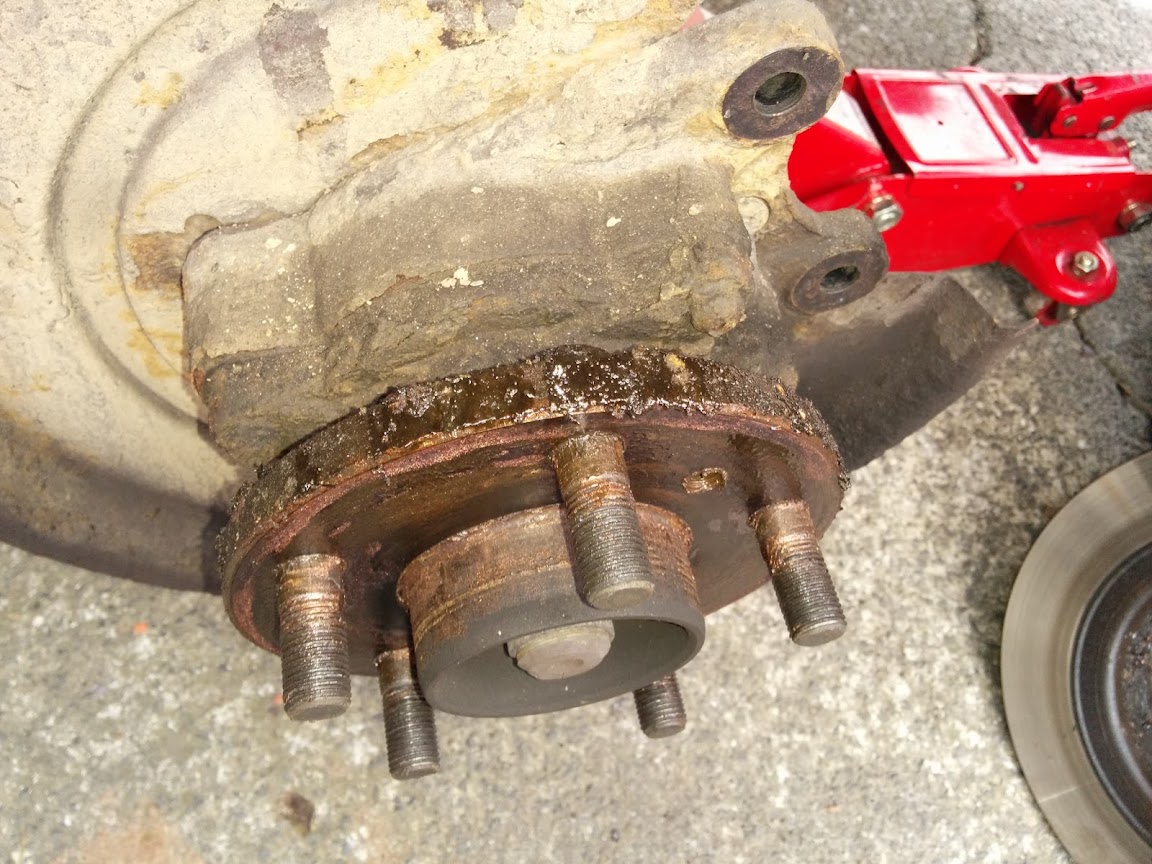
You can now clearly see the mess the oil leak has made, the hub is also looking quite corroded, at this point I'm pretty sure it's the one fitted at the factory 120K ago - rears tend to last longer since there's no additional pressure from the steering.
IMG_20140218_114945.jpg

IMG_20140218_115619.jpg


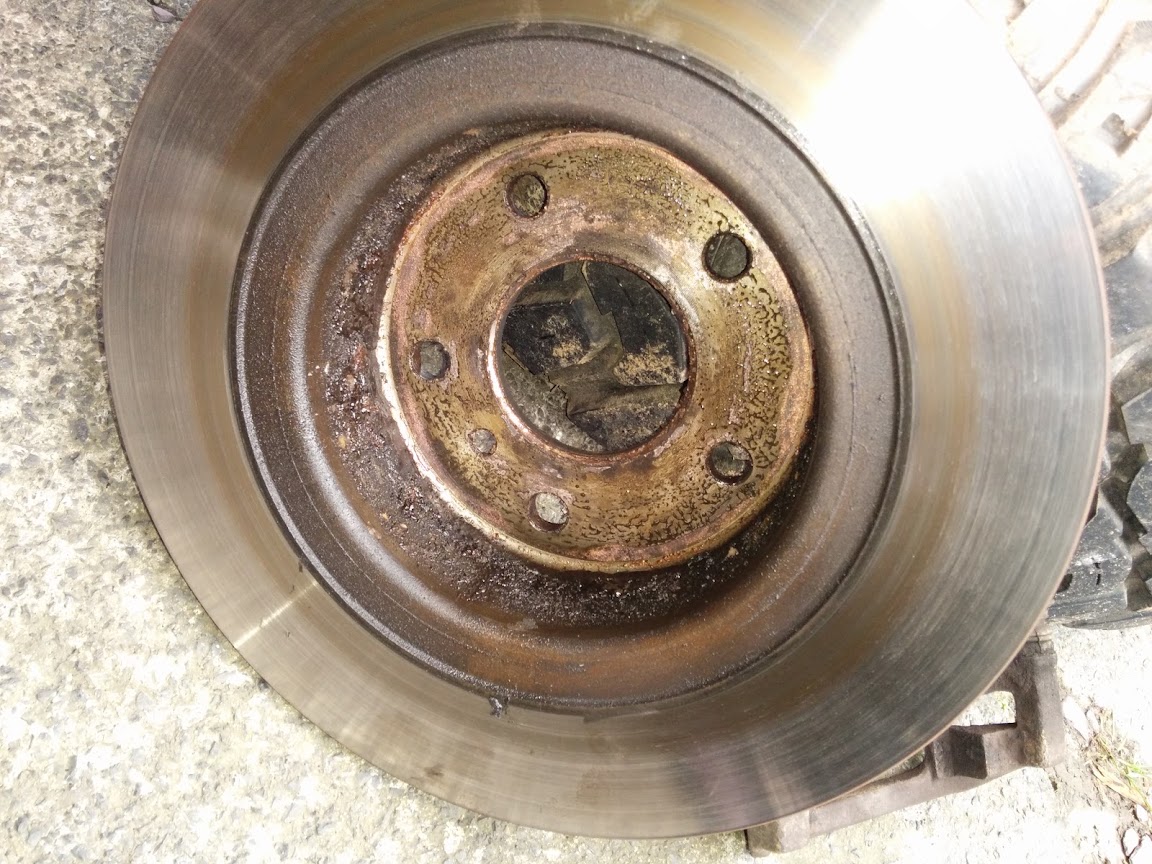
Here's the inside of the brake disk, also covered in oil
IMG_20140218_114949.jpg


Clean them up as best you can, I used brake/clutch cleaner on the disk, and a wire brush and small flat head screwdriver on the hub - pay particular attention to the ends of the hub securing bolts, the cleaner these are the easier they will extract
IMG_20140218_115526.jpg


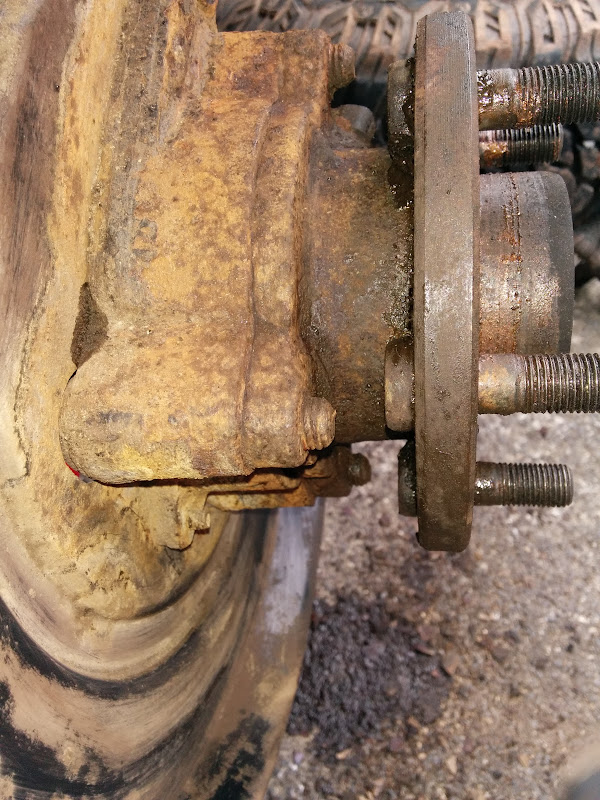
Most of the nasty rust removed from the hub
IMG_20140218_120145.jpg


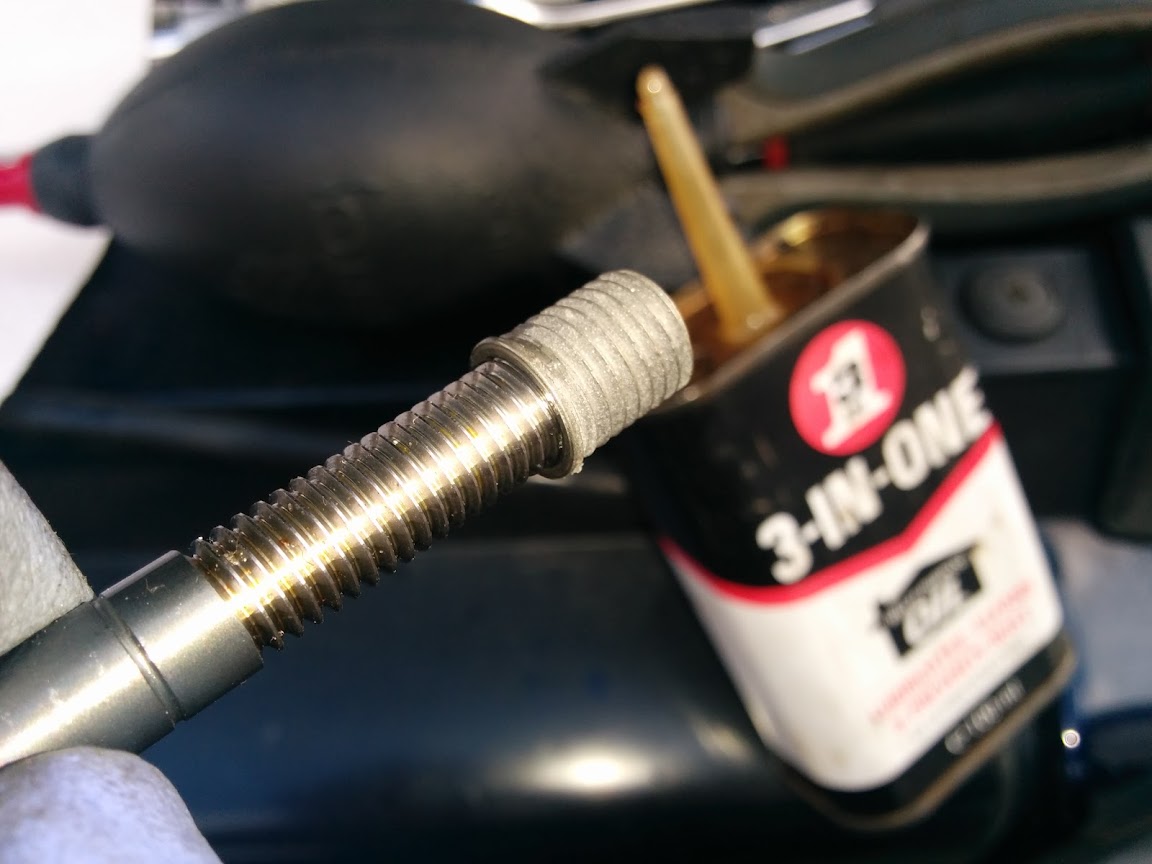
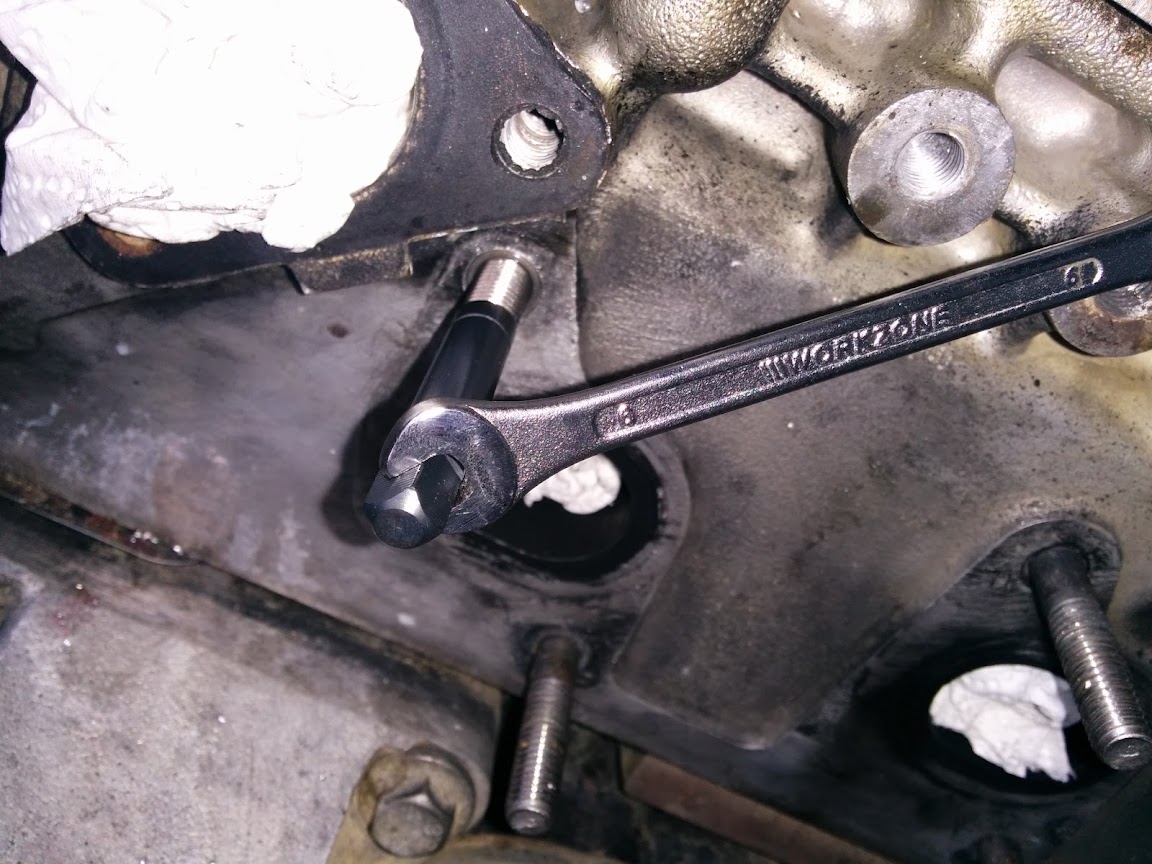
Now give the bolts ends the good news with some release oil and set about getting them off - I used a BFH to break them off, be careful if you are doing this since you might break your ratchet - it's not really possible to get a breaker bar in to them. It's VERY important to use a 6 sided socket here, you will easily round these old nuts off if you use a 12 sided one, you have been warned!
IMG_20140218_120556.jpg


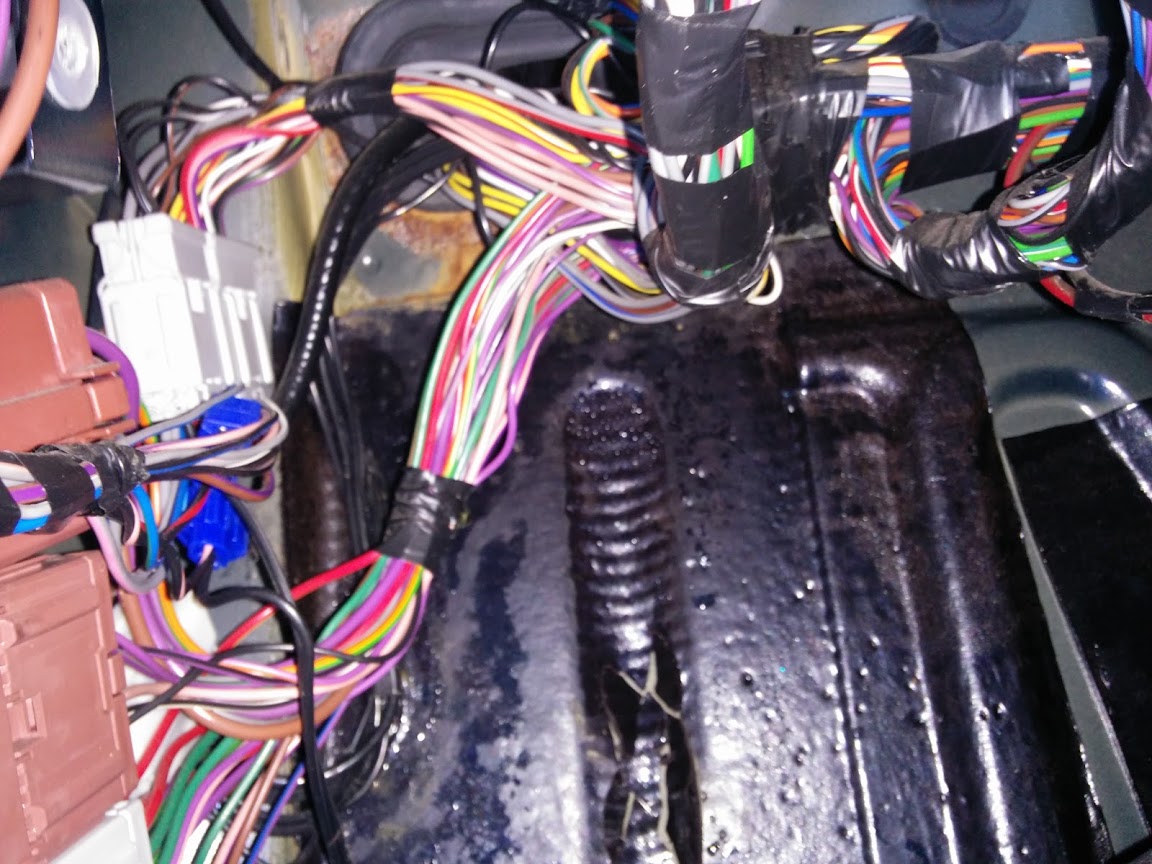
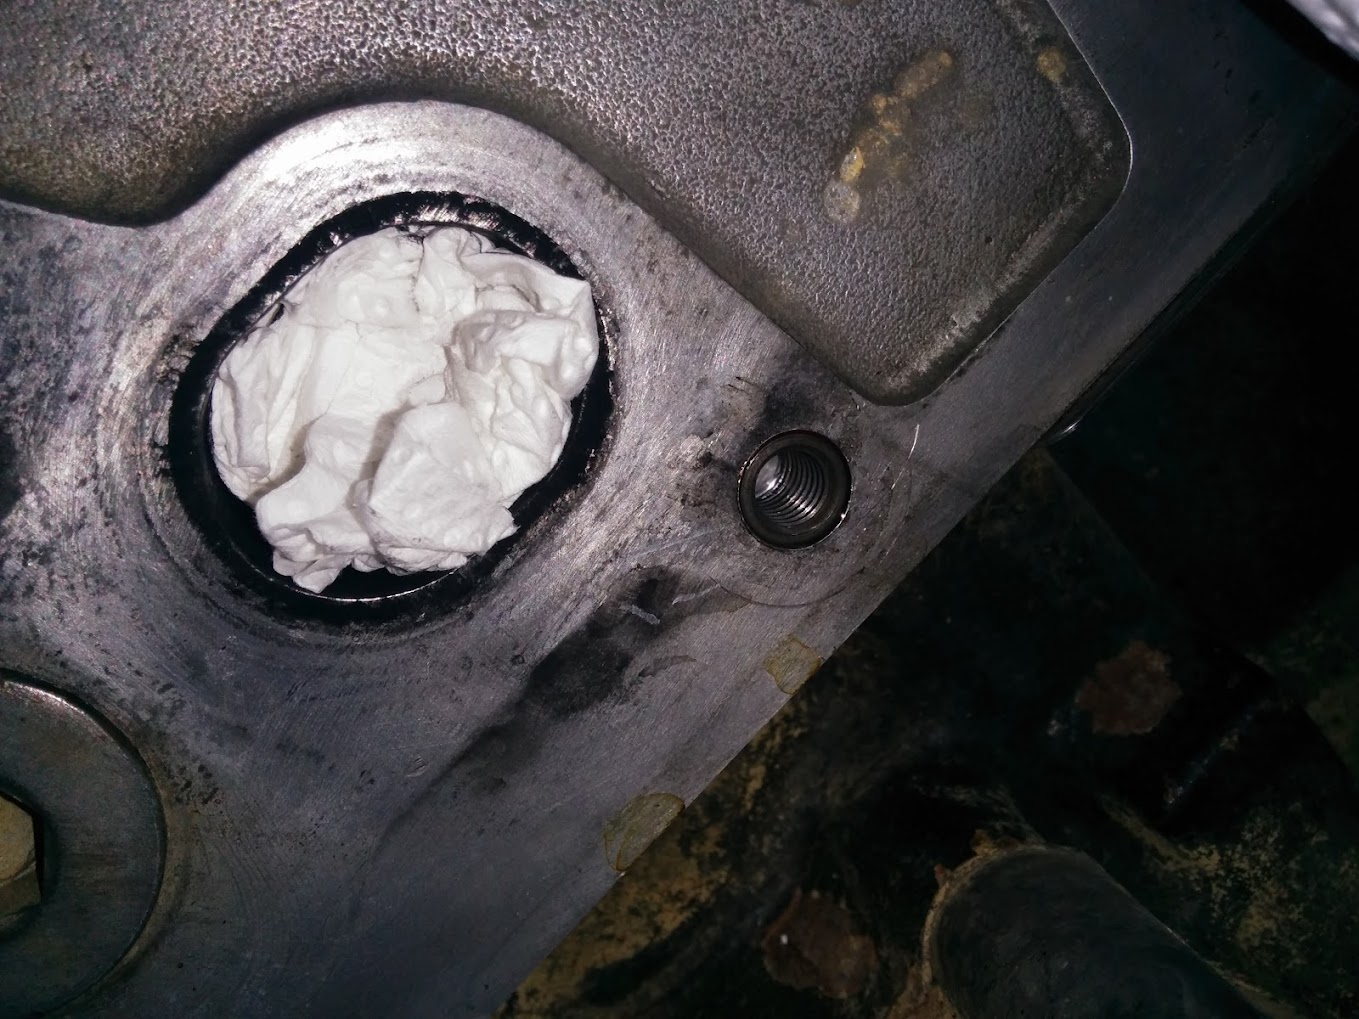
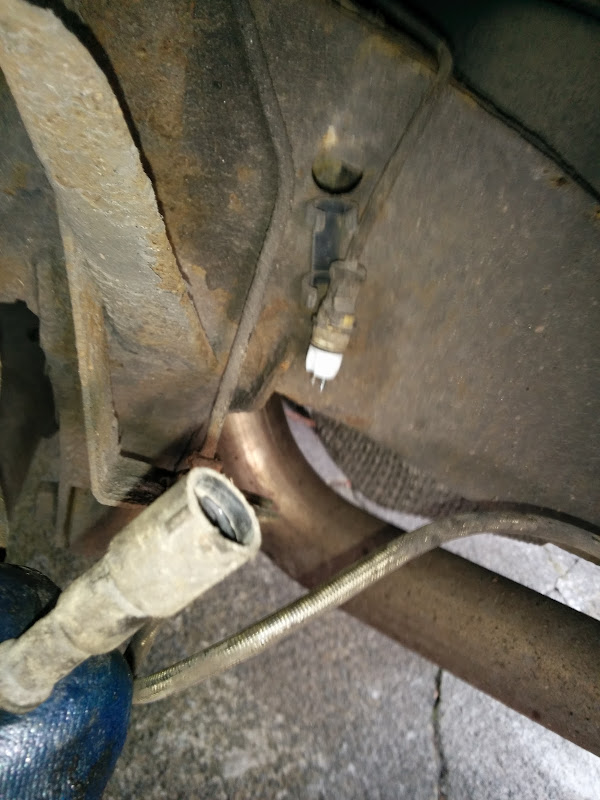
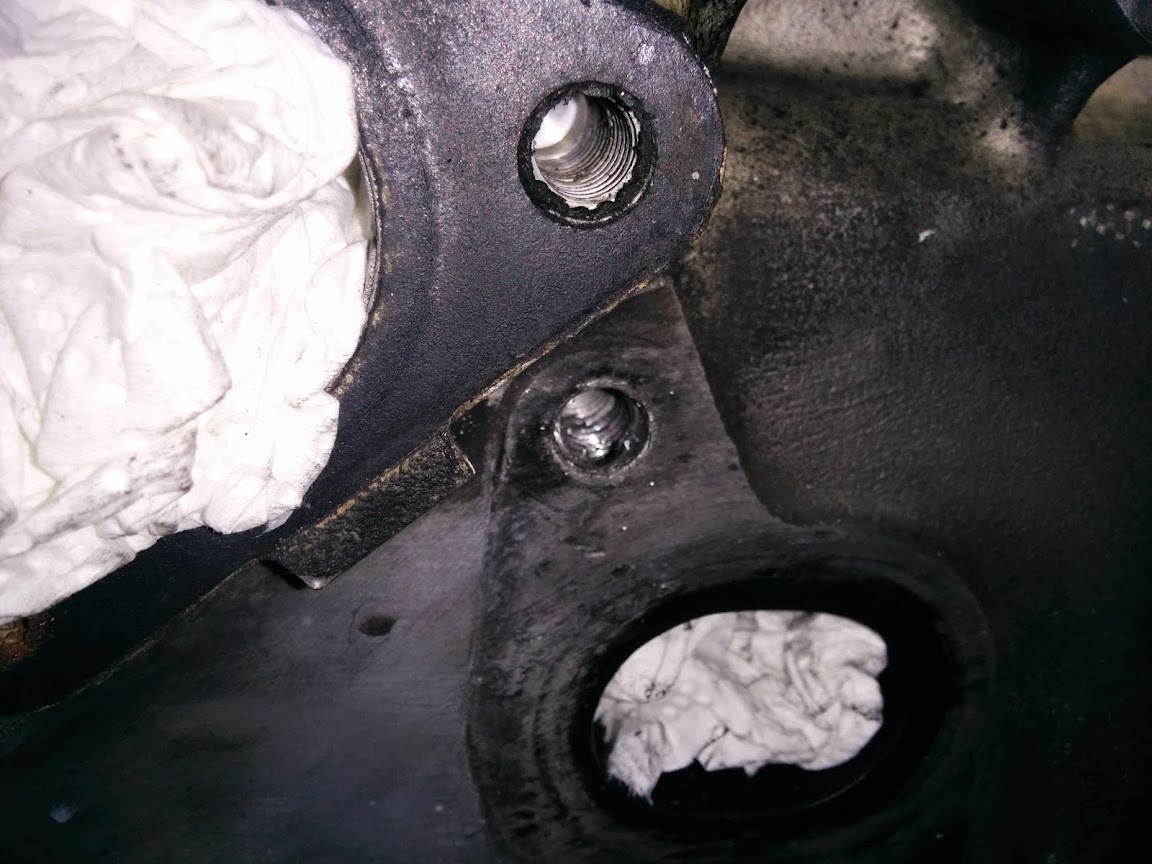
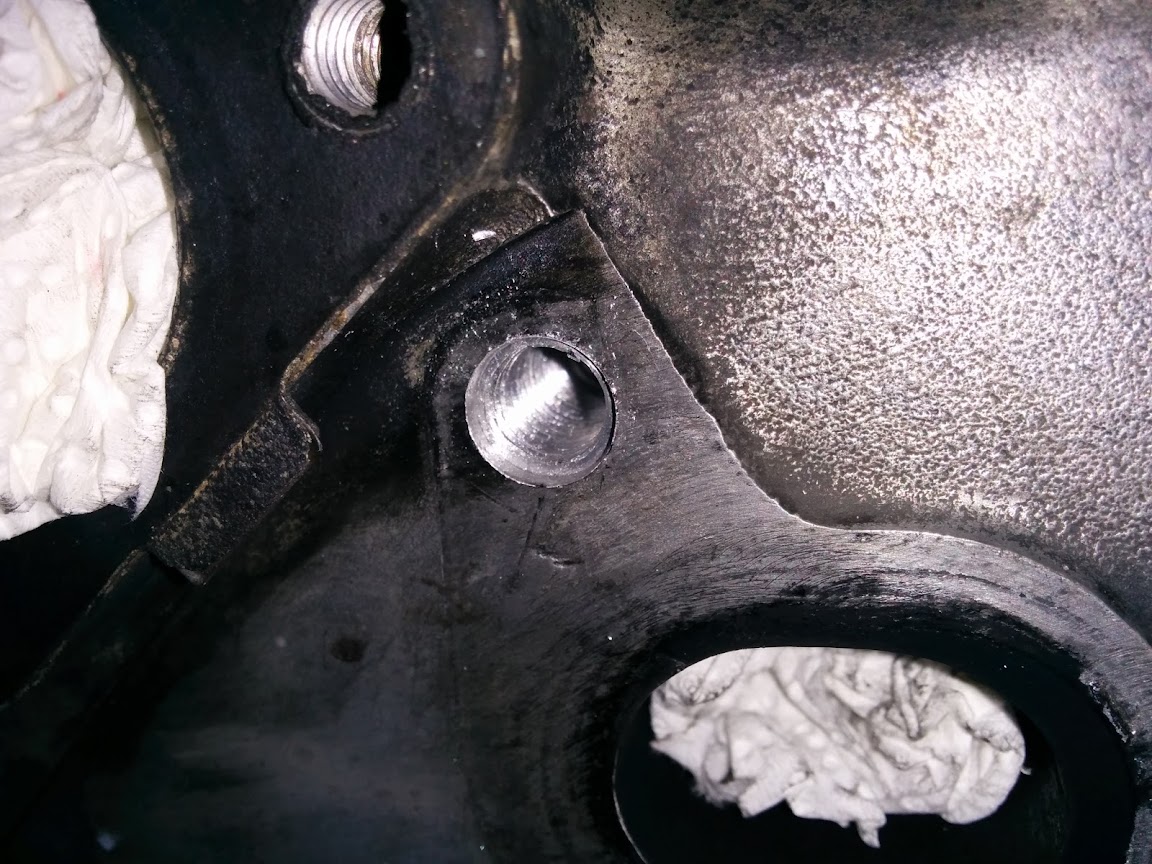
Once the bolts are out (they might put up a good fight, one of mine was BFH'd the whole way out!), disconnect the ABS sensor from the loom and feed it through the hole on the axle tube:
IMG_20140218_121815.jpg


Now comes the hard part, you have to break the hub off the axle, if like mine yours has been on for 14 years it will be well and truly welded in place.

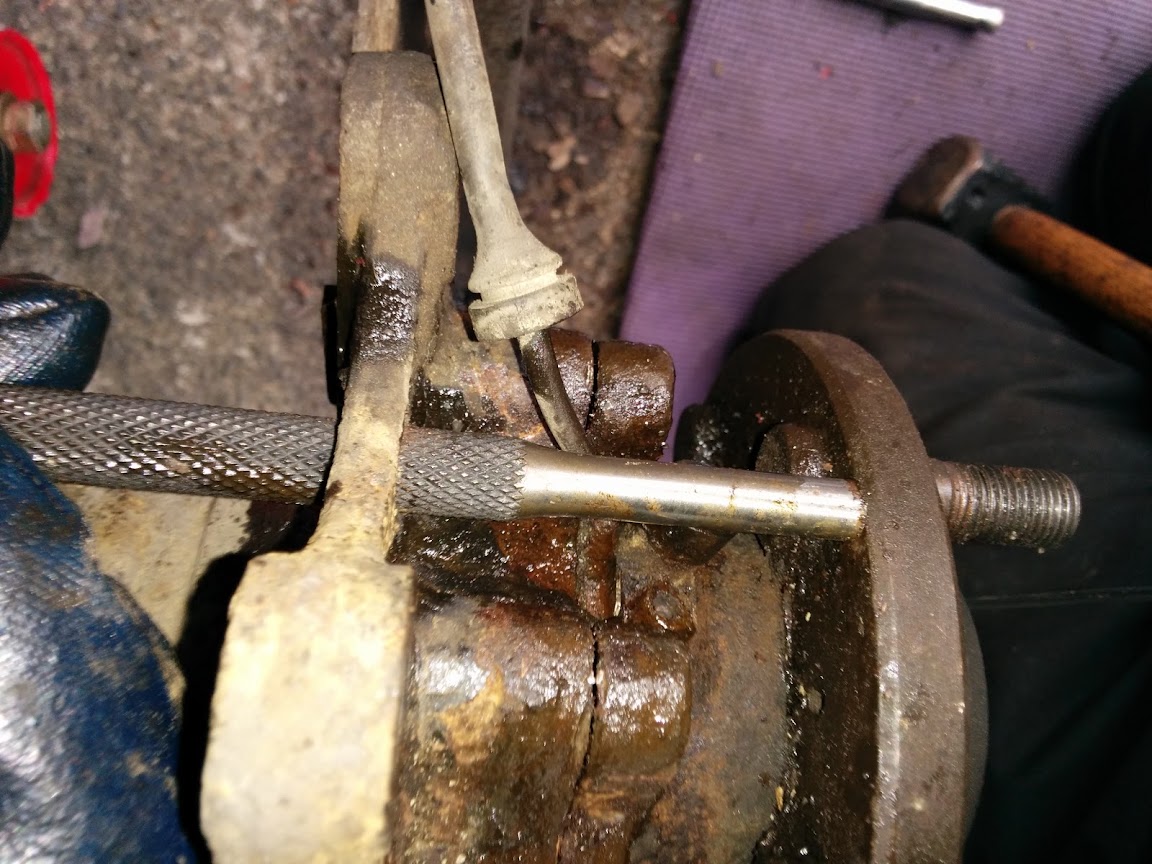
You can get a large punch through the ABS sensor wire hole and belt it against the hub from the rear:
IMG_20140218_122805.jpg


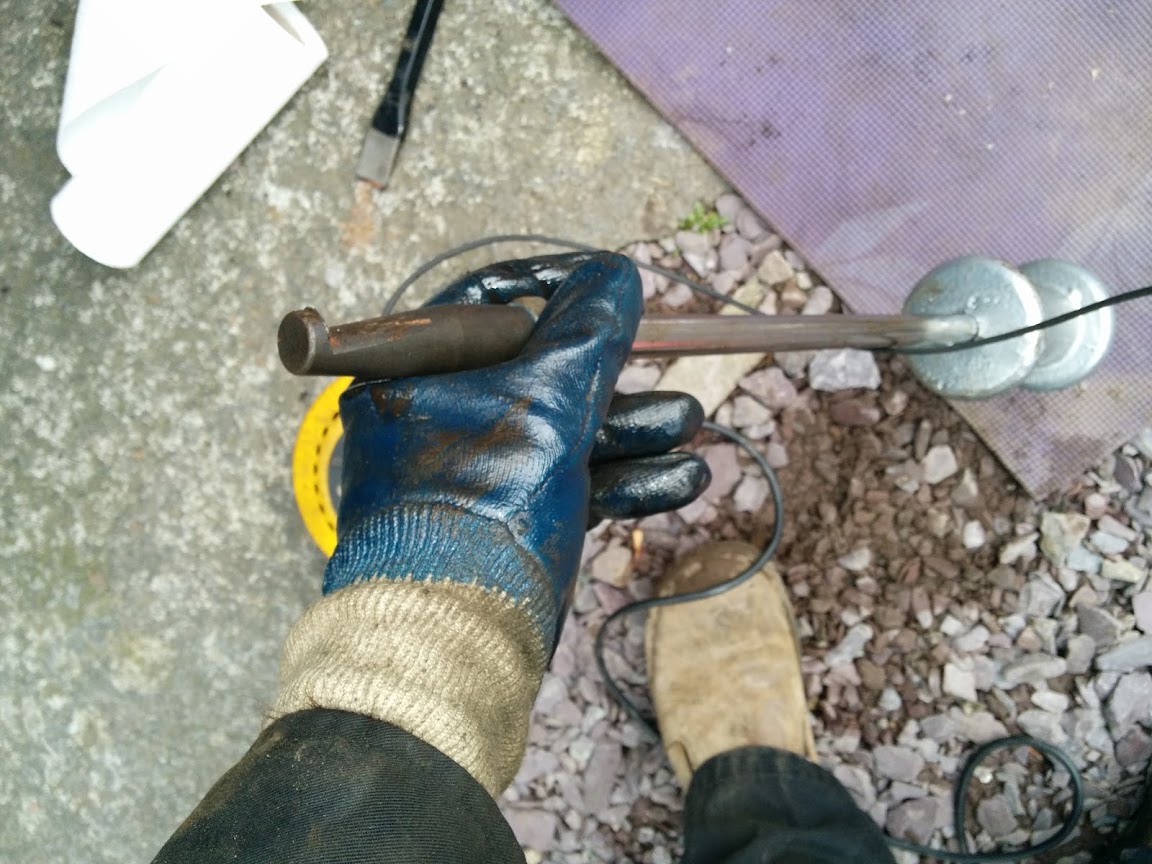
Or if you have access to one, you can use a slide hammer with a lipped attchment to pull against the hub
IMG_20140218_123335.jpg


The slide hammer is by far the fastest method, you just move it around the circumference of the hub front whilst hammering to slowly ease the rear of the hub assembly out of the axle tube. Another method is to hammer a sharp drift into the joint - this can be messy and do damage to the mating faces.

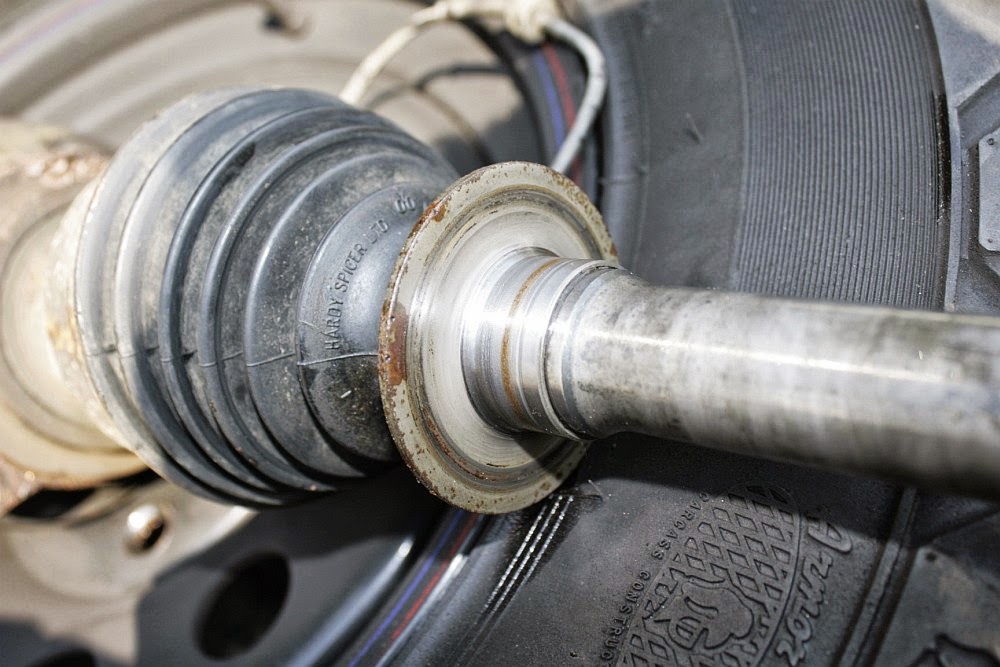
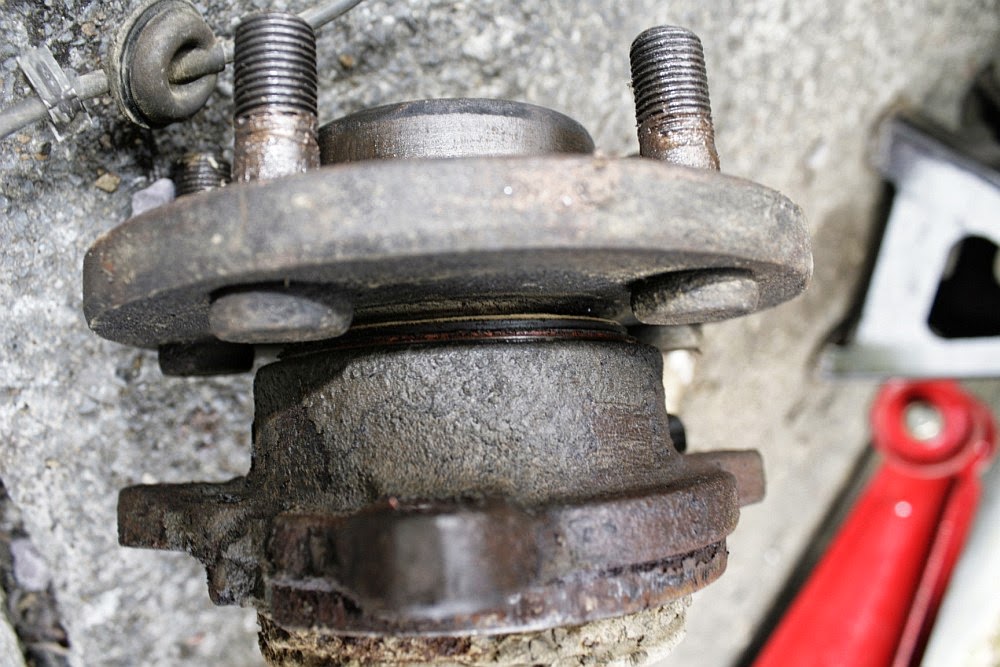
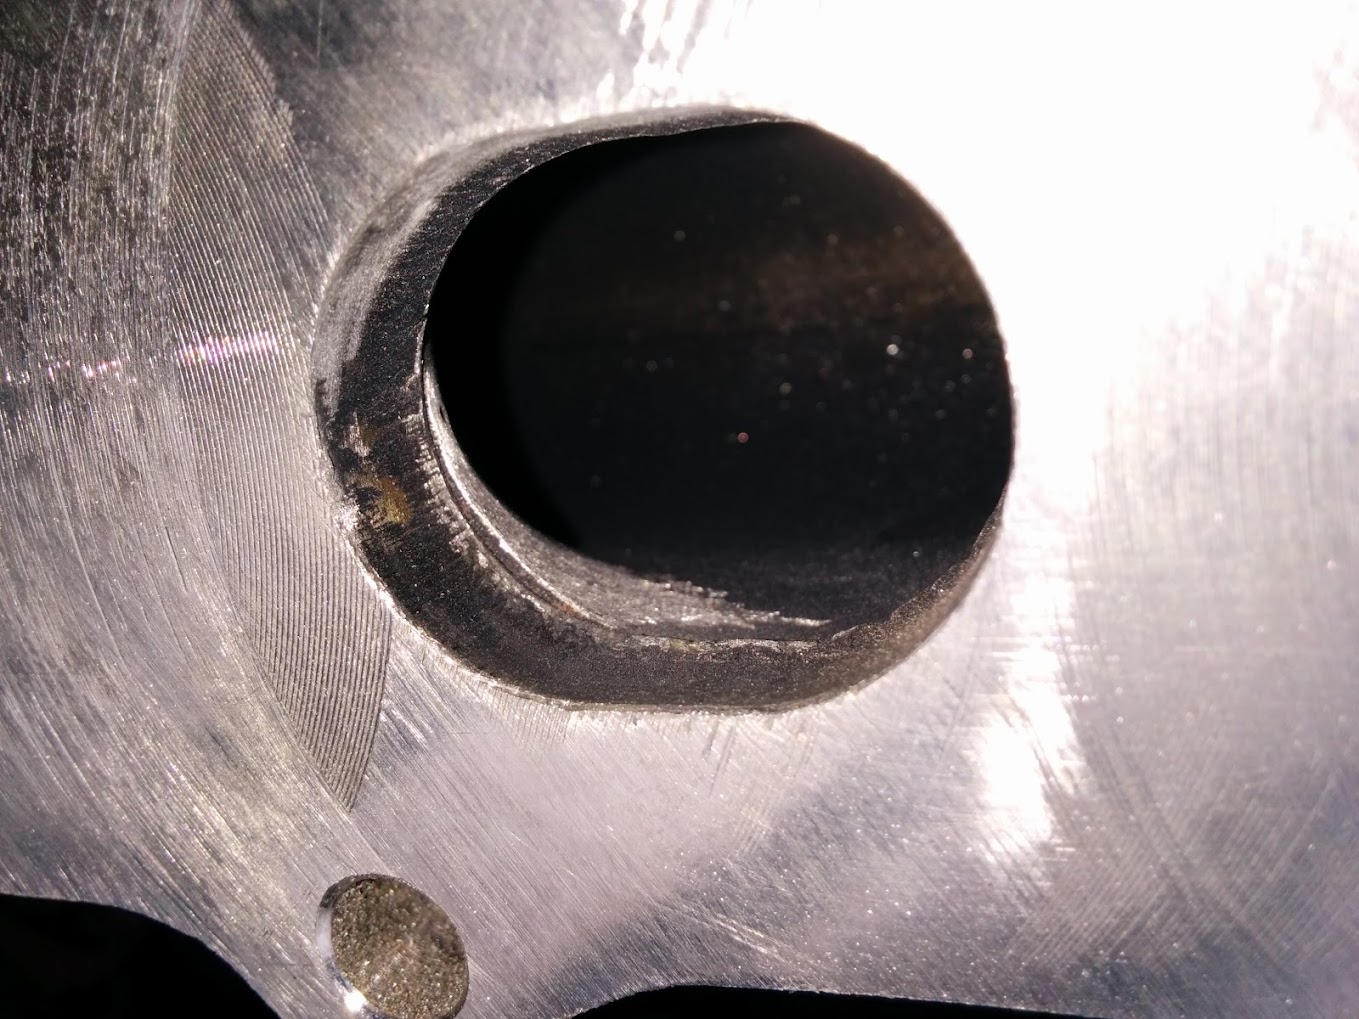
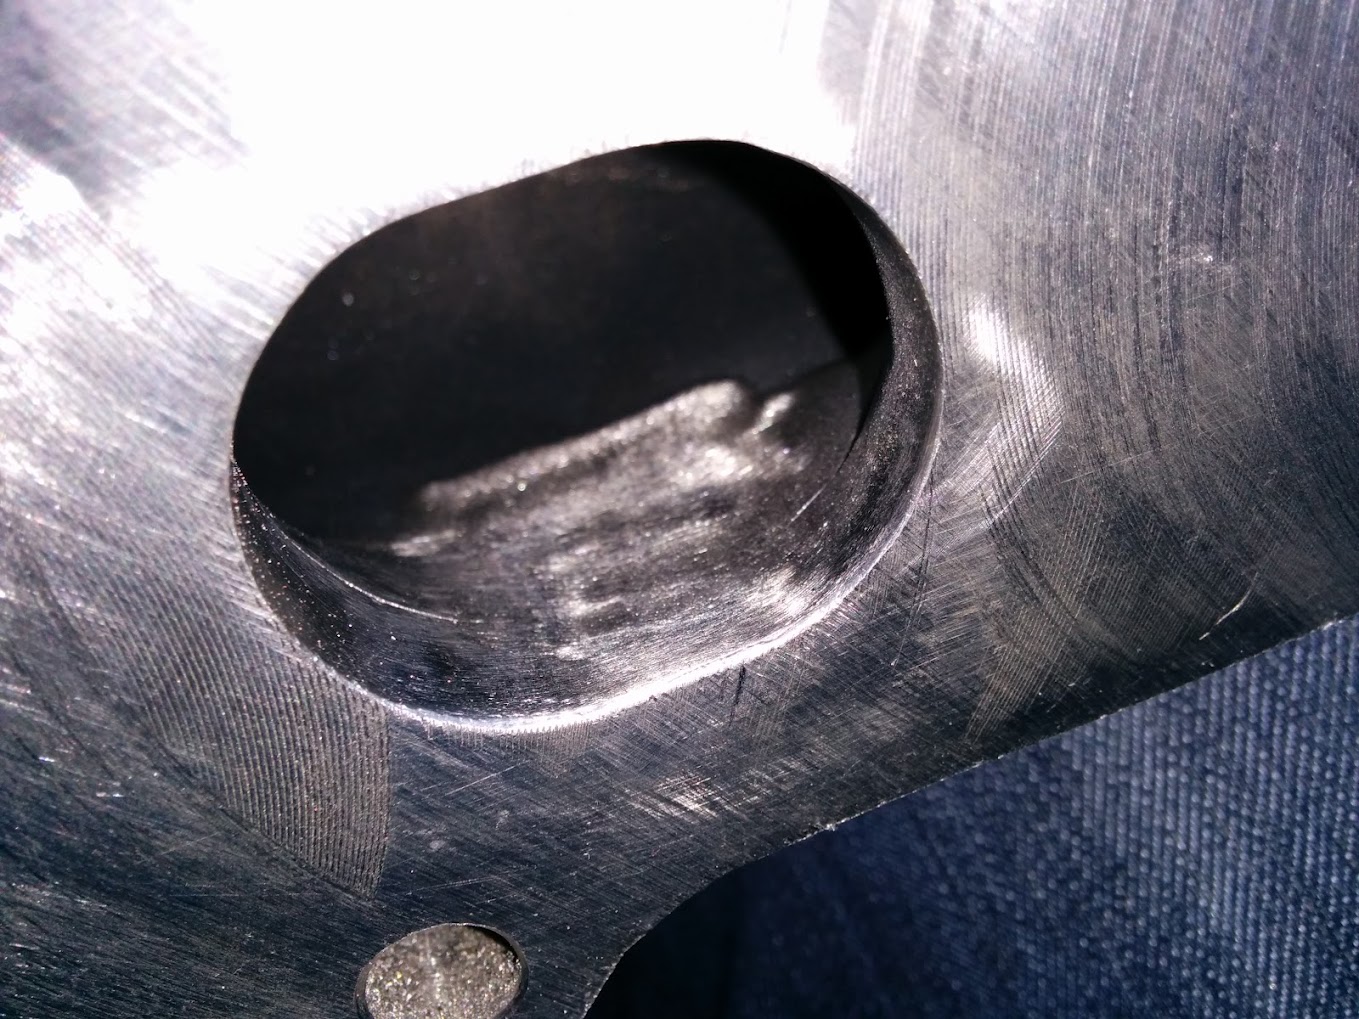
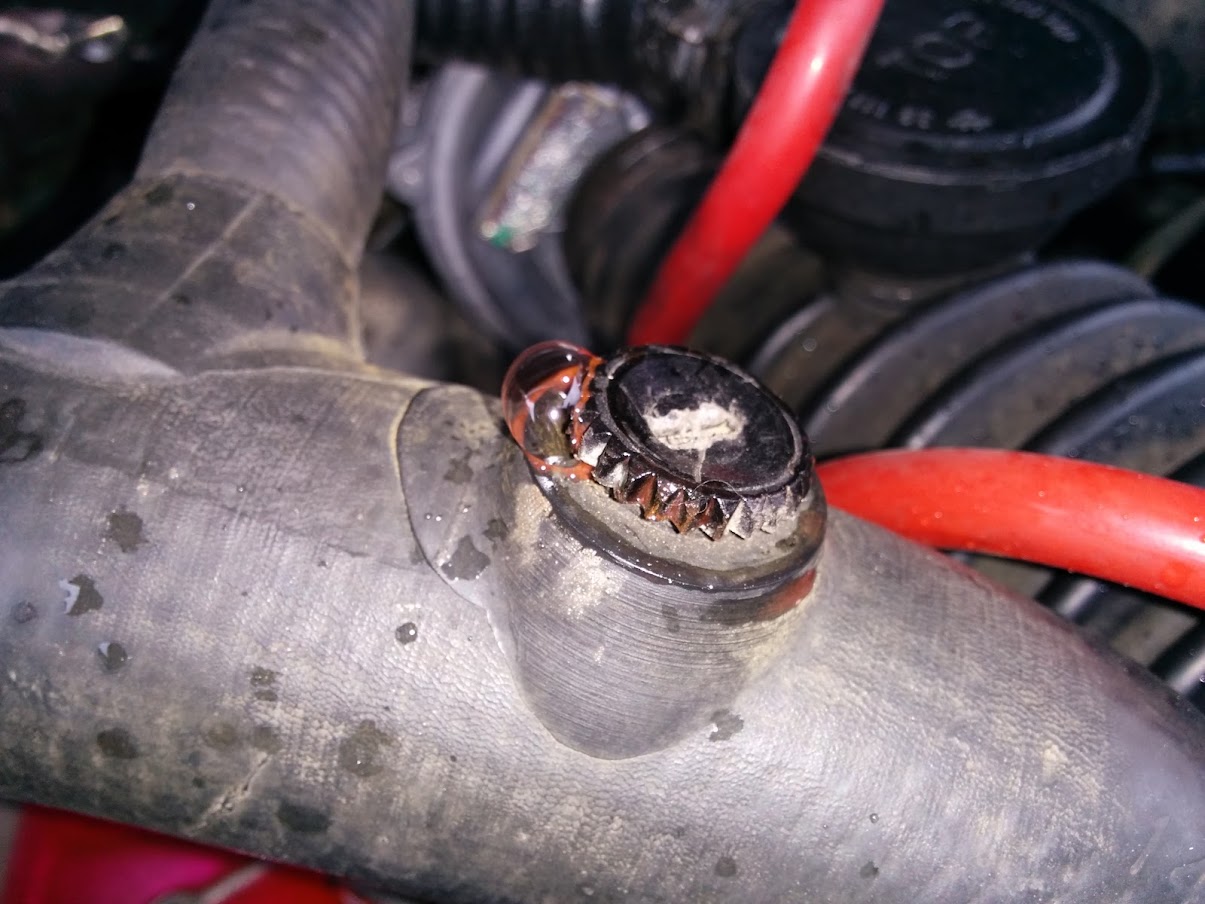
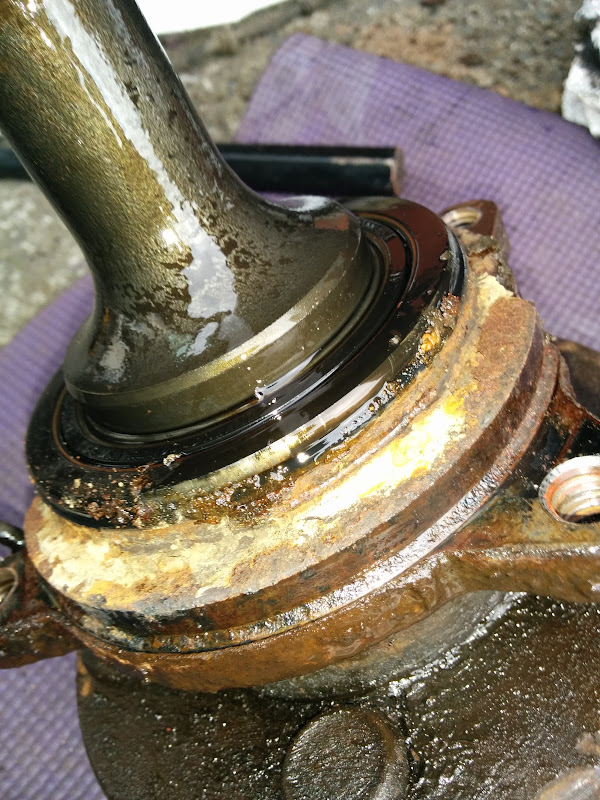
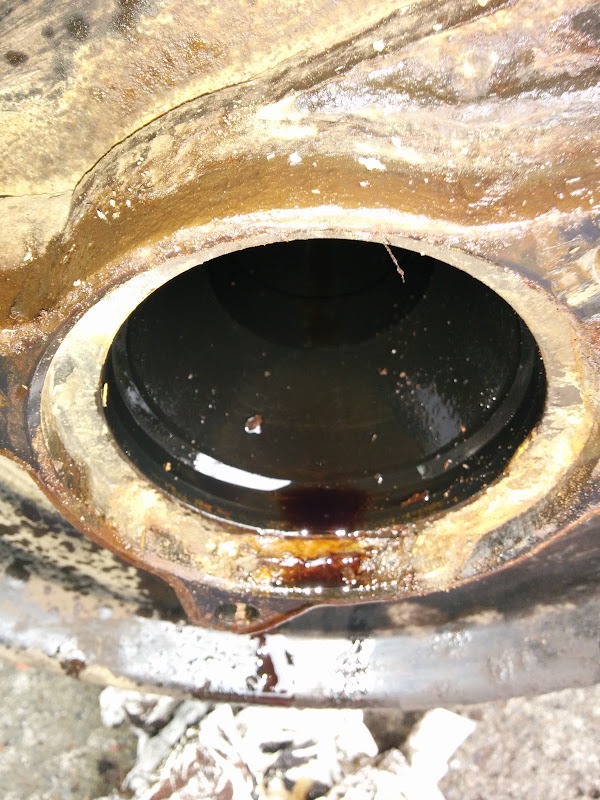
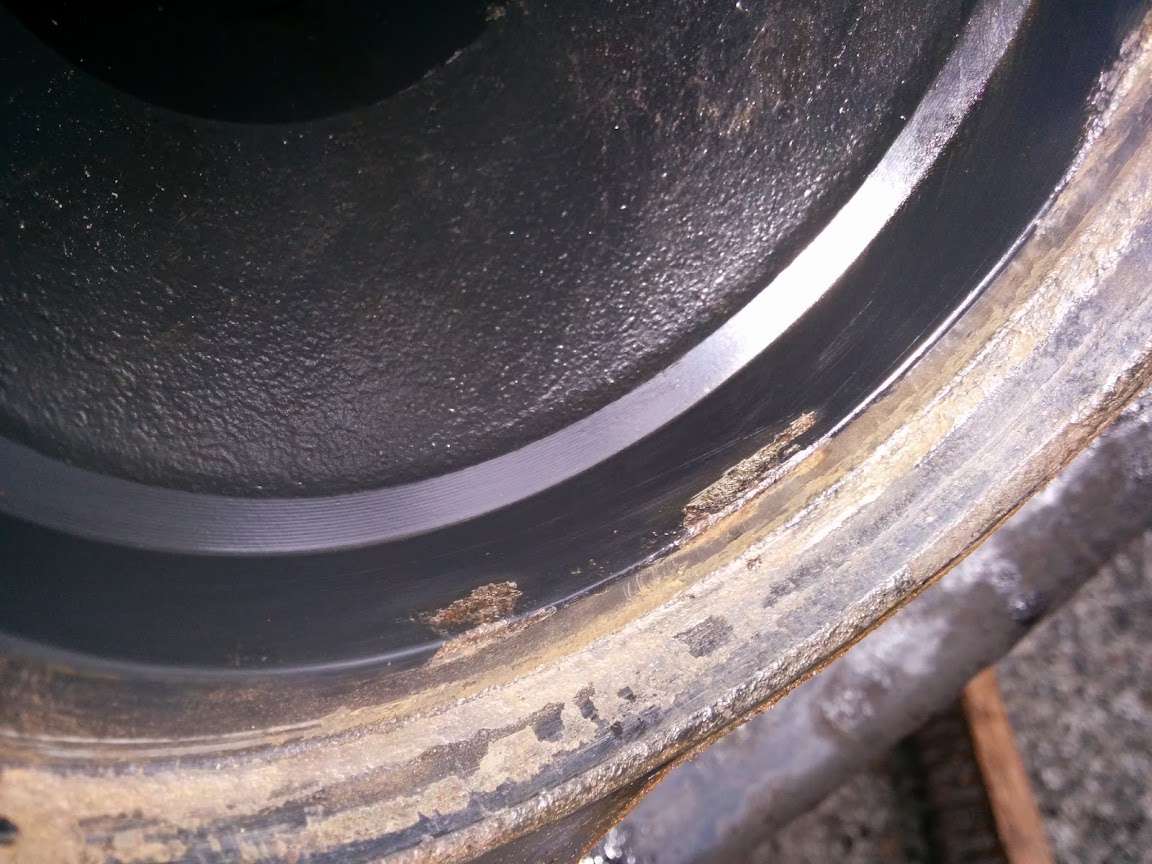
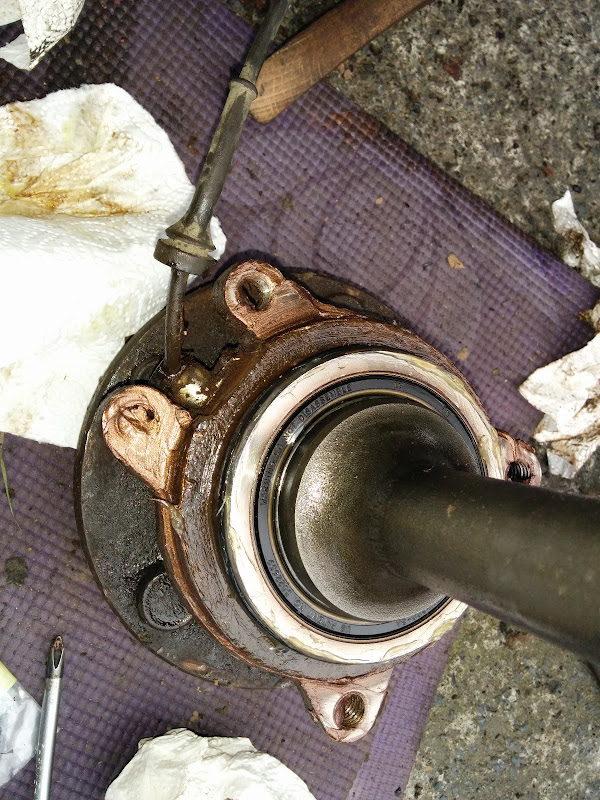
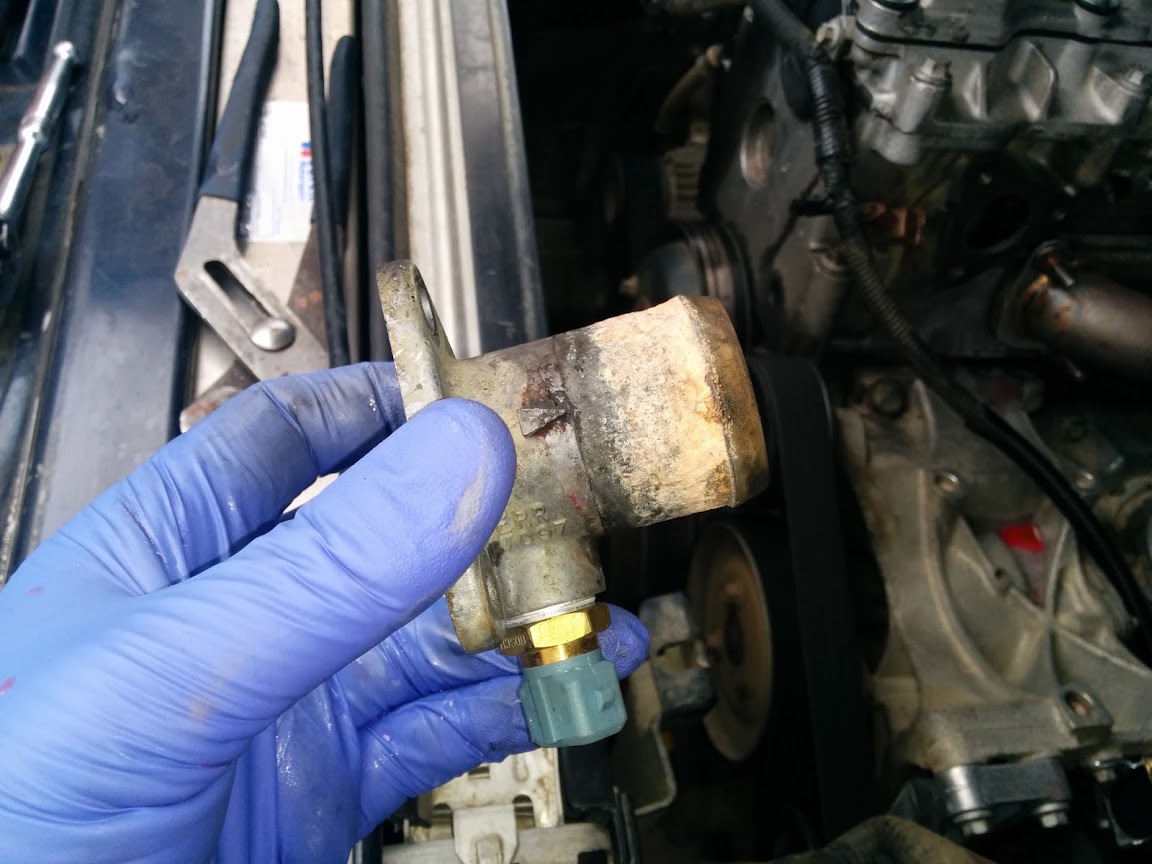
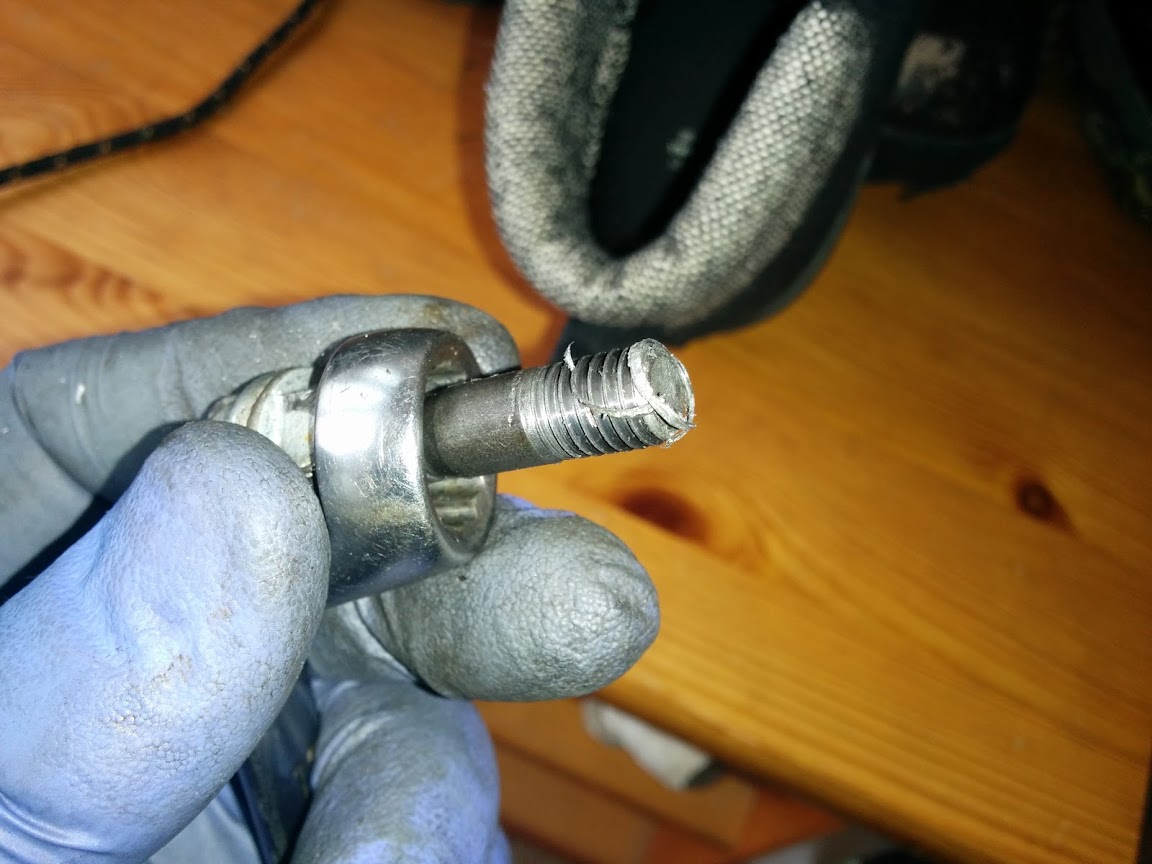
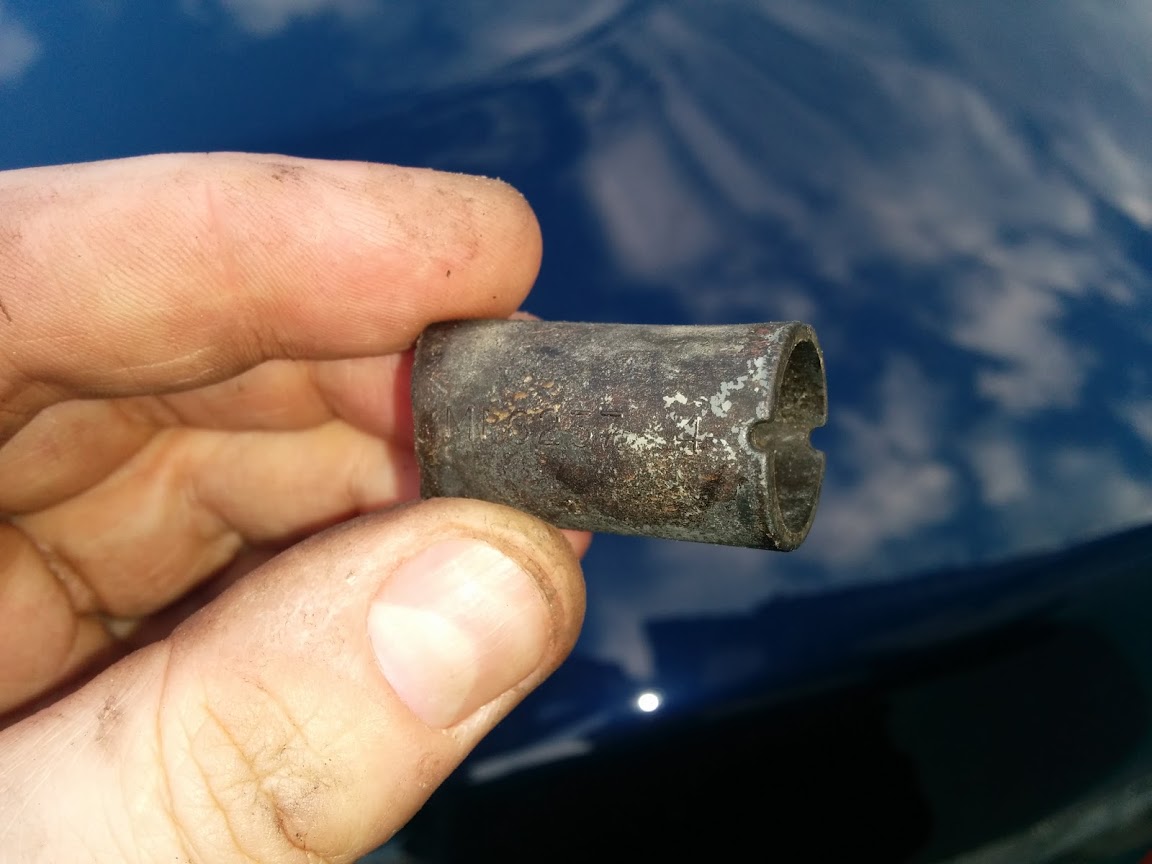
Once the hub is cracked off and levered out with a pry bar, you can extract the entire hub and half shaft from the tube. You can clearly see where mine has been leaking due to a thick rime of corrosion over the sealing o-ring
IMG_20140218_123352.jpg


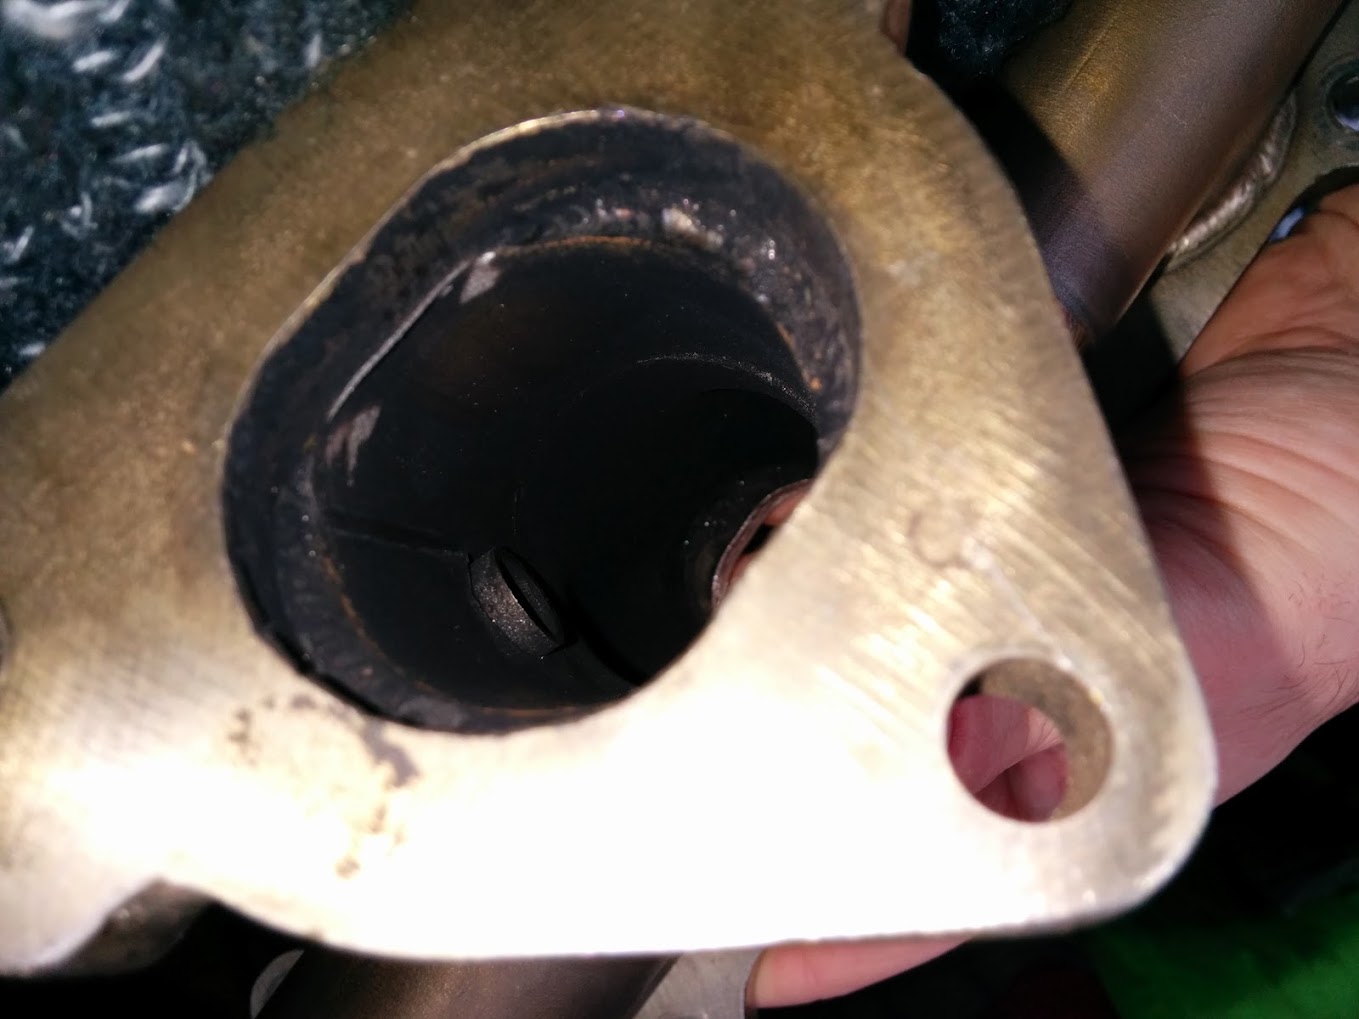
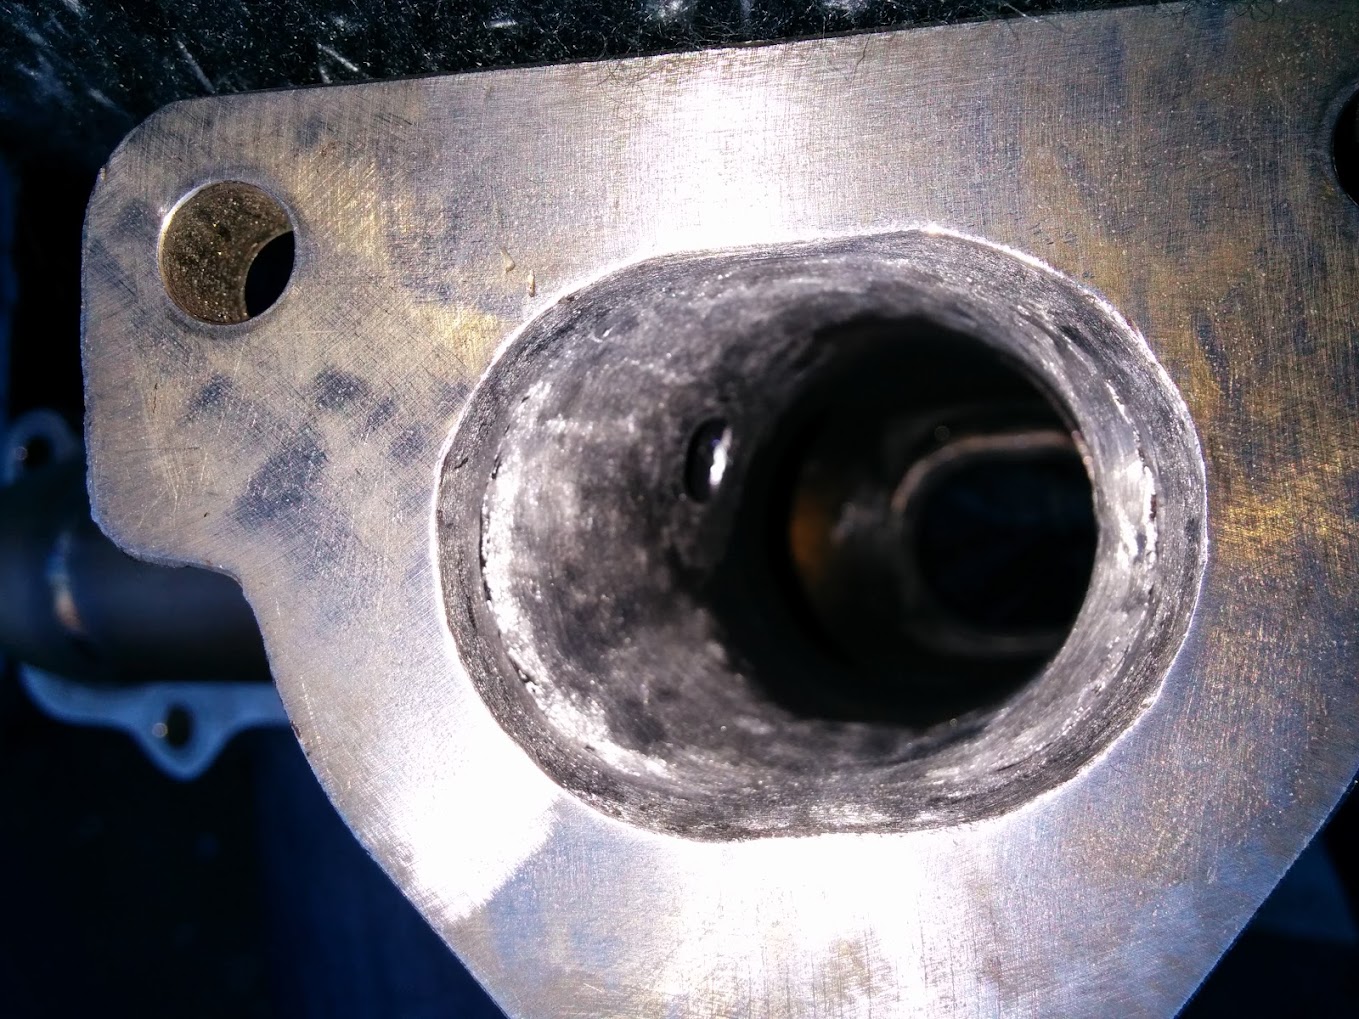
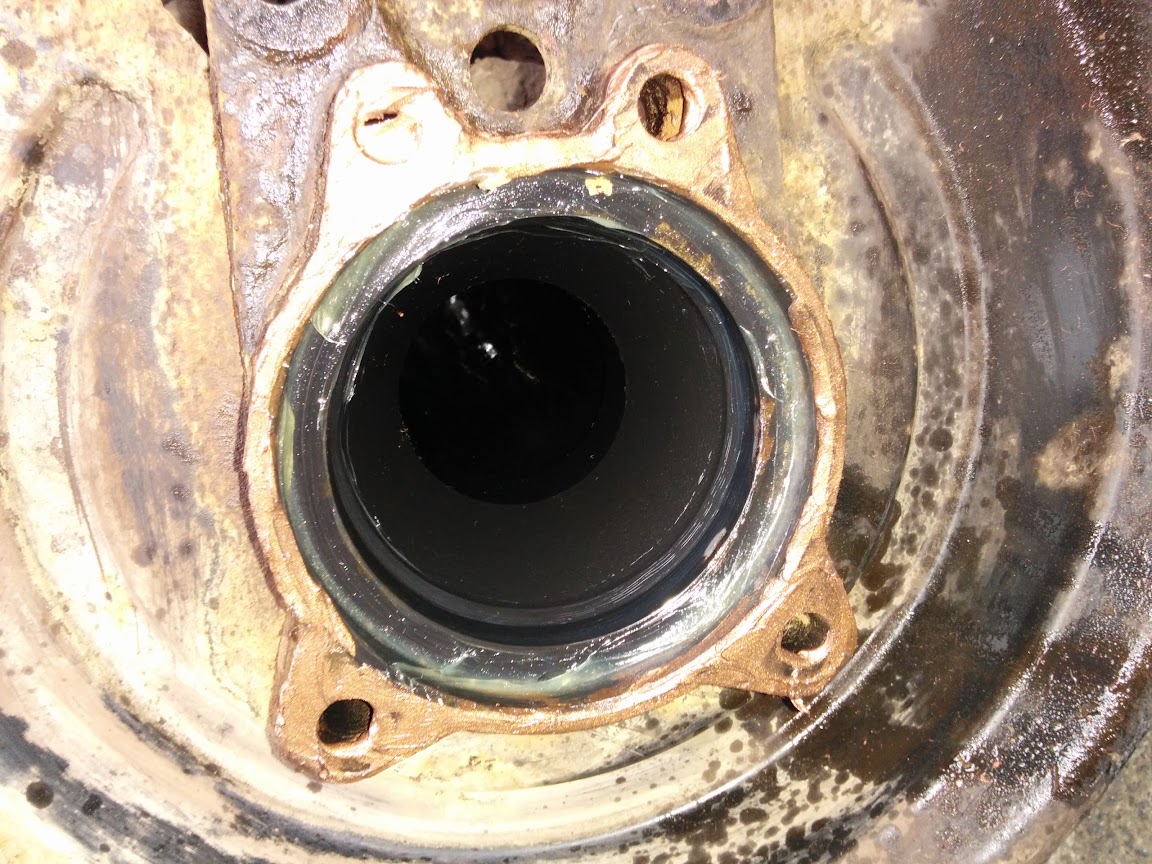
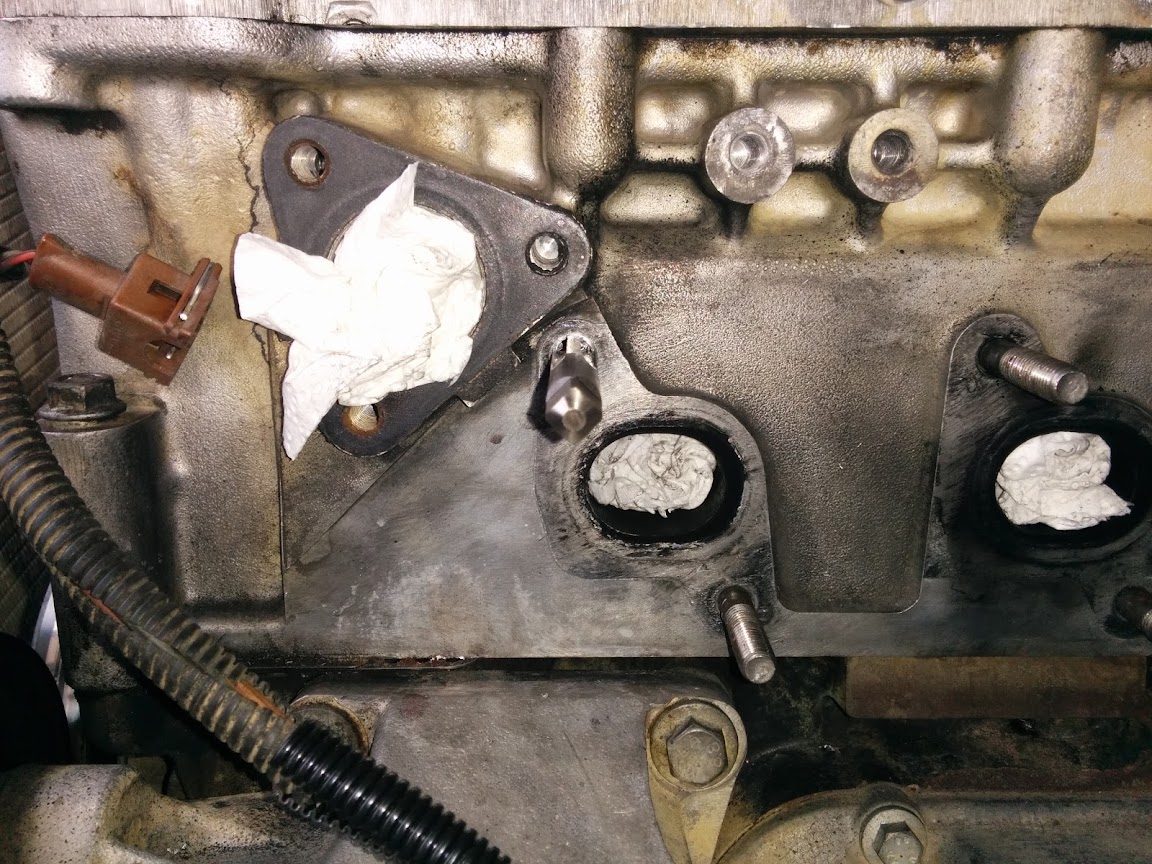
And the corresponding corrosion on the tube
IMG_20140218_123400.jpg


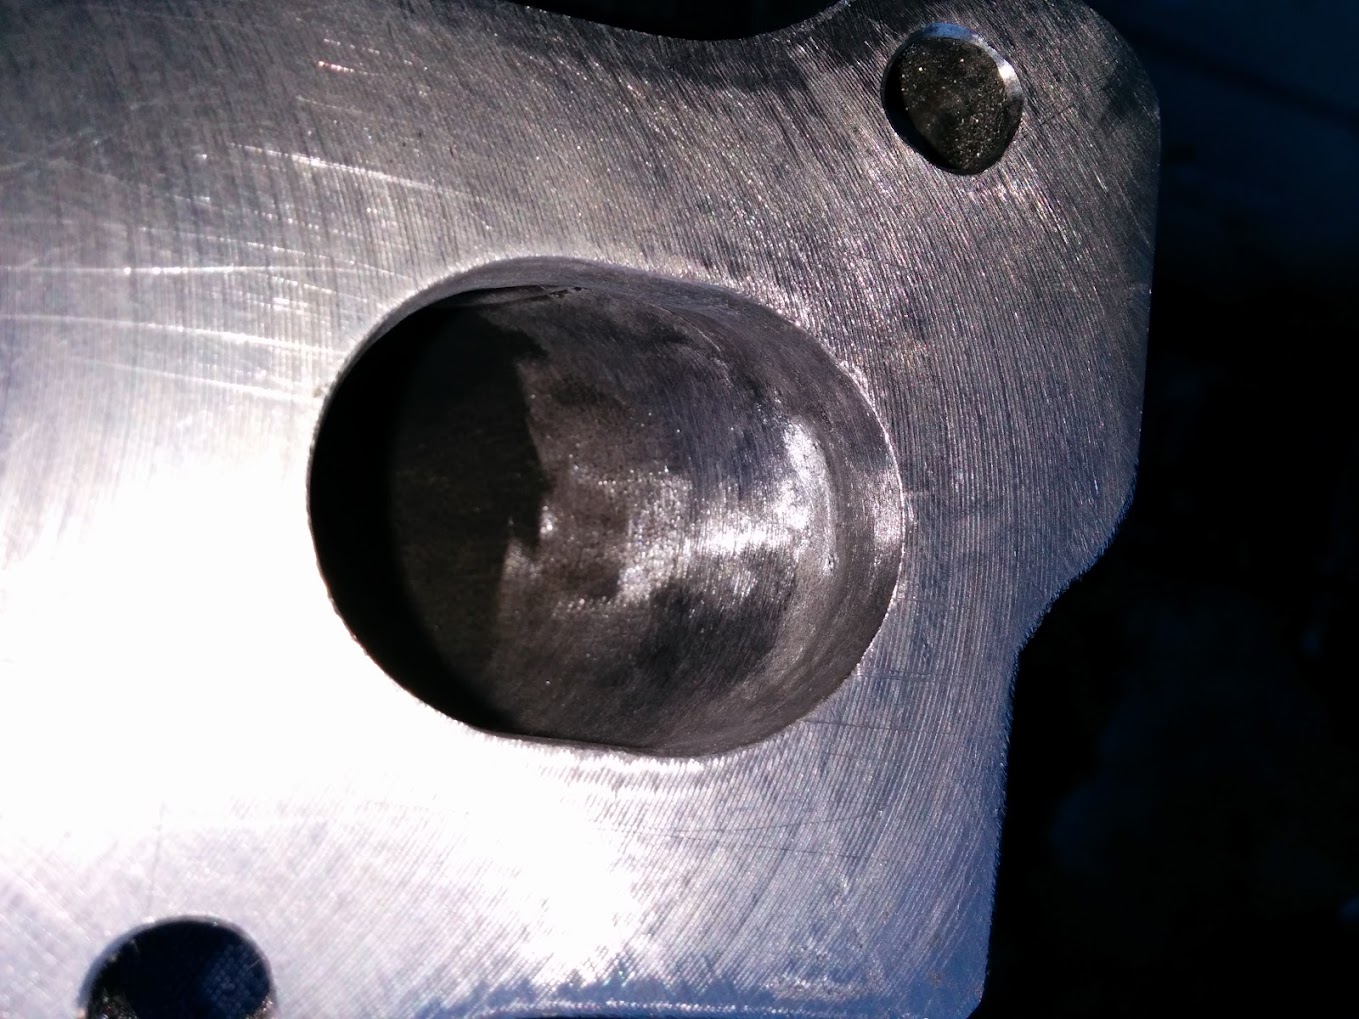
Set to the corrosion with appropriate tools to clean it off, I used a wire brush, small screwdriver, kitchen roll, and some scotchbrite. You can see where some of the axle tube has bubbled, I used a small wire wheel on a dremel to polish this down
IMG_20140218_125210.jpg


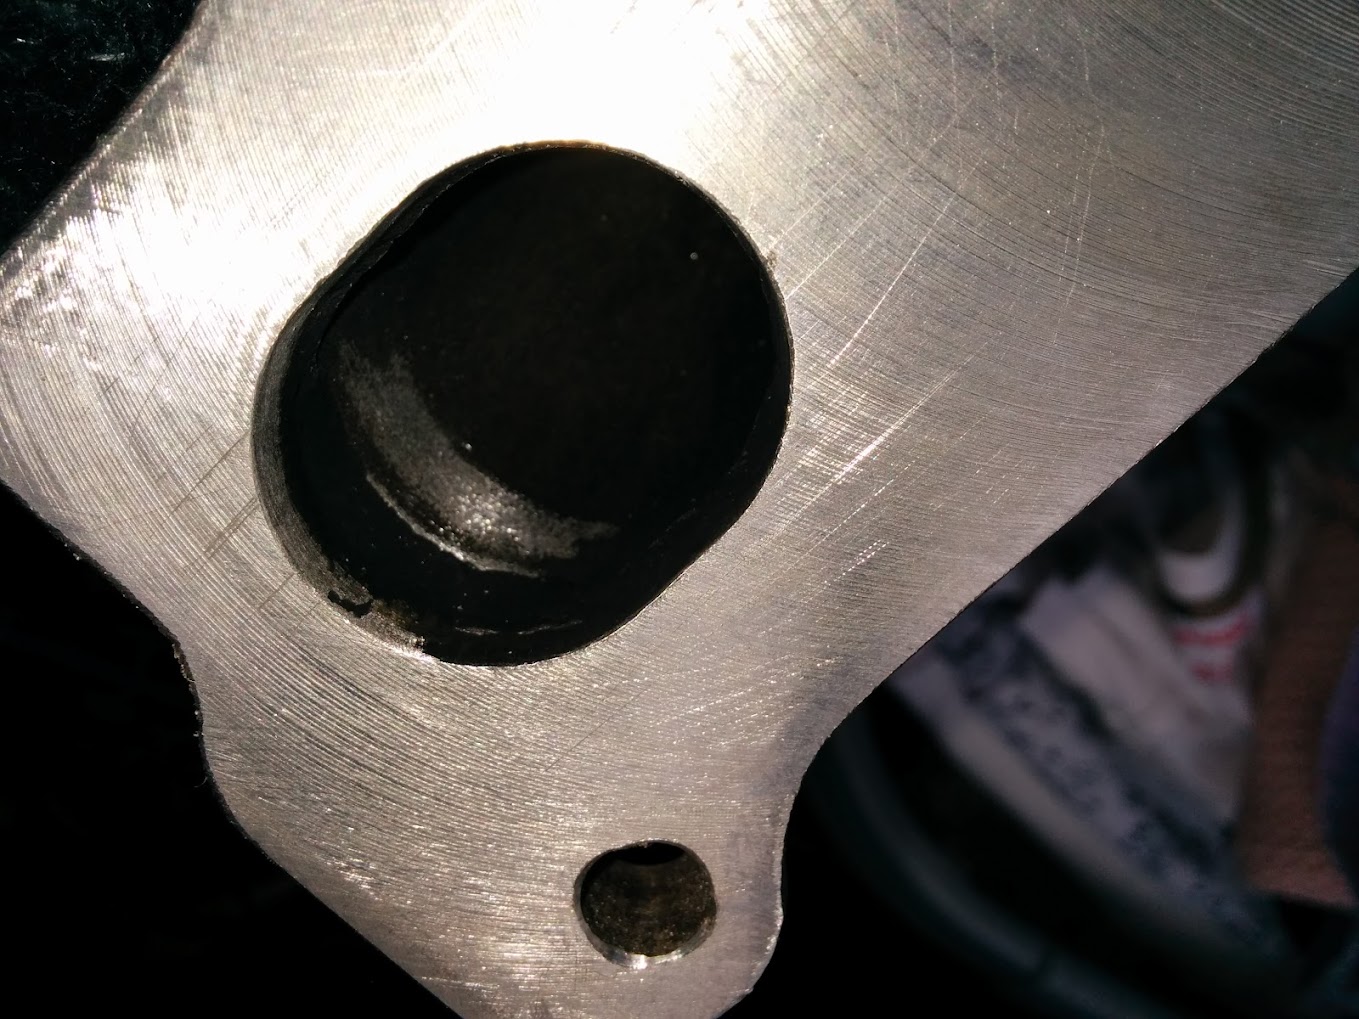
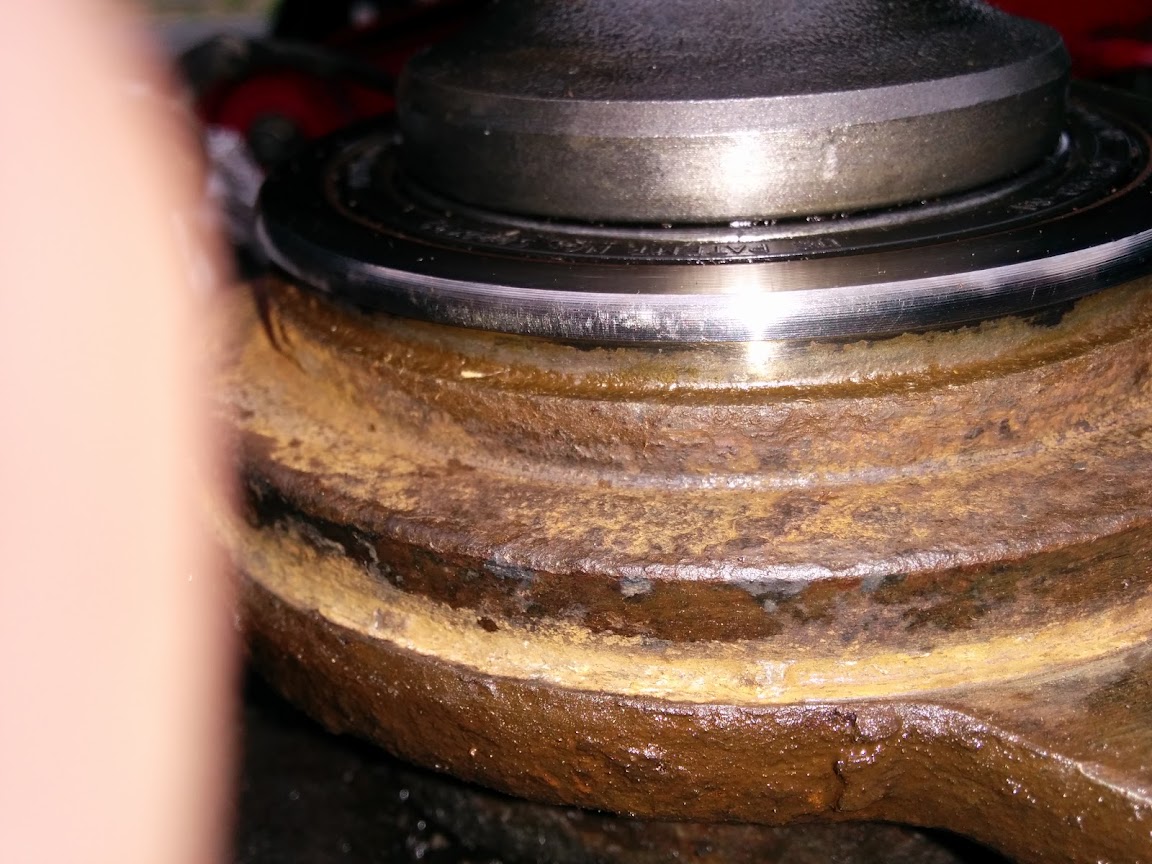
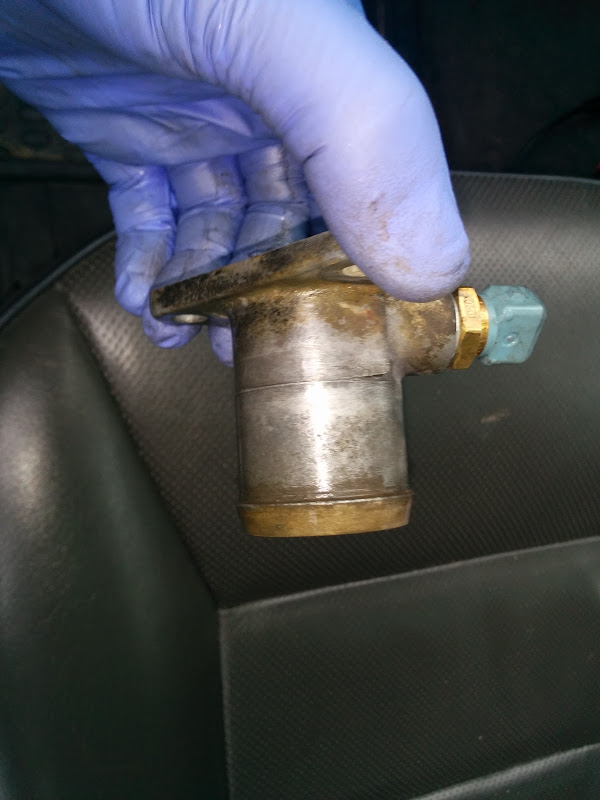
Again after removing the old oil seal (o-ring) you can see rust and crap in the channel for it on the hub - I used the same dremel attachment to clean this up.
IMG_20140218_125220.jpg


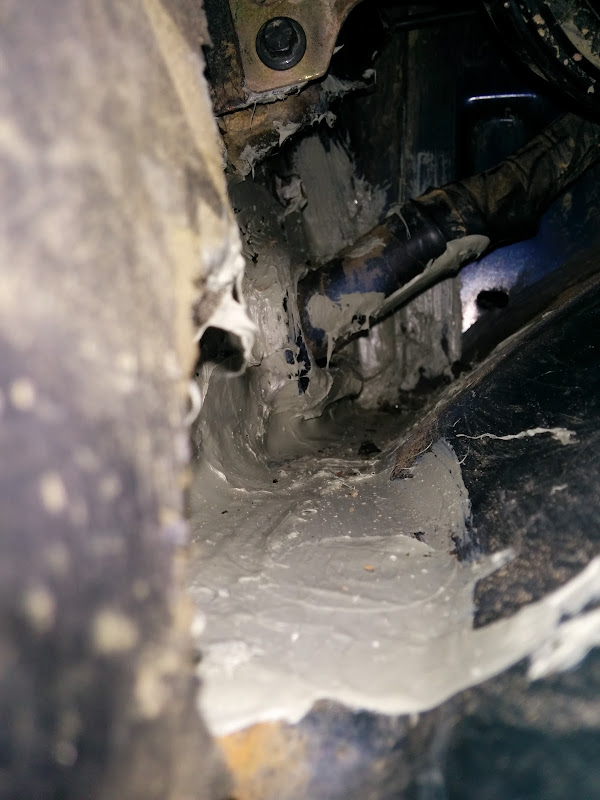
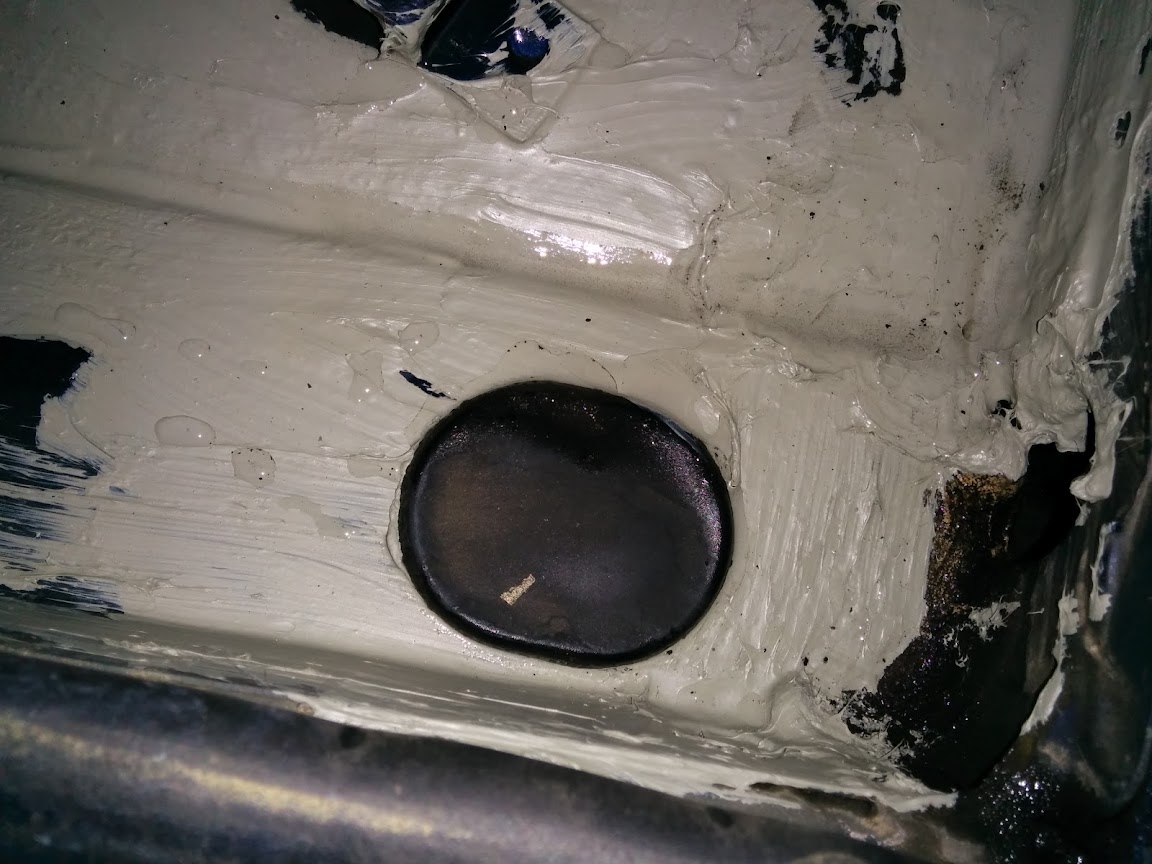
Once the axle tube was cleaned up I slathered the inner mating areas with lithium grease to hopefully avoid another crud build up, and to lubricate the hub/o-ring refit. I also applied copper slip to where the hub would mate up
IMG_20140218_130329.jpg


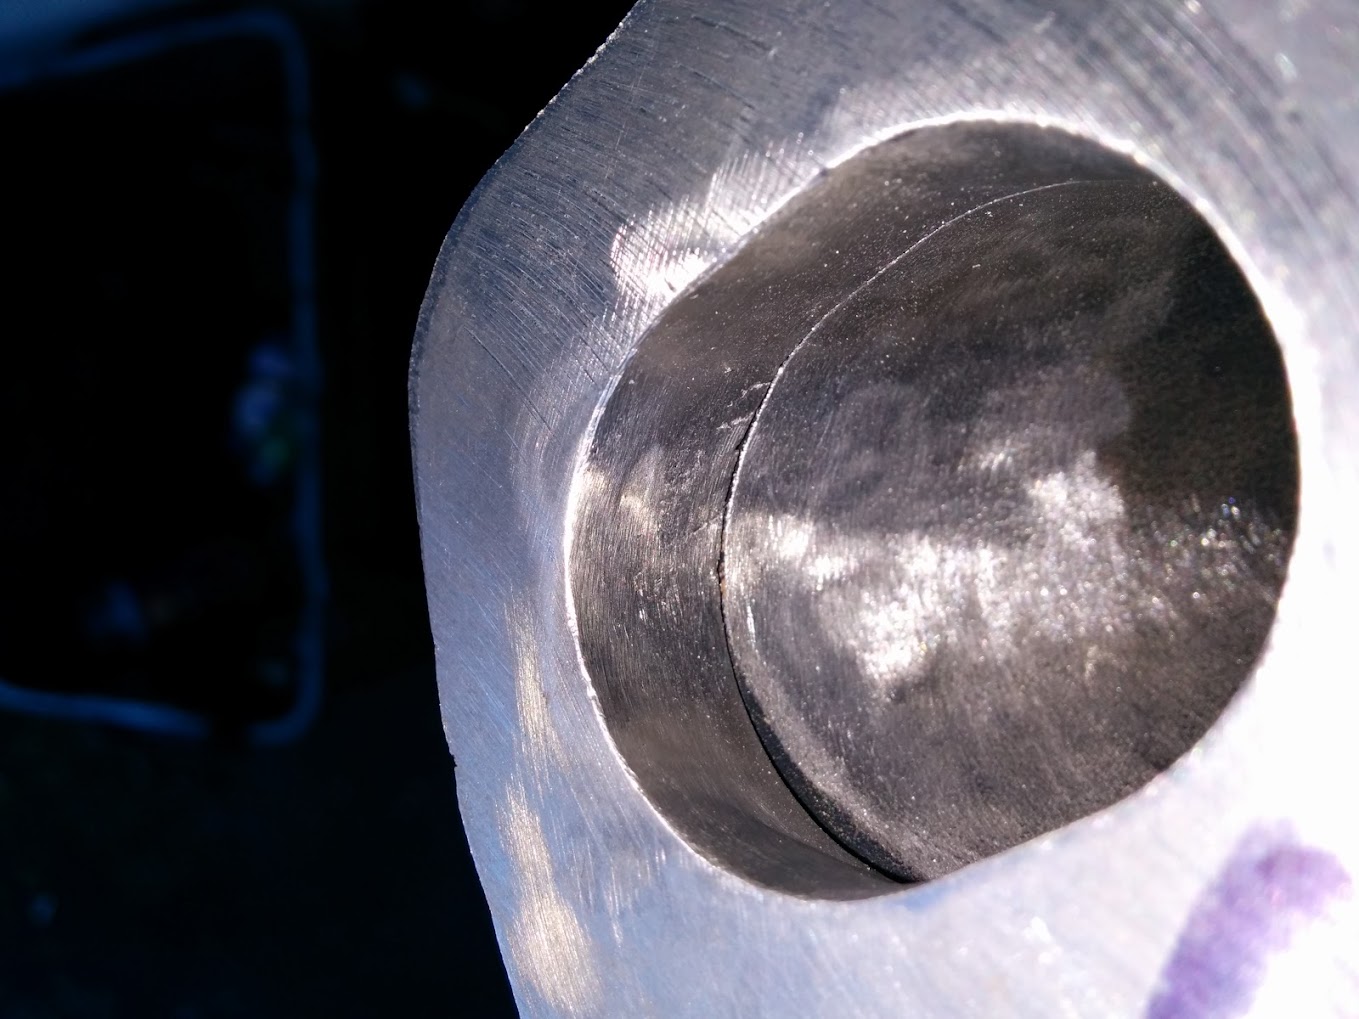
Same deal on the hub - the bearing is in great shape after 120K miles!
IMG_20140218_130334.jpg


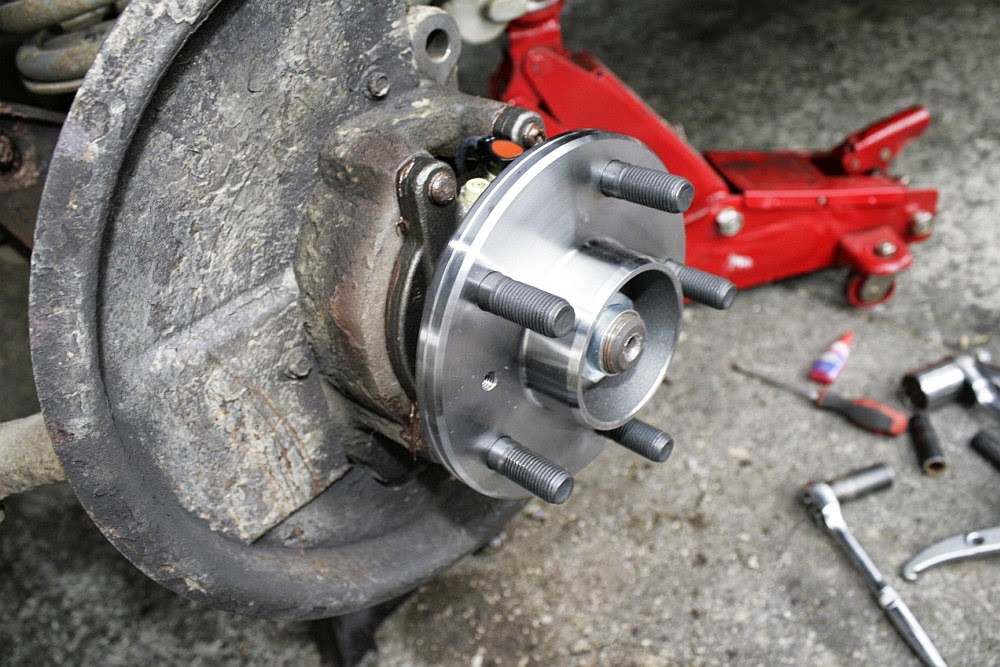
Reassembly is the reverse of removal!

Before refitting the brake disk clean everything off so you'll easily spot if it continue to leak, a new hub may be required if this is the case. Also be sure to check the axle oil level!
 
So this week I've been in DIY hell thanks to SWMBO. So far this week I've done about 5 tip runs, and on the latest I noticed that the indicator frequency had doubled when turning left... sure sign that a bulb was out!

After a quick inspection it turned out the front lamp had failed....

...it could have something to do with this:
IMG_20140228_161420.jpg


When I pulled the bulb out of the holder a small bit of rusted metal fell out:
IMG_20140228_161445.jpg


One of the bulb contacts, oops.

Went to adventure 4x4 in Morley to get a replacement indicator housing:
IMG_20140228_161543.jpg
 
Sun was out and SWMBO was at mother in laws with the kids so thought it was an ideal time to tackle the dodgy stud on my cylinder head

First job was to drain down the coolant, get the top hose out of the way and remove the water elbow:
IMG_20140301_124421.jpg


The elbow was a bit corroded:
IMG_20140301_124426.jpg


So I gave it some love with a wire brush:
IMG_20140301_124907.jpg


Next job was to make a bit more room by removing the turbo air inlet, MAF, and disconnecting some of the wastegate vac hoses:
IMG_20140301_125523.jpg


Then I started to remove the nuts and washers holding the turbo to the manifold and the manifold to the head. The bad one wound straight out of the head along with some threads!
IMG_20140301_133543.jpg


The damage to the head can clearly be seen in the hole:
IMG_20140301_133557.jpg


And a shot of the head with the manifold off - in order to remove it the banjo bolt that feeds oil to the turbo has to be removed. I tie a plastic bag around it to stop any contaminants getting in. I also block up all the ports with kitchen roll to stop debris entering - swarf from drilling etc:
IMG_20140301_133601.jpg


First stage of the fix is to drill out the damaged threads using the bit in the timsert kit:
IMG_20140301_134155.jpg


Next the hole is countersunk so the collar of the timesert sits flush:
IMG_20140301_134256.jpg


Then the most difficult part, tapping the new threads. There's not enough room to rotate a tap tool here so improvised with an 8mm spanner, you have to be really careful to check that the tap is going in perpendicular to the head otherwise the stud will poke out at angle and the manifold won't fit on, it was a bit low in this photo, so I corrected it on the next turn:
IMG_20140301_134817.jpg


Not a great photo, but the new threads are now cut:
IMG_20140301_140010.jpg


The timsert is now screwed onto the end of the insertion tool, a few drops of 3-in-1 help to lubricate it:
IMG_20140301_140116.jpg


The tool and timsert can then be hand screwed into the newly threaded hole, once in as far as you can get it easily you then screw the insertion tool right through the timsert. As it passes through it locks the timesert into the newly cut threads (the inside of the piece is tapered). You know you've gone far enough when it gets a bit easier to turn the tool.
IMG_20140301_140333.jpg


Then it was time to reassemble everything and fill the coolant back up.

I got a bit of a surprise when I was squeezing the top hose to try force some air out... I could feel something hard in the bit that runs to the radiator. Pretty sure this isn't supposed to be in there!!
IMG_20140301_154521.jpg


Turns out it's a stiffener of some kind.
 
So, a week ago I had the tracking done, and the steering and general handling was much improved.

The poor front tyres had taken some stick with the tracking being off though, worn a lot more on the inner edges:

IMG_20140302_105852.jpg


Look how low the blocks are on the right, and look at the tyre shape at the bottom :exclaim: :exclaim:

So, I've swapped the fronts and backs over.

:eek: 
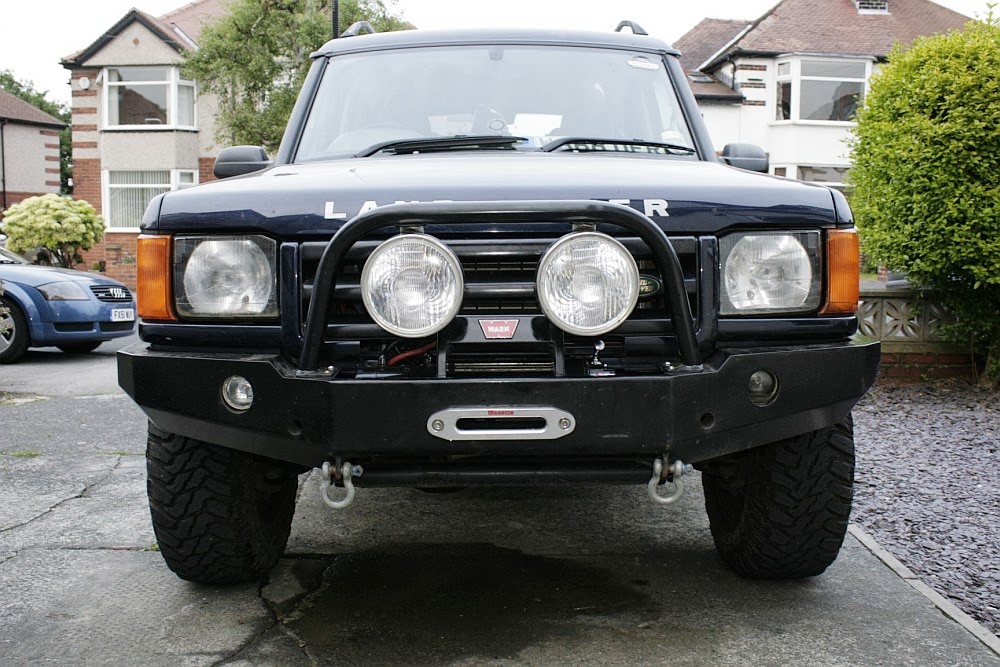
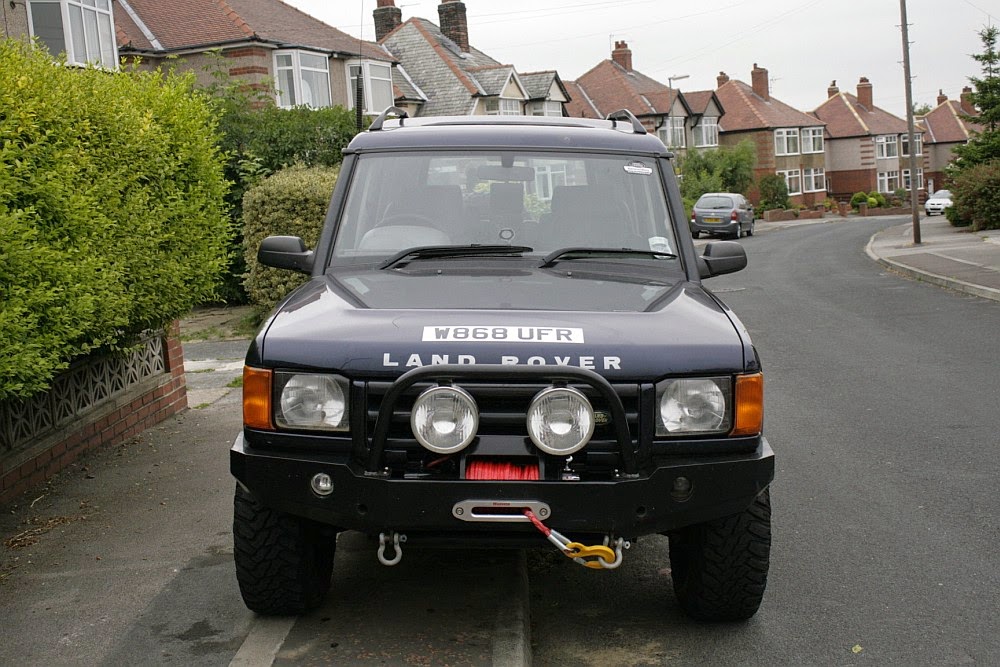
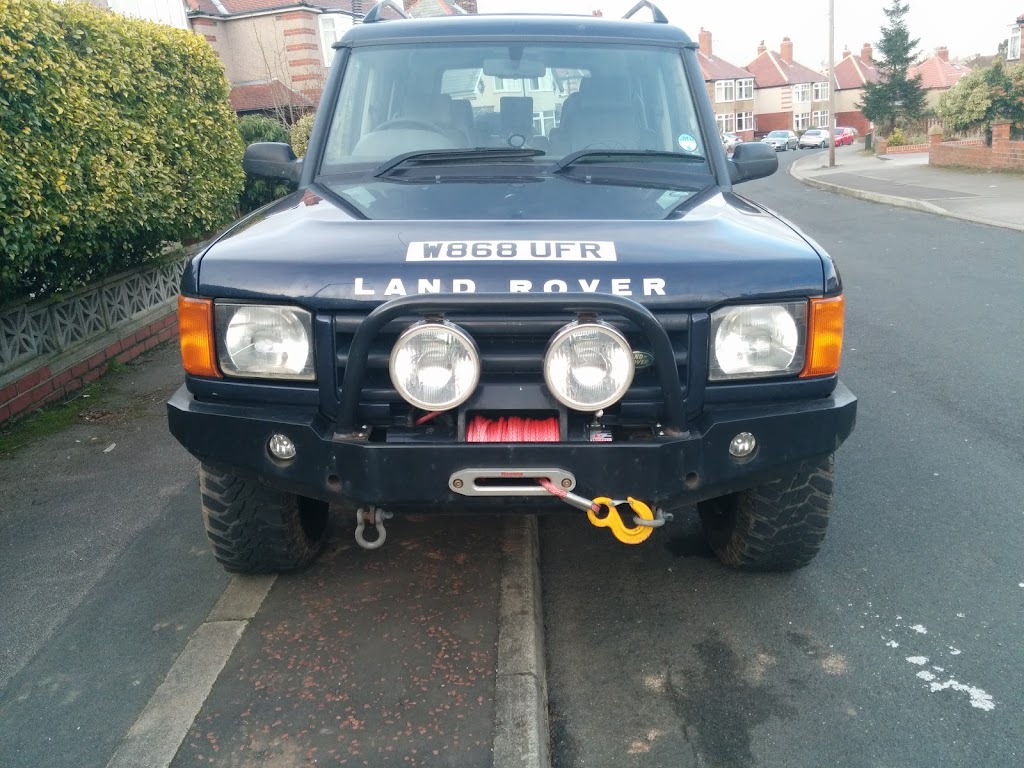
what a difference! a wierd rotational whine has gone (probably wheel balance), and the car seems to ride a LOT smoother. I think maybe I had too much air in the fronts before so will go out and check the pressures in a moment.

Think I might get some new boots for the back though!
 
Whilst looking into another issue the other day (2 amigos), I found that I had water leaking into the passenger side of the car via the grommet for the harness in the bulkhead:

IMG_20140304_184211.jpg


IMG_20140304_184347.jpg


It turns out this was because the seam sealant had failed higher up in the engine bay, so I cleaned it up and gave it a good old plaster with new sealant:

IMG_20140307_083556.jpg


IMG_20140307_083529.jpg


Water is now correctly flowing down the drain hole to the wing, the bottom right of the picture above still needs some attention but I'm going to wait for the rain to stop first.

Not the tidiest of jobs, or the easiest area to work on, but the leak has now stopped. Just got to dry out the carpet now [taz.gif]
 
For a little while I've had what can only be described as an 'escaping air whistle' from under the bonnet. Now I KNOW it's not the exhaust manifold, so decided to check out all the things that have changed recently....

So, that's wastegate modulator, vac hoses, mushroom, turbo & hoses.

Got to the turbo hoses and found one of them wasn't as tight as it should be, so I popped it off only to find a fair bit of oil inside it.

So with that in mind I set about ripping the car to bits:
IMG_20140311_122455.jpg


Here's the hose once I'd pulled the IC out:
IMG_20140311_122520.jpg


And here's what came out of the IC once flushed with white spirit:
IMG_20140311_123342.jpg


The IC fins were all clogged up so I gave that a good flush through too:
IMG_20140311_123349.jpg


Afterward:
IMG_20140311_125420.jpg


It's a bit nippier than before and not as smokey! And the whistling is gone yay!
 
So, we're pretty much up to present day now.

The IC has filled with oil again so I've bought on of these:

IMG_20140417_223709.jpg


MANN HUMMEL Provent 200.

They're all the rage on aulro so I decided to give one a try...
 
I've also got a thread going where I'm rebuilding a transfer and manual gearbox to swap in:

http://www.landyzone.co.uk/lz/f8/lt230-rebuild-247618.html

Got loads of jobs lined up to be honest.

X-brake fitting
Diff guard fitting
OSD front half shaft/CV change to try sort the oil leak
Sump gasket & rear crank seal change (waiting on the gearbox swap)

Galv chassis is on the cards & I'm also thinking about snagging another engine to rebuild.
 
Back
Top