Another 90 Rebuild

This site contains affiliate links for which LandyZone may be compensated if you make a purchase.
Hi Windy81, just got sight of your picture. I'm on holiday camping in Scandinavia and the wireless isn't always great at every campsite. Your picture didn't turn up the last time I was on the site. Your rebuild is looking great. That looks a similar colour to mine. Are you getting the panels painted individually?
 
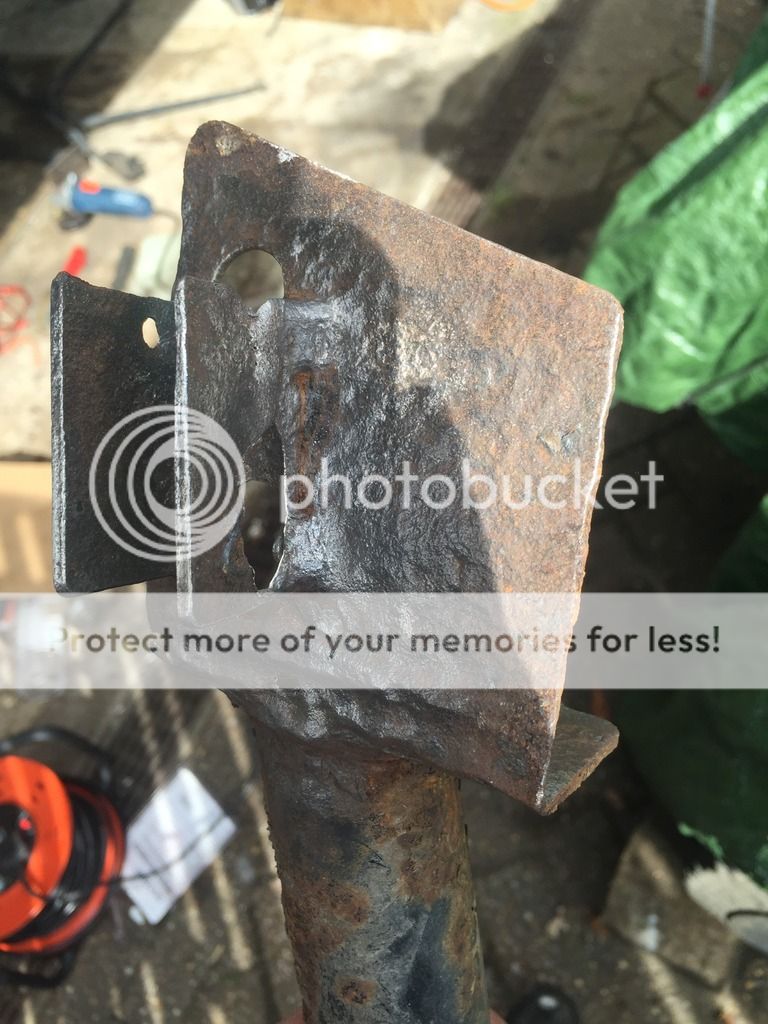
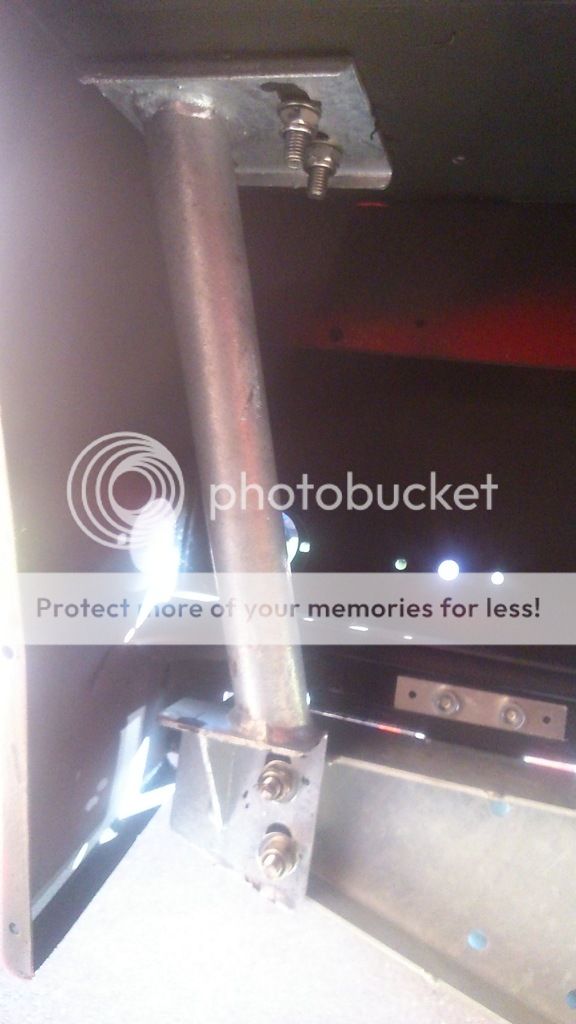
Question for you mate, so I went to clean up my rear seatbelt mount things yesterday, and there pretty knackered, the worst bits are at the crossmember side where the 2 bits stick out, can you check your Landy for me and see if the sticky out bits attach to anything as Im 250miles away from my Landy atm, I'm thinking of just cuting them off and welding a flat plate on it if those bits arnt essential as I can't find anywhere that sell them at a decent price.


You can see them attached on your picture here but I'm not sure what the 2 bits are for that stick out into the rear crossmember
 
Mine were totally wrecked. They are rarer than rocky horses to find. Some online places show they have them for silly money, but when you contact them they can't get them. I was dead lucky, I posted on here to see if anyone had some and got a reply straight away. They were in good nick too. Might be worth a try.
The two plates that stick out bridge the gap between the bolt holes on the bracket and the cross member. They don't actually 'attach' to anything, but stop the plate on the bracket collapsing when you tighten the bolts, so they are important.
 
Yes, they're just an anti-crush web, so if you've got access to a welder if I were you I'd just grind that bit off and weld another bit of metal on.
 
Ahh ok, thanks for the help guys. I'm going to get a friend to weld them up for me so I'll get him to put 2 new tabs on it aswel.
Hopefully by the end of next week mines going to be back on the road :)
 
Ahh ok, thanks for the help guys. I'm going to get a friend to weld them up for me so I'll get him to put 2 new tabs on it aswel.
Hopefully by the end of next week mines going to be back on the road :)
Good luck with getting it back on the road. Let us know how you get on.

Had mine to the local indi today to get the wheels aligned on their laser what not. :) They checked all four wheels.
Filled it up at the garage having taken note of the mileage on last fill up. 280 miles on 41.17 litres works out at just over 31mpg, so very happy with that.
Having said that it's a bit sluggish, so I think I'll change the lift pump.

Hopefully I'll be booking mine in for that and the wheels balancing in 2 weeks.

Not bad mph, I'd be happy with that too.

Mine was completely standard before, even had the egr still attached, that's now blanked off, decat exhaust and a full alisport intercooler, I might tweet the pump a bit too, the difference is going to be interesting. But it will be a bit heavier with all the new guards/rock sliders and that Might cancel everything out ha
 
I think you'll have to adjust the pump to get the most out of the larger intercooler.

Paddocks have dispatched the lift pump, so I should get that on this weekend. It'll be interesting to see if it makes a difference. I've read a few threads where folk have said their Landy ran fine with the lift pump removed.
 
Took the old lift pump off and gave the cam follower a squeeze. Fuel jetted out, so I'm thinking there is nothing wrong with the lift pump??
IMG_5745_zpsjwhyop36.jpg

Fitted the new one (Britpart G suffix) and took it for a spin up the road. It did feel a lot better, so I can't understand it. The symptoms were that it would reach a certain number of revs, not that high, and then flatten out not easily revving past that point. Some days it would be like that and other days it would be fine and pull really well. Since getting it back on the road, after the two years, it's has been a bit flat as described.
Certainly seems better now, but I can't understand it. Perhaps the lift pump wasn't effective under pressure. If anyone can shed light on how they work and what goes wrong with them I'd appreciate it. Do they usually stop pumping completely when they 'fail'?
Here it is fitted. Old gasket took a hell of a lot of scraping off. Hardest part of the job.
IMG_5746_zpstiqbn60q.jpg

The fuel pipes were slightly offset compared to the original and, of course, I was thinking blue box :( However, it was far easier to get two spanners on to tighten the unions and so might be a deliberate change to the design :)
 
The old fibre board and fablon rear door card was looking extremely shabby and so I pushed the boat out and bought an ABS one from SP 4x4.
This is the door before fitting.
IMG_5747_zps2pq0miku.jpg

The heated screen wire had to go behind the glass retaining strips.
IMG_5753_zpsqcfrqa60.jpg

The door check strap allowed the door to open a bit too much, so I cut an old radiator mount to fit the check strap slot. Works a treat, little bit of suspension :)
Rubbed down and painted up the old door handle.
IMG_5754_zpswmsohhet.jpg

Annoyingly, non of the holes in the new door card lined up with the holes in the door. :mad::mad::mad:
So, going against my 'don't drill holes in it cos it'll just rust' policy I drilled holes in the door. :eek: :) Mind you, I treated the holes (a few times) with wax oil and soaked the stainless self tappers in waxoil too o_O :oops:
IMG_5759_zpsqmz7n4jn.jpg

I'm not convinced by the black screw head covers that came with it. Light grey might have looked better. (I've no idea what that white mark is on the picture)
I know what you're all thinking. He lives up North and there's clear blue sky in that last picture! Took us by surprise too ;)

Got the tow bar galvanised a few weeks ago and needed to sort the electrics out. Sick of buying steel brackets for the socket, but they rust quickly and go floppy. You can probably buy thick steel ones, but had some thick ali plate, so cut one out of that. Polished it up and lacquered it.
IMG_5750_zps2okpfgu5.jpg

IMG_5757_zps1ze4ozbt.jpg

IMG_5762_zpsmrafngig.jpg

The damn masking tape labels I'd put on two years ago came off the wiring harness during that time :rolleyes:. So, it took a bit of multimetering and consulting of the wiring diagram Kwakerman sent me to sort it out. Trailer lights up now though.

When I put the door skin back on I sealed every possible join. Now, rather than run through to the inside, water fills the inside of the door handle up. :rolleyes:
IMG_5752_zpsrlgzgop6.jpg

There's about 1/8 inch lying in it here.
I'm contemplating drilling a drain hole! o_O It would need an trim edge though, so I'm wondering if you can get a hollow pop rivet or something like that. I'm also wondering what it would look like filled to the brim with some of that clear modelling resin.
 
When sorting the wiring for the trailer I googled to try and find a wiring diagram for the bunch of wires from the rear harness that go to the trailer. Couldn't find what I wanted. Lots of diagrams out there, but nothing clearly tagged that I could find. Despite the google search terms used, all sorts of vehicles were turning up. Even Freelanders! ;) Nothing on LZ that I could find either.
I've put this table together.
1996%20Defender%20300Tdi%20Trailer%20Wiring%20Diagram_zps0oytqexd.jpg

It's working fine for me. If it's wrong I'll happily change it. I've also got a single purple wire coming out of the harness at this point and no idea what it is for. It's permanently 12v live. It's probably a spare 12v supply for the rear of the vehicle. Kwakerman?
 
Very few things to do now, so I've lost urgency/momentum on the job. Need another project :eek: However, Aaron Morris I am not. :oops:
Took a picture from the front seat to show rear door cards and seats etc, just to show the overall effect. Not LR carpet and an aftermarket ABS door card but I'm happy that it looks fairly original.
IMG_5782_zpsmsgubcgq.jpg

If you've read all of this thread you may remember that Ashtree sold me an early 200Tdi bulkhead instead of the 300Tdi that I ordered. One of the knock on effects was no holes for the front door switches. As well as the interior light not working it obviously meant no contacts for the alarm.
Been pondering for ages and this is what I've come up with. I bought some micro-switches (about £1.99 for 5) and I've cut some strips of aluminium to fix them to. I discovered I could open up the holes in the switches to 2.5mm which is a snug fit on a pop rivet shank.
IMG_5777_zpsuc7a3b9t.jpg

This is the parts ready to go together. The plan is to araldite them to the side of the footwell.
Then assembled, being super-glued together.
IMG_5778_zpst1xiymbg.jpg

The super-glue may be ok on it's own, but the pins make a very secure job.
IMG_5779_zpsmt1z6tnb.jpg

Then the pins filed flat on the back. The other two holes are to feed the live and earth wires through to the switch terminals.
IMG_5784_zpshsxxlbnj.jpg

Then primed and painted black. Above the new set up is another prototype that I discarded. I'd fabricated a small box out of thin aluminium and painted it the colour of the Landy, but it was too chunky and was going to be difficult to fix in place.
I don't think they'll get too much weather where they are going. Time will tell, I suppose. I'll fit them tomorrow.
 
The Landy used to take a while to get up to operating temperature. About 6 or 7 years ago I bought a new thermostat, but never got around to fitting it because it didn't seem too bad even though I suspected the stat might be stuck open.
Anyway, since the rebuild and the new rad went on the temp gauge barely moves. 60mph on the A1 for 20 miles and the temp gauge would have gone up to the edge of the white line. The old rad must have been so inefficient, with corroded fins and blocked with mud and flies, that it allowed the engine to warm up quite a bit.
Now it was very obvious there was an issue.
Took the old one out this morning and sure enough it was stuck open.
IMG_5786_zpsdxfkjqq0.jpg

Put the new one in.
IMG_5785_zpsuallvotz.jpg

Tightened it up and topped the system back up and took it for a spin.
I'd barely done half a mile and the gauge started moving! Two mile up the road and it was just under half way, never moved after that.
HOT AIR coming out of the vents! :oops::rolleyes:
Had to go back and tell the Mrs she's been freezing to death on the way to work, needlessly, for years. :eek: :D
It is a decent, sunny day here, so it'll be interesting to see how effective the heater is in the winter. Even if it's not that good, it'll be a hell of a lot better than it was!
 
Looking amazing now :)

My back door holds water too. I tried to drill a drain hole but failed! To be honest at the rate that the back door is rusting I'll be replacing it in a couple of years or so anyway.

The power loss on mine has been mostly fixed by freeing off the little pin inside the injection pump under the rubber diaphragm. I bought a boost pin at the same time but has so far not been needed
 
You've got to see the funny side, GATSO. The Landy is the Mrs daily drive to work of about 17 miles. We've had it 11 years and during the winters she's gone to work with warm trousers, boots, several layers on top then a big ski coat, gloves, scarf a hat and a plastic scraper to scrape the ice off the inside of the windscreen when her breath froze on it! :( Thing is you start off Fender ownership reading all the stories of the trials and tribulations of being an owner, a famous one is the lack of a heater. Mine obviously hasn't been working since day one, but I've thought that was the norm all these years. :rolleyes:

Looking amazing now :)

My back door holds water too. I tried to drill a drain hole but failed! To be honest at the rate that the back door is rusting I'll be replacing it in a couple of years or so anyway.

The power loss on mine has been mostly fixed by freeing off the little pin inside the injection pump under the rubber diaphragm. I bought a boost pin at the same time but has so far not been needed

I'm still not sure what to do about the back door handle recess. The modelling resin is still favourite, though I've been looking at knocking the mandrel out of a pop rivet, cutting it down so it's not much longer than the width of the aluminium door skin, drilling a hole and putting the rivet in just squeezing it enough to bell the back out but not jam the mandrel head in it. Then knock the mandrel back through leaving a drain hole. Just an idea.

I think I might take the Landy up to the local indie and ask him to take it for a run out. He's worked with them all his life and must have driven hundreds, so he should be able to say if he thinks it's ok and just me. When he did the 4 wheel laser alignment he did say he'd took it out for a spin and said it drove well and was nice and tight. But, he was concentrating on the steering. I might take it back and ask him to consider the engine performance. The Mrs has driven it more than me over the years and she thinks it's fine. I might just be me, but I don't think so :oops:
 
Back
Top