Series King Cab

This site contains affiliate links for which LandyZone may be compensated if you make a purchase.
Cheers ;)


I'm tempted to try and fire it up this weekend if my new engine mounts are in the shop tomorrow :D

However that being said I still need to work out how I'm going to do this stupid prop shaft, been quoted £90 for a 30* wide angle prop shaft which isn't bad at all! But it limits my rear axle travel to 110mm down from 200mm which isn't so bad when you think about it for greenlaning but I'm half tempted to try and increase it back towards 200 with some fancy fabrication ;)

Axel travel isnt all that important... put some check straps on to limit it and you will still jave good articulation.
 
I wont be running a standard rear prop, mines gonna be more like a foot long :eek: :( hence needing the wide angle UJ's

Will get it sorted somehow though, and reckon moving it forward an inch or two on the engine mounts may just give me a little more room to play with on the prop side.

Think I may be able to get away with mounting a new rad inside the slam panel in order to save space too but gonna see what it measures up at once I've got everything in place
 
Got a final price on me prop shaft :D £112 inc VAT :)

Local place too so quite nice, gonna measure up at weekend to make sure its bang on as minimum closed length for a prop is 290mm so may need to make some engine mount mods to make it fit a bit better.

If worst comes to worst I can shove the engine forward 2" and then relocate the rad or use a smaller high performance one mounted within the slam panel
 
Semi productive day today, no pics as my phone was low on power and I really couldn't be arsed as nothing major was being done………..


On the Series 2a I changed the shock bushes…….surprise surprise the ****part ones didn't fit over the studs for the lower shock mounts so I had to used the same kind of bush that was used for the top. Fine they fit and with some compression from the mole grips went on nicely so the shocks got plenty of rubber on it now.

Think I may have been given a part thats been superseded for a lower pin style rather than eye.

Also fixed the exhaust mount on it so its ready for the MOT now


Onto the **** bastard that is my Series 3………….


One step forward ten back.


Made a start at tidying up the roof, re-drilled all the pop rivets to do again with a nicer set and began to shove more bolts into the bodywork to make it secure now that its nearing the end. Halfway through this process I found a dead homing pigeon that had been attacked by a sparrow hawk and somehow managed to bounce off everything and find its way under the workbench………..took a break to report it etc.


After this minor stall I measured up my rear prop length, it would appear that I'll only have a 280mm prop shaft which is 10mm shorter than the absolute minimum for any kind of decent prop. So I'm bringing the engine forward by 110mm leaving me with a 390mm prop (only 160mm shorter than standard then) this means I can keep decent travel length and reduce vibrations.

So in order to account for this 110mm loss on front space whilst keeping the series front the radiator has been relocated to the rear or will be once I fabricate some brackets for it to lie on.

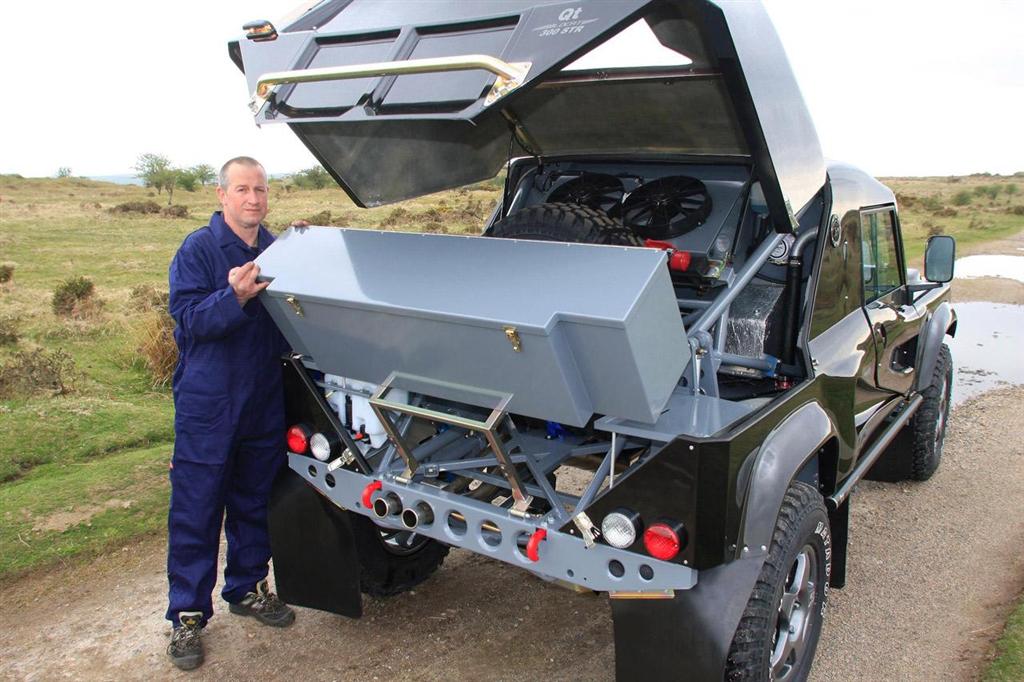
Radiator wise in order to account for the lost air flow I'm going for a twin rad set up with triple electric fans in order to keep things cool. These are going to be underslung rads, underneath the pickup bed with a filler cap going through the bed. measured up and they'll be perfectly safe under there especially once I put a mesh stone guard over them.

The crank pulley also has to be shortened so that it fits which means removing the redundant PS and AC belt pulley so it has been turned from a long nose pulley into a stumpy pulley by removing the first couple of belt pulleys and bolting it back together.

In order to sort the engine mount problem I'm using some box section and offsetting it 30mm between the holes to give me a 30mm engine lift (moves filter away from axle) and then making the holes on both sides 110mm apart……….now with these I'm not sure they'll fit and without having the engine out to measure I cant be certain so as well as making some box section mounts I'm also making a set of Z shaped ones too.

Only box section I had was 80x80x5mm so I'm not sure if it'll make the mounts a little too tight a fit hence the backup plan of two 1/4" steel plates welded with a 10mm bar between them creating the Z and then the offset holes allowing for the lift and movement forwards

Anyway by doing it this way it means I get to keep the series front end for the looks and get a decent length rear prop shaft allowing for a bit of extra comfort on the manufacturing side of things

The custom engine rubbers I wanted have arrived so just need to get all my mounts made up :D


Fuel pump needs mounting in the tank although I'm planning on getting creative and making a special mini swirl pot for it in order to make sure its constantly submerged in fuel. Once the TIG's set up and I can be arsed I'll be making up a full new tank.


Essentially then next weekend once I move the engine forward I can put all the major body panels back on and finish off neatening up the roof as I want it to look pretty much factory flush on top so thinking a little smear of body filler over the rivets before sanding down smooth should sort that. Fuel tank job is going to wait a little longer until I can work out just how I want the fuel pump to sit or if its possible to mount it inline within its own swirl pot fed via the fuel return which I think it may be depending on which of the two high pressure pumps I decide to use
 
Well I'm not removing the gearbox now I've set up and struggled with the transfer box, its all set up and in place so engine forward is best option and move the rads in order to keep the series front end.

Body is sorted now just needs going back together and for my new floor panel to arrive
 
Well I'm not removing the gearbox now I've set up and struggled with the transfer box, its all set up and in place so engine forward is best option and move the rads in order to keep the series front end.

Body is sorted now just needs going back together and for my new floor panel to arrive
you dont get 15 mpg without creating some heat
 
you dont get 15 mpg without creating some heat

True hence three fans and twin rads in the rear to double up cooling and will also need a small air scoop in order to funnel the air in towards them.


Essentially its the same idea as the bowler, rear mounted rads with air scoops and extra electric fans to cool it. If it works for them on a 4.6L engine it'll work on a puny 3.5 with twin rads and some air scoops


676611d1361942190-best-off-roader-bowler-wildcat-wildcat02-07_h4a_pakwheels-com-.jpg


Bowler+Wildcat+300STR+3+(Large).jpg
 
cheers, reckon it should be given the extra capacity, if it isn't I may just have to rear mount it on the roll cage like marks done on his trayback but I want to try and keep it hidden first
 
True hence three fans and twin rads in the rear to double up cooling and will also need a small air scoop in order to funnel the air in towards them.


Essentially its the same idea as the bowler, rear mounted rads with air scoops and extra electric fans to cool it. If it works for them on a 4.6L engine it'll work on a puny 3.5 with twin rads and some air scoops


676611d1361942190-best-off-roader-bowler-wildcat-wildcat02-07_h4a_pakwheels-com-.jpg


Bowler+Wildcat+300STR+3+(Large).jpg


now that is one tasty looking truck :)
 
Do you not recon the radiator will get covered in road filth, the fins block up and the engine overheat pretty quickly if you're putting the radiator under the tub?
 
now that is one tasty looking truck :)


Would love one :D got TIG welder now so may have a go at making a tubular chassis for the LT95 box I have when I get this one done

Do you not recon the radiator will get covered in road filth, the fins block up and the engine overheat pretty quickly if you're putting the radiator under the tub?

It was a consideration but I reckon it should be ok, if it isn't I'll have to mount it on the roll cage but I'd prefer not to. Should be alright if I give it a wash with hose after any offroading.

Will have mesh to stone guard it and vents coming from under the car to provide cold air. Worst case scenario is mounting it on the roll cage or making a custom radiator that fits inside the slam panel with extra cores and then another one where the heater matrix will sit.


This build is unearthing problems but none that cant be sorted. Also on the basis of road dirt etc the aircon radiator on my golf and on all VW/Audi are belly mounted beneath the drivers seat and the last time I had the car on the ramp (5500 miles after I last looked) it was still clean
 
Just had a thought, to help with the cooling situation I can run an engine oil cooler too.

Think I have an LT box one somewhere so shouldn't be a problem if not can source one, just adds a little extra cooling to the system and it'll fit nicely in the slam panel
 
Right done some research and found out how to do this, a lot of the hot rod boys have the same problem for space in america and even hotter weather!


The following pics and description give the idea


So this is the basic design however my ducting will run off the top of the roof like a Bowler


attachment.php


This is how the rad will look flat mounted onto the chassis with leccy fans (will be two rads)

attachment.php


attachment.php


Plan is to use two rads in order to get some extra cooling, two fans on one, one on the other which will be constantly on with ignition in order to make sure the engine stays on and meaning that theres no thermostatic switch to fail.

I'll be hooking them up on a shunt valve so I can disable one rad in winter if needed, obviously to combat the fact that I'm losing water flow rate I'll be shoving in a 12v pump inline to speed up the water return process too. Header tank in its standard place on the wing will still be the highest point of the system so no problem there either.


Heres the pic of the hotrod with body on (would post but its a bit big) it has no fancy ducting like mine will get (not decided fully on roof scoop or side scoop behind sliders but will choose soon)
Anyway from what I've found on all the hotrod forums its a little faff but it works nicely once set up right


http://www.jalopyjournal.com/forum/attachment.php?attachmentid=1166675&d=1291398373
 
Managed to get hold of a super slim Saab radiator today so I'm gonna see if thats enough by itself to keep the engine cool. It'll fit inside the slam panel with a little bit of cutting as the rad is only 28" wide so I could be onto a winner with this.


The TD5 and D2 V8 rad is a very skinny one too and about the same size from what I can find so this may just work! At any rate its easier to add to the cooling system and cheaper than trying to subtract
 
Back
Top