You are using an out of date browser. It may not display this or other websites correctly.
You should upgrade or use an alternative browser.
You should upgrade or use an alternative browser.
Project 1989 90 (Bruce)
- Thread starter Defender-Sam
- Start date
This site contains affiliate links for which LandyZone may be compensated if you make a purchase.
Defender-Sam
New Member
- Posts
- 358
- Location
- Burton Upon Trent
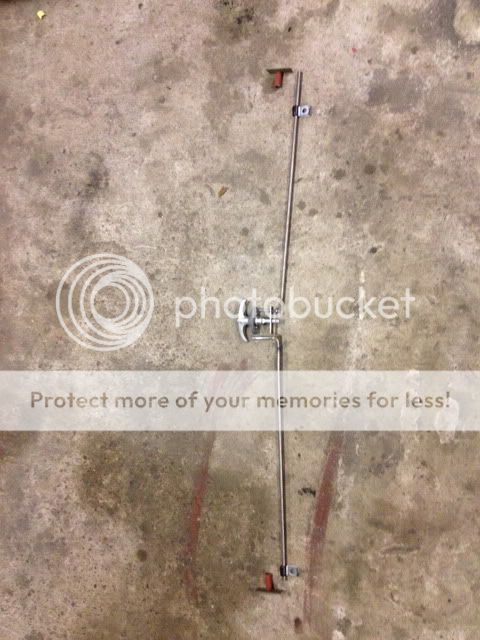
The top radiator pipe seems to have a harsh right angled bend in it?
yes don't worry about that once i have tested the wings i will cut it so its a little shorter so should remove the bend.
")
not going to get anything done tonight, been messed around by the suppliers of the side windows so need to find some (don't fancy britpart) or some hard top side panels. so tonight will be spent on the bay of e.
Sam
Defender-Sam
New Member
- Posts
- 358
- Location
- Burton Upon Trent
mid afternoon update..... it runs needed slight electrical assistance from a transit as both my charger and his jump pack gave up the ghost, typical.
chuffed to bits just letting the fumes clear then returning for round 2, Steering swapping to disco drop arm and steering rods.
:clap2: Sam
Defender-Sam
New Member
- Posts
- 358
- Location
- Burton Upon Trent
Finished today off by fitting the new steering arms and fitting the disco drop arm not finished yet as i need to liberate a lock washer, got steering tho so makes shifting it around the garage a damn site easier.
just a few quick pics of todays and yesterday evenings work,
engine shot (hard to capture a running engine)
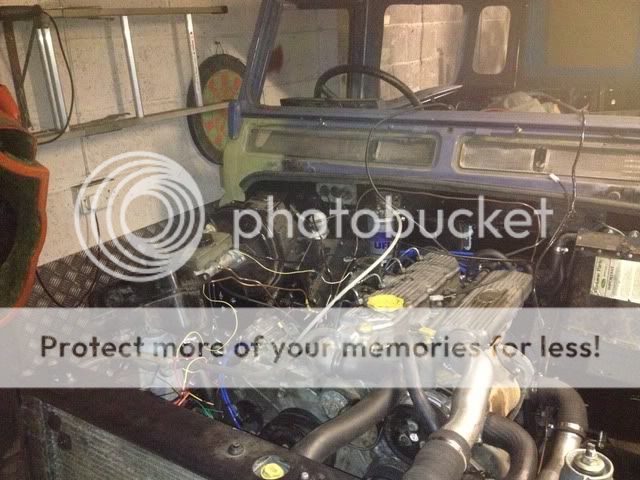
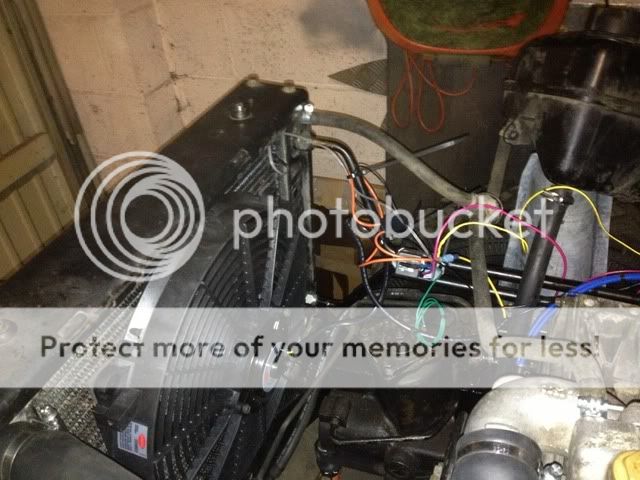
wired in the kenlowe the wiring will be tidied up and tucked away once the wings are fitted. on the subject of fans it has a adjuster to set the temperature that the fan kicks in at what would this be on a 300 Tdi?
Makes shift fuel lines, still not received the pipes I've ordered, so knocked some together to test the engine.
thats todays good points now the inevitable bad ones,
1 the engine starts on the key now theres some charge in the battery but it continues to run when the key is turned off and has to be stopped on the solenoid, anyone recommend a fix for this ? (i guess its something to do with the different ignition barrels I'm using.
2 think i may have fried the power steering pump, ran the engine for quite a while before realising theres no steering fluid in it. topped it up bled the system and it works fine apart from a noise at full lock? is this normal been over a year since it last ran and that was the 19J so can't remember if there was any noise.
some advice would be great to top off whats been in my eyes anyway, a pretty monumental day in the Resto/rebuild :tea: Sam
just a few quick pics of todays and yesterday evenings work,
engine shot (hard to capture a running engine)
wired in the kenlowe the wiring will be tidied up and tucked away once the wings are fitted.
on the subject of fans it has a adjuster to set the temperature that the fan kicks in at what would this be on a 300 Tdi?
Makes shift fuel lines, still not received the pipes I've ordered, so knocked some together to test the engine.
thats todays good points now the inevitable bad ones,
1 the engine starts on the key now theres some charge in the battery but it continues to run when the key is turned off and has to be stopped on the solenoid, anyone recommend a fix for this ? (i guess its something to do with the different ignition barrels I'm using.
2 think i may have fried the power steering pump, ran the engine for quite a while before realising theres no steering fluid in it. topped it up bled the system and it works fine apart from a noise at full lock? is this normal been over a year since it last ran and that was the 19J so can't remember if there was any noise.
some advice would be great to top off whats been in my eyes anyway, a pretty monumental day in the Resto/rebuild :tea: Sam
Defender-Sam
New Member
- Posts
- 358
- Location
- Burton Upon Trent
right got a little more progress on it today, started it again a tad smokey on start up but soon goes away, investigated the engine running on problem. without the engine running turn the ignition on and the fuel solenoid opens and then turn it off it closes but once the engine is running it seems to be powering itself so i have to disconnect the wire to stop it. i believe that this is caused me probably wiring up the alternator wrong. I'm going to ask some people at work tomorrow see what they think. then fitted the hinges to the rear door bottom and mounted that fitted the new door lock and striker then started to trim the door top down still a little more to come off but will sort that after work in the week.
Sorry no pics today, Sam
Sorry no pics today, Sam
Defender-Sam
New Member
- Posts
- 358
- Location
- Burton Upon Trent
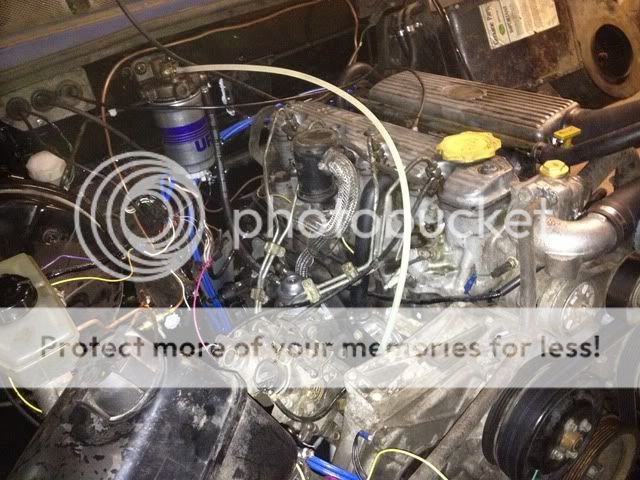
Where does the breather pipe from the cyclone filter go?
not too clued up on my engine terminology :doh: i think you mean the grey/silver pipe? visible in the last pic? if so it just goes around the back of the block around to the other side and is fastened by the starter motor i believe.
Defender-Sam
New Member
- Posts
- 358
- Location
- Burton Upon Trent
right interesting..... :scratching_chin: I've trawled through my pictures and found one showing the end of the pipe
just to the side of the copper pipe seems to be long enough to reach the airbox maybe its something ill look into.
anyway onto the wiring had a play got it to run and stop on the key and its charging as it should just the charge(dash) light doesn't seem to be functioning, can't find which wire go onto which terminals.
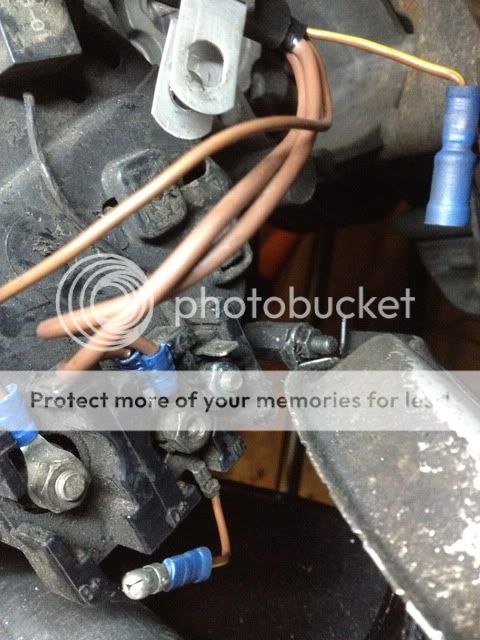
two thick brown and one thin brown (all permanently live) and one thin brown with a yellow tracer (charge?) and three terminals B+,D+and w
the brown/yellow has a slight supply to it I'm no electrical expert but using a test probe the bulb glows ever so slightly and the light on the dash works almost as it should but doest go out when the engine starts.
just to the side of the copper pipe seems to be long enough to reach the airbox maybe its something ill look into.
anyway onto the wiring had a play got it to run and stop on the key and its charging as it should just the charge(dash) light doesn't seem to be functioning, can't find which wire go onto which terminals.
two thick brown and one thin brown (all permanently live) and one thin brown with a yellow tracer (charge?) and three terminals B+,D+and w
the brown/yellow has a slight supply to it I'm no electrical expert but using a test probe the bulb glows ever so slightly and the light on the dash works almost as it should but doest go out when the engine starts.
wiltshire landyman
I’m back
- Posts
- 15,062
- Location
- salisbury plain wiltshire
w is rev counter b+ is battery and the other one is the dash light
Defender-Sam
New Member
- Posts
- 358
- Location
- Burton Upon Trent
thanks chap so the charge on the D+ terminal and the rest onto the B+?
Boris113
Well-Known Member
- Posts
- 1,356
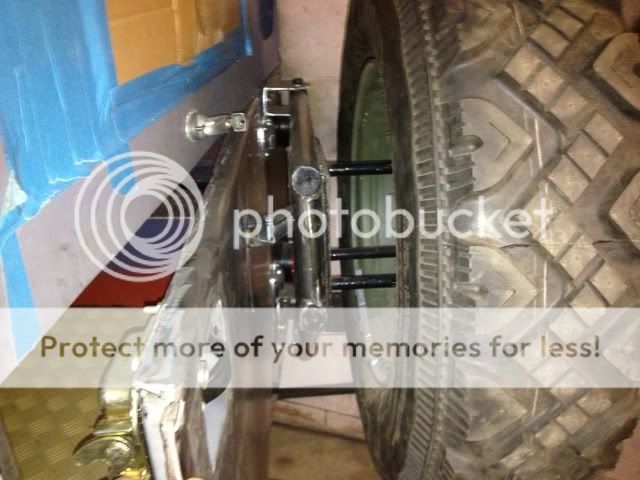
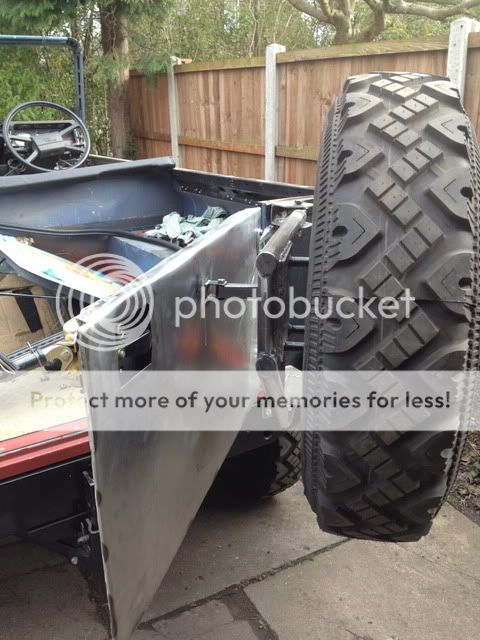
Very nice build Sam, I like the rear wheel carrier and split tail gate
Defender-Sam
New Member
- Posts
- 358
- Location
- Burton Upon Trent
Very nice build Sam, I like the rear wheel carrier and split tail gate
thanks Harry its getting there slowly,
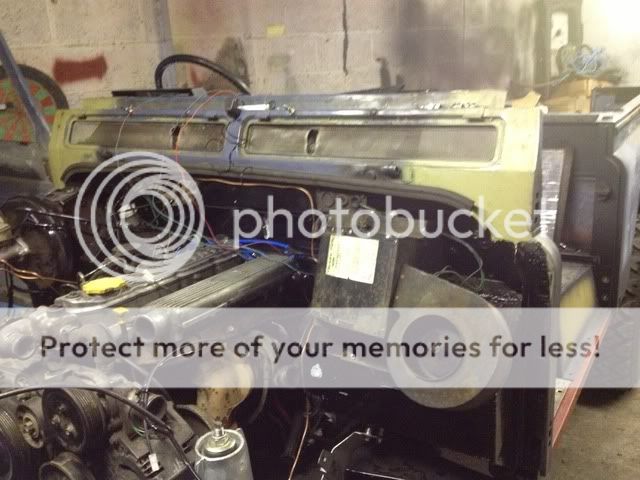
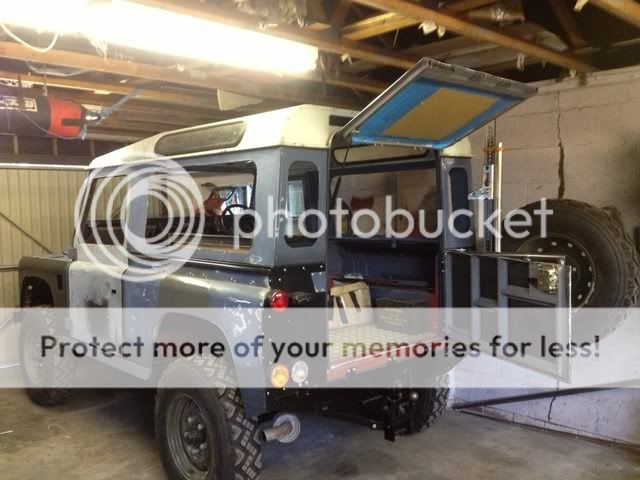
got a bit more done today started off by fitting the wings as now the engine is doing what it should, then spent some time fitting the top rad mounts as they needed further mods to clear the mounting pins then fitted the slam panel and front followed by the bonnet and its beginning to resemble a 90 again. :high5:
fitted the sills and bottom door seal the other weekend, only done the oneside once all the panels are retested (got some hardtop panels on there way and all being well another set of doors tomorrow) ill remove the roof and turn it around so i can complete the work on the other side (against the garage wall at the minute.
then got a little more done on the back door, the top needs more trimming then going to get some ali angle to cap the bottom, fitted a gas ram to open and hold the door up mounted on some simple brackets.
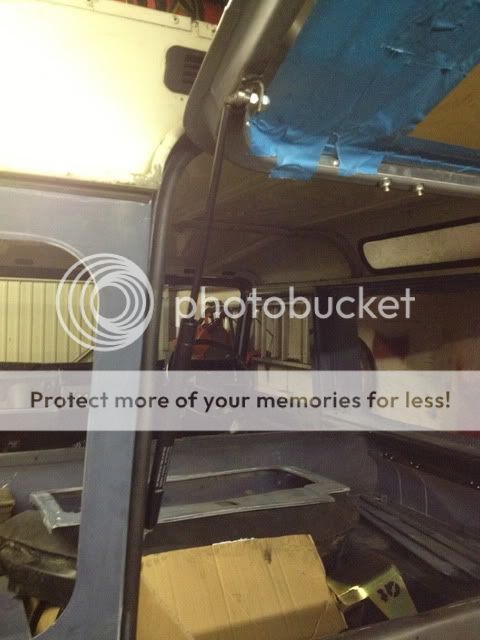
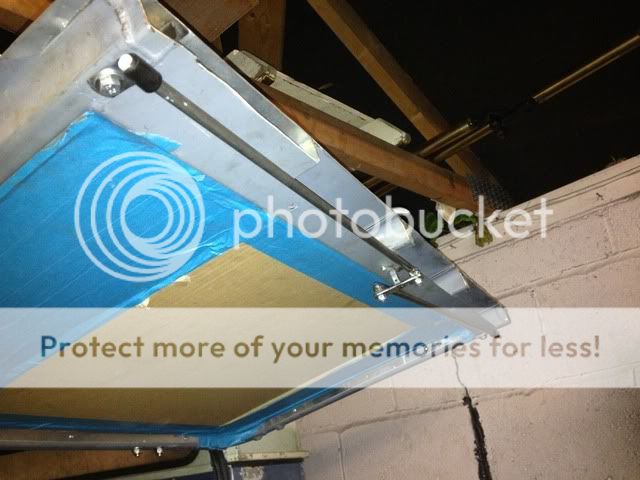
the locking method I'm working on for the door top,
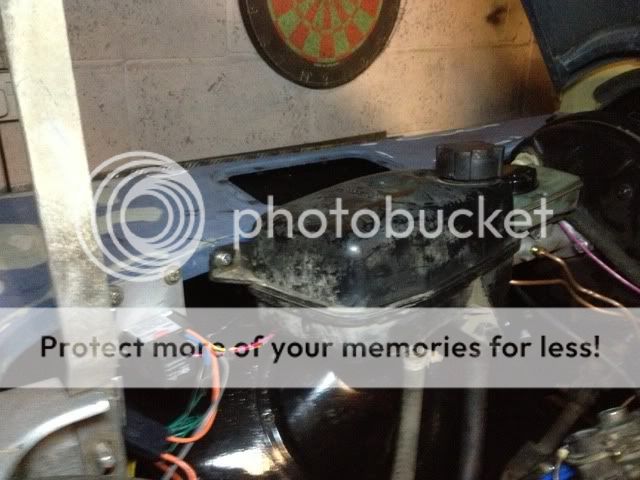
then finished off by fixing the header tank and fan controller to the wing,
thats all folks
SamDefender-Sam
New Member
- Posts
- 358
- Location
- Burton Upon Trent
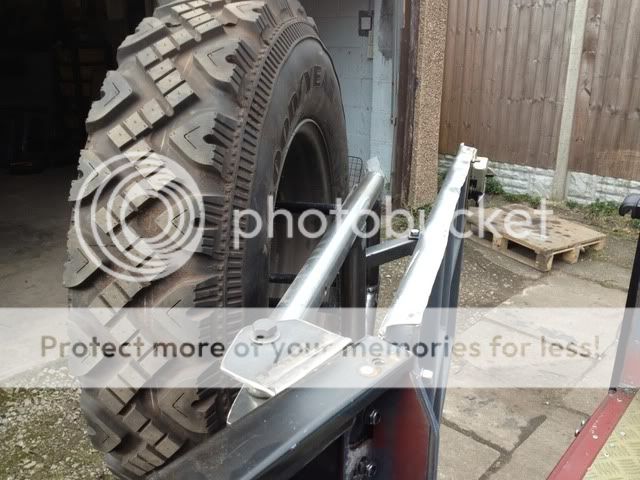
right been busy today, started off by finally finishing the wheel carrier (well just needs painting now) made the link mechanism that attaches it to the door, the plan originally was to make it tubular like the rest of the carrier but last sundays attempt went badly the tube just wouldnt cut into tidy notches like it did when the main carrier was fabricated so resulted a simple length of box section with a bracket at either end.
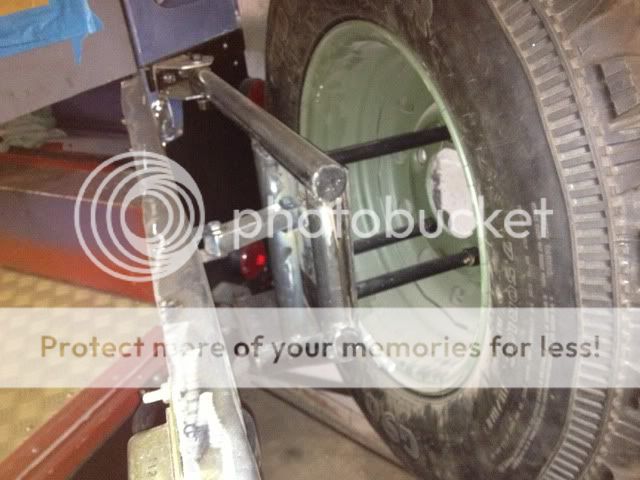
extremely pleased with how its turned out
then finished the top door catch and trimmed some more material off the bottom,

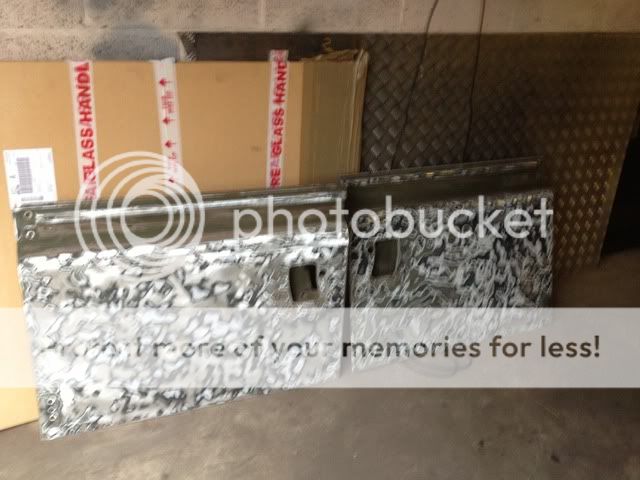
and my new doors (well to me anyway) thanks Harry/ Boris113, i think they look great .

the glass is there just took it out to replace a top rail seal/felt strip as the passenger side had a bad rattle. so probably take the glass out the drivers side to paint as well.
thats all for today hopefully take the roof off tomorrow and get it outside, will try and get some good pics with the camera they're coming out terrible on the phone.
:tea: Sam
extremely pleased with how its turned out
then finished the top door catch and trimmed some more material off the bottom,
and my new doors (well to me anyway) thanks Harry/ Boris113, i think they look great
.
the glass is there just took it out to replace a top rail seal/felt strip as the passenger side had a bad rattle. so probably take the glass out the drivers side to paint as well.
thats all for today hopefully take the roof off tomorrow and get it outside, will try and get some good pics with the camera they're coming out terrible on the phone.
:tea: Sam
Defender-Sam
New Member
- Posts
- 358
- Location
- Burton Upon Trent
Brilliant Sam - well done.
cheers mate, got too push to get it mot able ready for april then finish it off whilst using it, well thats the plan anyway still going to be quite a challenge.
danny6801
Well-Known Member
- Posts
- 1,665
- Location
- North Wales
Amazing job keep it up.
Defender-Sam
New Member
- Posts
- 358
- Location
- Burton Upon Trent
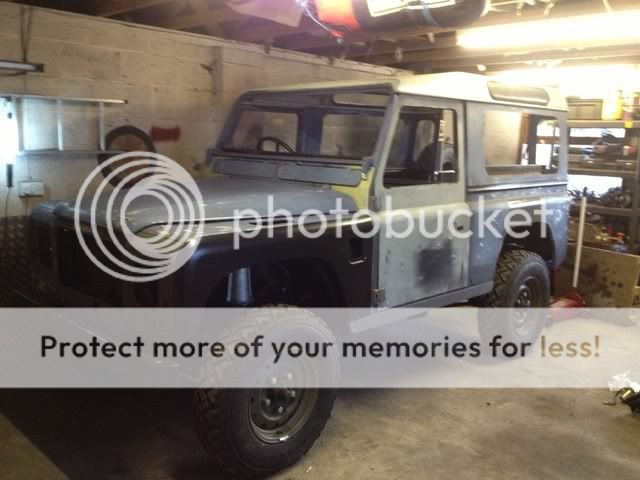
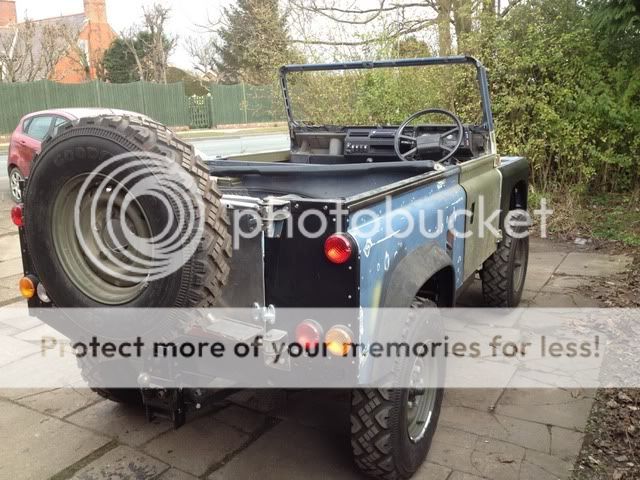
A little more progress today, started off by taking off the roof and sides so i could drive it outside to turn it around took some pics in decent light whilst i was at it.
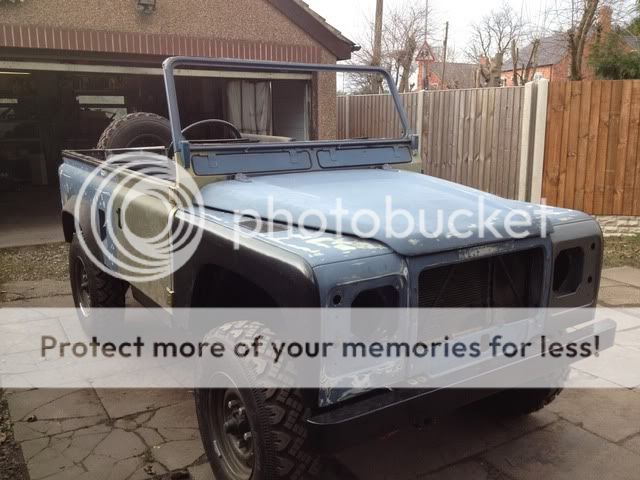
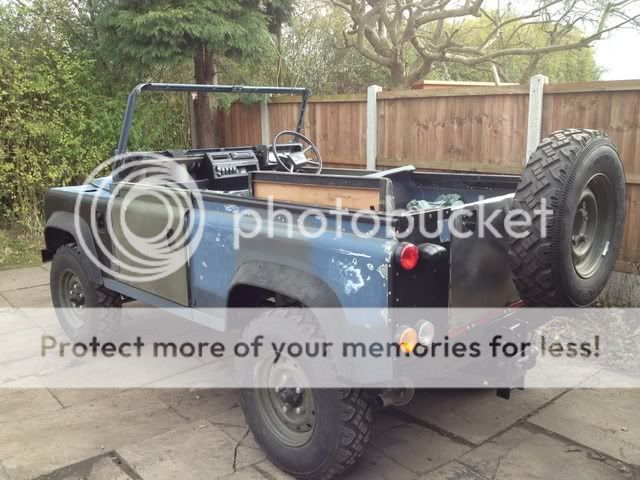
you may see that i have also fitted the eyebrows (well 3 i ran out of clips)
then finished off the day by sanding the doors, Dear army please use less paint on land rovers tis all..... got to have been almost 20 layers of paint on them and numerous diffent colours/schemes starting green then plenty of brown some hints of canary yellow then more brown, green, black, green then primer. still more to do on the doors around the rivets and from the curve to the cappings may have to be done by hand. then just the tops. i want to minimise the chance of reaction with the paint so plan to get as much off as possible.
thats all its having this weekend perhaps some more during the week. :tea:
mick the builder
Well-Known Member
- Posts
- 5,901
- Location
- Sligo,Wild West of Ireland.
Doing a great job there, keep photies coming
howardo
New Member
- Posts
- 6,783
- Location
- In the woods
nice.
Similar threads
- Replies
- 43
- Views
- 4K