Your expert opinions on my rust please!

This site contains affiliate links for which LandyZone may be compensated if you make a purchase.
The thing that puts me off lap joints is if I patch on the rear wheel arch and weld inside then won't there be a small pocket all the way around the underside where mud and water can get in? Does that make sense :confused:
 
The thing that puts me off lap joints is if I patch on the rear wheel arch and weld inside then won't there be a small pocket all the way around the underside where mud and water can get in? Does that make sense :confused:

Basically yeah but here's what you do. Cut out the old rusty ****e. Clean both sides with a grinder back to clean metal. Then cut a template and make your patch. Overlapping from either top or underside.

Now you have basically two overlaps, one underneath and one on top. Weld both sides all round. It's better for strength and for security. DON'T FORGET TO SEAM SEAL AFTERWARDS.

If you think of the welding tip as a pen and get yourself an a4 piece of paper. Then starting from the right hand side of the page travel across the sheet in small circles the size of say a five pence piece. Each circle should intersect the last one through is centre.

Pushing the weld is better than dragging it. You can also try just moving the tip from side to side in a backward arc fashion. These are the two methods I use but mainly the circles one.

Looking good so far
 
^^^ what he said. Getting both sides gives you twice the work to do but it makes it super strong. My advice is to put your patches on the outside of the vehicle where possible.

There's no real reason why it it was just my hunch, and I'm a genius so you should do what I say :D


Ok I'm joking.


Not about the genius bit though :hysterically_laughi
 
Cheers guys, sounds like I have a plan to work to now! I feel like I have a little more direction now! And seeing as your a genius MrNoisy, can you tell me a way to make some cold hard cash pretty fast so I can get moving with this project :banana:

I've bought some zin-tek ready for patching so all I need now is a complete floor kit, complete sills, seam sealer, primer, underseal, time, cash and probably a lot more I forgot!
 
And if I get some time tomorrow I'll weld some 5p circles and post them up for quality control to go over :p
 
the simplest option mate is to group together some possessions of reasonable value and sell them on eBay.

No joke, sell fridge, get dosh :)

Maybe it's time to part with all the expensive car detailing kit I have :(

On a separate note, does anybody have any ideas how I can get the right curve on a piece of zin-tek to fit the wheel arch? And is the seat belt mount a square of 3mm with a nut welded on? The repair panel is £20 on eGay but surely it's easy to make?
 
the simplest option mate is to group together some possessions of reasonable value and sell them on eBay.

No joke, sell fridge, get dosh :)

Take beer out of fridge first. Sell fridge. If get enough for fridge, drink beer. If get naff all for fridge, sell beer.

Do not tell misses your plan, they have habit of thinking us men stupid.
 
Maybe it's time to part with all the expensive car detailing kit I have :(

On a separate note, does anybody have any ideas how I can get the right curve on a piece of zin-tek to fit the wheel arch? And is the seat belt mount a square of 3mm with a nut welded on? The repair panel is £20 on eGay but surely it's easy to make?

If your existing arch immediately around the mount is sound you could utilise that and weld it over your patch. With regards the patch curve itself, my recollection is that the arch in that area is a single curve and not a compound one. Any road how, just bend it around to suit making small slits so the patch will bend in a compound way.

A lot of pairs to the discovery bodywork is going to test your ingenuity and tenacity so just be patient and away you go.

It's shagged around the mount so I need to cut it out and start again. Once I've got the curve In the new piece I think it's just a case of putting a 3mm piece on the back with a nut on.

I keep asking questions because I'm trying to get every job straight in my head. But when I actually get cracking I'm sure most of it will explain itself
 
found some more pics of the area your doing.
my disco this time, not a mates! (and rather rushed)

mydisconsrinitialhole.jpg


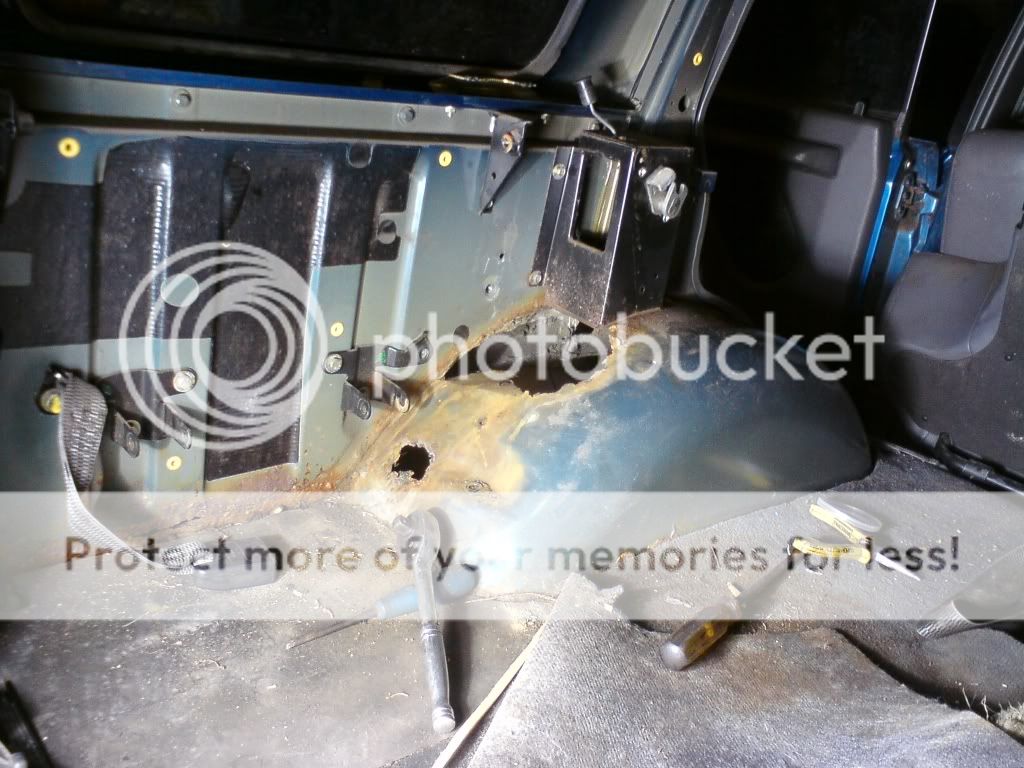
the sunday night "i'll just poke my wheelarch"

mydisconsrwelding1.jpg


its just gonna get worse.....

mydisconsrandquarterpanelholes.jpg


told yer....

mydisconsrprepped.jpg


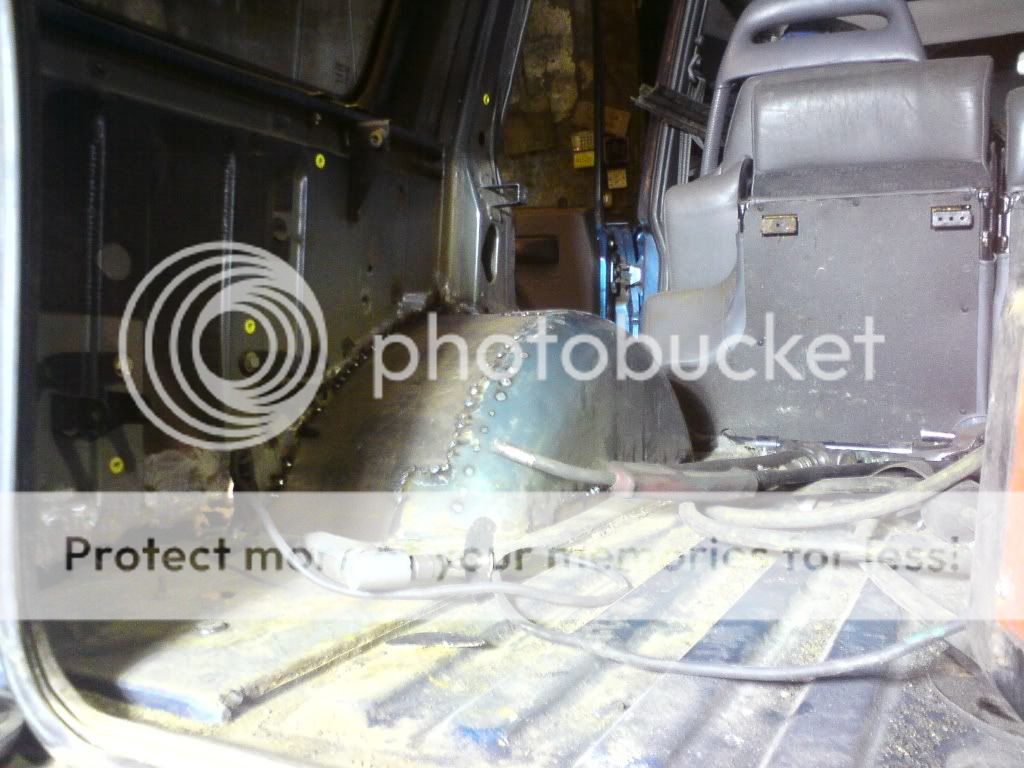
****e cut out and prepped ready for a repair section
(dont ask why the crane hook is there :confused:)

mydisconsrrepairsection.jpg


repair section cut then bent using rollers. appreciate not everyone has a set
but could crudely do it over a lump of scaffold in vice.
or tack one end, bend it down and tack next 2 inch, etc

mydisconsrrepairsectiontackedin.jpg


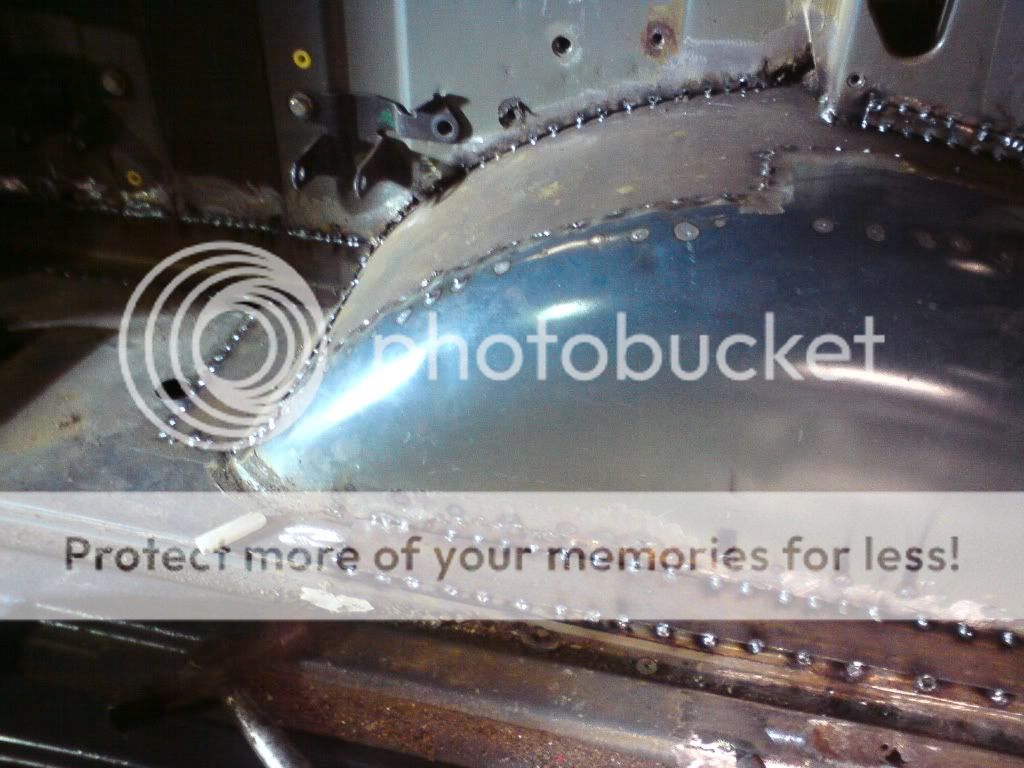
repair tacked from above

mydisconsrrepairfrombelow.jpg


repair tacked from below

mydisconsrrepairsectionandbodgitstripstacked.jpg


bodgit filler strips cut, bent and tacked

mydisconsrbodgitstripstacked.jpg


rear quarter fillet strip bent and tacked.

all parts tacked prior to seam welding inside and out. less heat distortion, and when seam welding do an inch or two, then an inch or two at another place. one long run and it'll warp all over.

unfortunately must have forgot to take any more pics, as it were all done in one night. kinda of "didnt really want to find this 2 days before my test...."
 
Great pics mate!

Yeah I just cut the panels to shape then pressed them in by hand. Easy enough to hand shape, maybe hammer in there to finish.

In fact, I did butt weld up to the seatbelt plate!

And, what kind of quality steel do you expect from the fridge?? Much better to sell it as a whole. Not such a genius idea after all.

I retain my title :)
 
great thread.
Soon I will be getting my first Discovery 1 ( that when my insurance pays out)
At moment I own a Tig welder. Now you chaps out there for the future do you think it will be worth me investing in a small mig.Ive been thinking about it. but I seem to be doing ok using the tig on my present 4x4 though its easier with a 2nd pair of hands.
 
never had a great deal of success with the tig set on second hand vehicle steel, you have to get it so clean to stop all the **** jumping onto the tungsten.
good with fresh steel tho and making pipework up.

would recomend a mig, point and press really. (tho you still need to clean stuff up)
 
Cheers for that.ive used mig in past but have always favoured tig prob because my first welding was with gas
Thoughb i do like being able to use very low current when working on thin stuff
Sent from my GT-I9100 using Tapatalk
 
Back
Top