Other what have u done on ur disco today

This site contains affiliate links for which LandyZone may be compensated if you make a purchase.
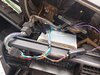
I can see that yours has broken differently to mine. So the fix in the link wouldn't work for me, sadly.
On mine it is the little placky thing that rotates a bit to make it click shut then click open that bust in two. I tried various glues and none held.:(

Yep, that's snapped on mine too. I managed to get it to stick with some epoxy and held with duct tape. Worked fine if you were careful, but then you forget it's broken a few months later and aren't careful enough...
 
Funny it was my driverside that rotted through, but as mine were rubber covered I could not weld in new steel, so a full replacement needed
 
Anyone thinking rot is confined to our landrovers has never owned a Transit.
20220522_140901.jpg
 
I daresay it could be done, but as I have no other use for a 3d printer and cannot justify getting one even to myself, then that'd be on the back burner for a while.
But a good idea none the less.
What i need is a spotty teenager with a need to do summat like it for a school project. I could give him the sample and get him (or her, lets not be sexist!) to make a few.
Then I could use a couple and come on here and flog the rest!!
The only glue to glue plastics and still resist pressure I have found has been that pongy stuff plumberists use for drain pipes.
But this bit was so tiny and fiddly it just melted it/them!:(:(

Hows this, then? Seems to hold up so far
 

Attachments

  • 20220522_141503.jpg
    20220522_141503.jpg
    339.6 KB · Views: 92
Connect2 lead arrived to link my steering controls with the radio. Only to find the existing LR/BMW to ISO adaptor does not have the wire link on the harness. Does anyone have the pinout for the LR plug ?
 

Attachments

  • Lead.jpg
    Lead.jpg
    340.4 KB · Views: 81
Ive got the issue identified, its just I need the pinout, so I can connect the brown wire from the Connect2 module to the 17 round pin plug. That wire link is missing.
 
20220526_154911[1].jpg
But the existing ISO harness adaptor doesnt have a wire link back to the original LR plug. The module is looking for an input from the resistive ladder on the steering wheel, but cant see anything. I could test it by sticking the appropriate resistors between ground and the brown wire, to check the module is picking up inputs.
 
Well, grey/red goes back to pin 10 on the 17pin plug and grey/black comes back to pin 17. The pair of wires are from the steering switches. Just need my meter to confirm the switches are working ok. I should have done a thread on this...

Switches working fine, and back to the pins.
 
Last edited:
Making a start on injector seals....

A438B34D-CA79-4827-9B74-4658C9BEF481.jpeg


I’ve got the slide hammer jobbie on order, but in the meantime had a go at levering with an Allen key, though I can’t see what I’m supposed to be levering against. I know the injector has a relieved section that the slide hammer hooks on to, but can’t see anywhere else or what to brace it against. Hoping the right tool turns up before Thursday!
 
Tried to finish up with the coolant system of my TD5. Wishing I could understand why the TD5 engine's cooling system doesn't seem able to hold a proper coolant level despite being able to more or less hold it when the water pump was leaking.:rolleyes:
This after I drained it, well at least partially, via the drain plug at the front under the rad.
Getting fed up of following the instructions to the letter and it not working.:mad::mad::mad:
Open to all ideas.
Please!!!
 
Hurrah! The injector slide hammer arrived in time for a fun packed bank holiday, but no instructions....
Have I got the position of the shaft right? Presumably the angled shoulder inside is there to open the top of the 'cylinder' and make the bottom part grip the injector? The collar isn't a tight fit.

IMG_20220526_090223.jpg
 
Doesnt need much of a tap out. Its only the strength of the o ring after the retaining clip is removed. The collar ring doesnt need to be tight, its only purpose is the keep the two halves of the tool together enough to grip the injector body.
 
Last edited:
Well the injectors came OK with a few good whacks of the slide hammer. There was a fair amount of coke on the nozzle that needed to be overcome as well as the o ring. Cleaned up OK though.

IMG_3185.JPG


Found most of the washers looked like this, with something a bit like crystallisation on the edge. Didn't see any that with obvious signs of having 'let go', but then I don't know if they would anyway.

IMG_3187.jpg


So all cleaned up, new washers and 'O' rings, put back in and torqued up - and it still won't start. Bum.

I'd had a meter on the battery while cranking previously, and I thought I saw it dip below 11.0V, but it was starting fairly quickly so I only saw the reading briefly. Tonight, with it just turning over and not firing, I could see the meter was at abut 10.5V, so tomorrow I'll jumper another battery to it and see if goes then.
 
Back
Top