- Posts
- 38,051
- Location
- North Shropshire
The usual disconnect/reconnect interest wiresDoes seem dark for 30,000. Perhaps it gets a little hotter with your rad setup? Paper looks good, discoloured but clear
@kermit_rr how did you fix SRS ?
The usual disconnect/reconnect interest wiresDoes seem dark for 30,000. Perhaps it gets a little hotter with your rad setup? Paper looks good, discoloured but clear
@kermit_rr how did you fix SRS ?
Hope mine is that simple, think issue’s in here somewhere. Got til Oct to sort it outThe usual disconnect/reconnect interest wires
View attachment 179028 phase one of the gearbox oil change... A bit darker than I'd of liked, but she's done 30.000 in the last two years and a run to Spain on Thursday, (bank holiday for us over here) then Ill drop the oil again along with the filter and hopefully another 30.000mls..... it's dark in the jar but when on white paper very little debris ....View attachment 179028 View attachment 179029
If i recall there's an srs related cable in the back of the dash. There also needs to be 2 working bulbs on the idiot lightHope mine is that simple, think issue’s in here somewhere. Got til Oct to sort it out
View attachment 179046
Good point, I may do two drops before the filter goes in with the third lot of oil.Does look dark but it will take a few flushes to get it all out.

 ,if its just a bit grey then there's not too much ground up metal being made! will post pics when it's finished
 Hmm painting my wing mirrors the wrong way
View attachment 179028 phase one of the gearbox oil change... A bit darker than I'd of liked, but she's done 30.000 in the last two years and a run to Spain on Thursday, (bank holiday for us over here) then Ill drop the oil again along with the filter and hopefully another 30.000mls..... it's dark in the jar but when on white paper very little debris ....View attachment 179028 View attachment 179029
Need to see this. One of mine is pretty crabby. Did you take it off or mask around it.?Hmm painting my wing mirrors the wrong way
Need to see this. One of mine is pretty crabby. Did you take it off or mask around it.?
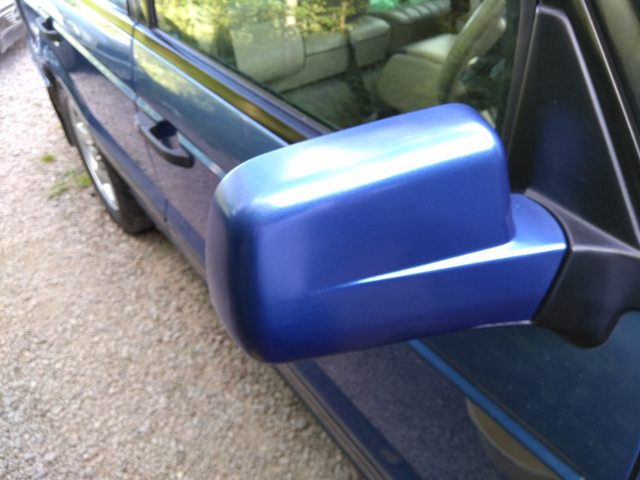
 thsi is also after 3 coats of colour no lacquer at this stage
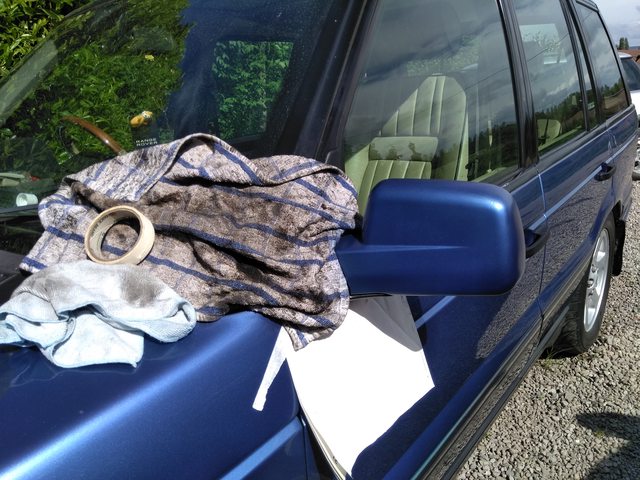
You finally got round to it! Yay!View attachment 179028 phase one of the gearbox oil change... A bit darker than I'd of liked, but she's done 30.000 in the last two years and a run to Spain on Thursday, (bank holiday for us over here) then Ill drop the oil again along with the filter and hopefully another 30.000mls..... it's dark in the jar but when on white paper very little debris ....View attachment 179028 View attachment 179029
Hi, yes I will when I get home. Currently in France for a week. I don't have a clear pipe on mine, just get heavy duty fuel pipe. I'm sure that your fuel pipes shouldn't be sweating fuel.Think it was you that pointed out to me it was in wrong place some time ago?
May stick the one I took out before the filter can you take a pic of yours for me?
Running the airlock out without lift will be fun
Made sure it is not too tight as the plastic would restrict easily with those powerful little clips. If i wobbled the NRV it would fill up with bubbles so xtra precaution. Clear Pipe is always clammy with diesel but too expensive to replace. Will try fuse I thought it was just a relay
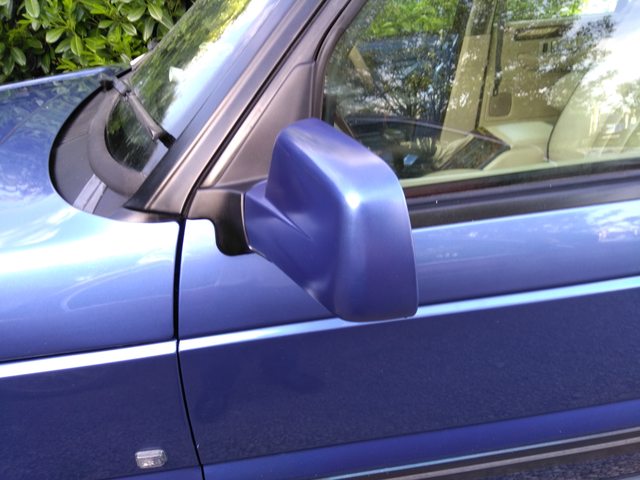
This is where I start from..Uhh TBH i did neither
Photo's speak for themselves
B4
Masked up
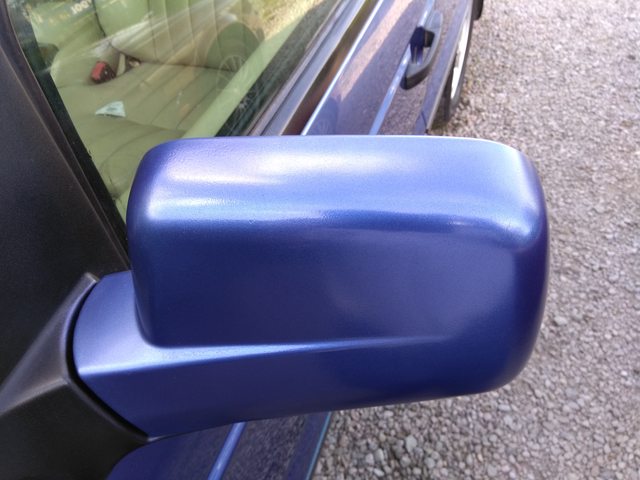
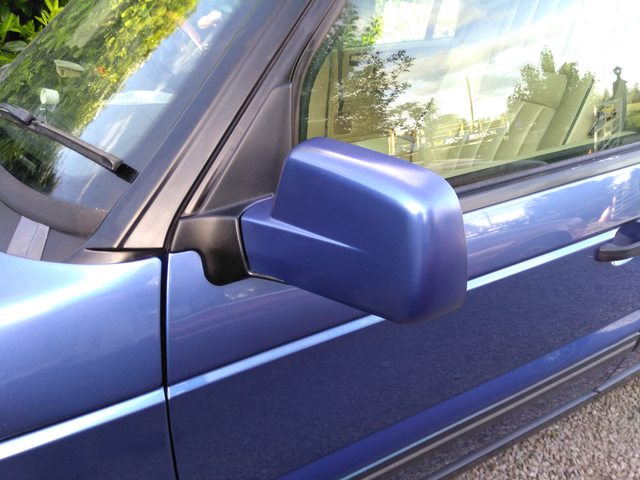
After sanding it down to primer with 1000 - 2000 grit, some paint prep and 3 coats of colour and 4 coats of lacquer this is the result..
polished up ok..
I wetsanded inbetween all coats to give a Glass type smoothness
2 coats of wax too.
Plenty of eBay suppliers can sell spray cans made up from paint codes/ colour name/ years.Just spec'd MC blue paint in ebay
Plenty of eBay suppliers can sell spray cans made up from paint codes/ colour name/ years.
Welcome To LandyZone, the Land Rover Forums!
Here at LandyZone we have plenty of very knowledgable members so if you have any questions about your Land Rover or just want to connect with other Landy owners, you're in the right place.
Registering is free and easy just click here, we hope to see you on the forums soon!