SpenB - 200Tdi Rebuild

This site contains affiliate links for which LandyZone may be compensated if you make a purchase.

SpenB

Member
Posts
89
Location
Scottish Borders
Morning all,

Ok then this has been a long time coming and will probably drag on in bits and drabs so bare with me.

Don’t know if you are interested in a rebuild thread so let me know and I will stop or carry on. lol?

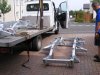
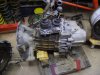
First of all you may remember I got a pair of matching Disco 300Tdi axles.
That way I was gaining rear discs and was able to refurb whilst not having to start stripping the landy down.

I finished the front 1 about 9 months ago but with work and family commitments/problems I have only just started the rear axle (as you have seen from my other post about the rear calipers).

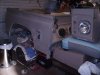
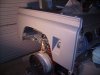
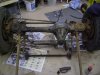
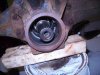
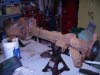
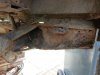
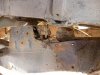
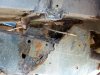
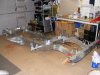
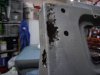
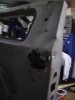
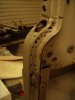
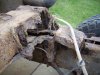
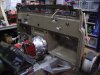
So have stripped the rear axle down to its casing – the diff is still attached.
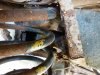
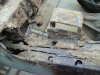
Will have to swap the 3 pin prop connection to the defender 4 pin – don’t know anything about how to do that or which parts I will need – so any advice or help on that part, please give freely.

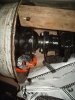
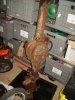
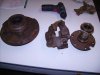
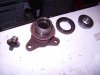
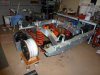
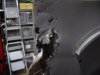
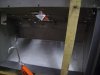
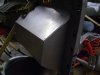
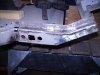
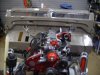
All the parts I have take off are just lying around and the next job will be to clean them up and work out what I need to order.
Used the parts drawings for the front axle but ended up missing a few items, so this time I will lay everything out on the floor and cross-reference with my shopping list just in case. LOL

I will post pictures as and when I can.

Cheers, Spencer
 
Ok, Some pics, One on the front axle before I started and then finished – can’t get a better pic as it’s tucked away in the garage. Then one of the rear axle draining and some parts off it that have had the crap chipped off, still need to start the other side’s parts.

Will need to remove all the seals and bearings then get them cleaned before painting.
 

Attachments

  • Front Start.JPG
    Front Start.JPG
    89.2 KB · Views: 349
  • Front Finish.JPG
    Front Finish.JPG
    130.3 KB · Views: 369
  • Rear Start.JPG
    Rear Start.JPG
    148.1 KB · Views: 346
  • Rear Parts Middle.JPG
    Rear Parts Middle.JPG
    66.9 KB · Views: 346
Ok then, here’s where I’m at.

Some Pics below showing the axle in state of rub down. The inside of the Diff and the parts I have taken out apart from the spacer washer which went inbetween the Pinion Flange and the back of the bearing.

Still Unsure and need help to understand:
Ok then when I put it all back together and tighten the bolt up to about 100Nm / 75lb ft how do I check the pre load of that pinion? I have heard about putting bolts in the 4 holes and winding string around them and then at 90° using fishing scales to check resistance. But I cant find and info on this to what the scales should be reading? Any advice?
 

Attachments

  • Pinion Parts.JPG
    Pinion Parts.JPG
    73.2 KB · Views: 288
  • Inside Diff.JPG
    Inside Diff.JPG
    123.1 KB · Views: 313
  • Rear Bench.JPG
    Rear Bench.JPG
    104.2 KB · Views: 285
Ok update:

Just phoned Richards and the chassis is at the galvanisers so not too long now.

Nearly finished the rear axle.

Finish painting the bits I wanted to paint.

And the Pool and Darts season is just ready to begin - Roll on late nights and plenty of orange squash. lol
 

Attachments

  • Inside Rear X Member.JPG
    Inside Rear X Member.JPG
    94.3 KB · Views: 287
  • P Shock Mount.JPG
    P Shock Mount.JPG
    107.9 KB · Views: 279
  • Rear Shock Mount.JPG
    Rear Shock Mount.JPG
    118.8 KB · Views: 291
  • Spring Mount.JPG
    Spring Mount.JPG
    121.2 KB · Views: 260
Ok then, here’s where I’m at.


Still Unsure and need help to understand:
Ok then when I put it all back together and tighten the bolt up to about 100Nm / 75lb ft how do I check the pre load of that pinion? I have heard about putting bolts in the 4 holes and winding string around them and then at 90° using fishing scales to check resistance. But I cant find and info on this to what the scales should be reading? Any advice?


This vid is quite good at explaining things and worth a watch Differential Ring and Pinion Gear Setup - YouTube
 
Ok then just a small update.

works slow and run out of money so will be slower.lol
 

Attachments

  • All New 2.JPG
    All New 2.JPG
    107.8 KB · Views: 294
  • 12-10-13 Chassis Pics 1.JPG
    12-10-13 Chassis Pics 1.JPG
    169.9 KB · Views: 285
Ok then, been slacking on the update front so let me catch up.

Got the engine out just before xmas and split it. It needs a new clutch. MORE MONEY AHHHH!
 

Attachments

  • 1-1-14 Engine Split from Gearbox 2.JPG
    1-1-14 Engine Split from Gearbox 2.JPG
    120.6 KB · Views: 231
  • 1-1-14 Gearbox Split from Engine 1.JPG
    1-1-14 Gearbox Split from Engine 1.JPG
    113 KB · Views: 241
Sent the bulk head away for shot blasting and came back holey!
 

Attachments

  • 1-12-13 OS Corner.JPG
    1-12-13 OS Corner.JPG
    64.8 KB · Views: 232
  • 1-12-13 OS Top Corner.JPG
    1-12-13 OS Top Corner.JPG
    75.5 KB · Views: 245
  • 1-12-13 OS Footwell.JPG
    1-12-13 OS Footwell.JPG
    53.3 KB · Views: 222
  • 1-12-13 NS Corner.JPG
    1-12-13 NS Corner.JPG
    55.7 KB · Views: 291
  • 1-12-13 NS Footwell Out.JPG
    1-12-13 NS Footwell Out.JPG
    67.7 KB · Views: 280
  • 1-12-13 NS Top Door Post.JPG
    1-12-13 NS Top Door Post.JPG
    65.7 KB · Views: 244
Think it was due a new chassis????
 

Attachments

  • 12-10-13 Chassis Pics 8.JPG
    12-10-13 Chassis Pics 8.JPG
    154 KB · Views: 265
  • 12-10-13 Chassis Pics 3.JPG
    12-10-13 Chassis Pics 3.JPG
    166.4 KB · Views: 299
  • 12-10-13 Chassis Pics 9.JPG
    12-10-13 Chassis Pics 9.JPG
    159.1 KB · Views: 234
  • 12-10-13 Chassis Pics 6.JPG
    12-10-13 Chassis Pics 6.JPG
    140.1 KB · Views: 236
  • 12-10-13 Chassis Pics 5.JPG
    12-10-13 Chassis Pics 5.JPG
    177.1 KB · Views: 303
Dont laugh - my very first attempts at welding?
 

Attachments

  • 4-1-14 OS Top corner welded 2.JPG
    4-1-14 OS Top corner welded 2.JPG
    109.4 KB · Views: 258
  • 23-12-13 OS Corner Cut Out 2.JPG
    23-12-13 OS Corner Cut Out 2.JPG
    72.2 KB · Views: 266
  • 23-12-13 OS Door Post Match up top 1.JPG
    23-12-13 OS Door Post Match up top 1.JPG
    65.7 KB · Views: 282
Ok... the 12 monthly update by the look of things lol.

Not much happened as 2 weeks after tha last post the son got diagnosed with Type 1 diabetes - He had just turned 7.

He was in a very bad way and got rushed in to hospital and stayed there for a while - and they tell us its a good job we got him in so quick.

So he takes up alot of time - 6 injections a day - to basically put it... to keep him alive.

Well, very nearly repaired all the bulkhead and then got the offer of a mint 300tdi one. So took that to save some time.

Just managed to pick up a "better looking" seatbox, will need to cut out the bottom of the battery box and weld in a new panel.

Cheers,
 

Attachments

  • 14-11-25 Bulkhead Painted 2.JPG
    14-11-25 Bulkhead Painted 2.JPG
    101.1 KB · Views: 192
  • 14-11-25 Bulkhead Painted 4.JPG
    14-11-25 Bulkhead Painted 4.JPG
    92.2 KB · Views: 214
  • 14-11-05 Bulkhead 1st time fit 1.JPG
    14-11-05 Bulkhead 1st time fit 1.JPG
    112.5 KB · Views: 207
Just a quick update.
Managed to get the Rear Tub from down the side of the house and into the garage.
The seat belt areas were non existance and had to be plated. The 3 cross bar supports i have had to weld up.
Tub is just sitting high and rearwards whilst other items need doing.

15-11-23 Tub Repair 2.jpg
15-11-23 Tub Repair.jpg
15-11-24 Tub Base.jpg
15-11-24 Tub First Fit.jpg
15-11-26 Tub Drivers Etched.jpg
 

Attachments

  • 15-11-23 Tub Repair 2.jpg
    15-11-23 Tub Repair 2.jpg
    59.9 KB · Views: 118
  • 15-11-23 Tub Repair.jpg
    15-11-23 Tub Repair.jpg
    62.9 KB · Views: 155
  • 15-11-24 Tub Base.jpg
    15-11-24 Tub Base.jpg
    88.6 KB · Views: 162
  • 15-11-24 Tub First Fit.jpg
    15-11-24 Tub First Fit.jpg
    102.6 KB · Views: 135
  • 15-11-26 Tub Drivers Etched.jpg
    15-11-26 Tub Drivers Etched.jpg
    88 KB · Views: 136
Back
Top