tomcat59alan
Well-Known Member
- Posts
- 18,611
- Location
- wirral and triquivijate
It would smell like a chip shop
Thanks Geoff
It'll get used but not as a daily
What's wrong with that.

It would smell like a chip shop
Thanks Geoff
It'll get used but not as a daily
What's wrong with that.
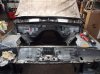
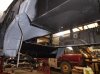
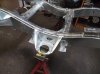
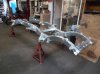
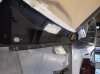
Underneath is where the bulk of the work is required so in the near future
the body will be lifted off the chassis to properly see whats needed but i've
had it on a ramp and the chassis itself looks in very good condition with
only light surface rust.
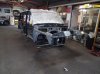
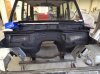
I got mine disassembled in a garage in Poole, Dorset, and they were amazed that I had no rust underneath, after almost 25 years of continuous use.
The only rust I got was guess where under the rubber mats of the driver's cabin. Ouh!
But otherwise very clean!!
Rust is the Nr 1 killer of a car.
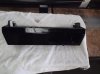
She looks great! Try perhaps another color, as I think that black is not so good for a Classic. Is it the original color?
The weather conditions are better here in France so the cars don't rot away as fast as they do in the UK.


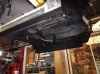


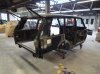
Great picture dunkan, i love that through all this, the headlining is still in !


Welcome To LandyZone, the Land Rover Forums!
Here at LandyZone we have plenty of very knowledgable members so if you have any questions about your Land Rover or just want to connect with other Landy owners, you're in the right place.
Registering is free and easy just click here, we hope to see you on the forums soon!