Important read all of this BEFORE you try and do it
I'm doing this over the next few day while I have the time, I will try and do a comprehensive write up so that even a numpty like me can follow it, so if there's anything you feel I have missed out on then please say, so I can include it (I can take pics as I'm putting it back together)
Time: About a day, depends on how you work, but I could probably do it in that time with a walk though
Cost: About £40 all in depending what you pay for the different fabrics, my cost came to a little less
Fabric: Home - Fabric Online
http://www.yourautotrim.com/
http://www.nationwidefabrics.co.uk
Tools: small flat head screwdriver, Phillips, 17mm socket (or adjustable for seatbelts) thin blunt bladed knife like a butter knife, Hover/Dyson a few CLEAN cloths, craft knife (or Stanley knife blade) hex head for the sunroof (I don't know what size though lol) small snips for the drain tubes on the sunroof (to cut cable ties) 4 cable ties (to fix them again!!)
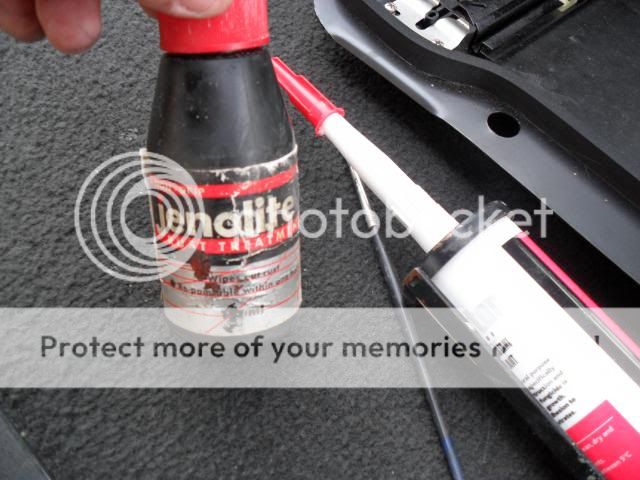
Glue (Hight Temperature Adhesive From about 90°C to 120°C I used 2 different brands of this stuff, I ran out of glue and ordered more, this was the best one I found to use was MEGAFIX you actually need 3 for the head liner (or 4 if your doing the pillars as well) 3 or 4 of this: eBay - The UK's Online Marketplace
If you want to do your pillars (in leather but its the same if you want to use fabric) then I have this guide for them already
http://www.landyzone.co.uk/lz/f10/how-refurbish-your-door-pillars-step-step-guide-105740.html
But if you can get the foam backed fabric, its probably easier to fit in to the contours, and will be more forgiving, if you cant the thicker the better
I used 3m of fabric (you need 4m for the pillars as well) its enough to do the sunroof as well, but it must be 150cm wide at least
CREAM - Fabric Online
Summery if your thinking about doing this job, its not easy out of 10 (1 being dead simple 10 being almost imposable ) I would say this is a 8 or 7 to get absolutely perfect and a 5 if you don't mind the odd wrinkle, but having just said that most of the wrinkles will be hidden, the hardest parts to do are the contours, handle reassesses are a bugger, and the front where it has like a small hump, I took my time doing that and it came out OK, it will be hidden anyway if you make a mistake by the sun visors, the same with the seals and handles, they will hide any bad edging you may have done, also sand down the head liner, as any blemishes will show TIP: the darker the fabric you use the less imperfections will show
This may sound stupid but if your especially using a light colour fabric, wash your hands and keep them clean (try not to wear gloves they don't show the muck on them) you or you will dirty the lining, I didn't realise that while I was doing it I had dirty hands, lucky it cleaned off
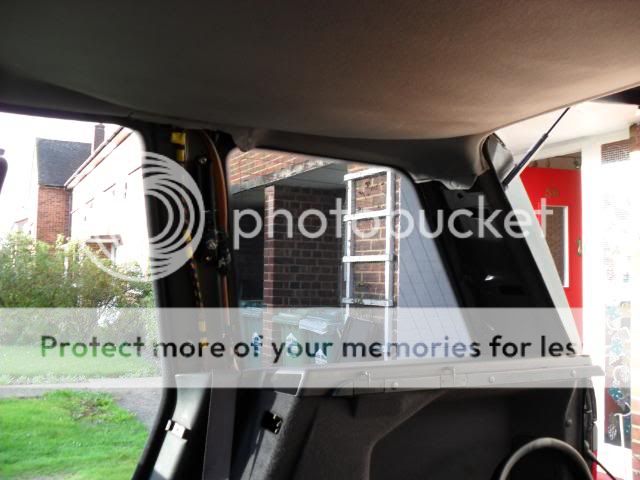
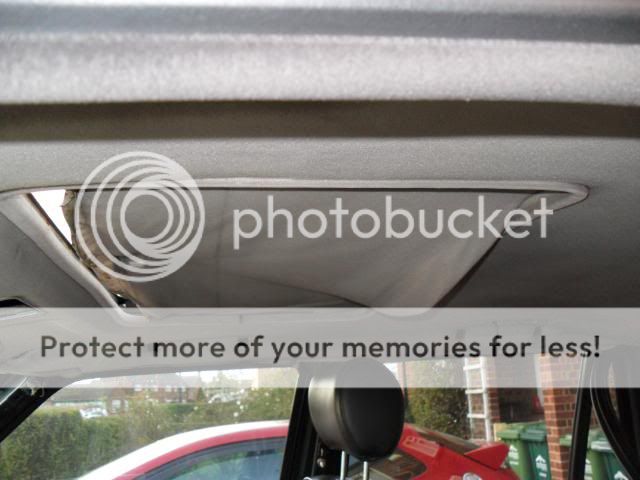
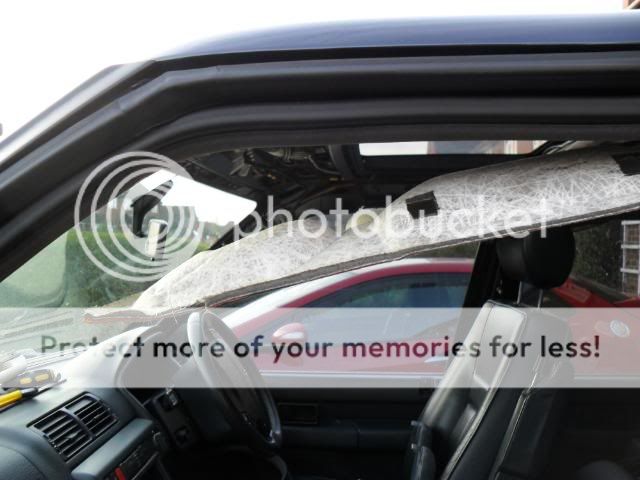
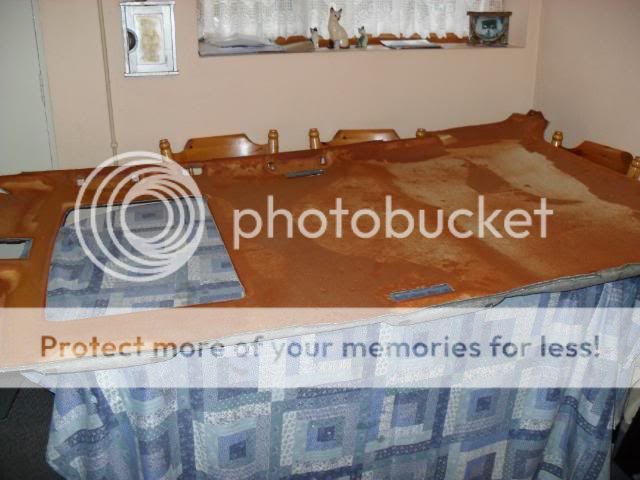
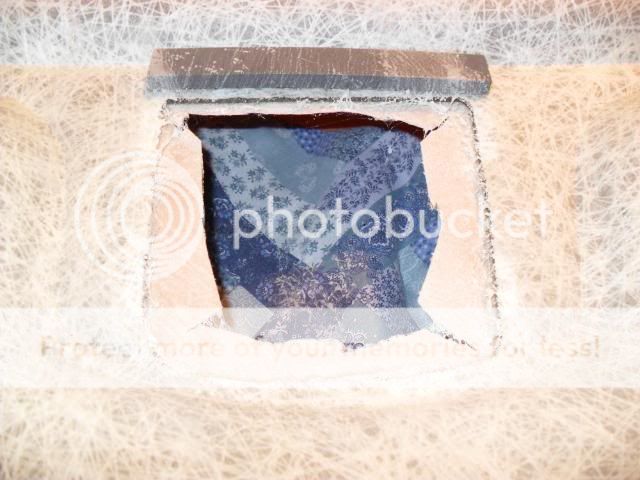
First thing you have to do is take everything off that's holding the liner up, you need to undo the seatbelt tops, and all the panels (8 of them) and (if you have a sunroof) all the gubbings around it as well the lights and the grab handles, it helps if you fold the back seats flat then things are more accessible and easier for you to do
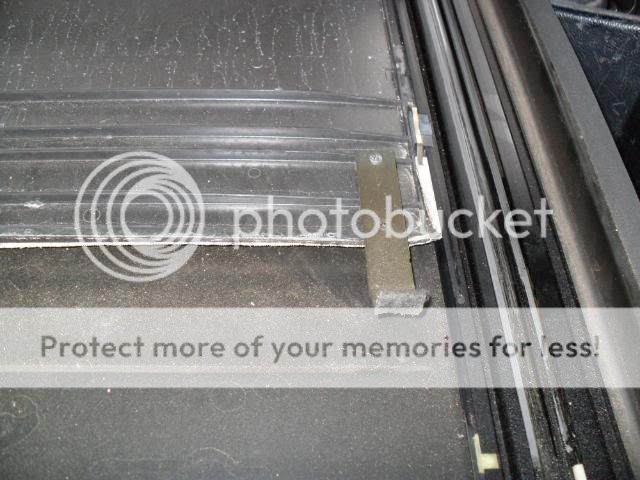
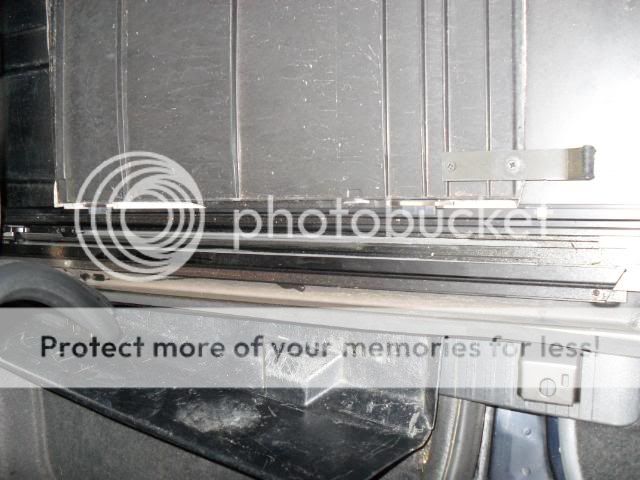
Start at the back and work yourself forward if you can reason being there's 2 studs at the back of the lining that will continue to hold the roof up, keep them in there until the last thing and you get the lining out, pull the back door seal away at the top and sides, this will make the back side panels more accessible to take off, prize the one side of the back panel lose so the pins are all out on the one side (opposite side of the side window)
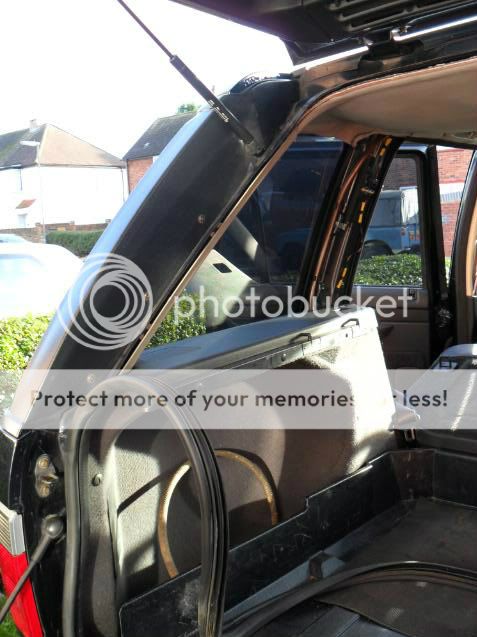
See where my fingers are? stick them at the back and pull towards you are only now pulling 3 pins out on the window side as you did the other 3 already (didn't you?)
(there are 6 pins holding this panel in) look at my next pic so you know where they are
Next take the top of the seatbelts off (no pics don't be such a numpty even I wouldn't need a pic for this) the black plastic lug hiding the nut at the top of the seatbelt (yours could be a different colour) carefully pull them off with a small screwdriver (they have 2 lugs on each side) so don't be pulling them off at an angle or you might break one of the lugs..... got them off? good now just undo the nut holding to top of the belt... well done have you broken anything yet? I haven't
Panels the seals cover the edges pull the seals away (same as on the back) again pull them towards you not at an angle there the same as the back ones you took off
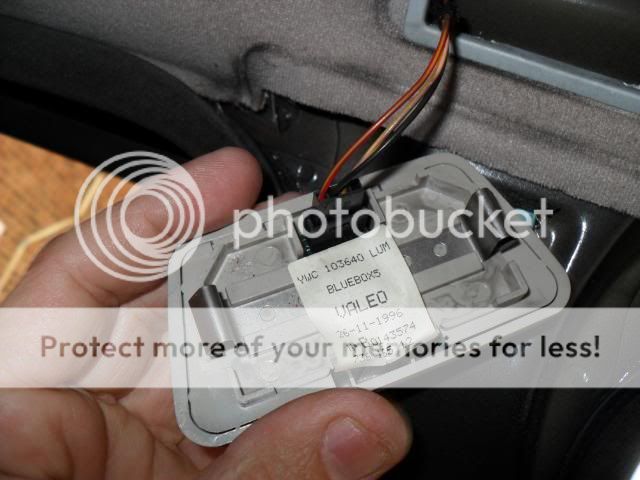
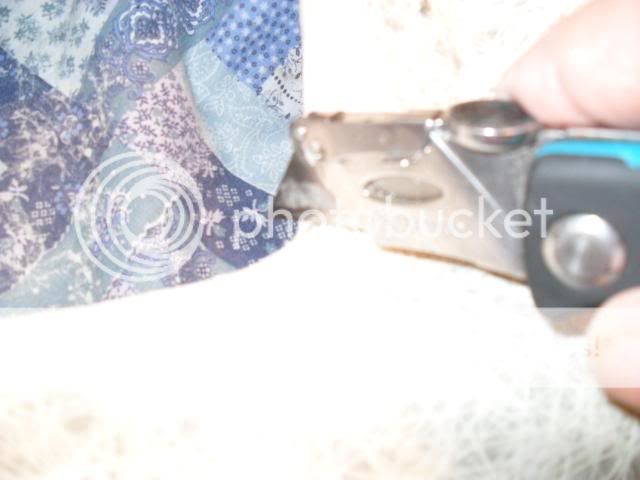
Lights and handles take the plastic window of the inside light off, and there's 2 screws holding them in just undo them
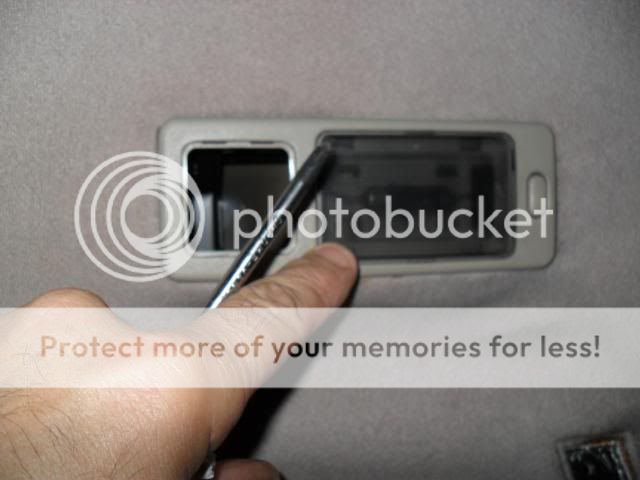
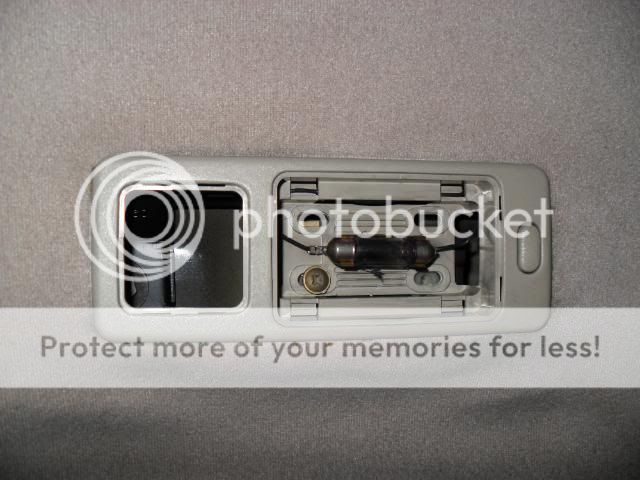
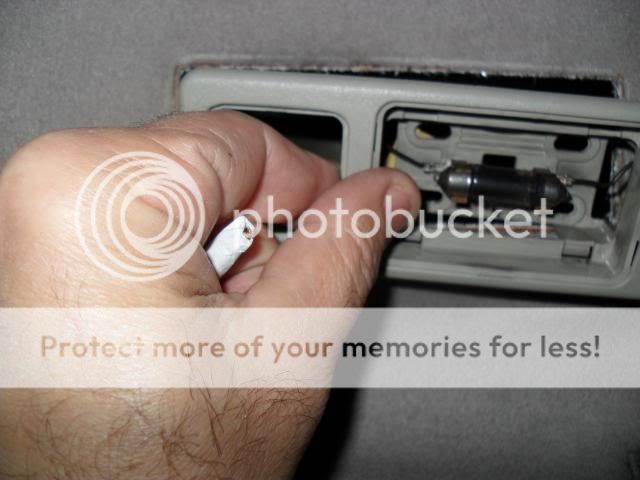
Pull the plug out from the BACK and it will come away
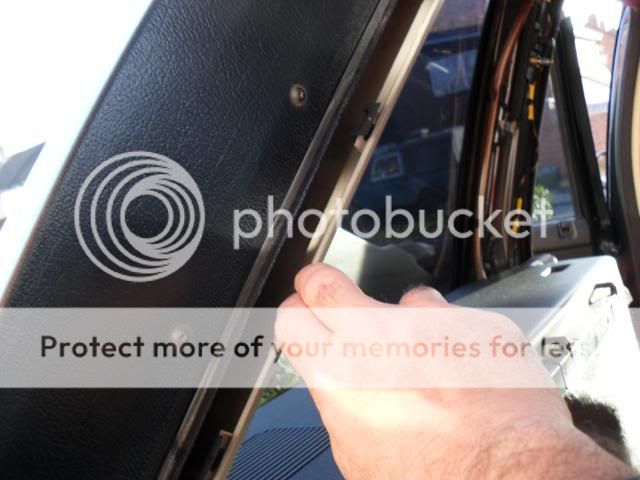
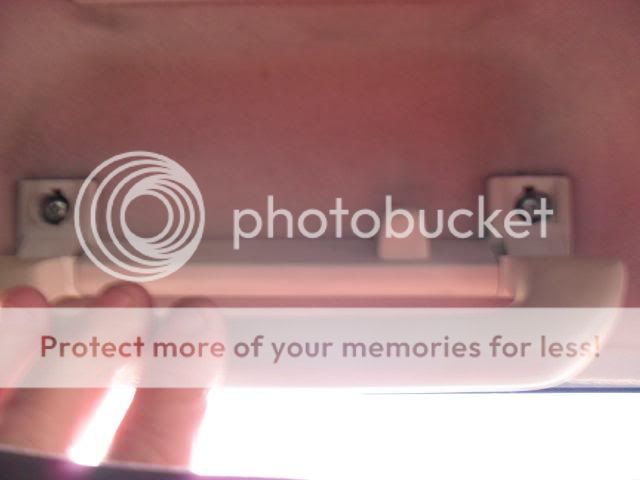
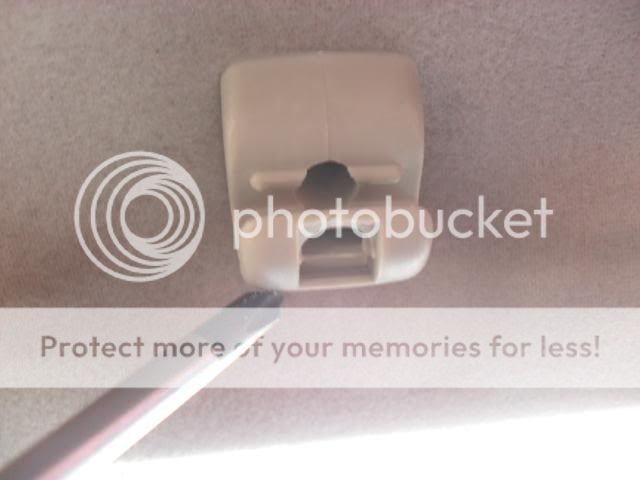
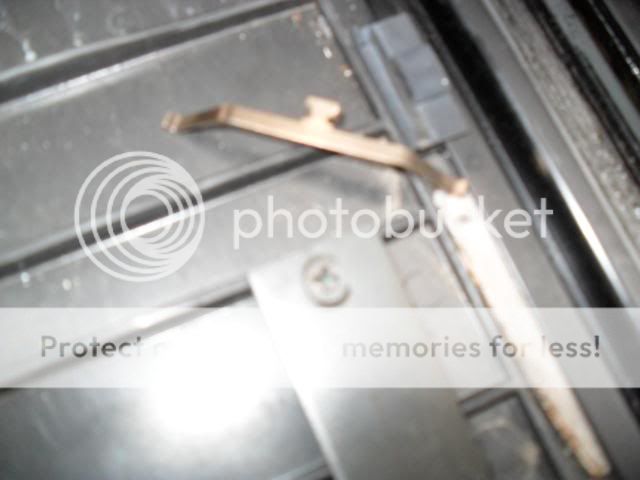
Handles get a small thin blade (or a blunt butter knife) and prize these 2 suckers off, there in there tight get them from the back if you can try no to shove anything in the gap or it will mark it (you'll notice it when you put it back
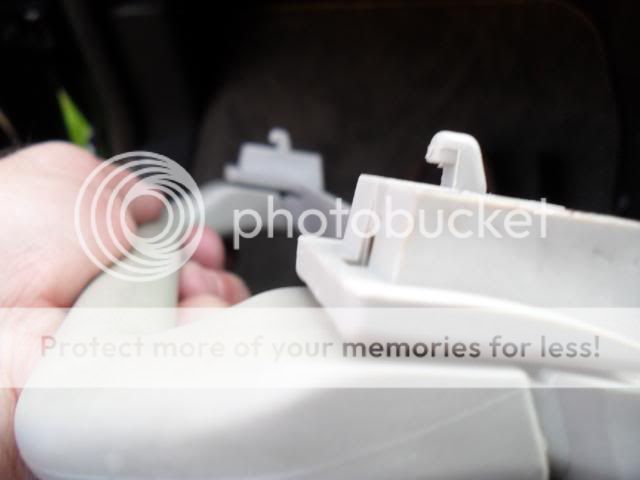
When you pull the handles out push them up and then pull them out, they have 2 HOOKS on them as per the pic
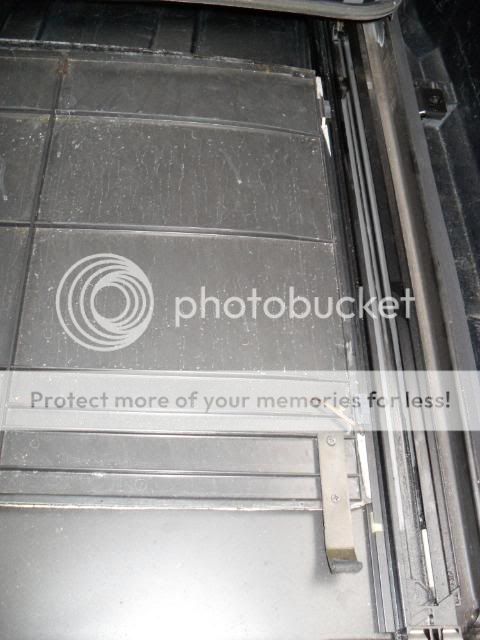
See the 2 screws? what you waiting for? take them out!! now just pull it away, blummy that's a good job you a pro at this or what??
Pull the 2 blanks on the drivers side where the handles would be for a left hand drive
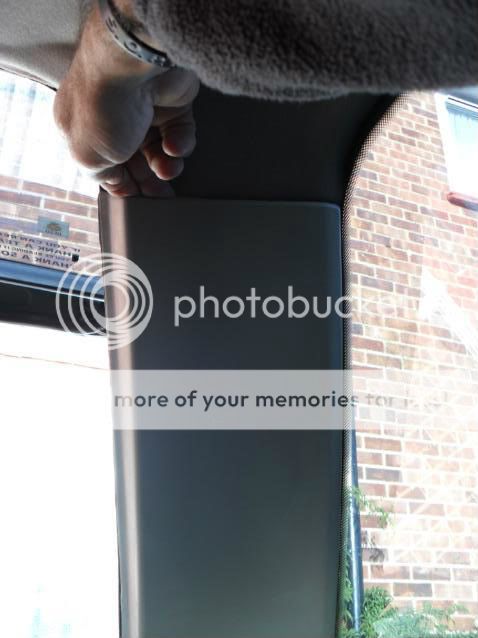
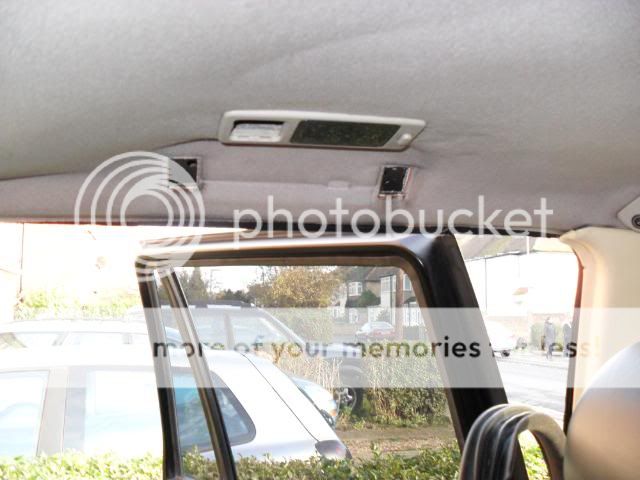
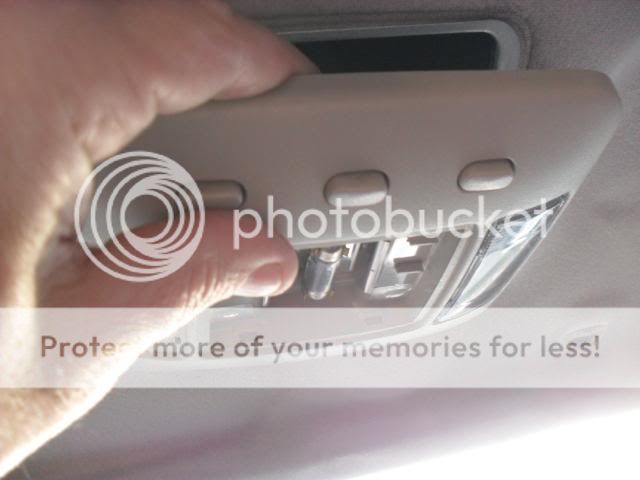
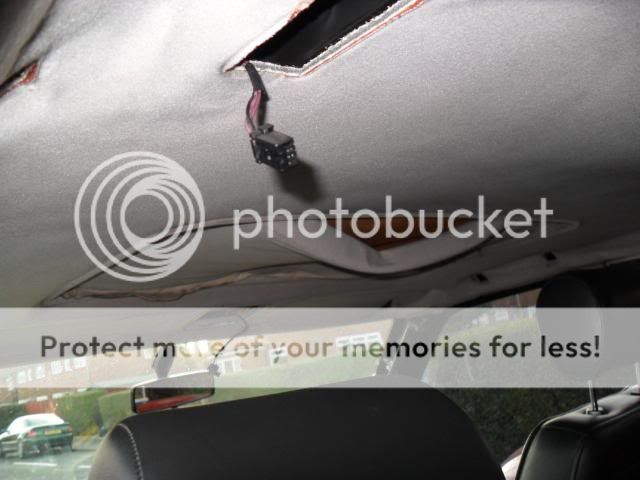
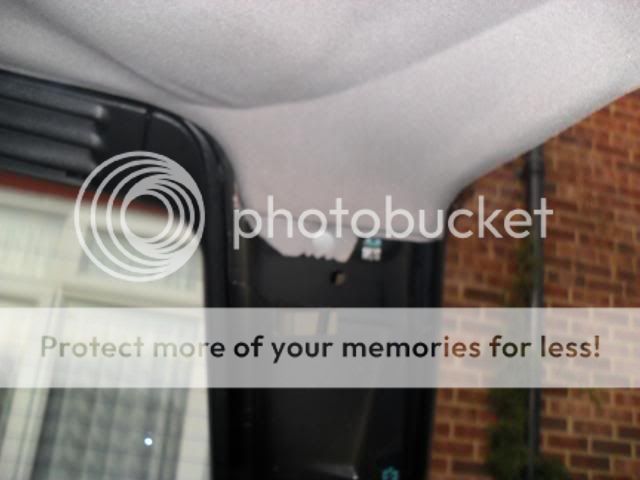
OK next is the sun visors, the sensors for the alarm, the front light cluster
There are 3 screws holding this in, undo the 2 then pull the visor out of the clip turn it 45° and you can get the 3rd one easy, do the same to the other side
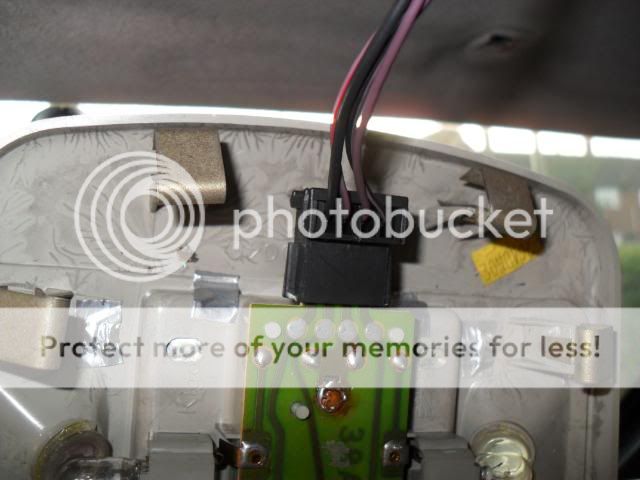
Alarm sensor just pulls out, no screws
Pull the plug out only 1 sensor
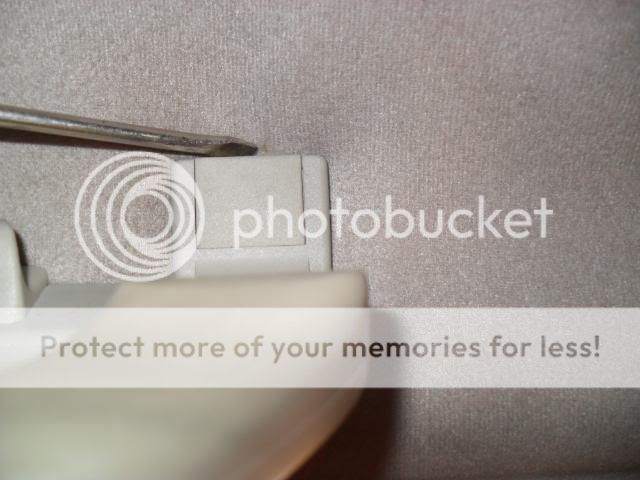
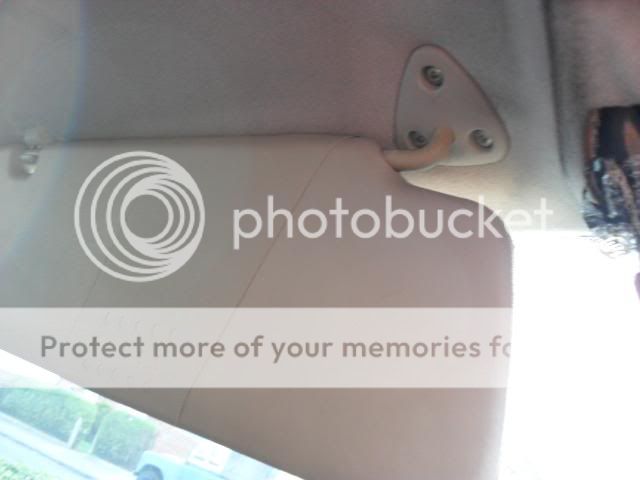
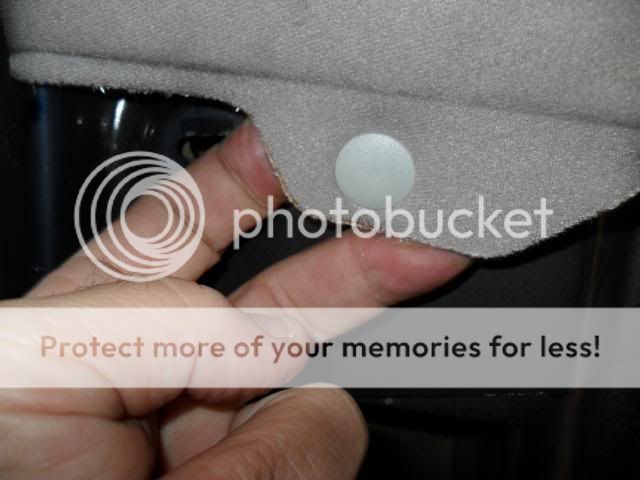
The clip holding the sun visor, have a close look at the bottom you'll see a square that will pop out with the help of a small screwdriver then you can get up underneath it and unscrew the clip again same for the other side, have a look at the pics

Pop that out
No unscrew it but...... it has a lug pull it out by using a small screwdriver and prizing it out from the back

Front light cluster just pull it out, again not screwed in
Pull the plug
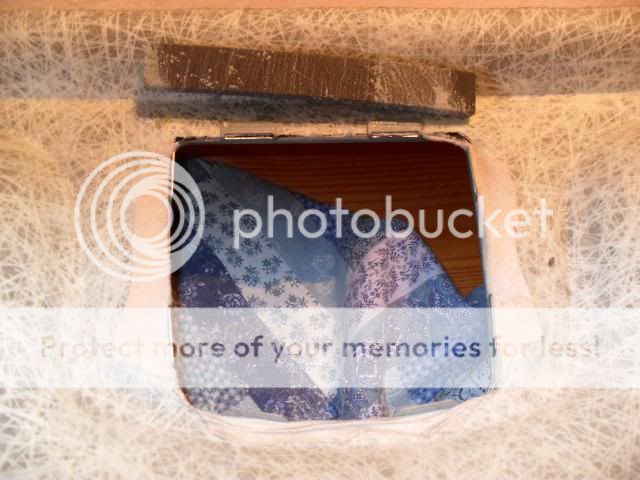
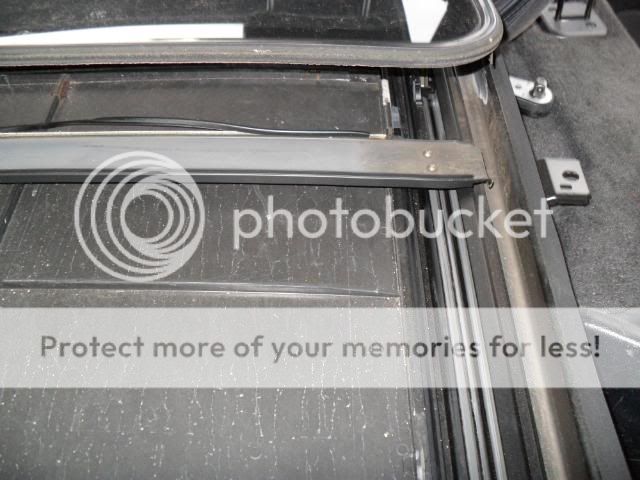
(If you have) sunroof pull the strip out BUT mark where it starts and ends, this will make it easy to put back again, I just put a dot up there with a felt tip pen

See the mark I made with he felt tip & you can see where the 2 blanks were taken out
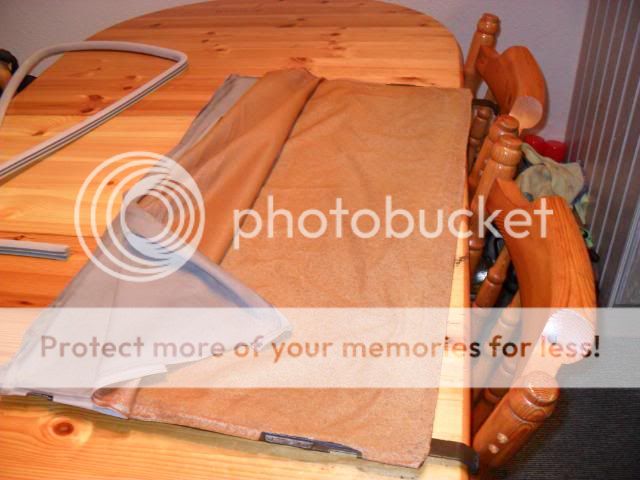
My sunroof is a wreck!! open up the shade
Your nearly there now as you pull the sunroof strip there's nothing at the front now to hold it up so the front should fall, After I cleaned this strip
I'm just cleaning the sun roof seal surround, it was black filthy and would have looked so crap against the new clean roof, so I stuck it in the sink with some fairy (the washing up liquid kind) its come up a treat, use plenty of w/up liquid and a soft brush,gently scrub them bubbles in and it will bring the dirt out rinse to get the residue off after, I then dried the excess off with a clean tea towel and I have just stuck it on the rad to dry it off completely, I would imagine you just give it a light brush after to fluff it up, absolute transformation, didn't realise how bad it was looks a different colour now!! I will post a pic, like you never seen one before eh??

WARNING: This roof is made of fibreglass, so its best to use some gloves you will get splinters (ask my SWMBO) I have rough hands so I was OK, its not flimsy but its not solid either the weakest part is the front where the sunroof is, you got a great big hole there so if its going to break that's where it will happen, so get someone to support it as your taking it out, and just be mindful of it all the time OK?
Pull the 2 lugs out from the back (see why I told you to leave them until now?)
Pull them from the BACK with 2 fingers or you could rip the liner like so.....
Get help like I said, its easy to get out, just be a little careful if it snags just squeeze it in and pull it out the back in a side to side motion, slowly carefully
That's it you did it!!
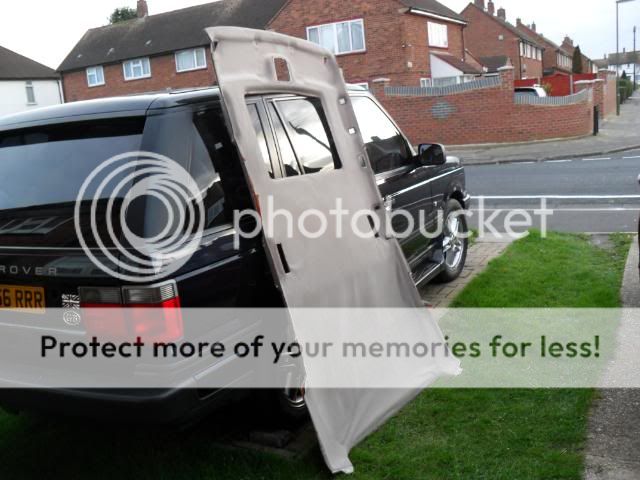
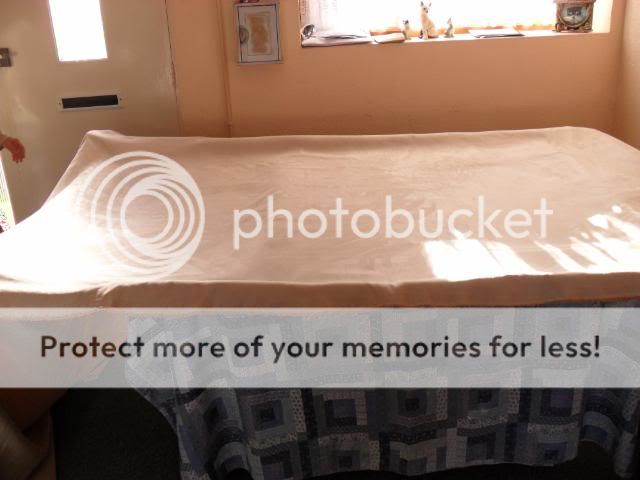
Get it on a flat surface (the wife's kitchen table if she's OK with that) if its big enough, high off the ground is best, its hard to work with things on the floor you step on things and lean on things and that's bad!!
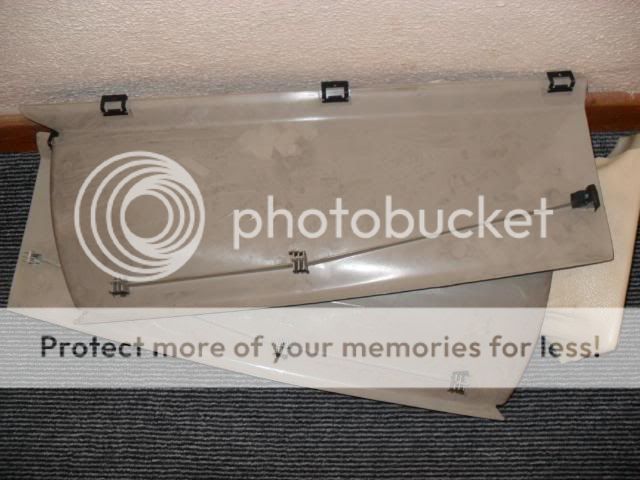
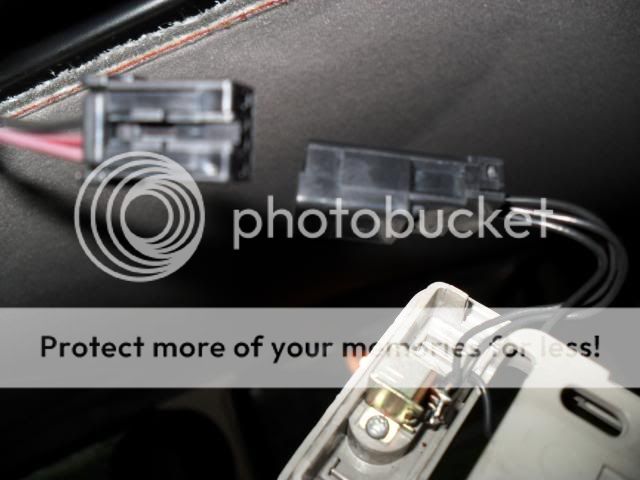
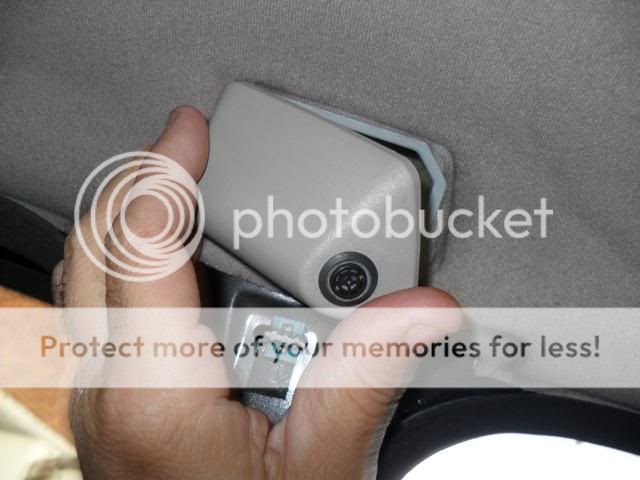
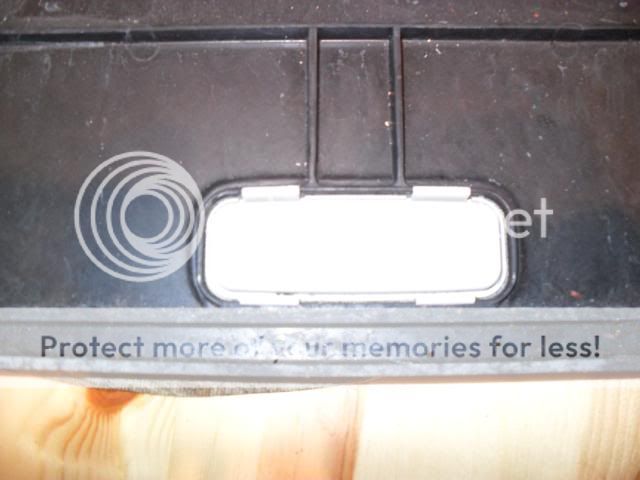
There's 2 of these one for the front light cluster and one for the alarm sensors, just pry gently back the leaves (there thin)

Pins bent back take it off now With it off, and just do the sensor its exactly the same

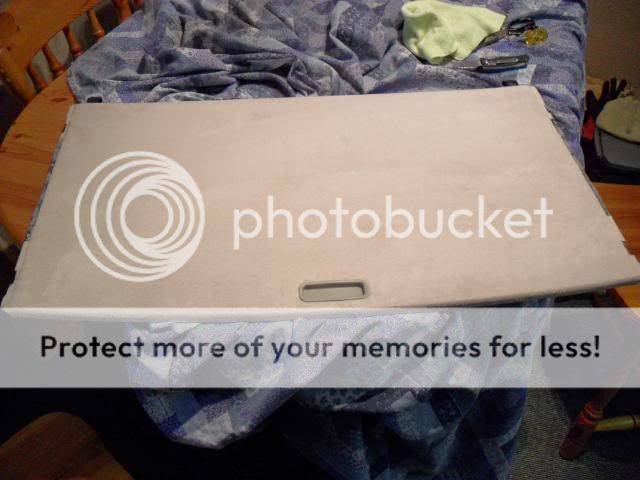
Pull the fabric off (bloody mess ant it!!) Now put your gloves on again, you'll get glass splinters otherwise, get your Hover/Dyson out, get a few CLEAN cloths (I used micro fibre ones) I (I should say SHE) put an attachment on the vacuum one with the small round brush to get the worse of it off with the vacuum, then you just rub with the cloth & with your fingers to get the rest off, now I cant stress enough, this is very important, you must get it ALL off, you may have to go over it 3 or 4 time till its all off, and its as clean as your ever going to get it, don't use sandpaper (there no point) don't use solvents (you don't want anything that will react to the glue your going to put on) how you do this is key, if you muck this up you have no base for the glue to stick and all your hard work will be for nothing OK? so spotless it the word (anybody heard about the bird, the bird is the word) use you fingers and hands as well as the cloth, and again keep them clean

Cleaned up as best as possible, I think the dark patches are staining
When I took all the foam backing off, the base seemed to be sticky (glue residue I guess?) after leaving it for a few hours it is no longer sticky its bone dry, and I see no harm in just leaving it as is, its dry and it will still act as a base when you spray your glue on to it at worst
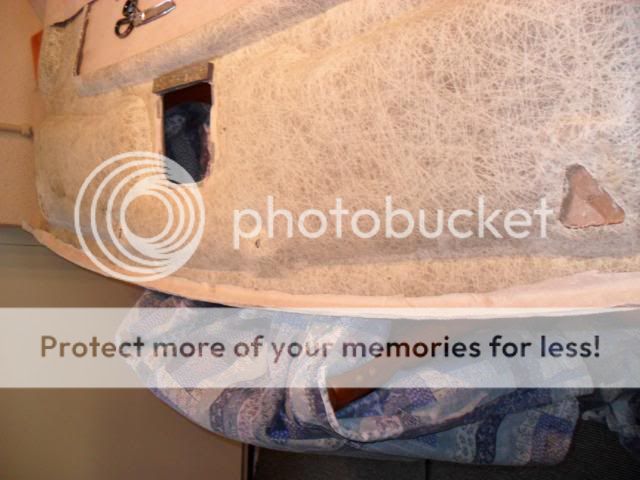
Lets start with the 2 blanks that cover the inside handles, they have blanks on them because if you buy a left hand drive grab handles are fitted on that side for passengers, but we don't need them, so I'm going to hide them, BEFORE you put the lining in, put the 2 blanking plates in (and I then glued then from the back) and then turn the roof over
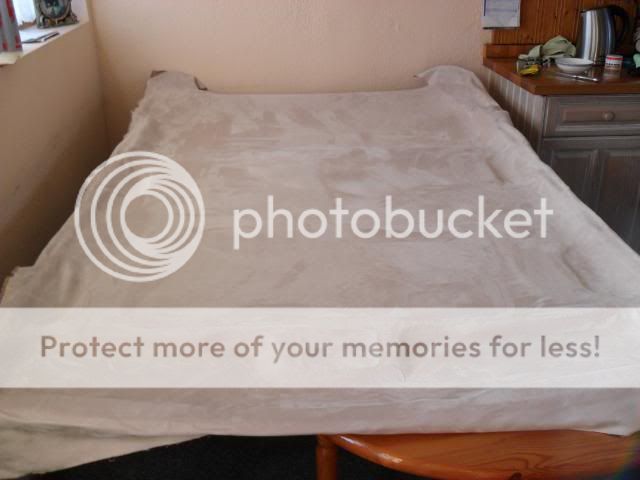
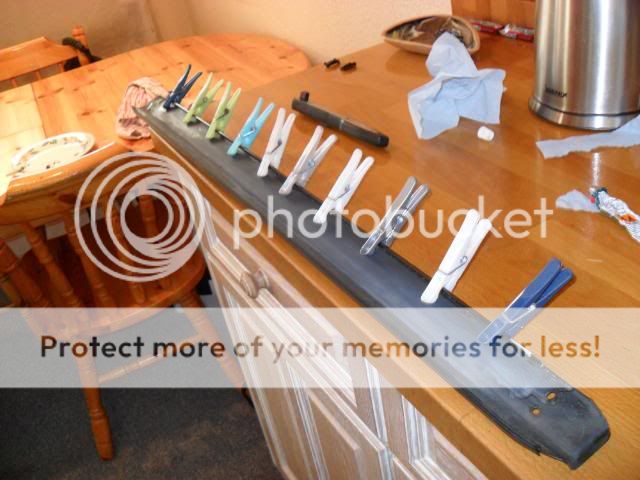
Now lay the fabric on to of it make sure its even on the edges, and flatten any air and creases out of it so its as flat as it can be, now using pegs (washing ones are fine) just peg the one end so it wont slip and it will remain aligned, the back is wider than the front so start from there then you'll know you have it covered correctly
TIP: what cutting the fabric put the fabric under the roof, then you can see where your cutting and not just guess where your cutting, remember the back IS wider than the front
And now your gona glue halve of the roof at a time I did mine front then back, but I see no reason you cant do the left side then the right one like so....
Now follow the instructions on the spray can, on mine you had to (as an e.g.) left to right on the roof and then up and down on the fabric creating a criss cross so if you miss a bit on one side it should make up for it on the other part you spray, pay particular attention to all the curves (like the door handle reassesses and the front where it contours (you know I'm using words I have never used before, makes me seem like a right smart arse, but you all know better)
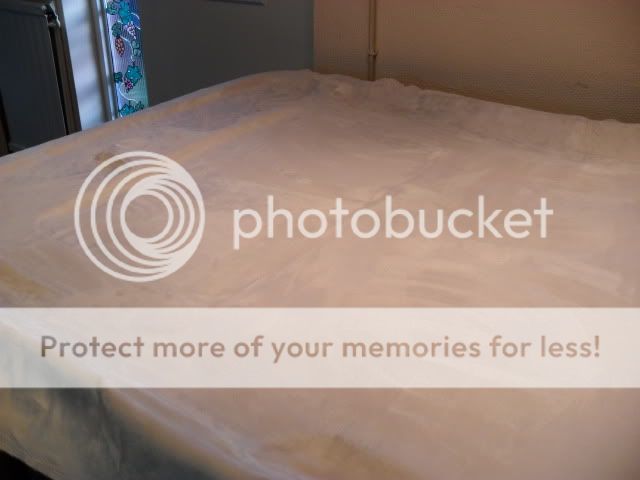
OK now I would have loved to show you how I smoothed it down and all the rest of it but..... drying glue and me taking pics just wont work so your have to just rad about it.... you have sprayed the glue and now put the fabric on to the roof, you need 2 people to do this ideally, pull the fabric up high (not yet touching the surface of the roof, making sure you both have the wrinkles out of it as you lay it on the surface of the roof, pulling it ever so slightly (slight tension on the cloth) but don't stretch it or it wont go into the reassesses and nooks and crevices it will create air pockets, working with a nice clean dry clothe work from the middle pushing away from it to the back or front and to the sides, if you done it right you should have no pockets of air, do the same for the other side easy eh?? the finished roof, I ran out of glue (2 tins) so I cant do the sunroof until I get more, so I will do the rest next week with an update and I think I will do the pillars as well
I'm going to cut the edge of it and leave about an inch all around to fold over (belt & braces) someone said that they cut it to the edge and it shrunk back (it could possibly be because the fabric was stretched as it was glued down, and it will always fight to retain its original shape)
I haven't trimmed the edge and glued and folded it back yet, but it has come out very well (the marks are because its Suede)
Because I managed to get the width I wanted as you can see there plenty enough to wrap around the frame so you can glue it to the back now, I'm going to trim it so there's about 2inch all around

Trim & Glue sides and fold over, the small holes don't bother cutting just leave as it it will help holding the liner in place and look neater
Don't be too fussy about cutting this your not going to see it anyway, but DO make sure you trim it you don't want it thick with overlapping you have to get all your seals over the fabric
Cut right into the corners and then make an envelope shape and fold it over
I took the foam off and stuck it down again (i put it upside down it stuck better)
Put the frame back in, making sure its square or it will look naff and askew, and do the same job on the alarm sensor, All done
Doing the rest of the edging
Don't forget keep cutting envelope and triangles where it makes a shape it it will pucker up and crease making it thicker & leave small holes alone
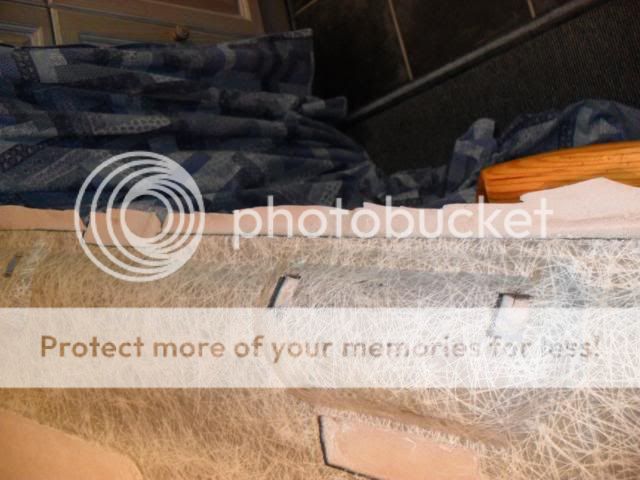
So I just cut 4 holes 3 for the lights and 1 for the sunroof only leave the rest alone anyway all trimmed up and and folded over, all done, now the sunroof
Now for the sunroof, a word of WARNING the 4 clips your going to take out, be extra careful, you cant get them (scrappy will supply them though)
Tilt the sunroof so its up at the back, this will make it easy later to get the sliding sun roof card out
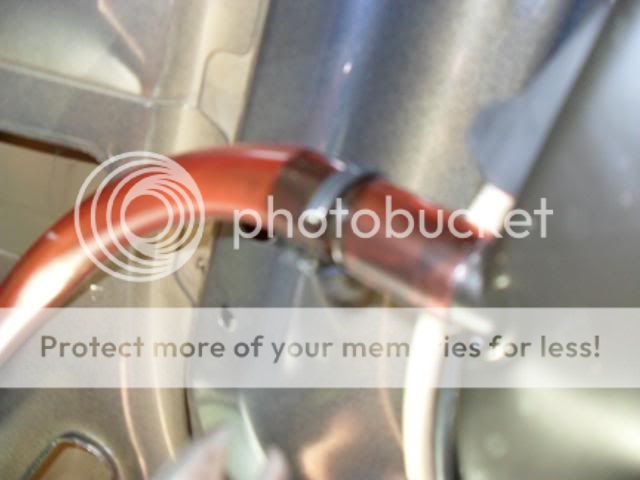
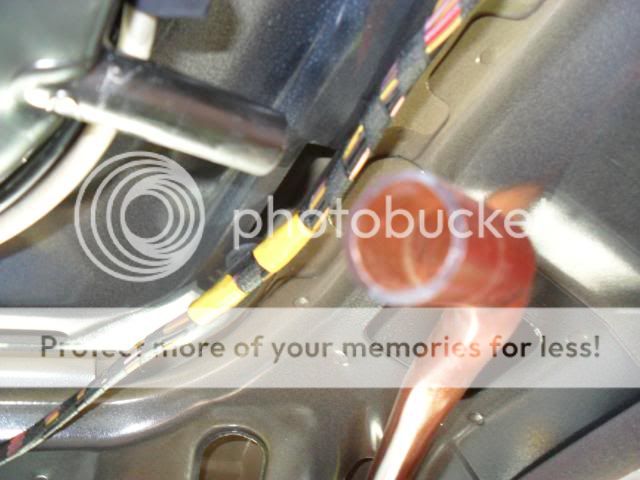
You first need to take the tubes out, there held on with cable ties, snip the 4 of them off, and TWIST the pipe DON'T pull on it (its just so much easier) and it will come off nice and easy
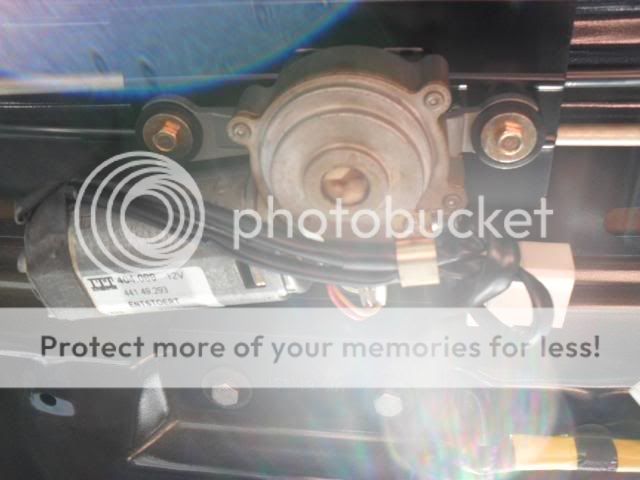
Undo the 2 nuts near the motor (don't take the motor out you don't need to, it will come out with the roof) the silver ones not the gold ones (bottom of the pic)
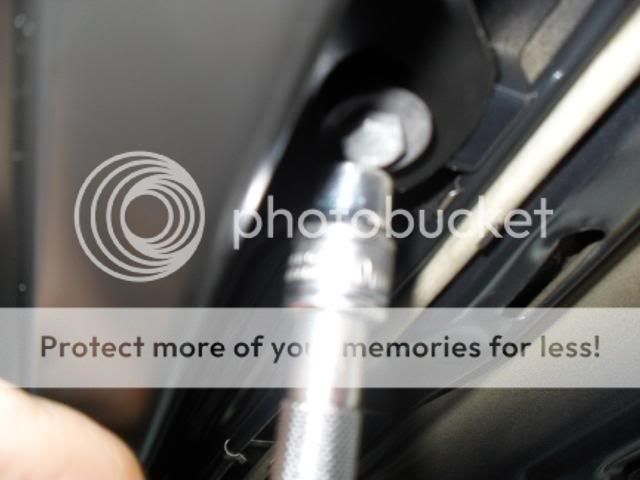
Take the rest of the nuts out all around the frame, 2 more in the front 2 more at the back and 2 in the middle, THIS IS A 2 MAN JOB if someone isn't holding it up for you it will fall, and its HEAVY so you could break something it will to some degree fall on to the headrests so its not too bad, when its undone position it to the back of the car (you did put the seats down like I said didn't you? good!!)
Next you have to take this bar out (4 Philips screws ((small ones))
You have 4 small (spacers pegs??? ) I broke one taking them out, pull the mettle parts that hold them in out,
This is where you might break the clips, the only way I found to get it out was to pull the frame apart, I pushed it apart at the top (near the clips) and the front came out great no problem, so try the when you do the bottom, hopefully you wont break the clips as you do it, I glued the 1 clip I broke with araldite)

Take note of where the lining is on the underside (you can always refer to this pic again) so you cant fold it all the way around for some reason they have left it like that for a reason (sliding action will be hindered??)
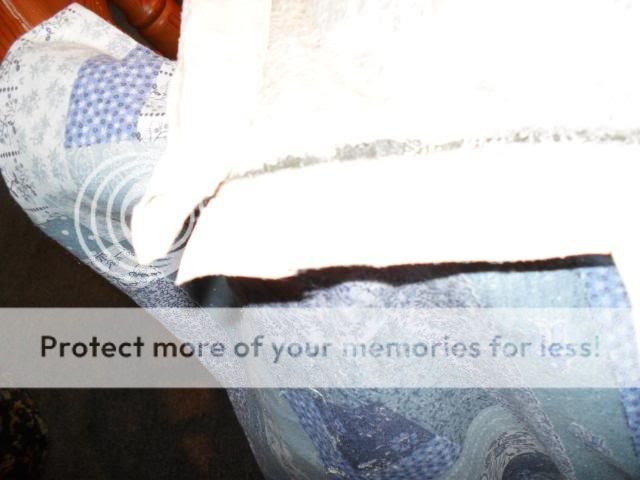
Mine was an absolute mess as you can see, there's 2 layers of fabric on this both of mine had gone, its up to you if one if fine and one isn't take it off or leave as is??
The back of it
Take the push/pull handle out (its just a push fit with lugs you'll see them when you turn it over
Just do exactly the same as you did on the roof lining, my sunroof came out really great
You know what I'm going to say next don't you? fitting is the reverse (obviously) And keep your hands clean again!!
When you got the bar out, there's a plastic strip along it, mine came out about 4 years ago, so i cleaned it up put it in the hot clothes dryer to soften it up, meanwhile I put rubber glue on the mettle bar, when I finished doing that, the plastic strip was nice and supple then fixed it back on stuck pegs on to keep it in place and pressure on it
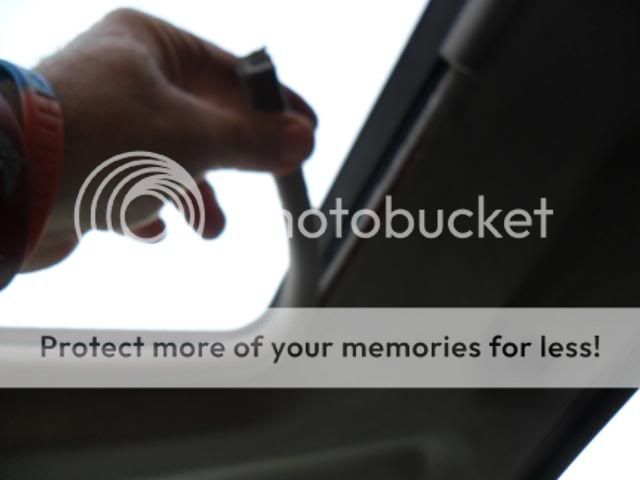
OK that's not the end, had a few problems getting it back on, a few things to lookout for, make sure the lining is square or your going to have trouble lining all the holes up for the sun visor and the clips that hold it, make sure you don't trap the wire from the front light (it will be too short to connect otherwise) you may have to reset the alarm, although I broke off one of the sliders on the sunroof, I put the 2 good ones up front and the 3rd one at the back, and its working fine, having put it back, I did it using a small flat head screwdriver and prized it in to the rail
Things you may want to do while you have the roof off
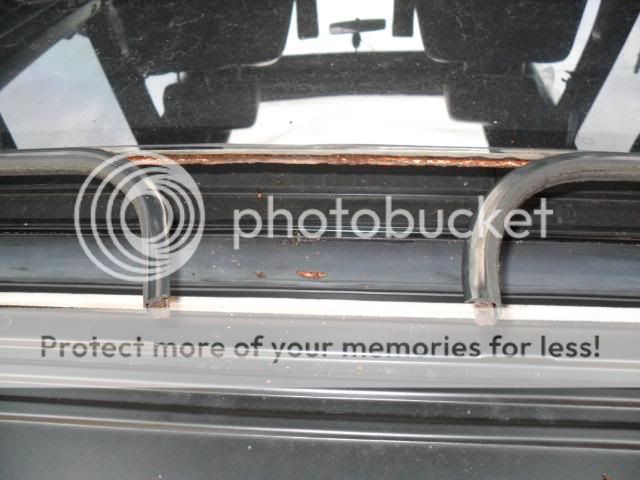
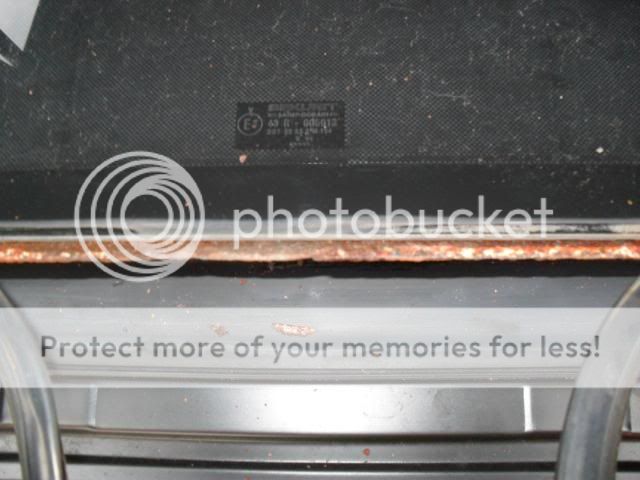
I noticed there was swelling on the glass roof, pulled the seal out a little and found rust, cleaned it off put some rust stop jell on it wait till dry, then some silicone to make it water tight
Just lightly tape the seal to keep it in place, don't put pressure on it or it will warp
Grease the rails, the motor will love you for this!!

A few pics of the almost finished roof and sun blind


Good Luck!!!!
I'm doing this over the next few day while I have the time, I will try and do a comprehensive write up so that even a numpty like me can follow it, so if there's anything you feel I have missed out on then please say, so I can include it (I can take pics as I'm putting it back together)
Time: About a day, depends on how you work, but I could probably do it in that time with a walk though
Cost: About £40 all in depending what you pay for the different fabrics, my cost came to a little less
Fabric: Home - Fabric Online
http://www.yourautotrim.com/
http://www.nationwidefabrics.co.uk
Tools: small flat head screwdriver, Phillips, 17mm socket (or adjustable for seatbelts) thin blunt bladed knife like a butter knife, Hover/Dyson a few CLEAN cloths, craft knife (or Stanley knife blade) hex head for the sunroof (I don't know what size though lol) small snips for the drain tubes on the sunroof (to cut cable ties) 4 cable ties (to fix them again!!)
Glue (Hight Temperature Adhesive From about 90°C to 120°C I used 2 different brands of this stuff, I ran out of glue and ordered more, this was the best one I found to use was MEGAFIX you actually need 3 for the head liner (or 4 if your doing the pillars as well) 3 or 4 of this: eBay - The UK's Online Marketplace
If you want to do your pillars (in leather but its the same if you want to use fabric) then I have this guide for them already
http://www.landyzone.co.uk/lz/f10/how-refurbish-your-door-pillars-step-step-guide-105740.html
But if you can get the foam backed fabric, its probably easier to fit in to the contours, and will be more forgiving, if you cant the thicker the better
I used 3m of fabric (you need 4m for the pillars as well) its enough to do the sunroof as well, but it must be 150cm wide at least
CREAM - Fabric Online
Summery if your thinking about doing this job, its not easy out of 10 (1 being dead simple 10 being almost imposable ) I would say this is a 8 or 7 to get absolutely perfect and a 5 if you don't mind the odd wrinkle, but having just said that most of the wrinkles will be hidden, the hardest parts to do are the contours, handle reassesses are a bugger, and the front where it has like a small hump, I took my time doing that and it came out OK, it will be hidden anyway if you make a mistake by the sun visors, the same with the seals and handles, they will hide any bad edging you may have done, also sand down the head liner, as any blemishes will show TIP: the darker the fabric you use the less imperfections will show
This may sound stupid but if your especially using a light colour fabric, wash your hands and keep them clean (try not to wear gloves they don't show the muck on them) you or you will dirty the lining, I didn't realise that while I was doing it I had dirty hands, lucky it cleaned off
First thing you have to do is take everything off that's holding the liner up, you need to undo the seatbelt tops, and all the panels (8 of them) and (if you have a sunroof) all the gubbings around it as well the lights and the grab handles, it helps if you fold the back seats flat then things are more accessible and easier for you to do
Start at the back and work yourself forward if you can reason being there's 2 studs at the back of the lining that will continue to hold the roof up, keep them in there until the last thing and you get the lining out, pull the back door seal away at the top and sides, this will make the back side panels more accessible to take off, prize the one side of the back panel lose so the pins are all out on the one side (opposite side of the side window)
See where my fingers are? stick them at the back and pull towards you are only now pulling 3 pins out on the window side as you did the other 3 already (didn't you?)
(there are 6 pins holding this panel in) look at my next pic so you know where they are
Next take the top of the seatbelts off (no pics don't be such a numpty even I wouldn't need a pic for this) the black plastic lug hiding the nut at the top of the seatbelt (yours could be a different colour) carefully pull them off with a small screwdriver (they have 2 lugs on each side) so don't be pulling them off at an angle or you might break one of the lugs..... got them off? good now just undo the nut holding to top of the belt... well done have you broken anything yet? I haven't
Panels the seals cover the edges pull the seals away (same as on the back) again pull them towards you not at an angle there the same as the back ones you took off
Lights and handles take the plastic window of the inside light off, and there's 2 screws holding them in just undo them
Pull the plug out from the BACK and it will come away
Handles get a small thin blade (or a blunt butter knife) and prize these 2 suckers off, there in there tight get them from the back if you can try no to shove anything in the gap or it will mark it (you'll notice it when you put it back
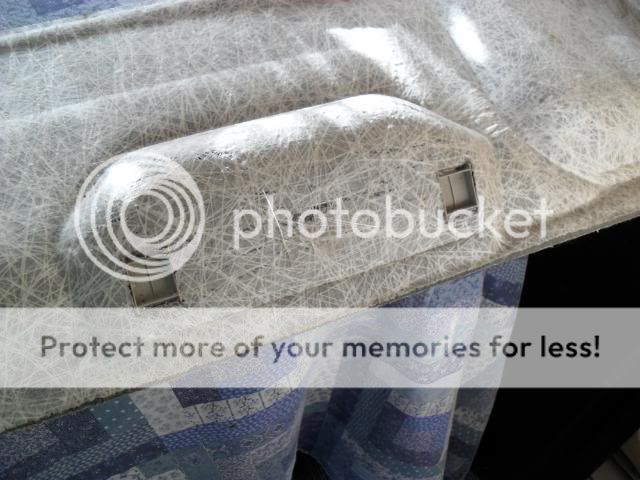
When you pull the handles out push them up and then pull them out, they have 2 HOOKS on them as per the pic
See the 2 screws? what you waiting for? take them out!! now just pull it away, blummy that's a good job you a pro at this or what??
Pull the 2 blanks on the drivers side where the handles would be for a left hand drive
OK next is the sun visors, the sensors for the alarm, the front light cluster
There are 3 screws holding this in, undo the 2 then pull the visor out of the clip turn it 45° and you can get the 3rd one easy, do the same to the other side
Alarm sensor just pulls out, no screws
Pull the plug out only 1 sensor
The clip holding the sun visor, have a close look at the bottom you'll see a square that will pop out with the help of a small screwdriver then you can get up underneath it and unscrew the clip again same for the other side, have a look at the pics
Pop that out
No unscrew it but...... it has a lug pull it out by using a small screwdriver and prizing it out from the back
Front light cluster just pull it out, again not screwed in
Pull the plug
(If you have) sunroof pull the strip out BUT mark where it starts and ends, this will make it easy to put back again, I just put a dot up there with a felt tip pen
See the mark I made with he felt tip & you can see where the 2 blanks were taken out
My sunroof is a wreck!! open up the shade
Your nearly there now as you pull the sunroof strip there's nothing at the front now to hold it up so the front should fall, After I cleaned this strip
I'm just cleaning the sun roof seal surround, it was black filthy and would have looked so crap against the new clean roof, so I stuck it in the sink with some fairy (the washing up liquid kind) its come up a treat, use plenty of w/up liquid and a soft brush,gently scrub them bubbles in and it will bring the dirt out rinse to get the residue off after, I then dried the excess off with a clean tea towel and I have just stuck it on the rad to dry it off completely, I would imagine you just give it a light brush after to fluff it up, absolute transformation, didn't realise how bad it was looks a different colour now!! I will post a pic, like you never seen one before eh??
WARNING: This roof is made of fibreglass, so its best to use some gloves you will get splinters (ask my SWMBO) I have rough hands so I was OK, its not flimsy but its not solid either the weakest part is the front where the sunroof is, you got a great big hole there so if its going to break that's where it will happen, so get someone to support it as your taking it out, and just be mindful of it all the time OK?
Pull the 2 lugs out from the back (see why I told you to leave them until now?)
Pull them from the BACK with 2 fingers or you could rip the liner like so.....
Get help like I said, its easy to get out, just be a little careful if it snags just squeeze it in and pull it out the back in a side to side motion, slowly carefully
That's it you did it!!
Get it on a flat surface (the wife's kitchen table if she's OK with that) if its big enough, high off the ground is best, its hard to work with things on the floor you step on things and lean on things and that's bad!!
There's 2 of these one for the front light cluster and one for the alarm sensors, just pry gently back the leaves (there thin)
Pins bent back take it off now With it off, and just do the sensor its exactly the same
Pull the fabric off (bloody mess ant it!!) Now put your gloves on again, you'll get glass splinters otherwise, get your Hover/Dyson out, get a few CLEAN cloths (I used micro fibre ones) I (I should say SHE) put an attachment on the vacuum one with the small round brush to get the worse of it off with the vacuum, then you just rub with the cloth & with your fingers to get the rest off, now I cant stress enough, this is very important, you must get it ALL off, you may have to go over it 3 or 4 time till its all off, and its as clean as your ever going to get it, don't use sandpaper (there no point) don't use solvents (you don't want anything that will react to the glue your going to put on) how you do this is key, if you muck this up you have no base for the glue to stick and all your hard work will be for nothing OK? so spotless it the word (anybody heard about the bird, the bird is the word) use you fingers and hands as well as the cloth, and again keep them clean
Cleaned up as best as possible, I think the dark patches are staining
When I took all the foam backing off, the base seemed to be sticky (glue residue I guess?) after leaving it for a few hours it is no longer sticky its bone dry, and I see no harm in just leaving it as is, its dry and it will still act as a base when you spray your glue on to it at worst
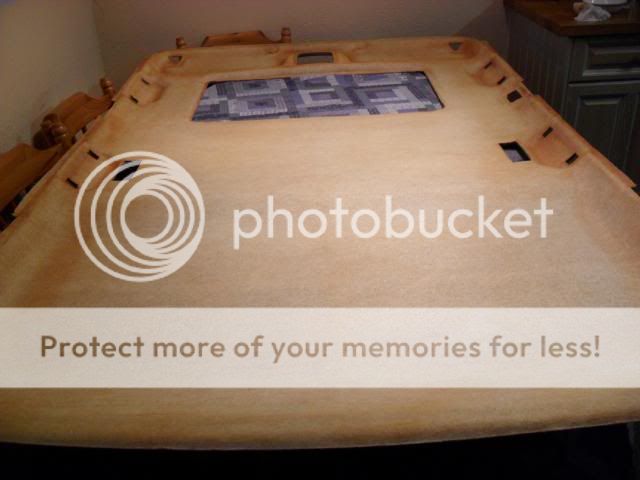
Lets start with the 2 blanks that cover the inside handles, they have blanks on them because if you buy a left hand drive grab handles are fitted on that side for passengers, but we don't need them, so I'm going to hide them, BEFORE you put the lining in, put the 2 blanking plates in (and I then glued then from the back) and then turn the roof over
Now lay the fabric on to of it make sure its even on the edges, and flatten any air and creases out of it so its as flat as it can be, now using pegs (washing ones are fine) just peg the one end so it wont slip and it will remain aligned, the back is wider than the front so start from there then you'll know you have it covered correctly
TIP: what cutting the fabric put the fabric under the roof, then you can see where your cutting and not just guess where your cutting, remember the back IS wider than the front
And now your gona glue halve of the roof at a time I did mine front then back, but I see no reason you cant do the left side then the right one like so....
Now follow the instructions on the spray can, on mine you had to (as an e.g.) left to right on the roof and then up and down on the fabric creating a criss cross so if you miss a bit on one side it should make up for it on the other part you spray, pay particular attention to all the curves (like the door handle reassesses and the front where it contours (you know I'm using words I have never used before, makes me seem like a right smart arse, but you all know better
)OK now I would have loved to show you how I smoothed it down and all the rest of it but..... drying glue and me taking pics just wont work so your have to just rad about it.... you have sprayed the glue and now put the fabric on to the roof, you need 2 people to do this ideally, pull the fabric up high (not yet touching the surface of the roof, making sure you both have the wrinkles out of it as you lay it on the surface of the roof, pulling it ever so slightly (slight tension on the cloth) but don't stretch it or it wont go into the reassesses and nooks and crevices it will create air pockets, working with a nice clean dry clothe work from the middle pushing away from it to the back or front and to the sides, if you done it right you should have no pockets of air, do the same for the other side easy eh??
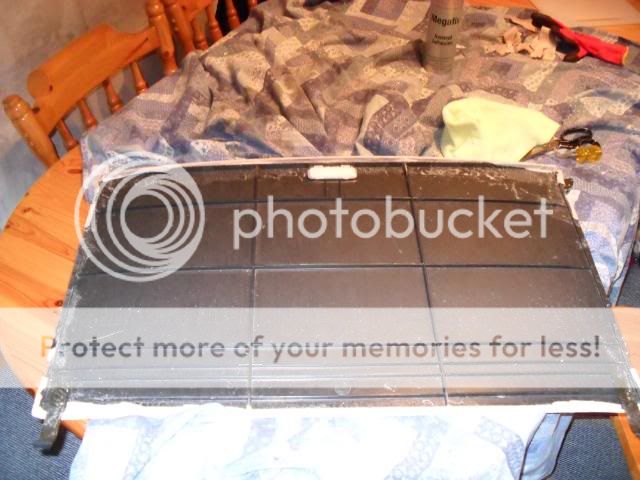
the finished roof, I ran out of glue (2 tins) so I cant do the sunroof until I get more, so I will do the rest next week with an update and I think I will do the pillars as wellI'm going to cut the edge of it and leave about an inch all around to fold over (belt & braces) someone said that they cut it to the edge and it shrunk back (it could possibly be because the fabric was stretched as it was glued down, and it will always fight to retain its original shape)
I haven't trimmed the edge and glued and folded it back yet, but it has come out very well (the marks are because its Suede)
Because I managed to get the width I wanted as you can see there plenty enough to wrap around the frame so you can glue it to the back now, I'm going to trim it so there's about 2inch all around
Trim & Glue sides and fold over, the small holes don't bother cutting just leave as it it will help holding the liner in place and look neater
Don't be too fussy about cutting this your not going to see it anyway, but DO make sure you trim it you don't want it thick with overlapping you have to get all your seals over the fabric
Cut right into the corners and then make an envelope shape and fold it over
I took the foam off and stuck it down again (i put it upside down it stuck better)
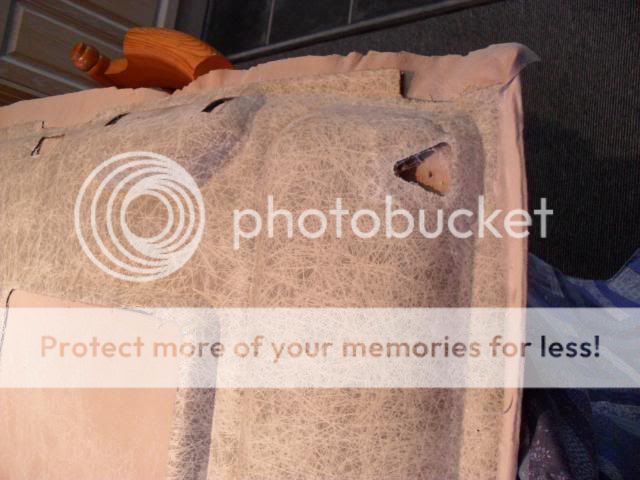
Put the frame back in, making sure its square or it will look naff and askew, and do the same job on the alarm sensor, All done
Doing the rest of the edging
Don't forget keep cutting envelope and triangles where it makes a shape it it will pucker up and crease making it thicker & leave small holes alone
So I just cut 4 holes 3 for the lights and 1 for the sunroof only leave the rest alone anyway all trimmed up and and folded over, all done, now the sunroof
Now for the sunroof, a word of WARNING the 4 clips your going to take out, be extra careful, you cant get them (scrappy will supply them though)
Tilt the sunroof so its up at the back, this will make it easy later to get the sliding sun roof card out
You first need to take the tubes out, there held on with cable ties, snip the 4 of them off, and TWIST the pipe DON'T pull on it (its just so much easier) and it will come off nice and easy
Undo the 2 nuts near the motor (don't take the motor out you don't need to, it will come out with the roof) the silver ones not the gold ones (bottom of the pic)
Take the rest of the nuts out all around the frame, 2 more in the front 2 more at the back and 2 in the middle, THIS IS A 2 MAN JOB if someone isn't holding it up for you it will fall, and its HEAVY so you could break something it will to some degree fall on to the headrests so its not too bad, when its undone position it to the back of the car (you did put the seats down like I said didn't you? good!!)
Next you have to take this bar out (4 Philips screws ((small ones))
You have 4 small (spacers pegs??? ) I broke one taking them out, pull the mettle parts that hold them in out,
This is where you might break the clips, the only way I found to get it out was to pull the frame apart, I pushed it apart at the top (near the clips) and the front came out great no problem, so try the when you do the bottom, hopefully you wont break the clips as you do it, I glued the 1 clip I broke with araldite)
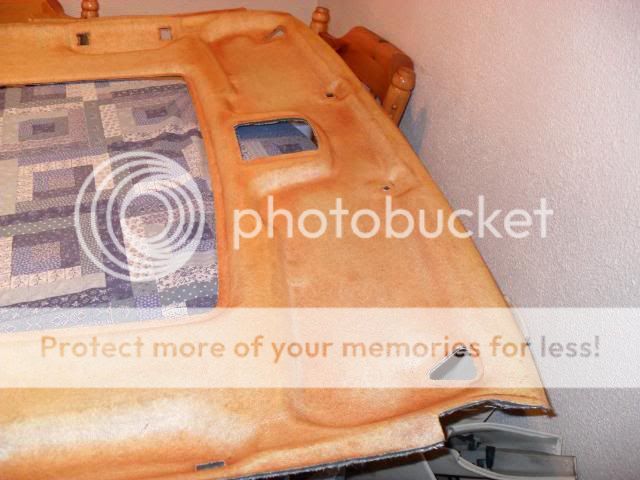
Take note of where the lining is on the underside (you can always refer to this pic again) so you cant fold it all the way around for some reason they have left it like that for a reason (sliding action will be hindered??)
Mine was an absolute mess as you can see, there's 2 layers of fabric on this both of mine had gone, its up to you if one if fine and one isn't take it off or leave as is??
The back of it
Take the push/pull handle out (its just a push fit with lugs you'll see them when you turn it over
Just do exactly the same as you did on the roof lining, my sunroof came out really great
You know what I'm going to say next don't you? fitting is the reverse (obviously) And keep your hands clean again!!
When you got the bar out, there's a plastic strip along it, mine came out about 4 years ago, so i cleaned it up put it in the hot clothes dryer to soften it up, meanwhile I put rubber glue on the mettle bar, when I finished doing that, the plastic strip was nice and supple then fixed it back on stuck pegs on to keep it in place and pressure on it
OK that's not the end, had a few problems getting it back on, a few things to lookout for, make sure the lining is square or your going to have trouble lining all the holes up for the sun visor and the clips that hold it, make sure you don't trap the wire from the front light (it will be too short to connect otherwise) you may have to reset the alarm, although I broke off one of the sliders on the sunroof, I put the 2 good ones up front and the 3rd one at the back, and its working fine, having put it back, I did it using a small flat head screwdriver and prized it in to the rail
Things you may want to do while you have the roof off
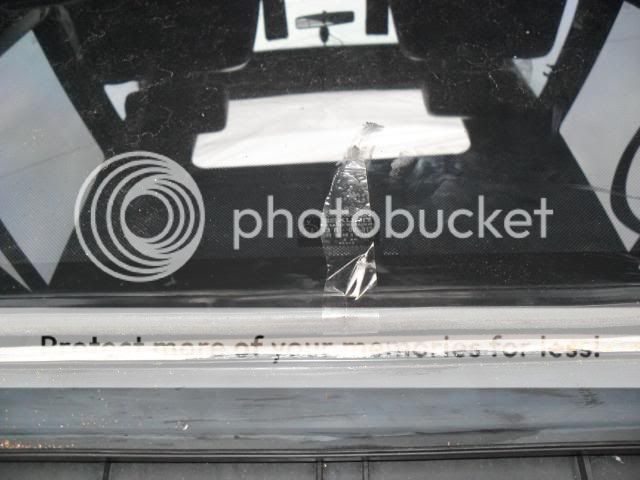
I noticed there was swelling on the glass roof, pulled the seal out a little and found rust, cleaned it off put some rust stop jell on it wait till dry, then some silicone to make it water tight
Just lightly tape the seal to keep it in place, don't put pressure on it or it will warp
Grease the rails, the motor will love you for this!!
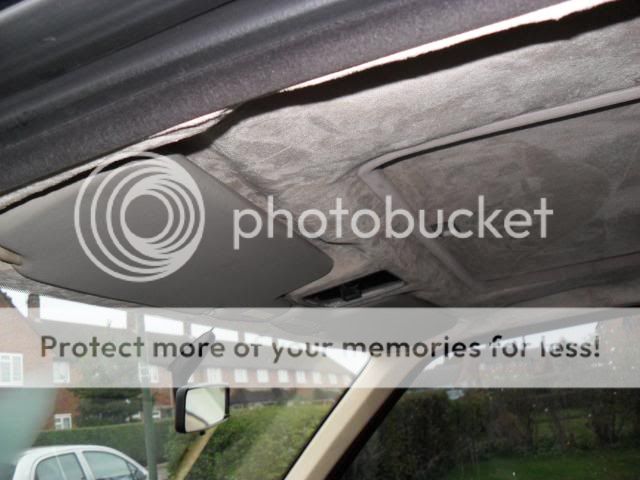
A few pics of the almost finished roof and sun blind
Good Luck!!!!
Last edited: