Removing and cleaning a TD5 MAP sensor

This site contains affiliate links for which LandyZone may be compensated if you make a purchase.

ratty

I'm not special I'm limited edition
I haven't cleaned the MAP sensor on my defender for a little while so I thought that it was about time I gave it a spring clean before my holiday. Unfortunately I didn't think about taking any pics until after I've cleaned the MAP so can't show you how gunky it actually was.

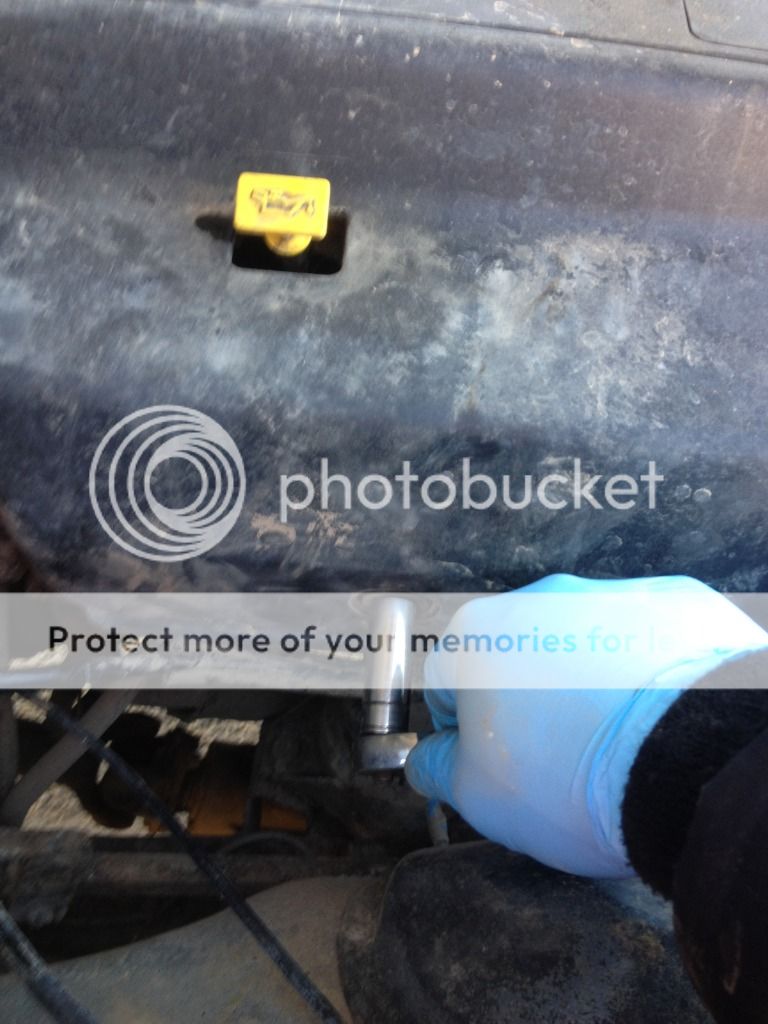
First off you need to remove the three 13mm bolts holding the plastic engine cover on.

There is one on the offside (drivers side) of the vehicle....

Map7.jpg


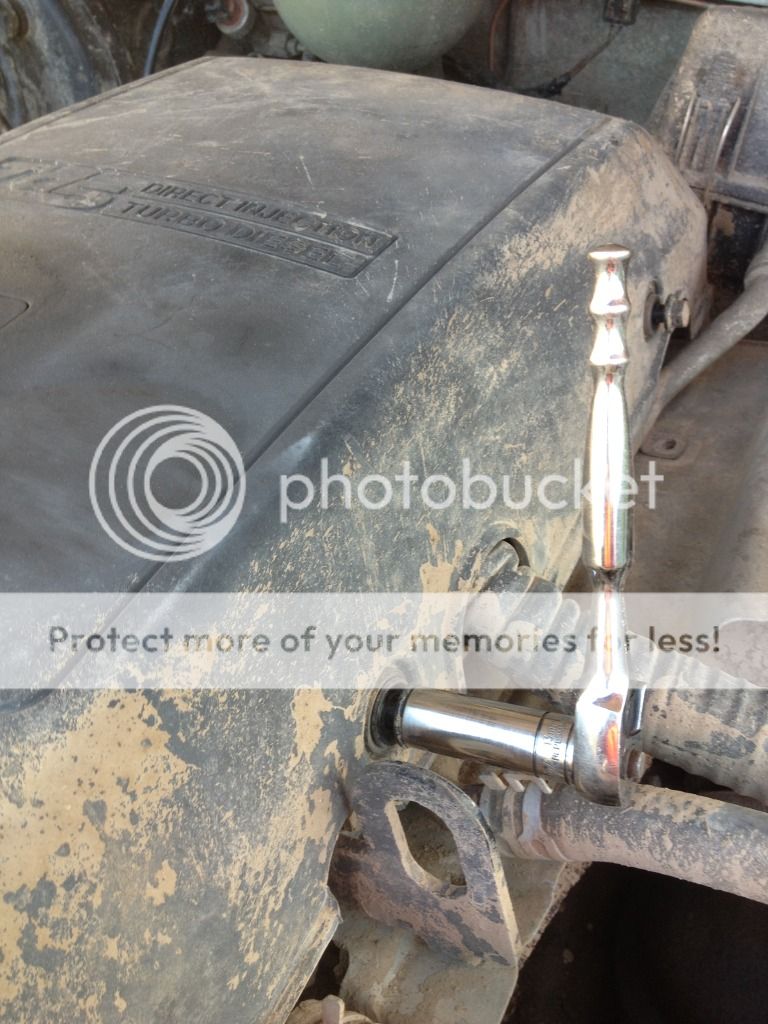
and 2 on the nearside (passenger side).


Map6.jpg


We can now see the MAP sensor situated alongside the dipstick

Map4.jpg


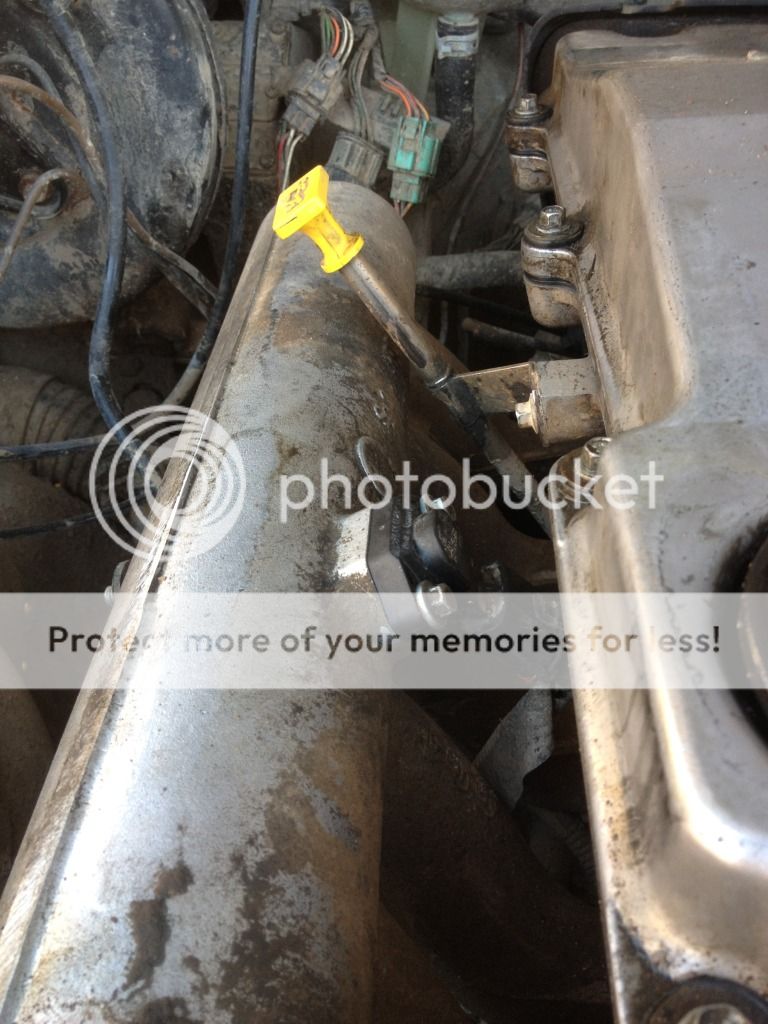
Next we need to undo the two 8mm bolts holding the MAP in place. You will need to use a spanner as the bolt nearest the front of the engine doesn't have enough room to get a socket and ratchet on

Map3.jpg


Gently wiggle the sensor from side to side while pulling and it should ease out. You will then need to unclip the electrical connector by squeezing the plastic tab at the wire end of the plug.

Map2.jpg


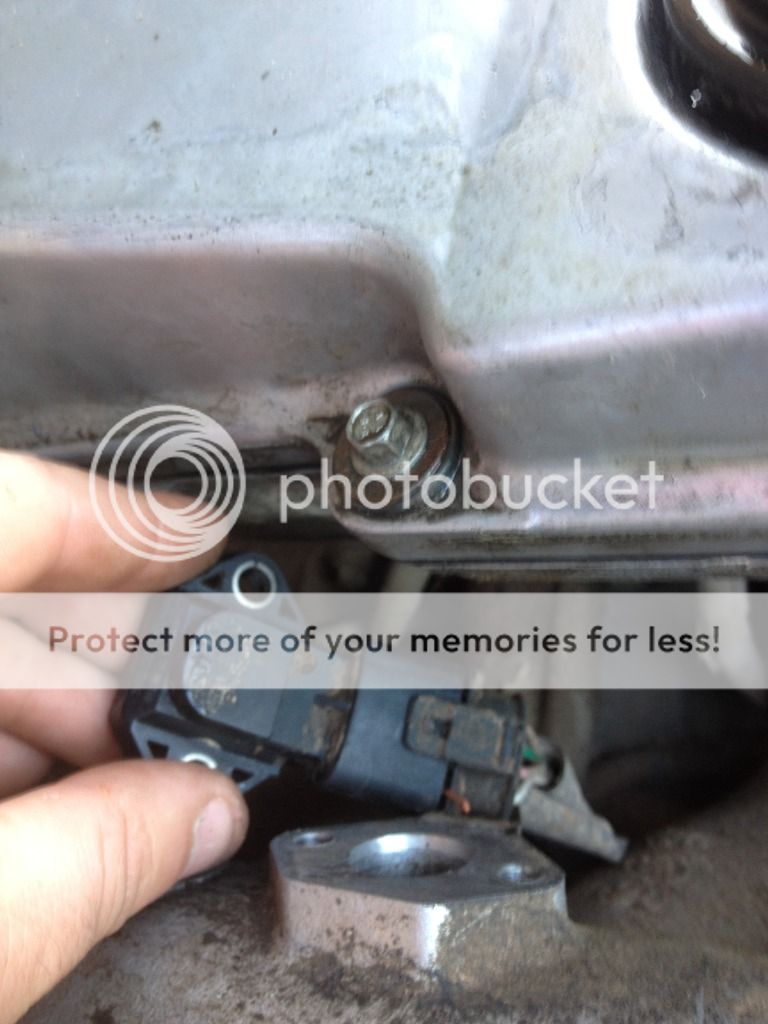
You will then be left with this.....

Map1.jpg


Map.jpg


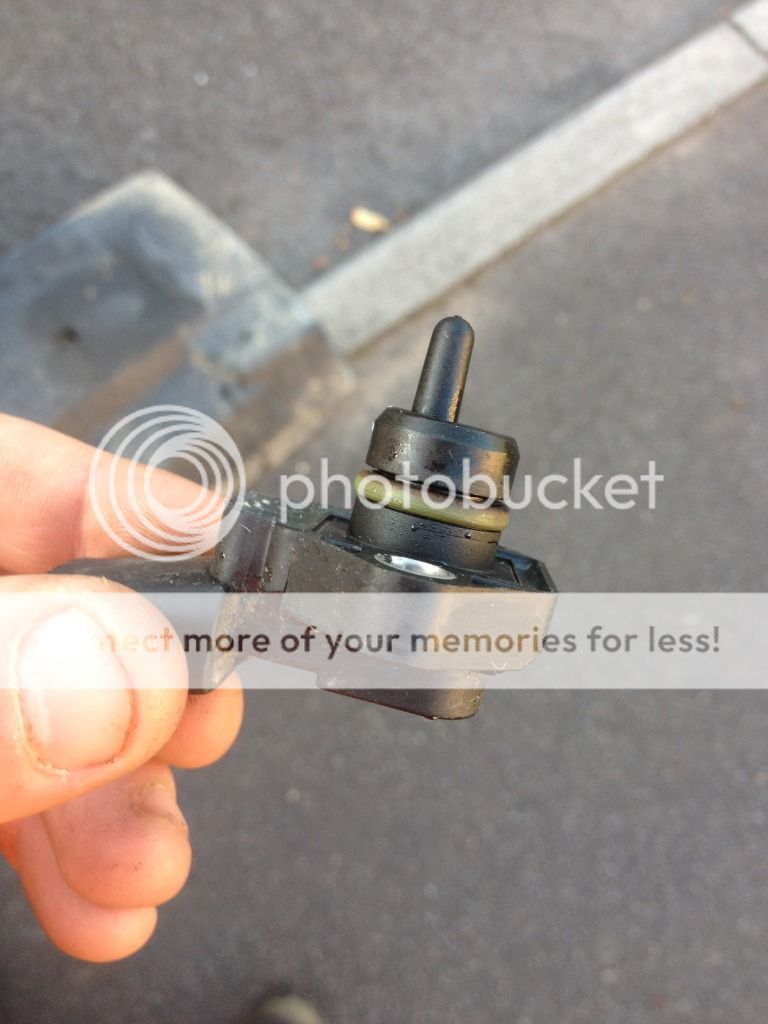
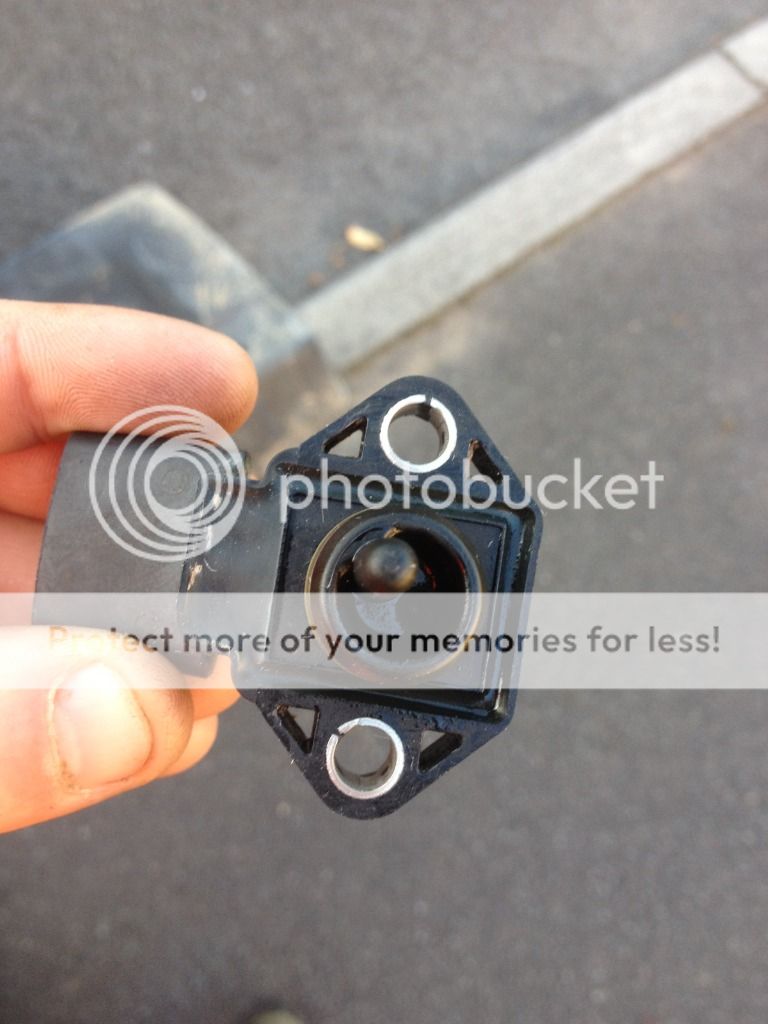
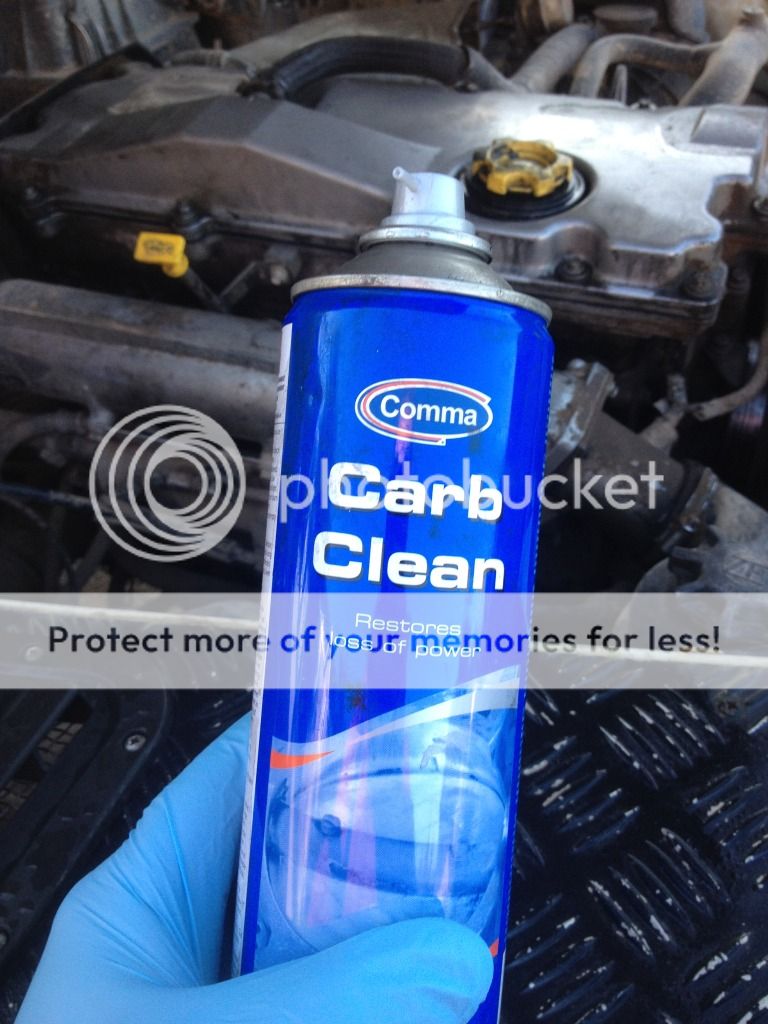
Using Carb cleaner or similar, repeatedly spray and then wipe off until the sensor is clean as in the above pics.

Map5.jpg


Re-fitting is simply the reverse of the above.
 
Last edited:
Want to do this...

...but I'm a pleb.

S

What I posted is literally all that you need to do. There are no hidden surprises. As long as you can use a spanner you can easily do this job yourself. The reason for me posting things like this that can be considered basic to some people, is to show peeps like yourself, that aren't overly confident, that it is something within your ability.

I also try and list the tools required so you can beg borrow or steal what you need to get the job done.
 
Been meaning to do this for ages so based on your comment I popped out and bought some carb cleaner, and also ordered an EGR blanking kit.
When you take the EGR off you'll see just what crap your engine has been breathing all these years. The inlet manifold will have more oil and tar in it than the Torey Canyon did. Showing my age now.

I also cleaned out a spare inlet manifold and swapped them over so my inlet was as clean as possible. I can not think of a dirtier job than cleaning out the manifold was. It was bloody horrible.
 
Ok. Took the car and misses to Norfolk this weekend which, with the weather, was lovely. Will do it this weekend. Look forward to the follow up post everyone.

S
 
After driving my landy around on the isle of wight for the last 3 days I can happily report back that cleaning my MAP sensor was well worth the effort. I am back to full power and my fuel economy seems to have improved too.:)
 
Sorry to bring up an old thread but just followed this to clean mine. Easy peasey job and well worth the 10 minutes or so it took to do. The sensor was well "gunged" up. Just took it out for a run after cleaning and it fairly flies through the gears now and torque seems much better. Cheers Ratty, nice one. :D
 
Found this thread yesterday so tonight I was out with my spanners and what did I find? A very gunked up sensor! Looking forward to taking the Disco for a spin friday to see what difference it makes!
 
you should clean the AAP sensor too(in the airbox)...this one will not have muck on it but it has a small hole which is the access to the sensor itself and used to coloect dust inside... it's even more important for boost than the MAP as the ECU extracts the readimg of this sensor out of the MAP reading to calculate the boost, as the reading from MAP= AAP + boost. Use a syringe filled with white spirit or something not very agressive through that tiny orifice then blow it out with a hairdryer(not on hot)...compresseed air might damage the element
Ambient Air Temperature and Pressure (AAP) sensor

The AAP sensor is located in the top of the air filter housing. It provides voltage signals relative to both ambient air
pressure and temperature to the ECM. The AAP sensor produces a voltage between 0 and 5 volts proportional to the
pressure level of the air in the air filter housing. A reading of 0 volts indicates low pressure and a reading of 5 volts
indicates high pressure. The ECM uses the signal from the AAP sensor for the following functions:
l To maintain manifold boost pressure.
l To reduce exhaust smoke emissions while driving at high altitude.
l Control of the EGR system.
The sensor also supplies a voltage between 0v and 5v proportional to ambient temperature. The ECM uses this signal
for the following functions:
l Exhaust gas over temperature protection.
l Turbocharger overspeed protection.
Input/Output
Connector C0158 pin 8 of the ECM supplies the AAP sensor with a 5 volt power supply. The pressure output from the
AAP sensor is measured at pin 10 of the ECM connector C0158, the temperature output from the AAP sensor is
measured at pin 31. The earth path is via pin 30 of ECM connector C0158.
The AAP sensor can fail the following ways or supply incorrect signal:
l Sensor open circuit.
l Short circuit to vehicle supply.
l Short circuit to vehicle earth.
l Contaminated sensor element.
l Damaged sensor element.
l Resistance in wiring harness.
In the event of an AAP sensor signal failure any of the following symptoms may be observed:
l Altitude compensation inoperative (engine will produce black smoke).
l Active boost control inoperative.
l Turbocharger boost pressure limited to 1 bar (14.5 lbf.in 2 ).

l EGR altitude compensation inoperative.
The MIL will not illuminate in an AAP sensor failure, and the ECM will use a fixed default value from its memory.
 
Just done mine. Slowly working through the MANY problems from years of neglect. Such a difference afterwards.

I can't load a photo off my phone for some reason, but believe me, it was more grease/oil/muck/dust than sensor.
 
Back
Top