Redhands font of all knowledge

This site contains affiliate links for which LandyZone may be compensated if you make a purchase.
am at a loss here! am assuming yer wanting yer sub woofer to improve the sound quality of yer 8 track, twisting wires together and slappin some parcel tape on it int the best way to get a good sound out yer speakers whether they be sub woofers or plain old canoe woofers
 
The rules on towing..

GTW = Gross Train Weight and is often called MAM.
MAM = Maximum admissible Mass and is the combined, maximum weight of a fully loaded vehicle and the trailer and the trailers load.

A 90/110 Discovery & RR can tow a trailer with MAM of 3.5tonnes on overrun brakes and 4 tonnes if the trailer is fitted with close coupled brakes (Hydraulic or Air brakes)

The maximum speed for towing a trailer in the UK is 60mph on Motorways and dual Carriageways and 50mph on Single lane roads. 30mph in built-up areas. (unless sign indicate otherwise)

Older licences that carry granddad rights allow the holder to drive upto a GTW of 8.25tonnes so 7.5tonne truck & 750kg trailer. or 4.75tonne truck & 3.5tonne trailer.

The new B+E requirement. for which you have to take a test if you want to tow a trailer heavier than 750kg or where the MAM would exceed 3.5tonnes, or where the MAM of the trailer would be greater than the unladen weight (Kerbweight) of the towing vehicle came in on the 1st January 1997.

These links should help to clarify anything you don't understand in the above thread.

Driving licence Driving Licence
Trailer Max Weights Towing Laws
Helpful tips on towing. & speed limits. Trailer Tips
 
I have hosted the the TomTom Greenlanes & Fords POI's on a file hosting site If anyone has any similar file or routes they want to share send them to me and I'll host them as well.

Fords Fords.ov2
GreenLanes 1 Green1.ov2
GreenLanes 2 Green2.ov2

Do i transfer these files onto my satnav?, if so how do i :der:do that?,
apologies for me lack of PC savvy, been living in a cave for the past 22 years...
Fantastic thread thanks.

DW.
 
Do i transfer these files onto my satnav?, if so how do i :der:do that?,

I use Tom Tom on a Mitac Mio PDA ... find the folder that already holds the POI (OV2) files and simply copy these across to the file using ActiveSync.

Then go into TT, preferences and POImanagement and check to see the POI's on screen. Works well, gives start and end points of green lanes.
 
Do i transfer these files onto my satnav?, if so how do i :der:do that?,
apologies for me lack of PC savvy, been living in a cave for the past 22 years...
Fantastic thread thanks.

DW.


Alright m8! All you need to do is copy and paste the files into the map folder on your TOMTOM. The map folder can vary in name but will usually be something like "Great_Britain-Map"

Good luck! Happy Laning!
 
I use Tom Tom on a Mitac Mio PDA ... find the folder that already holds the POI (OV2) files and simply copy these across to the file using ActiveSync.

Then go into TT, preferences and POImanagement and check to see the POI's on screen. Works well, gives start and end points of green lanes.

Result!!..
got ,em thanks, and to you too Hunter,
i is well pleased, off too check out the nearest ford to me right now(2.4miles)@ 2.15 am, might as well get cracking.:D
 
Fitting a safari snorkel to a defender TD or 200TDi.

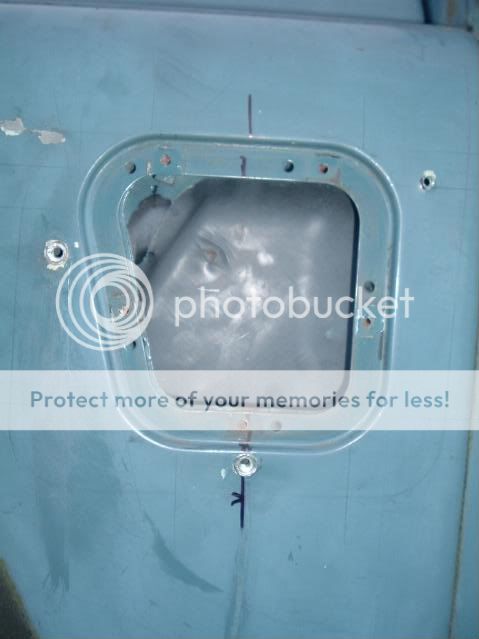
First remove the inlet vent cover on the N/S wing. Save the screws because you'll need them later.

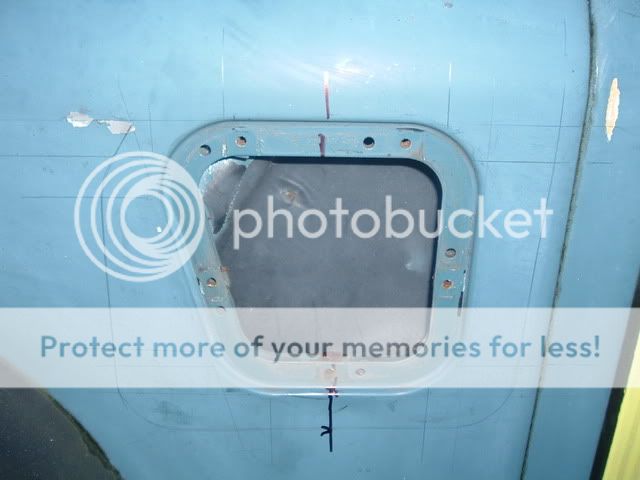
Then Mark out the centre and perimeter of the inlet vent extend the lines using a ruler and pencil.

DSCF1307.jpg


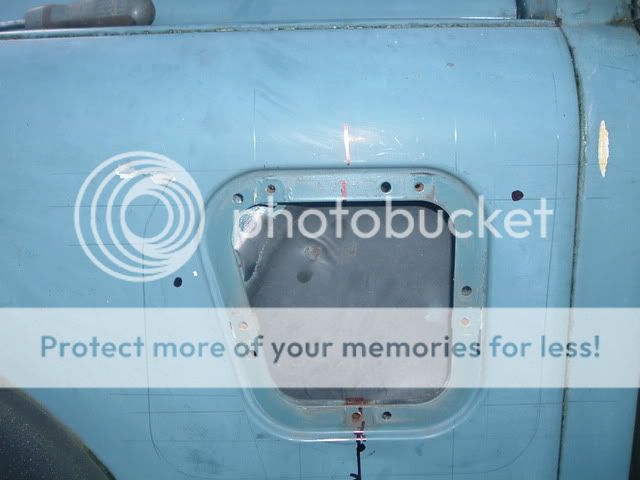
Then offer snorkel up and when you're happy with it's location mark the 3 holes for drilling. I stuck a felt tip pen thru each hole. And mark round the outside of the snorkel. This allows you to measure at several points to ensure the inner hole of the snorkel is lined up with the vent hole.
DSCF1308.jpg


Next using a small pilot drill drill out the 3 holes. At this point be 100% sure you're happy with the holes as it'll be too late to do anything about it if you get it wrong. Then using a 9.5mm drill for the front 2 holes and a 4.5 drill bit for the rear hole, Drill the holes and offer the snorkel up to ensure you haven't cocked it up.
DSCF1310.jpg


At this point you may!! notice that your nice new safari snorkel is as porus as a sponge and has more holes than a dutch brothel.
If this happens feel free to
dummyspit.gif
curse loudly :violent: and throw tools across the garden. Have a stomp around :Cry: and then take snorkel back to supplier. If it came mail order I suggest a cup of Hot sweet tea to calm you down before picking up the Phone??

This thread will be completed as soon as They manage to send me a new snorkel :frusty: :Cry: :Cry:
 
Nice one ... ;)

Think I'll make me own for the Disco ... with pics, of course.
 
Right replacement has arrived so on with the thread.

Fit the 2 rivnuts that are supplied to the 9.5mm holes you drilled earlier

DSCF1399.jpg


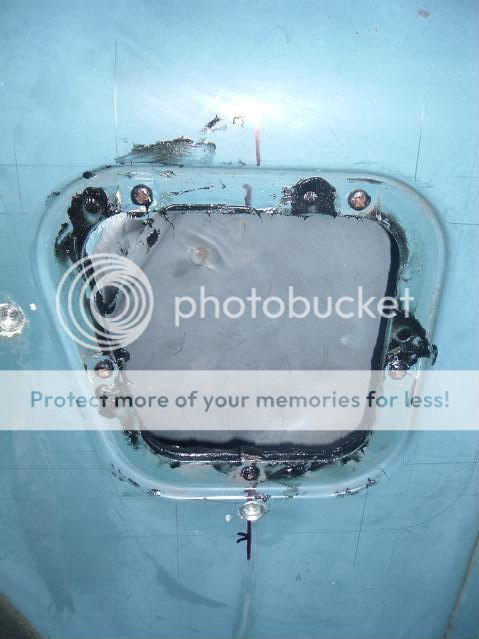
Then using silicone sealant seal the air inlet pipe to the inside edge of the wing and using the screws you saved earlier screw the pipe to the wing. making sure it is fully sealed with silicone.

DSCF1400.jpg


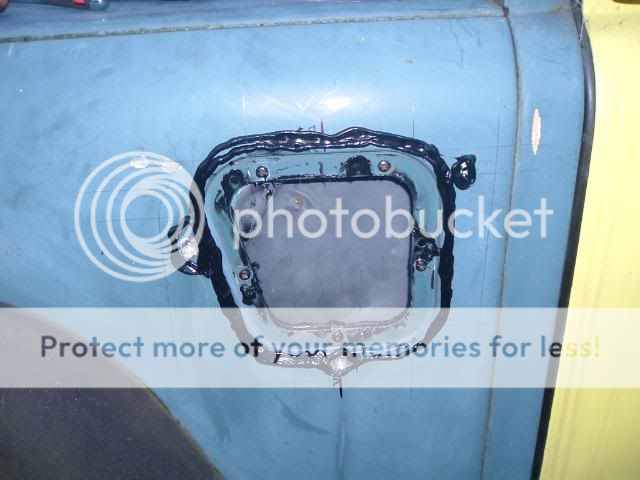
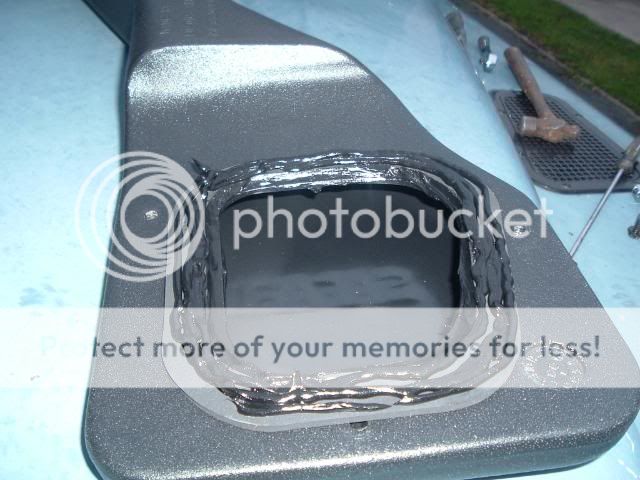
Then put a thick bead of silicone on the wing around the air inlet and around the holes you drilled

DSCF1403.jpg


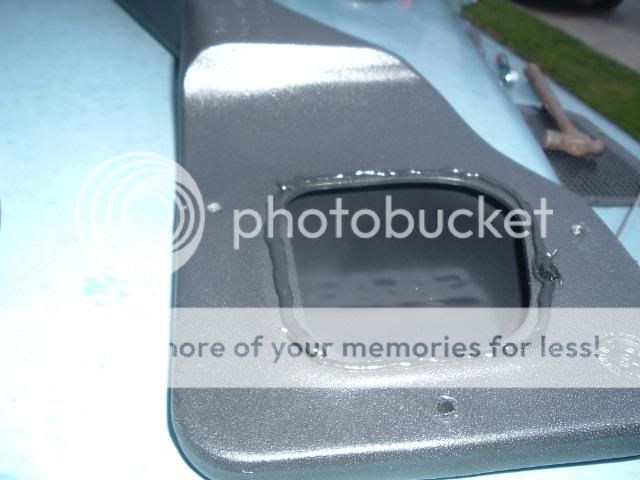
Then silicone the foam gasket to the back of the snorkel.

DSCF1401.jpg


And apply silicone to the face of the gasket that will be against the wing.

DSCF1402.jpg


There is no such thing as too much silicone!!

Fit the snorkel to the wing and tighten all the bolts up fully then mark and drill the holes in the A post for the upper bracket. Wrap some tape around the drill bit, about 10mm from the end of the drill. this prevents the bit snapping when you break thru and shoot forwards, and hit the far side of the A post

fit the self tapping screws and all that's left is to test it works and then fit the top piece and tighten the jubilee clip up.

DSCF1406.jpg


and the finished job

DSCF1405.jpg
 
For those of you with more money than sense a complete step by step guide to doing the facelift and changing your front end to make your Disco look like something it isn't, really. Supplied by TD5alive and passed on to me by Daft

Now hosted on mediafire Free File Hosting. As with all these sites. make sure you run a virus scan BEFORE opening the file. It's a PDF so you'll need adobe acrobat to read it.

Discovery FaceLift step by step Guide.pdf
 
For the numpties who haven't got the intelligence to figure this out for themselves how to change your battery without losing the code. Should be useful to the rangy owners, that are always whinging about this problem.

You'll need a 2nd battery, or a boost pack. or some other 12v Power source besides the main battery.

Step 1 - Find your battery

Step 2 - Set up your secondary power source

* If using a booster/jump pack; Find a stable location in the engine bay in which to site the jump pack where the leads can easily reach the battery terminals. Now clamp the crocodile clips of the booster pack over the leads that connect to the battery. Do not let the two crocodile clips touch each other! Ensure that you connect black to black and red to red. Also ensure that you have secured the crocodile clips to a metallic part of the leads that will not obstruct you whilst taking the leads off of the current battery. If your booster pack has a power switch ensure that it is switched on.

* If using a 12 volt battery and a set of jump leads; Place your 12 volt auxillary battery on the floor next to the vehicle and connect the jump leads to the auxillary battery. Connect the red lead to the positive terminal and the black lead to the negative terminal. Do not let the crocodile clips at the opposite end of the cable touch each other! Now clamp the crocodile clips at the other end of the jump leads over the leads that connect to the battery. Ensure that you connect black to black and red to red. Also ensure that you have secured the crocodile clips to a metallic part of the leads that will not obstruct you whilst taking the leads off of the current battery.


Step 3 - Remove clamp holding your battery in place
Look at your current battery to find out how it is being physically held in place. In many cases there will be a clamp at the base of the battery holding it to the floorpan. In other cases there may be a clamp across the top of the battery holding it in place. Once you have worked out how the battery is being held in place, use your socket set to loosen the bolt(s) on the clamp and remove the clamp.

Step 4 - Remove your old battery
Now that your battery is no longer physically held in place we need to remove the leads from the battery and remove the battery. Locate the bolts on the battery leads that are holding the clamps onto the battery terminals. Using your socket set, loosen the bolts but do not remove them. Now, here comes the important bit... One at a time, starting with the negative lead, remove the leads from your current battery whilst ensuring that the crocodile clips from your auxillary power source remain connected. Once the leads are free from the battery, remove the old battery from the vehicle. Your auxillary power source is now supplying the power to your car until we connect the new battery.

Step 5 - Connect your new battery
Without knocking the leads currently being supplied by the auxillary power source, lower your new battery into place. Now connect the leads onto the new battery - ensuring that you first connect the red to the positive terminal and then the black to the negative terminal. Be careful that you don't knock the crocodile clips off the leads as you manoeuvre them onto the new battery. Now tighen the bolts on the clamps to hold them firmly in place. You can now safely remove your auxillary power source by disconnecting the crocodile clips
 
Back
Top