- Posts
- 4,810
- Location
- Near Heathrow.
Zero compression on cylinders 2 & 4. All the rest are 150-180, but that's cold engine, and no squirts of oil, etc.
Time to start stripping . .
Time to start stripping . .
Read the faults on Nanocom this evening. Too dark to look further tonight.
- GEMS Engine:
- P0340 Camshaft Position Sensor Fault. Strange that the engine runs (but badly) with this fault. I thought cam sensor stopped it running ?
- Cleared the code, but it comes straight back.
- Wabco ABS:
- Normal wheel rotation on all 4 wheels (why is this logged as fault ?)
- Airbag SPS2:
- Passenger airbag open circuit.
- EAS:
- No faults, except the usual "invalid fault"
- Levelling after ignition off mod will be installed after I fix all the other stuff.
- Works ok manually in all heights, but calibration seems wrong, because car leans to right.
- HEVAC:
- No faults or book symbol
- Fan knob stiff to turn, but auto works.
- BECM:
- Fuel gauge fault. Need to check the sender voltage, but test mode doesn't work.
- Other gauges are fine.
- Reports electric memory seats, but the seats are manual with heaters. At least I now know the BECM supports memory seats. Connectors are present on BECM, but loom is missing.
- Doors:
- RH Rear is only one working correctly.
- All others need lock motors & microswitches checking or replacing.
Pete
what about these ? https://sklep.denos.pl/pl/p/FC-280SC-20150-wal-62mm/79
The motor linked to above I think is what I bought, but from a UK seller on eBay - the electrical connections are at the wrong end - they need to be at long end of the shaft. I wondered about pressing the shaft all the way through the motor to address that - but then I think it would spin the wrong way - so lock would be unlock and vice versa.

Is that the 2.5 diesel omega


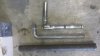
So back on the original topic . . . . . .finally got time this evening to take the o/s head off. That rear exhaust bolt is a bitch, but did it without removing steering shaft or heat shield !! What socket size are the head bolts ? My old 5/8" seemed to fit best, but gotta buy new socket for the replacements.
Some of the head bolts were definitely not torqued properly. . . but not around the dodgy cylinders. Never seen a head gasket blown like this before.
Still gotta clean up and see if there's any other damage . . . but that's another day. 2 pics attached for your entertainment.
View attachment 100314 View attachment 100315
Welcome To LandyZone, the Land Rover Forums!
Here at LandyZone we have plenty of very knowledgable members so if you have any questions about your Land Rover or just want to connect with other Landy owners, you're in the right place.
Registering is free and easy just click here, we hope to see you on the forums soon!