My new (old) Defender .. ;)

This site contains affiliate links for which LandyZone may be compensated if you make a purchase.
ok finally had a chance to read the update paul, sorry my post before was done while stuffing my face after nearly crying at the state of my 90... hehe

I ordered parts from yrm today before 11 in hope they would come tomorrow so hopefully ill get the same service as you got :D

Keep the pics coming mate you really don't mess about!!
 
Cheers TC, no worries mate, I've saved the prop for you to do .. ;)

Robbie, First time I've done it so it took ages, but if I remember right I think there's 1 bolt on the bulkhead near the heater, then 4 or 5 down the doorpillar, one on a bar stopping the bottom of the wing from flapping, on the outrigger shoe thing, then took the washer bottle off with 1 bolt each side and one below it, two bolts holding the washer holder to the wing. Undid the upper wing heater air inlet and also undid the 2 screws holding it onto the inside, then removed the side vent by levering it off and just manhandling and manouvreing it and the air filter inlet all out the way ... I've already moved most of it when I added a snorkel to the offside wing.

Along the top edge of the wing and inner wing are five (I think) bolts, supposed to be captive I think, but weren't, 2 bolts near the top of the radiator, 1 bolt near the bottom and another on a plate near the bottom edge. The inner wing also has a couple of bolts holding it to the chassis. Don't hold me to the numbers, I've been asleep since I did it .. ;)

It's a bitch to do!!

Took me ages and next time I'd probably not try to remove the inner wheel arch and wing outers separately, I'd do it all as a piece, just take the washer bottle pipes off maybe.

Have fun.

:eek:
 
ive had fun for 2 hours mate, on my defender captive means I'm rusted off and going to spin on the back!... snap on gun got most off and small rachets the rest, just a few more and i think she's coming off! thanks
 
Weird, thought I'd posted this earlier, but can't find it, so can't have posted it ...

Anyway, too wet for a welder etc so got under the 90 to remove the rear prop and fettle the bust UJ from Wales, to find the splines are also very wobbly, so new prop needed. Front prop off the Disco looks too short, till I 'stretched' it, so the splines are as far apart as the 90 prop .. and then they're identical! I actually knew this, having asked the question previously .. ;)

However, it looks like someone's used a front prop on the rear at some time. Seems to have worked well enough, but I thought I'd try to make a spacer to add some length to the system .. Not finished properly yet, but the following video shows a little of it ..

Rear Prop?

Used an old chopping board which is about 12mm thick, previously used as a laptop holder in the Disco, and a holesaw, drill and 'tools' to produce it. At first I thought I'd need two, but one looks like it'll be fine. Will shortly make a second anyway, just in case. I have some longer bolts to suit, so job'll be a good 'un. ;)
 
Paul you really do impress me mate! Ive gotta come up and meet you!

You've been unlucky if its been wet up there, its been dry here all day luckily and ive managed to start welding my rear part of my chassis... also cut a lot of my passenger footwell away lol!

I had to laugh on that video when u grab your brew lol, proper yorkshire man! lol
 
Weird, thought I'd posted this earlier, but can't find it, so can't have posted it ...

Anyway, too wet for a welder etc so got under the 90 to remove the rear prop and fettle the bust UJ from Wales, to find the splines are also very wobbly, so new prop needed. Front prop off the Disco looks too short, till I 'stretched' it, so the splines are as far apart as the 90 prop .. and then they're identical! I actually knew this, having asked the question previously .. ;)

However, it looks like someone's used a front prop on the rear at some time. Seems to have worked well enough, but I thought I'd try to make a spacer to add some length to the system .. Not finished properly yet, but the following video shows a little of it ..

Rear Prop?

Used an old chopping board which is about 12mm thick, previously used as a laptop holder in the Disco, and a holesaw, drill and 'tools' to produce it. At first I thought I'd need two, but one looks like it'll be fine. Will shortly make a second anyway, just in case. I have some longer bolts to suit, so job'll be a good 'un. ;)
have you got the wrong prop fitted or have lifted it considerably
 
Don't know James. I only bought the 90 in feb, and this prop was on it .. I put +2" springs on it, +4" shocks and 'better' trailing arms so it isn't lifted much, but articulates better. The 90 prop that came off had very 'sticky' splines, they wouldn't pull out or push in easily at all, especially compared to the Disco front prop, which is silky smooth. The 90 prop splines were also 'clicking', they are well worn, another reason to swap the prop .. but no money hence why I'm trying to fit the Disco prop.
 
The prop is off your old disco is 300tdi ? And the defender is a 2.5td. Am I right in thinking the engine is further back like the 200tdi so the front prop would be a longer one than the disco? Only the 300tdi defender and disco would be the same?

Correct me if I am wrong though?
 
The prop is off your old disco is 300tdi ? And the defender is a 2.5td. Am I right in thinking the engine is further back like the 200tdi so the front prop would be a longer one than the disco? Only the 300tdi defender and disco would be the same?

Correct me if I am wrong though?

quite right ,engine and transmission sit further back than 300s, 300 been the same front prop as disco
 
Sorry, I might not be clear, the broken prop (the longest) is off the 90 2.5TD, the prop I want to use is off a Disco 300 and is slightly short, hence why I made a spacer to take up some of the distance.

However .. the prop from the 90 looks too small anyway as about 1" or so of splines shows out the end when the 90 is sat straight and level .. In this position and laid next to the Disco prop in it's 'normal' state, with no splines showing, the 90 prop is longer.

If I pull the Disco prop slightly so it's splines are out too then it will fit exactly the same as the prop I took off the 90. Hence why I now think someone might have used a 90/Defender/Disco front prop on the rear at some point. I assume the 90 rear prop should be the same as the Disco front prop and NOT show splines when sat level.

At all states of the spline there is at least 2 1/2" of spline, maybe more, inside the prop tubes, whether 90 or Disco.
 
Again, sorry, it's the REAR 90 prop and front Disco prop ...
 
Been spotting with rain today, on and off so not a great deal done.

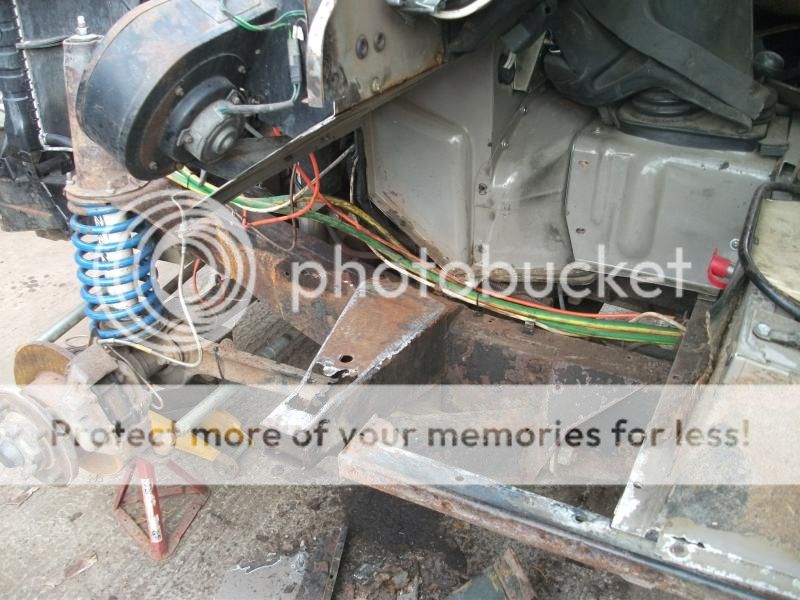
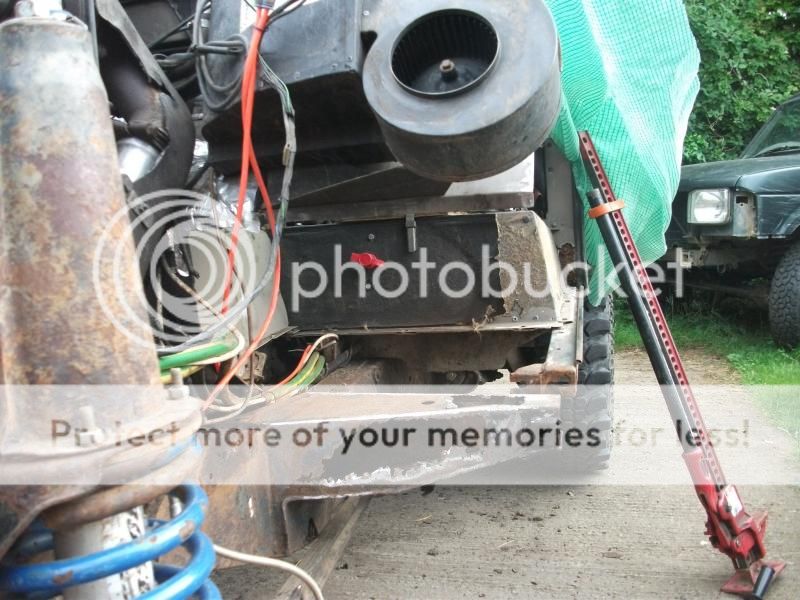
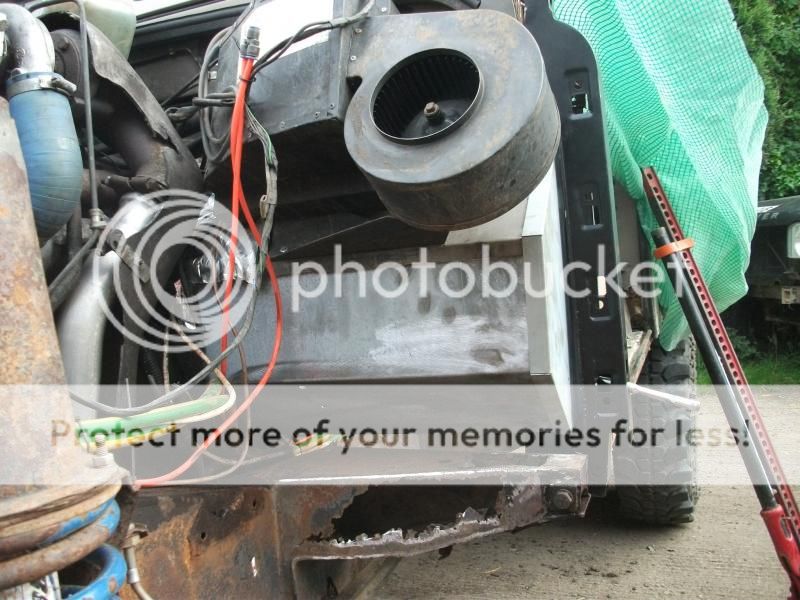
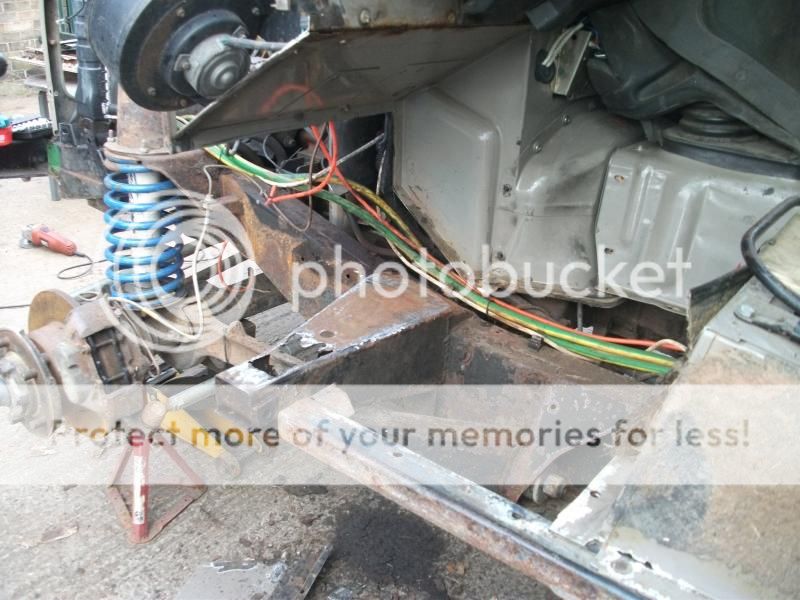
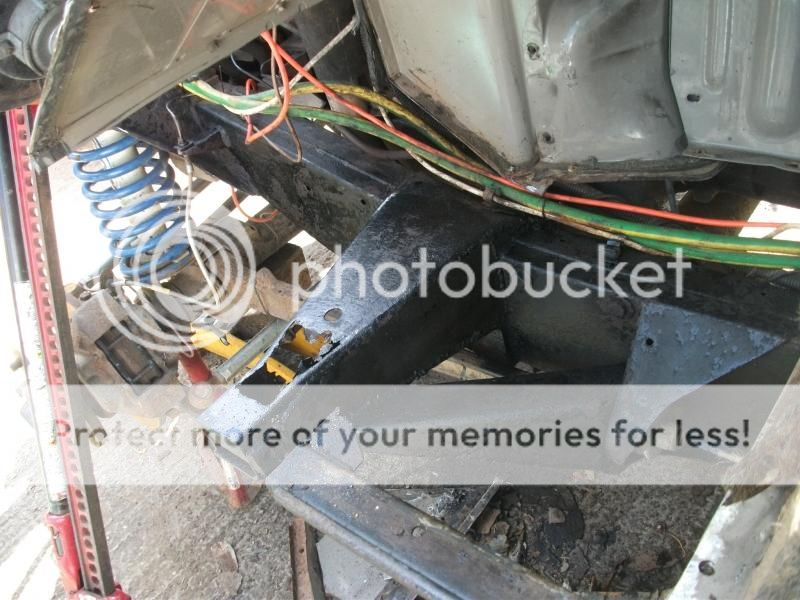
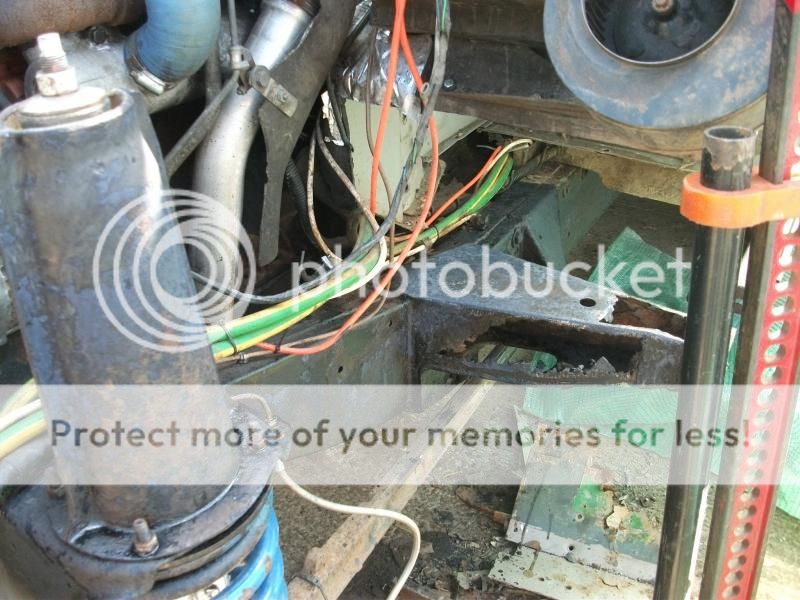
Took all the footwell out and whilst I had the grinder to hand cleaned up the outrigger in pre-prep for welding plates to it. Gonna treat it with fertan later today, especially on the inside, let it dry etc before welding it. Also gonna do the chassis in the same way, fertan, dry it off, red oxide primer, matt black paint, Tetroseal underseal. The front of the chassis that hasn’t been exposed at all looks brand new .. the bits where the underseal has been scraped off or fallen off have a coating of rust, so it needs something doing. I know of one hole in the chassis so there’s likely to be more, but they can’t be seen from here .. I suspect that when I (eventually) remove the roof and tub I’ll find ****e!!

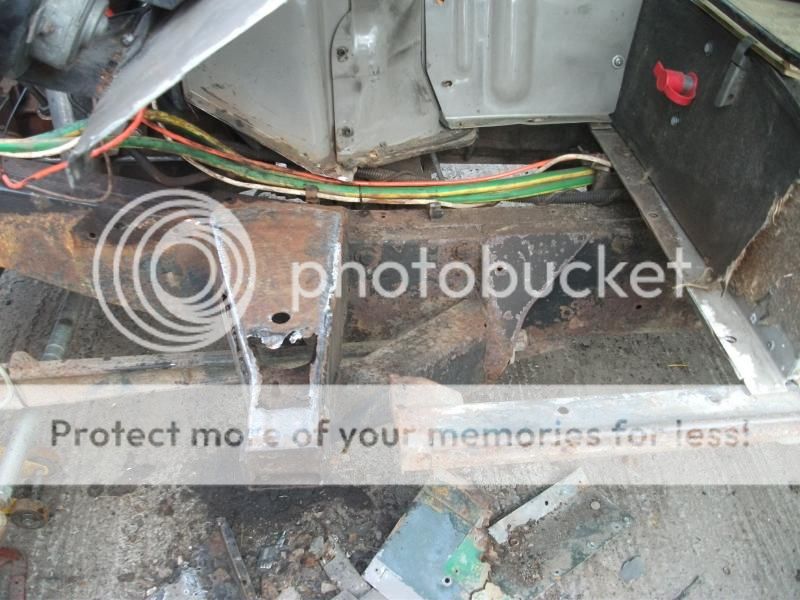
So, most of the lower footwell cut out, it looks somewhat bare.

cutout001_zps83075796.jpg

cutout002_zps3b19408e.jpg

cutout009_zps75e5fba7.jpg


The front chassis looks new, the rest doesn’t, but it’s only surface rust .. the hammer makes it ring .. ;)

cutout013_zps46cd87f7.jpg


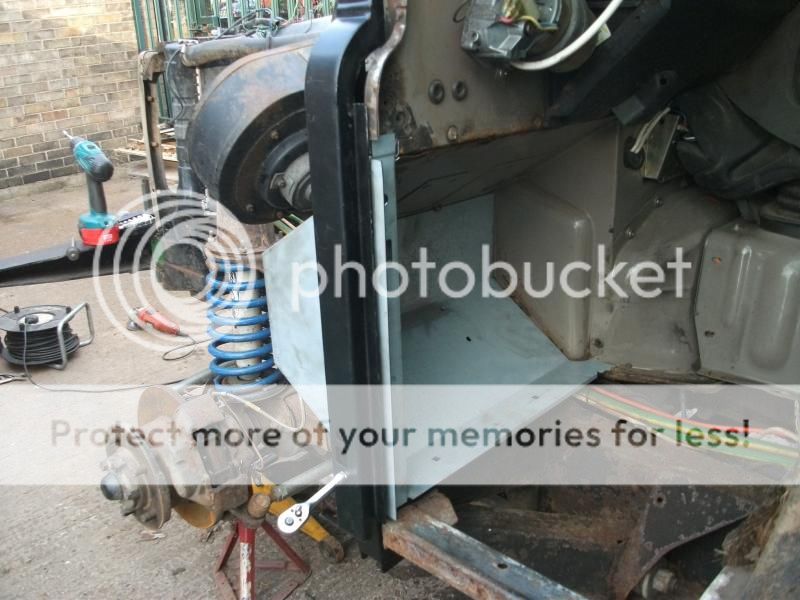
Now all the parts, except the top bulkhead plate, offered up with a ratchet stuck in to hold them together loosely.

cutout003_zpsb7bb379f.jpg

cutout006_zps9948a49d.jpg

cutout007_zps671c57fc.jpg


It all looks a bit lop-sided, but that’s ‘cos nothing’s holding it together. I’ve gone for a new bulkhead foot as well as the pillar and glad I did. Whilst the old foot was OK, the spacers and bolts in it were rotten and the new foot comes as a one piece part so to my mind is a little stronger.

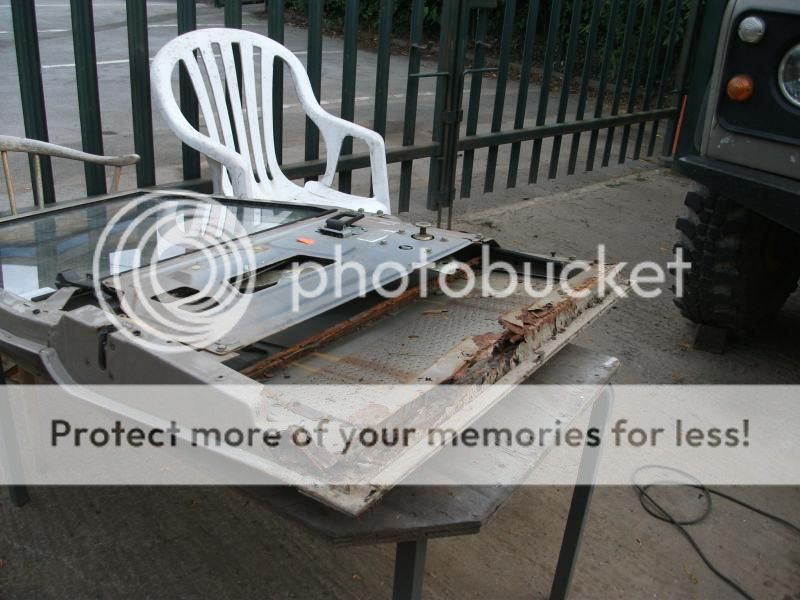
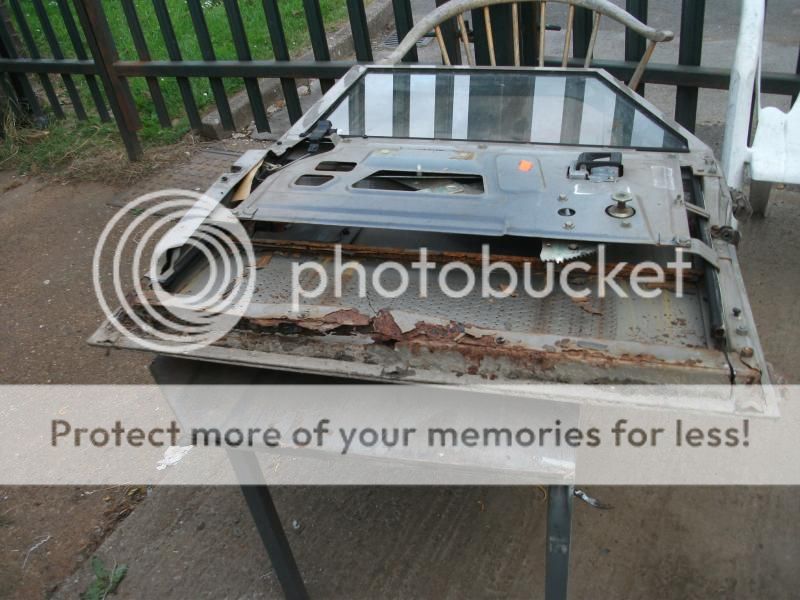
Not gonna weld anything yet till the chassis is cleaned and done, no point, so whilst I wait for a couple of things I’m gonna make a start on the passenger door. Most of it’s fine, it’s only really the bottom edge and hinges that are rotten, so as I already have new hinges I’m gonna chop out the crap on the bottom rail and see what I can do .. :)

cutout004_zps4b3ff45e.jpg

cutout005_zps0d4de3ee.jpg


I’ve never done this before so I’d be grateful for a little help or input ..

The door skin, does it literally just bend up to slide the frame out?
How else, if it doesn’t, do I remove the frame?
If it does, do I then simply bend the skin back around the frame when I’ve replaced it?


The door doesn’t seem too bad other than the lower steel frame really .. the window bar higher up looks rusty but it isn’t half as bad as it looks ..

Now to start with the Fertan .. ;)

door skin edges usually gets unfolded to form a 90 degree bend rather than the 180 degree, but only where the frame needs replacing.
frame then cut carefully as not to damage the outer skin. frame will usually be stuck to outer skin with sikaflex or the like, may need warming then carefully pull the remnants of the frame out.
cut new frame to fit, mitring as required, test fit, sikaflex in, weld joints.
carefully fold skin back over new frame.
don't forget the red oxide after welding, and before refolding ;)
 
post some pics of the fertan process! ive heard good things but never seem it applied!

Simple as .. clean the rust of all loose bits, dampen down with a wet cloth all the area to be fertanned then brushpaint the fertan on. After an hour or so most of it will have started going black, damp it down again!. I then leave it a couple of days and the rust turns properly black, sometimes with a dusty residue, so use a wet cloth or hose it off to clean the residue if you're going to paint it. Let it dry again and it's ready to paint.

looking good that Paul :)

if i remember correctly the frame is bonded as well as lapped over the edge.

Thanks, thought it might!

door skin edges usually gets unfolded to form a 90 degree bend rather than the 180 degree, but only where the frame needs replacing.
frame then cut carefully as not to damage the outer skin. frame will usually be stuck to outer skin with sikaflex or the like, may need warming then carefully pull the remnants of the frame out.
cut new frame to fit, mitring as required, test fit, sikaflex in, weld joints.
carefully fold skin back over new frame.
don't forget the red oxide after welding, and before refolding ;)

Nice one mate, thank you.

I had only intended to unfold it enough to get the frame out and new bits back in. Had a good look and half the sealant is not there anyway, the other half seems to be cracking away .. just hope the ally is OK underneath .. actually not too bothered, 'cos it has a chequer plate bit on the bottom as well, so it'll be covered.

Red oxide is a must .. ;)
 
Looks good paul. could you share with me the part your ordered for the doors to hinge onto, ive cocked up and ordered the lower a frame like a tit.... can't see the ones you have brought....
 
Looks good paul. could you share with me the part your ordered for the doors to hinge onto, ive cocked up and ordered the lower a frame like a tit.... can't see the ones you have brought....

Same as ebay part No 280700176934

But I don't recall paying that much ... this was the first I came to.
 
Fertan, pic by pic ish .. ;)

So last night I wiped the chassis etc down with a wetish cloth so all the rust got damp, then simply brushed Fertan on, as per the bottle instructions.

This is what it looked like before Fertan ..

cutout013_zps46cd87f7.jpg

cutout010_zps9f641c64.jpg


This is it this morning ...

fertan002_zps82f46b73.jpg

fertan003_zps17118f1d.jpg


A big difference, I think you'll agree!

Next job, this evening, is to hose or wipe the residue off, plain water on a cloth seems to work best, then leave it a day or so until it properly dries before primer and paint then underseal ... then I'll start welding and re-do the painting and undersealing as necessary.

No point rushing and spoiling it simply to gain a day or two.
 
This is it just after wiping it down with a damp cloth, it now looks greyish in parts. No flaky bits or residue left though, and as soon as it's all dried fully I'll spray red oxide on and then matt black and it'll be good for undersealing after all the welding.

'course it's now fine and sunny 'cos I'm at work, but at least that means it'll be fully dry ready to paint at 6 tonight .. :)

001_zps5f45f7f7.jpg
 
Back
Top