James's rebuild thread

This site contains affiliate links for which LandyZone may be compensated if you make a purchase.
No problem, glad it has been useful, I enjoy doing it :)

You should def give the rebuild a go, as you can tell I don't know anything about the mechanicals of cars, but I'm getting there and have learnt a lot.

Also, the guys on here never fail to help out with my multitude of problems!
 
Couldn't stretch to a galv one, but went for one with a heated rear already in it.

Hope the SP ones are better than the Britpart ones. I replaced my rear door about 7yrs ago. Had it professionally painted, but have just had to replace it again - it was rotten. For my rebuild I bought new doors, stripped them, plastic coated the frames, painted the skin on the inside then put them back on. A lot of work, but I hope it pays off.

YachtMaster said:
I'm now seriously considering acquiring a 300tdi, stripping it and popping it onto a galvanised chassis (+bulkhead if required) then using it for some off-road fun- nothing radical, probably a standard set-up, but believe me, I wouldn't even be considering this if it wasn't for the EXCELLENT advice, guidance and pics that are freely shared on this forum

Definitely give it a go. Tons of help on here and your own spanner man if needed. Doesn't get much better than that. :) Cost more than you think tho :eek:
 
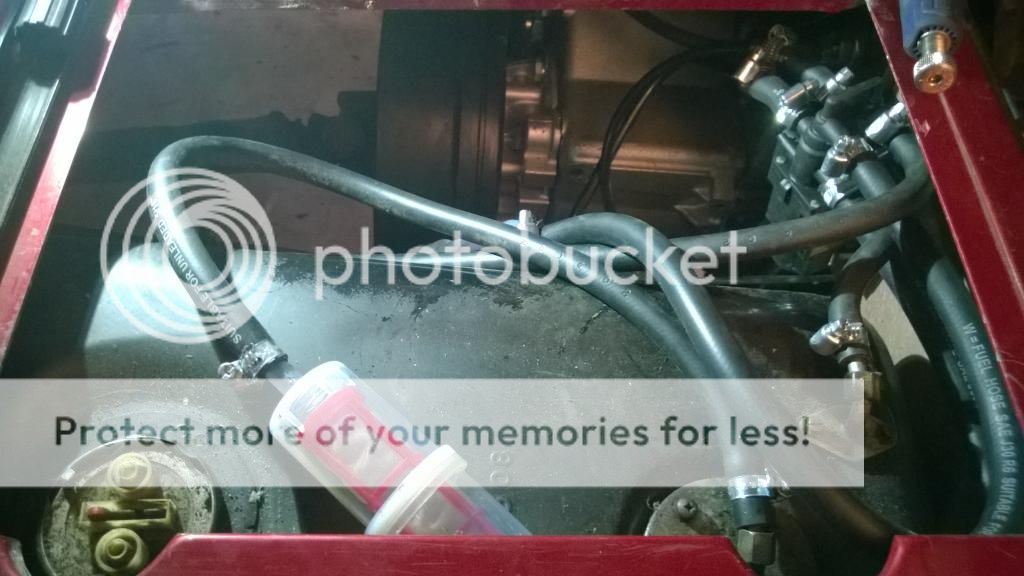
Got some stuff done this morning, bled the clutch (I think) and connected up all of the fuel pipes. Wasn't a very fun job and think I may have gone a bit overboard on the jubilee clips:
WP_20141024_14_17_32_Pro_zpsa64fe24e.jpg


I also spent an hour working out how to crank the engine from the battery, as the ignition doesn't seem to have any power.
Finally managed it, only to find that the never failed method of removing the crank damper bolt wouldn't undo it, so I'm slightly stuffed now. Any ideas?
 
James,

what did you try for the dog nut? I used a long breaker bar and the chassis, worked well, even if it did make the derriere twitch, LOL
 
James,

what did you try for the dog nut? I used a long breaker bar and the chassis, worked well, even if it did make the derriere twitch, LOL

Tried that, it just kept moving the whole vehicle even when chocked!

A friend has had a go and managed to loosen it, but the loctite is still holding it in. Trying to work out how to get air up to my shed so I can use a gun on it.
 
Tried that, it just kept moving the whole vehicle even when chocked!

A friend has had a go and managed to loosen it, but the loctite is still holding it in. Trying to work out how to get air up to my shed so I can use a gun on it.

an empty gas bottle with a connector bolted on ,makes a air portable
 
Blimey James,

sounds fun, NOT. gotta say mine undid straight away using the breaker bar method whilst also in gear. I take it you did take the connection off of the fuel solenoid so it was not trying to start up at the time, LOL

anyway, whoever fitted it must have used a strong loctite, hope you get it off.

Cheers

Thanks.

Yeah, the funny thing is the guy who is helping take it off is the guy who tightened it up 5 years ago!

Will hopefully come up with a new plan of attack tomorrow...
 
make sure you have that filter pointing the right way up, theyre a #### of a yoke to get to flow properly if theyre not sitting right

Thanks, I did put them the right way around the first time, but have taken one off since then so I need to check.

They will prob need changing pretty much straight away anyway as I'm guessing a lot of crap has ended up in the tank.
 
I may ill have a look this morning see if it works / is there.

Thanks.

I'm going to looks at a house this morn, but will be back at about lunch time.

The other solution is to fit a steering box and column and get it steerable so I can get it to the shed with the compressor.
 
This weekend I have done a few smaller jobs, but it is all coming together now. Apart from the *****ing dog nut which I still can't get off...

The weekend started well with me fitting a new arm to the steering box (which took a lot of effort) and then fitting all of the steering components. Then I realised yesterday that I had put the arm on in the wrong position so had to take it all apart all over again. Plus the box seems to be leaking fluid so I probably need a new one anyway...oh well at least it steers now :)

I have also bled the brakes, worked out why there was no power and painted the battery box.

Also got one of the rock sliders to sit properly (with a lot of grinding) and fitted the filler system
WP_20141026_14_31_05_Pro_zps68a193d0.jpg

WP_20141026_14_30_50_Pro_zpsfcd34ea6.jpg

I'm a bit worried that the right angle that comes from the rear tank may stick out too far into the wheel arch and may foul on the tyre. So I'm either going to have to cut some off or buy one that isn't as long.

Today's question: Where do the two connectors (hoop spade things that look like earths) that come out of the engine end of the wiring loom go???
 
Looks like you are almost done mate, wish i had gone for the chassis with the rear tank mount would have saved some messing about
 
Looks like you are almost done mate, wish i had gone for the chassis with the rear tank mount would have saved some messing about

Dunno, it has been a fair amount of effort. The exhaust still doesn't fit and is currently held on with cable ties! It will be nice to be able to do 650 miles on a fillup though :D

I am almost done, but not being able to put the engine back together is really holding things up.
 
Fuel tank guard on:
WP_20141027_18_53_15_Pro_zpsbcb8175d.jpg

Was an absolute pain to do, have had to cut some off to get it to fit with my rock sliders, and also drill a hole through the chassis which I have been avoiding. FYI fit the back bracket before the tank goes in! I don't recommend the tank guard at all considering it was over £200. The rear one was badly designed too and neither have come with all of the fittings.

Hopefully James is going to help me get the dog nut off tomorrow night, then I can make some proper progress :)


I should be there make sure youve got plenty of air ;) theres one or two tricks ive got left :D
 
Back
Top