foss
New Member
- Posts
- 1,734
- Location
- The muddiest driveway in Essex
After sifting through threads on this & not found a full install write up, Ive bitten the bullet & got myself a boost gauge. Hopefully this will throw some light on a little lack of torque & enable me to establish that Im running the right boost (1 bar @ 1800-2000 rpm standard) & whether or not my Wastegate Actuator is playing up.
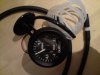
Ive attached a pic of the parts used & will follow up with how I routed the vac hose etc...
The gauge is to be installed on the pillar next to the dash binnacle/windscreen.
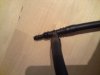
The vac pipe is going to be tapped in to the metal section of the turbo-intercooler hose where you'll find a nipple with a thin hose coming off of it. This hose goes to the Wastegate Actuator. It has been suggested to install the new pipe into the inlet manifold, but this would involve drilling & tapping a new hole which isn't really a route I want to take & seems a bit extreme when there is already a good enough location for it.
I have acquired-
1 x Boost gauge (-1/+1.5 bar) I wont be going over 1.5 bar in my set up (supplied with T piece)
1 x box of straight plastic pipe connectors 3.2mm
3m x Vacuum pipe 3.2mm
1m x twin core cable (gauge illumination)
The gauge comes with optional illumination which I will be wiring to an earth under the steering wheel by the fuse box. You will see a metal brace under the steering column with some convenient pre-threaded holes that take a short fat self tapping screw or an M5 bolt. Positive feed will be supplied by the dash lighting by splicing into my rear wiper binnacle switch. You need to splice into the wire supplying Pin 2. You can use any of the binnacle switches for this, Pin 2 is dash illumination on all of them. NB when installing the bulb into the gauge-push the bulb as far in to the rubber grommet as it wil go or it may foul the gauge mechanism & move the needle giving you a false reading.
The wiring is then fed up the behind the the door rubber on the door post, with the vacuum hose, up behind the trim next to the windscreen that runs up to the roof lining.Its easier to remove this trim first. The gauge pod is mounted here with 2 self tappers.
Now for the Vac hose. I chose to run across from under the steering wheel, behind & under the front edge of the centre console (loosen at the front for access) where the transfer lever is, round the other side, behind the heater motor & up behind the BCU & SLABS ecu.
Well up in the passenger front footwell on the bulkhead is a medium sized wiring grommet with cables running through it. It is easier to locate from the engine bay. It is to the right & down of the Inertia Switch as you look at the bulkhead from the front, roughly below the passenger wiper blade on the bulkhead.
I dismembered a wire coat hanger & used it to poke a new hole through the top part of the grommet avoiding any wiring. Then duct tape the vac pipe to the end of the coat hanger & FIRMLY BUT GENTLY push it into the new hole. You can now pull it through from the footwell side & connect it up with a straight connector to the pipe coming from the gauge.
Once the coat hanger is removed, gob the new grommet hole up with some Tiger Seal or similar to keep any damp out.
Connect the other end of the vac pipe to the new T piece, once cut to length up to the wastegate pipe nipple.Remove the existing pipe from the turbo- intercooler pipe nipple.Re-attach to the T piece. Finally, add a new piece of pipe from the nipple to the T piece.
Ensure all air connections are sealed well, I used fuel pipe clips on each & Q Bond on the pipe/connector edges.
Finally check the pipework the whole way along for kinks & straighten out if necessary.
Job done!
Ill post some photos up when its stopped raining...
Ive attached a pic of the parts used & will follow up with how I routed the vac hose etc...
The gauge is to be installed on the pillar next to the dash binnacle/windscreen.
The vac pipe is going to be tapped in to the metal section of the turbo-intercooler hose where you'll find a nipple with a thin hose coming off of it. This hose goes to the Wastegate Actuator. It has been suggested to install the new pipe into the inlet manifold, but this would involve drilling & tapping a new hole which isn't really a route I want to take & seems a bit extreme when there is already a good enough location for it.
I have acquired-
1 x Boost gauge (-1/+1.5 bar) I wont be going over 1.5 bar in my set up (supplied with T piece)
1 x box of straight plastic pipe connectors 3.2mm
3m x Vacuum pipe 3.2mm
1m x twin core cable (gauge illumination)
The gauge comes with optional illumination which I will be wiring to an earth under the steering wheel by the fuse box. You will see a metal brace under the steering column with some convenient pre-threaded holes that take a short fat self tapping screw or an M5 bolt. Positive feed will be supplied by the dash lighting by splicing into my rear wiper binnacle switch. You need to splice into the wire supplying Pin 2. You can use any of the binnacle switches for this, Pin 2 is dash illumination on all of them. NB when installing the bulb into the gauge-push the bulb as far in to the rubber grommet as it wil go or it may foul the gauge mechanism & move the needle giving you a false reading.
The wiring is then fed up the behind the the door rubber on the door post, with the vacuum hose, up behind the trim next to the windscreen that runs up to the roof lining.Its easier to remove this trim first. The gauge pod is mounted here with 2 self tappers.
Now for the Vac hose. I chose to run across from under the steering wheel, behind & under the front edge of the centre console (loosen at the front for access) where the transfer lever is, round the other side, behind the heater motor & up behind the BCU & SLABS ecu.
Well up in the passenger front footwell on the bulkhead is a medium sized wiring grommet with cables running through it. It is easier to locate from the engine bay. It is to the right & down of the Inertia Switch as you look at the bulkhead from the front, roughly below the passenger wiper blade on the bulkhead.
I dismembered a wire coat hanger & used it to poke a new hole through the top part of the grommet avoiding any wiring. Then duct tape the vac pipe to the end of the coat hanger & FIRMLY BUT GENTLY push it into the new hole. You can now pull it through from the footwell side & connect it up with a straight connector to the pipe coming from the gauge.
Once the coat hanger is removed, gob the new grommet hole up with some Tiger Seal or similar to keep any damp out.
Connect the other end of the vac pipe to the new T piece, once cut to length up to the wastegate pipe nipple.Remove the existing pipe from the turbo- intercooler pipe nipple.Re-attach to the T piece. Finally, add a new piece of pipe from the nipple to the T piece.
Ensure all air connections are sealed well, I used fuel pipe clips on each & Q Bond on the pipe/connector edges.
Finally check the pipework the whole way along for kinks & straighten out if necessary.
Job done!
Ill post some photos up when its stopped raining...
![P300110_12.28[02].JPG](/data/attachments/12/12360-8a2ca2af70c8efd05a04d6ec0caf0cd8.jpg)
