Freelander 1 Diesel mist spraying all over the Fuel Rail & Injectors

This site contains affiliate links for which LandyZone may be compensated if you make a purchase.
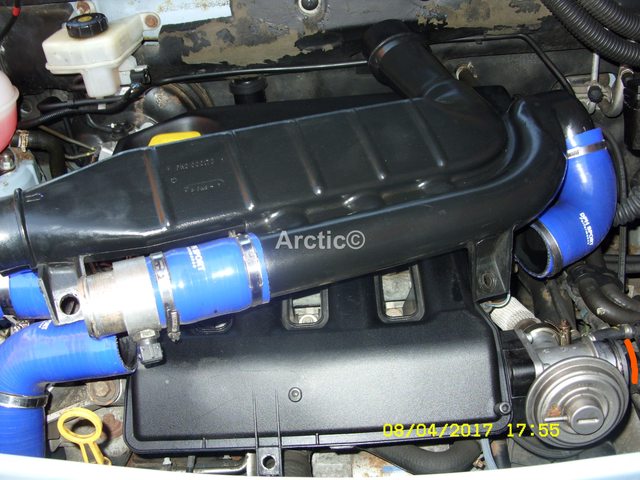
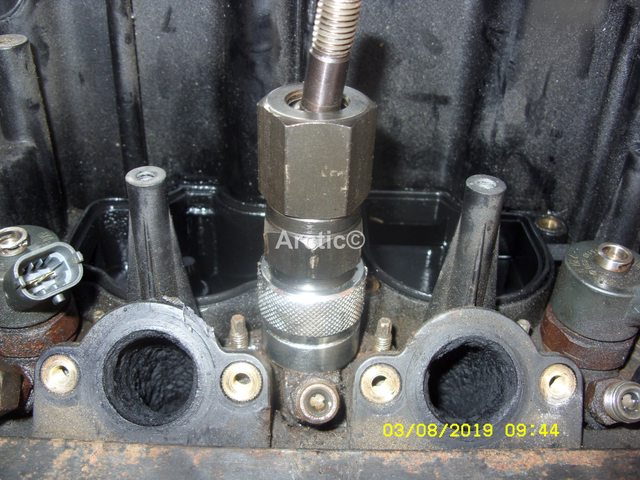
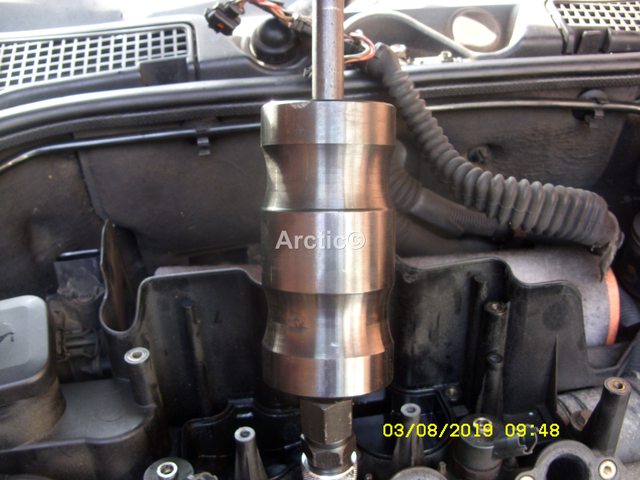
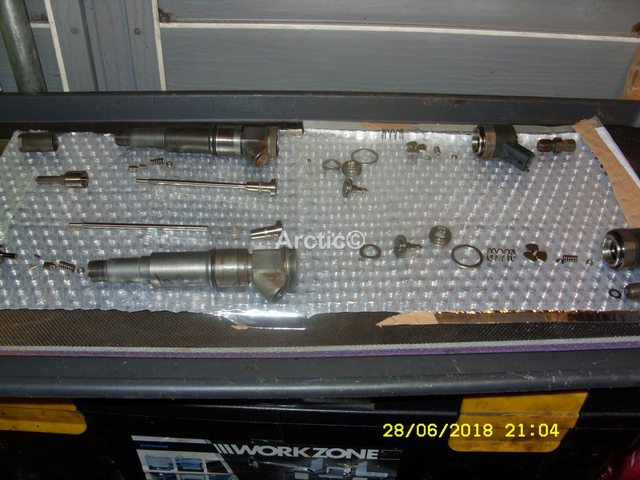
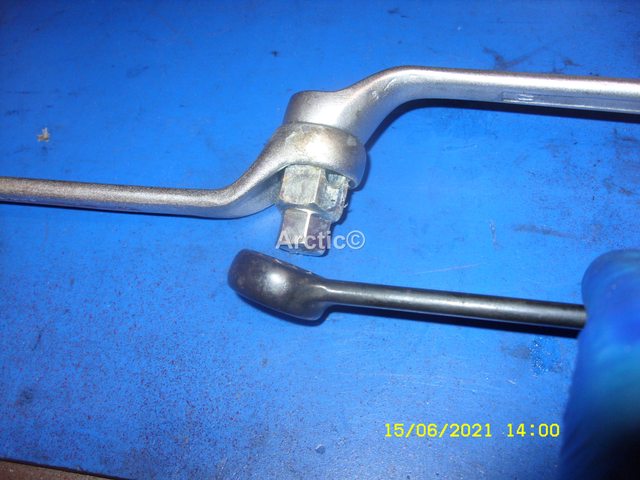
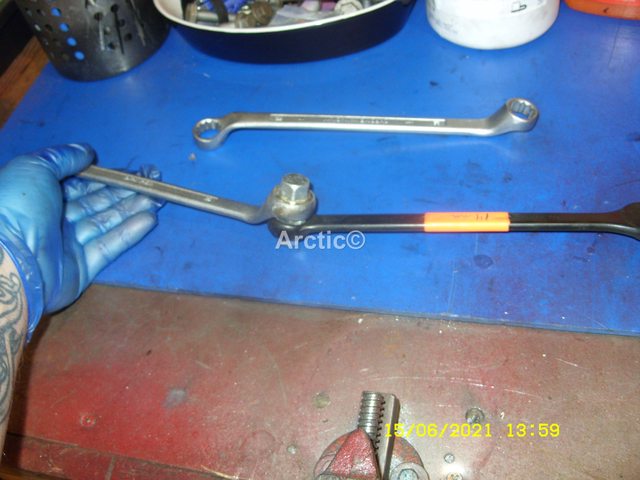
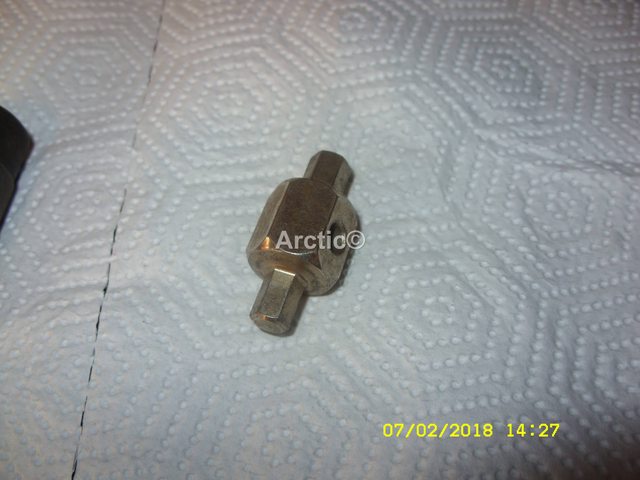
You might need some injector seat cutters, these are designed as the name suggests to recut the seat where the injector washers sit, but I only ever use them to scrape the seal area clean so thats just a couple of turns by hand, then its long screwdriver and some rag to clean the seat, literally the seat area is all that matters.
Some cars have real issues with sealing the injectors, have a google for mercedes injector black death.

Annealing will make an old washer soft and ready to use again, anneal a new washer makes it softer as well as, I was initially sceptical of this, but someone on this (I think ) forum mentioned it and I have tried it a few times since with no issues, of course I may have had no issues anyway but have had issues with inj washers sealing before, I reused three injector washers a couple of weeks ago and have just done 1500 miles on them with no leaks etc.

Cracking write up by Arctic2!

This might be of interest, my experience with Mercedes injectors!:
Mercedes 'black death' and diesel being forced up the side of the injector is something I'm all too familiar with from my Sprinter.
This is invariably due to failure of the copper sealing rings at the bottom of the injector allowing combustion gases to leak from the cylinder.
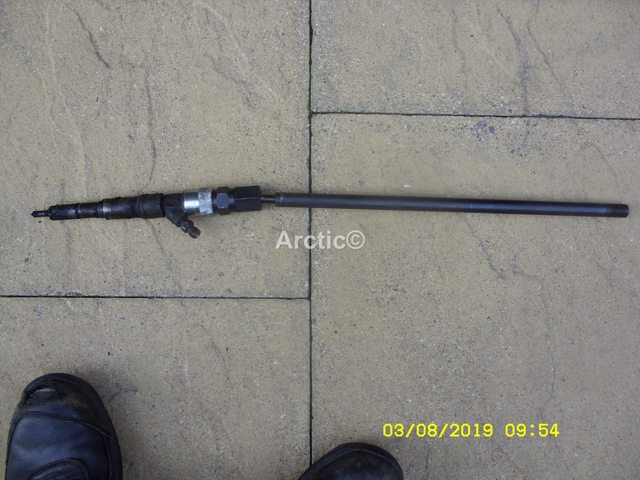
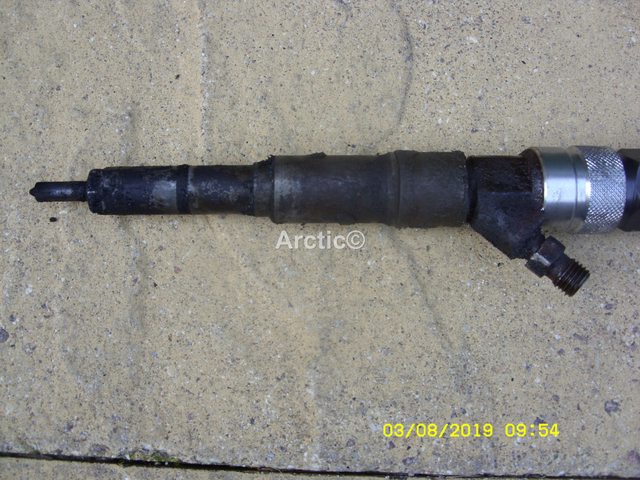
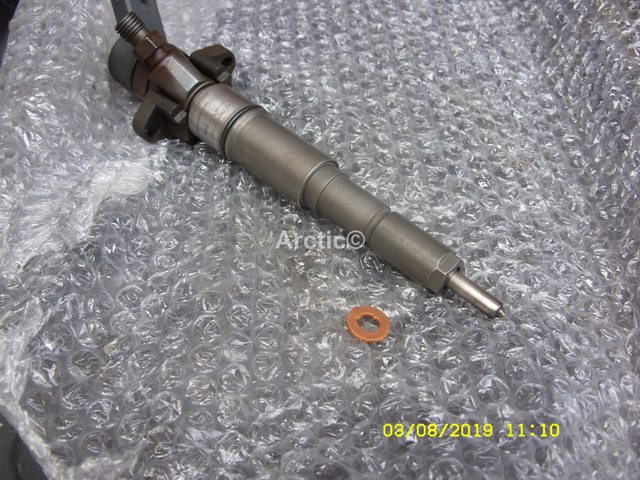
You injectors look very similar to the MB ones as to the clamping slot & the lower parts & the copper washers look identical - although I can't say if they are the same size.
The face of the injector that contacts the copper washer must be perfect & undamaged or you're wasting your time.
The face of the head that the other side of the washer contacts to make the seal must also be as perfect as you can get it & super clean.- which may require the careful use of a seat cutter to restore.
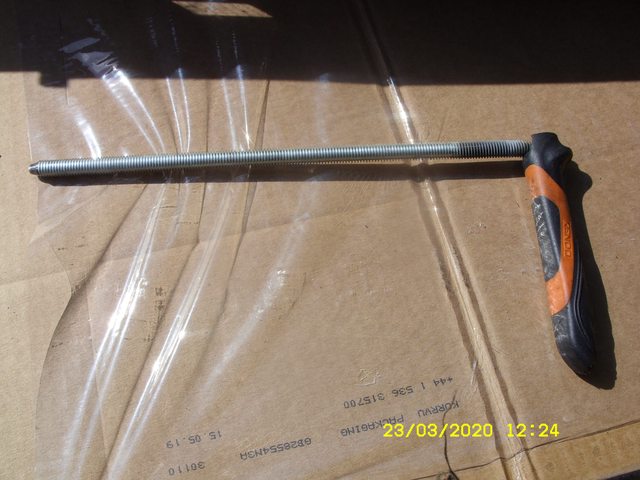
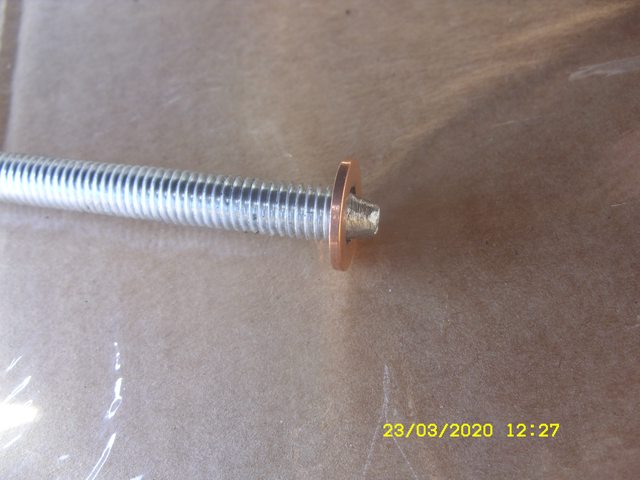
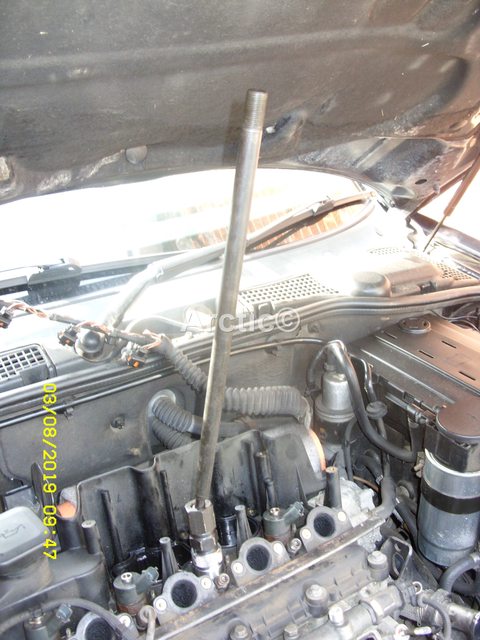
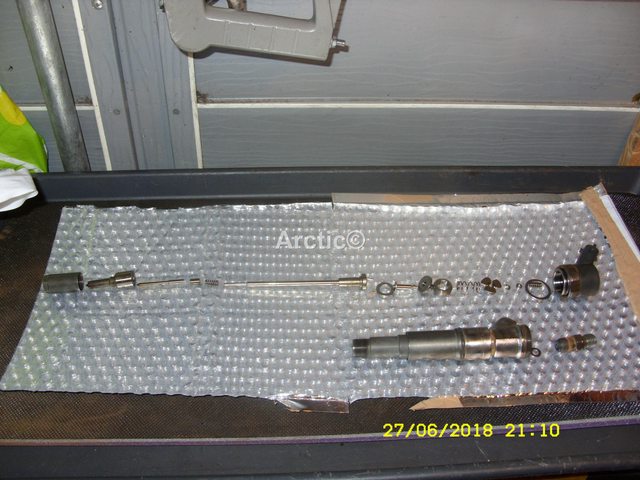
Be sure that you've got the old sealing washer out as they can sometimes stay stuck in the injector hole - I've got a suitable length of steel rod filed to a point with a barb filed just to the rear of the point which I needed to make to hook two of them out.
The genuine MB ones are hard as hard things & I had two fail in short order after replacement.
I've seen it recommended to anneal new MB ones before use but the advice is to use Honda 2.2 ones which are slightly thicker & much softer. Not had any issues using them.
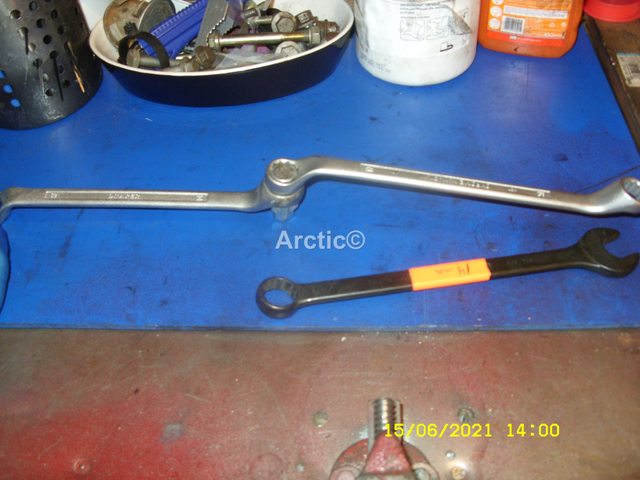
Couple of injectors were really stuck in. Levering not recommended as anything a lever can be used on is easily damaged & as suggested on an MB forum I slackened the retaining bolt & ran the engine at tickover which softened the crud & started the injector moving.
Mercedes Diesel Injector Advice (Disregard any of the ad boxes inviting you to download PDFs & other stuff!)

Good luck!
 
Last edited:
I always use this tool i made to remove old copper washers if they are stuck in the injector port.
WoyNSoIl.jpg
1

Piece of all thread with an handle on from a pair old pliers.
FKEwpUul.jpg
2

As above always use your common sense if you use the method of prying up an injector, always use a flat bar, and if the injector will not move do not pry to hard, that way damage will not happen, then you must move to another method namely a slide hammer.
c48M966l.jpg
3

KobN1Cel.jpg
4

KQbs1LSl.jpg
5

uc6Vz1Ll.jpg
6

XELKtpJl.jpg
7
nice clean one to replace the above injector.
lTpcofXl.jpg
8

You could use the method above mentioned undo the two 8mm nuts a little and start the engine, never used this method myself though, always been successful with prying up gently, only ever had to resort to the slid hammer twice i think in 12 years.

I like to take my injectors completely apart and clean and replace any damaged items,
qg046r8l.jpg
9

fUScUftl.jpg
10

I am sure Marc will overcome the problem and all will be well in the end.
 
Thanks @Arctic2, especially for the part with egr and manifold cleaning. Did a bit over the weekend. Sometime back, you had linked to the vacuum pipes at 3.2mm. I had bought one and tried to change the one to turbo solenoid. As I couldn't get it on I found that one other hose was split and changed that one. Will try again, but asked myself that the ID should also have something to do with the vacuum created as well. The garage gave me 4mm last time which was easy to fit, but I think not good. Thanks again for all the pictures as well.
 
Many thanks to "Arctic2" I look forward to the two caps arriving, I am still trying to get the vice sorted out to give me the clearance to avoid clamping on the large nut under the plastic cap, I have ordered a 15mm aviation spanner as that should give more leverage and as its a ring both ends I can slide a piece of tube over it for even more leverage.
I also looked at the combination 6 point spanner but I don't have a large enough tube to go over the open ended section, If the aviation spanner & heat fail then I will go for ordering the 6 point combination spanner and get myself a larger piece of tube.

Just waiting for the Aviation spanner to arrive and I will try again, thanks again to everyone for the helpful suggestions
 
Another ghetto trick for getting more leverage on a spanner is to put the ring key end over the fastner you want to move, then hook a second spanner's ring end over the open end of the first spanner, as shown in this video I googled for you
 
I would be very careful trying to use two spanners hooked up or joined together like that, accident waiting to happen, as you can not completely control the leverage, if you are going to to use two spanners together use two rings spanners joined together with a sump plug key, as in the photos below, even then go steady with the pressure you use to try and control it.

vI9z8sil.jpg
1

ZrLqSs5l.jpg
2

WfPefEYl.jpg
3

HqBd7Iwl.jpg
4

Caps posted out today.
 
Hi All
Well the continuing saga of the Injector issue, with the help of very kind people on here I am now further on but still not out of the woods.

The two injectors that I found it impossible to remove the cap on are now apart with the help of a 15mm Aviation spanner a piece of scaffold tube and a blow lamp, the issue now is that although the cap is removed and the little piston, spring and spacer will all come out, the lump with the Jets in the end that has a Needle (for want of a better word) in the centre has come out in one piece.

I have tried to remove the needle by tapping the unit on a block of wood and also tried to get it out with a magnet to no avail, I have just submerged both of these Lumps in carb cleaner and will leave them to soak over night. If there are any other tried and tested methods that anyone knows of I would be most grateful.

Having read previously that the needle must move smoothly within its housing I am assuming that I really need to get them out to even attempt to clean the five holes in the jet part.

I assure you all I really am trying

Hi March.
They must be really carboned up to not move using the tap on the wood and or magnets, i have never come across that before, i posted the caps out to you 21st so they should have arrived by now, unless they arrive tomorrow. hopefully the carb cleaner will help them free off, once again you could try a little heat but use thick glove or hold the jet in some pliers so you do not get burnt, have replied to your message.
 
Hi All
Well I must have done something drastically wrong, I stripped and cleaned the top of the injectors as per Arctic2's excellent guide, I even borrowed a cleaning bath, all parts were cleaned and I did the carb cleaner through the nozzle test and all four sprayed beautifully, I carefully re-assembled the top parts in order, washer, spring, very small disc (laying flat) then the tube, then carefully fitted the needle into the nozzle, mounted that on the two locating pins which left a small gap that could be closed by putting pressure on the nozzle against the spring and then fitted the cap, nipped and then 1/4 turn.
The injectors were then fitted back into the head and everything re-connected, once all was assembled I backed off the nuts connecting the fuel rail to the injectors
and turned on the ignition to purge any air in the hard lines.

I then re-fitted the inlet manifold and associated air and electrical connections, but did not not re-fit the air cleaner cover, I tried to start the car but although it turned over very quickly it made no attempt to fire.

So assuming I was just a idiot, I checked for leaks and there were none at any of the Diesel connections inlet or leak off, I then checked all the electrical connections and all were firm, but I removed and re-connected them anyway. I then tried to start the car again with the same result.

So I then removed the inlet manifold, the fuel lines and the injectors, which fortunately all came out without issue, I then connected the hard lines to the fuel rail and connected the injectors to the hard lines, fitted the electrical connections and the leak off pipes but out of the engine, turned on the ignition and backed off the nuts to the injectors to let any air out of the hard lines, retightened the hard lines to the injectors and turned the engine over to see if I got any diesel spraying from the nozzles, but unfortunately nothing.

So somehow I appear to have made some glaring errors but have no idea where to start looking, is there any way of electrically testing the injectors as my first thought is that the injectors are not operating and therefore not letting any diesel through the nozzle but I am just guessing.

PLEASE HELP!
 
Hi Marc.
Don't be trying to start the car with the injectors out of the car, if it starts and you are anywhere near the fuel coming out of the jets it can kill you if it pieces your skin, put it all back together, and do a video for us to hear it trying to start, maybe try a little engine start in the EGR, can you hear the fuel pump working in the wheel arch?
 
Hi

I can hear the pump at the rear going as soon as the ignition is turned on and it defiantly is sending fuel to the rail as when you back the nuts off to get the air out fuel comes out around the nut where it mounts to the injector. where exactly would I spray the Easystart when everything is all back together, also can I leave the Air cleaner cover off to try all this as its a real pain to put back as I am not the tallest among you

Many thanks for the help as I am beginning to loose faith in my ability to repair this vehicle
 
Take the piping to the EGR off and spray it in there towards the inlet manifold, is what I'd do as has been suggested.
(I think!);)
 
Take the piping to the EGR off and spray it in there towards the inlet manifold, is what I'd do as has been suggested.
(I think!);)

Yes follow the instruction above and report back to us asap, only do one short spray into the EGR marked by the orange line in the photo, while someone tries to start the engine for you, see if it kicks into life, if not try again, but no more than a couple of times, if all as been put back properly there is no reason why it should not start.
BgSFxc0l.jpg
1
 
Hi all

Many thanks for all the advice, I have to work on my own so I have no way of spraying Easy start into the prescribed area at the same time as cranking,I have checked that the LP pump is working ok by disconnecting the feed to the HP pump and putting a hose to a plastic bottle and when the IGN is turned on it pumps very swiftly into the bottle, when trying to start the car it just turns over with not even any thought of firing I also let the LP pump run until it cuts out (between 58 and 60 seconds each time) three times before each attempt.

I have video of all the connections in the engine bay and one of it cranking which I will try to upload if someone can tell me how to upload a AVI file
 
Ok. I will try spraying and then subsequently try and start it, I am unfortunately new to working on these vehicles and the instructions were to spray while turning the engine over so I assumed that both operations would need to be carried out simultaneously.

As far as putting the video on You Tube I would not have the first Idea how to do that, (Too old) I am guessing that there is no way of uploading the Video to this site as You Tube has been suggested. Sadly it took me more than one attempt to get the video recorded on my Digital camera, I have managed to store the files on my computer though
 
Ok. I will try spraying and then subsequently try and start it, I am unfortunately new to working on these vehicles and the instructions were to spray while turning the engine over so I assumed that both operations would need to be carried out simultaneously.

If you squirt enough easy start around the air intake pipework, by the time you walk around to the drivers door and crank the engine, the vapours will still be in the air gettin ingested by the engine. There's enough pipework between the MAF (sensor behind air filter) and the inlet valves on the head that you could actually sprat easy start straight dewn the air pipework and not have to worry about the engine ingesting raw ether leading to it becoming addicted to easy start as the ether washes out the carbon creating the seal around the worn out metal piston rings / bores / valves etc.

Top tip, when using the dreaded easy start, assuming it isn't a windy day, if you ain't smelling the chemicals strongly, the engine aint smelling them at all, so spray mre in such a manner as the engine can suck int he fumes of the easy start but not the liquid.

Just remember to not spray it driectly into the inlet manifold lest the solvent liquid get ingested into the combustion chamber, but spraying it behind the air filter, it's got the MAF to turbo elboe, the turbo, the turbo to intercooler pipe work, the intercooler, the intercooler to inlet manifold pipework, and finally the inlet manifold for an potentially harmful liquid easy start to evaporate into its relatively harmless and useful gaseous form. And it's "boiling point" is like minus eleventeen°C

Who else remembers sooking a burnig news paper into old diesel inlet manifolds when they wouldn't start #80sTrucks

As far as putting the video on You Tube I would not have the first Idea how to do that, (Too old) I am guessing that there is no way of uploading the Video to this site as You Tube has been suggested. Sadly it took me more than one attempt to get the video recorded on my Digital camera, I have managed to store the files on my computer though

If you tell me what devices you use, as in make and model of phone you run, and whether you use a tablet / laptop / desktop PC, and if it's apple / android / windows etc, I'll put together a "mongtards guide" to uploading a video to imgur / youtube in the easiest way possible with what you already run.
 
Thank you for the reply, It was recommended that I spray easy start into the EGR valve having removed the hose going to it, is that incorrect ? everything is back together with the exception of the air filter cover, so I am a little confused as to where to spray the easy start.

As far as equipment goes I have a Lenovo ThinkPad Edge Laptop computer and a HTC One M8S phone, video was taken on a Ricoh CX5 digital camera

Thanks again
 
Back
Top