Daves D2 TD5 Project

This site contains affiliate links for which LandyZone may be compensated if you make a purchase.
Here's a few more pixels, the Front Tow Hitch is now finished fabrication, has just had a nice thick brushed coat of Zinc Etch Primer, it's hanging up to dry now :)
I will hit it with Satin Black before I go in and then I can start fitting his face back together the morra :) ....


I ordered a couple of 30 amp relays and will re wire the Driving Lamps neatly and properly, the other Relay is for the Light Bar, which will be switched via a proper Land Rover Front Foglamp Switch on the Dash, and will be wired (as will the Driving Lamps), so they all cut off when switching from full beam to dipped, as per UK regs.

Basically they all have their own independent fused power supply, the only load on the Discos Full Beam circuit will be the two Relays Coils ;)

I also ordered a neat little Switch for the installation of the rear LED Work Lamp :)

I vill be baaack .........
 
That front end jobbie was an epic ....................

I knew it would be time consuming as there was so much to do whilst having the A Bar, Grille and all the Lights etc outta the way, but it's all done now :) I will buy new lettering for the Bonnet, but looking at around £80, and I've spent this months project budget and plenty over already, so down the priorities list right now, the Front End looks amazing now, well happy with it :)

Pixels :-

So I built a nice Sub Loom for the Driving Lamps, started off with a 15 Amp fuse inside the Fuse and Relay Box, onwards to a 30 Amp Relay fixed properly to the Headlamp Panel with the Relay and Lamps Earth Terminals, and then from the Relay, two x twin core Cables one for each Lamp, all working nicely now and nothing flapping around loose, no "Scotch Lock" junk connectors anywhere, I soldered the Relays trigger wire into the Full Beam circuit and heat shrunk it :) ....


Sprayed some Waxoyl inside the Bosch Lamp Casings ....


Whilst I was in behind the Radiator Grille I found this just dangling around ....


Here's the other half, which was attached to the Transmission Oil Temperature Warning Light Switch ....


Clearly the aforementioned toss pot "mechanics" couldn't spend literally 5 minutes to change the Plugs when they fitted a new Trans Oil Cooler Switch :mad: ...................

It's kind of an important part, especially when working the vehicle hard whilst Towing, once again, it took me 5 minutes to fix, beggars belief really :(

The pack of Brake Hose metal clips arrived so I rectified this "inept bodge artist special" :rolleyes: whilst D15KOE was in the air ....


.................................. Yeah it passed an MOT like that ................................. Knob Jockey Tester too huh !!

And now, I have a Discovery with it's new nicely aligned Face :) ....


I just love the way the Rioja Red changes hue to a "Copper" colour in different light conditions :) :) :)

Well happy with the end result :)

The replacement Half Shaft is here, plus I have a load of other parts to fit, I will put a new CV Boot on that Shaft and keep it, will swap it when my "Loctite special shaft" shows signs of leakage, or last job, whichever occurs sooner ;)

Cue the Music .................. Back Soon :)
 

Attachments

  • upload_2021-7-16_9-6-26.gif
    upload_2021-7-16_9-6-26.gif
    42 bytes · Views: 98
Last edited:
Land Rover Disco looks like the Bailiffs have been in :D :D :D

I was dreading this job, dunno why, probably because I've read somewhere that they are difficult, and never done a D2 !!
About half hour and it was all stripped out, "No Clips, Trim pieces etc were harmed in the making of this production" :) ....


So here is my Curved LED Light Bar, dangling from suitably placed Cable Ties, I'm happy with the alignment, so I've Marked the Roof, I'll get it drilled tomorrow, and final fixed ....


Whilst the Headlining is out I will also fit the Work Lamp at the rear in the centre of the Roof shining downwards :)

I doubt I'll refit the Headliner this week, I will either re-cover it or more likely just repair the usual droopy bits, (I've done both on Disco 1's and Range Rovers in the past with good effect) :)
Then before refitting I will give it a clean up :) I have refitted the B Pillar (Seat Belt) Trims so if needs be I will still be able to drive it :)

Ton of work in this coming week 3 non starters all suspected ECU issues, I'll bet at least 2 of 'em aren't, that is the standard excuse that muppet garages give when they don't know what is wrong, then they send 'em to me ;)

Time Dave woz not 'ere :D
 
So I didn't get as far yesterday as I'd liked, but had a nice day none-the-less .............
Mel cooked Brunch that's when most of the work stopped, absolutely huge plate fulla grub, then just when I thought I was nearly finished she proceeded to pile some of hers onto my plate, which of course I duly ate :D :D :D

To say that the afternoon went slowly would be an understatement
upload_2021-7-19_8-39-32.gif
:rolleyes:

Anyways here's where I'm at with Disco ....

LED Bar final fitted ....


Work Light final fitted ....


Cable entry grommets rear (and front same)


Rear Wiring all run in following main Loom route above right Door Pillars and down right A pillar as far as the under Dash Fuse Box, connected to 12V Supply to test the Wiring so far ....


I have bought 2 spare Front and Rear Fog Lamp Switches to fit in the 2 blank slots on the left of the Dash Cluster, plus the correct Terminal Plugs for the Switches :)

These will then Switch the Front LED Bar, (via Relay controlled by Full Beam circuit), and the other will be on / off powered from a Key Pos 1 (Acc) circuit for the rear Work Lamp :) ....


So might get some time today to connect the Cable for the LED Bar then run that down the right front Screen Pillar and make some connections etc ;)

Gotta bell out the Wiring to find suitable Supply points etc, and add the illumination circuit for the 2 new Switches :)
There is a nice convenient M6 Threaded Hole unused behind the Drivers lower Dash Panel / Fuse Box Cover, so I can use that for securing my LED Bar Relay and the Lamp Earths :)

Relay shouldn't be required for the rear Work Lamp, measured that sucker yesterday, it only draws 0.9 amps, so I'd like to think the Switch can cope with that :)

L8r's ............................
 
Small update .......................

Sadly I had already bought D2 Fog lamp switches plus Blue and Green plug kits for my LED Light Bar and Rear Work Light, before I realised they are not suitable as they don't latch :rolleyes:

I have now ordered the correct Puma Defender Heated Seat Switches with Black Plug kits ............. Ho Hum, whoda thought the humble D2 was using the same sort of Wiring tech as a Mercedes :D:D:D

Still I'll need the fronts off the used Fog Lamp Switches I bought :rolleyes:
 
I'm just plain flat out here with broken Customers Cars and waiting for parts to arrive.

In between times I have managed to clean up all the removed Headliner and inside Trim pieces taken out during the process, and now refitted them all, including repairs to the saggy Headliner material, by stapling it back around all the unseen edges areas and then using carefully placed grey plastic Fir Tree Studs, with M6 washers behind the flimsy fibreglass moulding, which stretches the material back into the shape of the Moulding underneath it :)
Then finally melt the ends over into a mushroom shape atop the washers .................

I can't justify paying out to re-trim or replace the Headliner with new, it's not a new Vehicle, it's not a Car for "best", it is a Towing Vehicle that is for workshop use so yes, spend money on making it reliable for driving one end of the country to the other is the sensible choice :)
upload_2021-7-22_8-34-27.gif


Yup saggy Headliners annoy the hell outta me, this IMHO tidies it up, costs peanuts and doesn't annoy me any more
upload_2021-7-22_8-34-27.gif
:D

A few pixels ....


Yeah, I'm happy with that, just gotta sort out a couple of Plastic Trimmy Clipamabobby artifacts to cover the gaps in the two Sunroofs Beading Trims
upload_2021-7-22_8-34-27.gif
:D

At least it is re fitted nicely, and I've cleaned all the "Bear minging poop" off everything now, needs a final hoovering to get rid off all the fluff and dross that all came out from the Trims and Headliner removal ;)

So next job is to wire in the 2 Switches, (when they arrive) on the dash for the LED Light Bar and Work Light, all wiring is now in the vicinity ;)

TBC .....................
 

Attachments

  • upload_2021-7-22_8-34-27.gif
    upload_2021-7-22_8-34-27.gif
    42 bytes · Views: 91
  • upload_2021-7-22_8-34-27.gif
    upload_2021-7-22_8-34-27.gif
    42 bytes · Views: 93
Another D2 update ....................

In between loadsa work last week, plus family arrived yesterday I finally finished my sub wiring loom, and fitted my modified LR Puma Defender Heated Seat Switches ......................

The result is that for the Rear Work Lamp to switch on, the Switch has to be pressed and the Ignition must be in Acc Pos 1 :)

For the LED Light Bar to work the Switch has to be turned on, (and as per UK C&U Laws) just like the Driving Lamps they can only come on with Full Beam and must extinguish when switching to Dipped Headlamps ;)

Dash Cluster, Switches / Surround and Lower Dash area all now back together and everything is working as it should :cool:
I also took the time to leave an Earth and an Acc Pos 1 feed coiled up so when I imminently install my Tom Tom Navi unit that will be hard wired to come on and go off with Key Pos 1 ...............

Damn it, did I ever mention I hate those stoopid dumb assed "Cigar Lighter / USB Adaptor things" and having various wiring trailing around the Dash of vehicles ;)

Here's the pixels :-

The Wiring etc, Relay is fused for the Front LED Light Bar, the Inline Fuse is for the Rear Work Lamp, the 2 Earthing Points are shown ....


The Coiled Acc Position 1 +ve and Earth for the Tom Tom Navi ....


The lowest pair of the 4 Switches are the 2 made from spare Foglamp Fronts, and new Puma Defender Heated Seat Switches ....


Rear Work Lamp switched on ....


Front LED Bar switched on and Headlamps on Full Beam ....


Leave Switch on, Dip Lamps, the LED on the Switch goes out, Relay drops out, LED Bar switches off :) ....


Jobs a good 'un :)

Next jobs to be done, might get some done later this week ...............

Install Tom Tom very soon, should be fairly easy now, I also didn't mention that I don't like the dumb "stick on window suction cup mounts" which always fall off at the most in appropriate moment, so it will be properly affixed to the Dash top nicely and the Cable hidden ;)

1) Fit the good used left front Halfshaft after fitting a new CV Boot to it

2) Change Diff Oils Front and Rear including new Magnetic Drain Plugs and Brass (as opposed to standard plastic) Filler Plugs

3) Complete Transmission Oil Filter and Pan Gasket change inc flushing Converter and Oil Cooler

And then in no particular order but likely this one ............

4) Fit New Radiator and Intercooler (upgraded), currently the IC and Rad are OK, but they look grotty and I don't wanna trust 'em on a long journey, including total Coolant Flush and Change

5) Change Road Springs all round for "Standard Height" and fit Terra Firma All Terrain Shock Absorbers all round
5.1) Remove Dropper Plate from Rear Towball

6) That's about it, Re Map and Silicon Hoses perhaps, replace Tyres with some chunky BFG All Terrains (when the existing new ones are worn out) perhaps replace Watts Linkage and Radius Arm Bushes at some point ??????????????????????

7) Unexpected after this major refurb, but fix anything else that ****s it's pants as and when
upload_2021-7-26_9-44-59.gif
:D:D:D

TTFN, I probably won't be around too much this next 9 days as 2 work Jobs and family here for 10 Days ;)
 
Last edited:
Family have gone home, work and trouble with other family have meant not much done in the last 10 days or so with D15KOE .....................

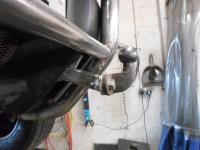
I fitted a pair of Engine Mounts and also the good used Half-shaft and a new left front Caliper Carrier.

I could really use some help with this Discovery now if anyone can confirm my suspicions / help me on a few issues below ;)

1) It's always had a slight Engine Vibration, can be felt most when hand on Auto Shifter Stick, or Elbow on Door Card ?? The Trans Mounts looked OK, so I ordered a pair of Engine Mounts and yes, when inspected the old ones were sitting down tight on the rubber inside, so I duly replaced them with new ............................ No noticeable difference despite the new ones not sitting down on the rubber, (as observed through the small hole underneath 'em) .............................
Vibe alters, worse some days, less others, it's definitely Engine speed related, can feel it in Park at idle and increases frequency when I rev the nuts off it.
I've looked at the Harmonic Balancer Pulley, what I can actually see of it looks OK, it doesn't wobble when running.

2) It still has the Steering Wander when going along a straight road below around 50mph it's worse, I haven't tried yet but I'd imagine with a Trailer on the back it would sling you from one side of the road to the other with a pendulum action :( 
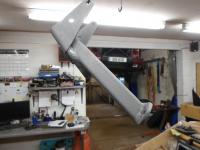
Radius Arm Bushes and Rear Watts / Front Panhard look OK !!
This is despite having changed everything from Steering Coupling, Steering Box (was leaking), Steering damper (Terrafirma), all Linkages and Ball Joints, Tyres are new (not chinese), and Tracking is fine. This feels like when they have a seized Steering Coupling, self centring is barely detectable from just off straight ahead position especially at slow road speed. IDK :(
It has had a lift kit, due to vague info of exactly what it should be I'm not quite sure what height it should be, (No ACE, No Air, Coil Springs all round) ;)
When measured from Wheel centre to Wheel arch it measures 530mm front and 540mm rear ....................
Some say a 50mm lift doesn't affect Steering others say it does, this is the first D2 I have owned / worked on. I had a 2000 TD5 Defender 110 which drove way way better than this D2 :(
So as I've already spent a whole bunch on this thing, I might as well chuck more at it now ........................
I have ordered Terrafirma All Terrain Shock Absorbers (suitable for std to +50mm height), also ordered brand new std height springs.

3) It doesn't seem as lively as it should, although I don't ever recall driving a D2 before this one, seems very sluggish from 0 - 45 ish, then seems to go betteras speed increases. Brand new Brakes F&R Calipers included, nothing binding all working perfectly.
Also I've got a brand new Radiator and a good used Intercooler here, as whilst the Radiator is not leaking, both are showing significant signs of "West Highlands Corrosion", the Intercooler has Oil Weep signs, so is probably losing some boost, although it's not hissing etc. Engine starts instantly on a cold morning and has just had Full service, doesn't misfire, but it does not feel lively like my TD5 Defender did .................
OK, so Defender was 5 spd Manual, Disco2 is 4speed ZF Auto, but surely it don't make that much difference ?
Engine also had new MAF (and Fuel / Air Filter when serviced) and is not putting up any fault codes. IDK ?????????????????

Any suggestions would be very welcome :)


TBH Mel and I are having a rough time atm with a long standing issue .................... Basically very briefly, a crabbit old mother in law with dementia and nephew coercing money from her, like 10's of thousands for a long time :mad:
We thought this had all been sorted some weeks ago as Mel has power of attorney invoked now, but just Tuesday this week bank allowed the old girl to transfer another £1000 to the lazy no job scum :mad::mad::mad:

Quite frankly right at this moment I regret ever clapping eyes on this bloody Discovery 2 ..................
it's an effin money pit that I'm now committed to, and I don't need the hassle it's giving me :(

So, bearing in mind the gazillion parts I already replaced trying to make it nice, rectify issues, and some just to increase reliability, if anyone has any decent ideas regarding its faults listed above I'm all ears ;)
Hopefully before I get p155ed off enough to write off the significant amount of dosh I've already spent on it and just give it to the scrappy :(

DVLA seem to have lost the bloody logbook, so now it looks like muggins here needs to pay and get a new one :( ........... Honestly, I couldn't make this sh1t up !!

Apologies for the rant, it has not been a good week ;)
 
Last edited:
I've spent thousands on mine so far and there will be thousands more yet. However, I intend this to be the car that lasts me until I die or can no longer drive, whichever comes first. Rant away, it's good to let off steam where it won't do any harm. Then you can approach your problems with a clearer head. Hope things get better for you.

My DD Disco is a '99 auto and it's sluggish as f%$£. It's tuned as well but it just doesn't feel nearly as lively as a manual. I put it down to the gearbox probably needing a good overhaul but I can't be bothered to do anything about it as long as it gets me around. I'm hoping my project Disco will be on the road before I need to do anything with the auto box.
 
Thank You for your kind comments :)

Yes I was having a bad couple of weeks and in melt down, things have got better now both the family issues and the Disco ;)

I posted a copy of this in the general Discovery Forum, without the rant and couple of guys came on board with some helpful info.

I admit whilst I was peed off then, like you I do intend to keep this D2, I am 60 next year ;)

The Car / Truck / whatever had a replacement Engine and Transmission a couple years ago, from an 80k mile Disco, this it turns out is a 15P Engine, rather than the 10P the car had originally.
The guys in the other thread gave me some pointers, it may well be wastegate seized, because the Car stood for about a year, as the PO died. After around a year PO's wife gave the car to a friend / customer of mine who got it going and got MOT but didn't really want it, he needed a van so I swapped him for my Pug Expert, which owed me nowt ...........................

I can't complain, I expected to spend money, I have one more small job on a customer car this week, Disco will be going on the lift tomorrow, I have already half fixed the wandering .................

Embarrased to say, but after reading some threads on here I let the rear Tyres down to 29psi (from 36) and let the fronts down from 30 to 28 and the bloody thing drives almost perfectly in a straight line now lol

I have new TF All Terrain Shocks and New Standard Height Springs, which I reckon (hope) will restore proper Camber Angle and get it where I want it ;)

Engine Bay wise I have a few things to check and a New Coolant Rad and I/C to fit plus hopefully new Silicon Boost Hoses and 2 new Transmission Mounts will arrive before the w/end :)

I'll update once all that little lot is done, busy 4 - 5 days ahead of me ;)

Some big bills have just ben paid into my business, so I'm a lot happier now, I actually have some more spare coin to throw at the old girl ;)

To be fair to it, it is a 1999 model and it's in pretty good nick considering it's age and 190k miles on the Body / Chassis ;)

TBC .........................
 
Well the 2 problematic (heads rusted away) lower Shock bolts were easier to get at once I chopped the old Spring into little bitties and then whacked a 7/16 impact socket on top of the rusted away heads, they came out
upload_2021-8-13_11-29-36.gif
;)

So that's the right front done, which I do believe that one is the hardest one due to the front Propshaft preventing the Axle from dropping quite as far as the left side should unless one removes the front Cross-member which I didn't want to do right now as I know that will waste another hour or 2 sorting the bolts and captive nuts out as the bolts will likely snap !!

So I had to use Spring Compressors to get the new Spring in place .................... Other side might well drop an extra inch or so and allow me to slip it in place and then use the Vehicles weight to compress it so the top Shock bolt will go in easily
upload_2021-8-13_11-29-36.gif
:)

Got a small job to do on a customers BMW now, so hopefully later I can get the left front side done
upload_2021-8-13_11-29-36.gif
:)

Rears, well providing the rear Shock Bolts will come out I reckon they will be easier still
upload_2021-8-13_11-29-36.gif
:rolleyes:

Clickable pixels ....


L8r's
 
That's the best news I've had today (It's definitely Friday 13th lol) :)

I gotta go drop a customers Car back in a short while, then I'll be back at the old girl, hopefully get LF finished before close of play today, I've then got at least Saturday, half of Sunday at least and then Monday and perhaps Tuesday to get as many jobs done as I can :)

When the Rear Springs are out I'm going to weld plates inside the Spring Mounts on Chassis both sides, those 2 areas haven't been done, Spring Mounts are solid, so will save me pulling the Springs again to get at them perhaps next year or 2 ;)

Thanks for the reply much appreciated :)
 
That's the right and left front Shocks and Springs finished, left front shock sha99ed, well passed it's sell by date, just gotta chuck the Wheels on tomorrow
upload_2021-8-13_17-53-27.gif
;)

I also fitted the first of the new Boost Hoses as it had to come off to get the left Shock Turret out
upload_2021-8-13_17-53-27.gif
:)


Rears tommoz :)

Beer and Hot Tub now
upload_2021-8-13_17-53-27.gif
:D :D :D
 

Attachments

  • upload_2021-8-13_17-53-27.gif
    upload_2021-8-13_17-53-27.gif
    42 bytes · Views: 89
  • upload_2021-8-13_17-53-27.gif
    upload_2021-8-13_17-53-27.gif
    42 bytes · Views: 89
  • upload_2021-8-13_17-53-27.gif
    upload_2021-8-13_17-53-27.gif
    42 bytes · Views: 96
It's going well and much easier than the Fronts, all bolts came out with no issues.
Both rear Shocks were knackered ;) No wonder the stability felt pants ;)

Back end will likely not be finished until Sunday night / Monday as I am welding 2 plates inside the Chassis' Spring Hanger / Receptacles, they are the only 2 bits of that rear Chassis end that have not been repaired, and I really don't wanna take it all to bits again next year just to weld them 2 areas, no holes atm but I'm sure I could bash some in it, certainly by next MOT ;)

Also the rear Watts Linkage is goosed, so I took the liberty of getting all the 5 Bolts undone ;)

I had to undo 2 of them anyways to allow the Axle to hang low enough to get the Springs out without using Spring Compressors, so I will order a new Watts Linkage Assy and new Bolts and it shouldn't take an hour to swap when it gets here now all the old Bolts are undone and Copperslipped ;)
 
Back tuit ..................

Not certain how much will actually get done today, Mel is cooking Brunch at midday and I'm still full from last nights mass Ruby
upload_2021-8-15_8-59-52.gif
:rolleyes:

Close of play last night ....


I know the Spring Mount looks well grotty but they are 3mm thick at least, thicker than the useless and measly 2mm that LR decide on using for the Disco 2 Chassis Rails, and so the Spring Mount still has life left in it ...................

Idea is I will get at least 1 more MOT (so at least 18 mths use) on this Chassis ;) That way I have time to save up in the projects pot, well actually I've budgeted a separate fund for a £3000 Galvanised Chassis ....................

So, doing all the work I'm doing right now will mean it'll all come apart pretty easy in 18 mths - 2.5 years time and won't need too many other bits replacing at Chassis swap time ;) ........................

Of course this isn't exactly cast in stone, I can't possibly predict if I'll still have D15KOE Discovery by then, crikey with all that's been going on over the past year and a 'alf none of us really know if we'll all still be here in 2 years time
 
Predictably "Brunch" was lovely, but after we'd finished at 1pm things have been going a fair bit slower.

Before Brunch I decided to also weld in 2 more plates, between Spring Mount and Shock Absorber Mount and the next bit along between Shock Absorber Mount and Outrigger as although there were no holes I don't think the Tin Worms were far away ;) This is the hardest, well fiddliest area to sort out when Springs and Shocks are back in.

Deja Vu the Silver V6 SLK, the weldathon goes on and on and on on and on :D
Well except getting at areas to weld on the Discovery is a whole bunch easier ;)

I managed to get it all ground up and a solid run of weld around each area, buffed that down flat, and cut the 2 plates all before the "Grub up" call :)

Apres Nosh, I have welded the 2 further plates in, this is all 14 Gauge (2.03 mm thick), so same as original Chassis material ;) ....


So just fired the Spring and Shock Absorber on the Right side ....


Hopefully will get the Left side finished tomorrow, I am going to weld the same 3 plates in that side, left side shouldn't take as long, I just removed the left rear Spring and Shock, (that one was knackered as well) :rolleyes:
I have the Card Templates to cut the 3 plates out, just flip 'em over ;)


I really need to use the old Girl Tuesday early evening, I have a little Vauxhall Corsa to go and collect in Portree, will be easier than getting a lift up there and Driving the car back, I can just bung it on a Trailer :D :D :D

After all, that was the whole reason for me getting the D15KOE ;)

Time to degrease myself and adjourn to the Hot Tub, methinks it's Beer O Clock
upload_2021-8-15_15-8-44.gif
 
OK, well, predictably, on a Monday, the phone was alight, lots of drop in customers, so I finally finished the left side weldathon at 7 pm last night, got to fire it all back together, test the Towbar Socket and replace if needs be, and remove the drop plate on the Rear Towball, plus a Diagnostic on a BMW Mini Cooper and order whatever parts, and all before 3pm ;)

The left side needed a little more Welding, (the upside down pyramid on shock mount) compared to the right side which only had the 3 Outer chassis Rail pieces welded in ;)

Then I gotta go to Kyle of Lochalsh, pick up a Trailer and head to Portree (north Skye) to pick up a wee 2009 Vauxhall Corsa for our local and now oldest resident ;)
A bit of a mercy mission, a kinda favour job, I do all his repairs, he's a lovely old fella 96 years young, and his wee van, (nearly as old as he is), was recently condemned due to tin worm !!

Busy Day ahead :)

Pixel at close of play last night ....


Better get back tuit ....
 
D15KOE's first working maiden voyage, 120 mile round trip to Portree to pick up the wee Corsa for the old fella ;)

Towed well, didn't miss a beat, only complaint is the new rear Springs, Standard rate / height are pants, the wee Corsa is not exactly a heavy weight and the ass end of the Discovery sat too low when the car was loaded ........................

So looks like I will be trying to get some aftermarket Standard Height but heavier Duty rear Springs ...................

More expense :(

Wee Corsa is a cracking little Car for the little old fella :) 1.2 Petrol, clean as a whistle underneath, slight dent in rear Bumper and a couple of wee scabs on Bonnet plus Electric Windows need fixed, all of which was disclosed in advert :)

I gave it a thorough going over last night, grovelled under it, drove it, checked everything working, interrogated everything on Vaux Com Diag, only found one old code, now gone etc etc.

Stuck it on lift this morning, found one other item, which I will do later today, slight play, (very slight) in right front lower Ball Joint which will cost a couple of magic beans and a half hour to fix.

Will also check out the Windows, I know it needs regulator on passenger side, but think it might just be a blown fuse or wiring on driver side ;)

If you guys had seen the tatty old rust bucket Vauxhall Combi Van he was driving around, white van which was green with moss etc rusty rotten, and mushrooms growing outta the carpet inside, Mel and I just know he's gonna be over the moon with this wee Car ;)

Pixels ....


Another busy day ahead,

TTFN
 
Been a bit quiet on my Project thread lately, just been feeling very unwell (long story will only get worse), and also busy
upload_2021-8-23_9-53-2.gif
;)

I have also fitted in a load of the less essential jobs on D15KOE this weekend whilst waiting for the parts (Medium Duty Springs and complete Watts Linkage) to hopefully sort out my rear end
upload_2021-8-23_9-53-2.gif
:)

So first up I removed the Centre Console as I wanted shot of the Cigar Lighter in favour of installing a double USB Charging Socket ....


One thing led to another, (I've always thought this Discovery 2 was noiser / harsher than any of my previous three Disco 1's and other LR's and once the console was out I found out why
upload_2021-8-23_9-53-2.gif
:(

Once again, previous inepts have been at work
upload_2021-8-23_9-53-2.gif
:mad:

I mentioned way back, someone had added the Diff Lock function, by adding the Lever that engages Diff Lock (left to right) as well as the standard on Disco 2's High and Low Gears (fore and aft).

Excellent, great mod to these D2's, but what the absolute idiots had failed to do was to properly reattach the Hi / Lo / Difflock Lever Gaiter, so in other words the rivets were in the metal attachment plate but not holding the rubber, therefore there were big gaps where you could literally see the road / Transfer Gearbox
upload_2021-8-23_9-53-2.gif
:rolleyes:

As they had also ruined the Sound Insulation "foam piece" that goes atop and around the T/fer box lever and the Auto Selector, I could hear loudly all the road and Engine / Transmission noise etc. So I drilled all the rivets, and reattached the Boot and it's metal attachment plate, and found a nice suitable piece of thick sound deadening foam, vehicle is now quiet as a Church Mouse, much much nicer ............. Unfortunately I didn't photograph that lot as I was busy
upload_2021-8-23_9-53-2.gif
:(

Well he's almost quiet as a Church Mouse
upload_2021-8-23_9-53-2.gif
;)

I now have 2 smaller issues to address, now I can hear me-self think when driving it, there is a tiny squeakety squeak squeak from Drivers Seat on bumpy roads, and when kicking down a gear and revs rise, there is a much fainter jangling tinkle tinkle sound coming from the linkage from T/Fer Lever to Diff Lock, because the same "Yee Ha Tonto Moron" didn't fit the 2 small nylon Bushes when they installed the linkage Clevis Pin ...........................

Having trouble finding a pair of them, but will make a phone call shortly, and also look down my storage shed as there is a very rare 1:1 T'fer box in there which may have the linkage still on it.

I kept that in case one day I'll ever do another V8 Chevy Diesel Conversion, like I did all them years ago on my Range Rover Classic, maybe just might do a Discovery 2 to 6.5 litre V8 Chevy Diesel if the TD5 goes bang, but did I mention there is an ML OM646 6 cylinder Engine and Auto / Tfer Box going begging in one that is being broken up by one of our local Garages, who is a good mate of mine hmmmmmmm
upload_2021-8-23_9-53-2.gif
:D

I digress ................

Next up I fitted the Tom Tom Navi, no trailing wires, I modded the stick on windscreen "chav mount", the cable runs under it now, and through the Dash top next to the mounting bolt, and securely bolted the whole chebang to the Dash Top panel :)
upload_2021-8-23_9-53-2.gif
Yeah I'm looking for a suitable plastic trim to cover that Bolt / Washer
upload_2021-8-23_9-53-2.gif
;)

It is hard wired all outta sight behind Dash via the USB PCB 'guts' of a Cig Lighter adapter I dismembered and soldered the wiring to, so it comes on with Ign Pos 1 (Acc)
upload_2021-8-23_9-53-2.gif
....


A few jobs underneath, a new XYZ (range switch) on the Auto Gearbox was giving a small issue ..........................

To get the Dash to Display 'D' and thus allow Trans to shift properly, I had to move the lever slightly further back towards 3 then back into D then all was hunky dory, I adjusted it as far as it would go, but no dice, so I elongated the 2 slotted holes to get a tad more adjustment and now it is perfect in all Gear positions
upload_2021-8-23_9-53-2.gif
I also found same inept twit had been here when fitting the Switch, as the upper of the 2 bolts, (fiddly) had just been left out
upload_2021-8-23_9-53-2.gif
....


I also fitted 2 new Transmission mounts ....


And the final job was ....................

On all of the Landies and RR's I've owned LR in their infinite wisdom only fitted an Exhaust Mounting forward of the rear Silencer, so the whole weight of Silencer and Tailpipe is hanging on the welded Joint where the Pipe goes into the Back Box.

I can tell you from bitter experience I used to have to change rear Silencers on almost an annual basis they had always ripped off at that weld, so in the end I added a second Rubber and welded a Bracket to the Chassis / Body mount and another to the Tailpipe. Yeah it does work the rear Silencers last twice as long at least
upload_2021-8-23_9-53-2.gif
:)

As D15KOE has recently had a genuine LR Stainless back end I added the extra mount as insurance
upload_2021-8-23_9-53-2.gif
....


Hopefully get time to fit my other "insurance policies" today, a new Radiator, Intercooler and the remainder of the Boost Hose set
upload_2021-8-23_9-53-2.gif
;)
 
Last edited:
Back
Top