Disco 2 And now it's the Bonnet Hinges

This site contains affiliate links for which LandyZone may be compensated if you make a purchase.

Cliff4WD

Active Member
Posts
177
Location
E Sussex, UK
Well, clearly I no longer own a vehicle; I own a "Project"!
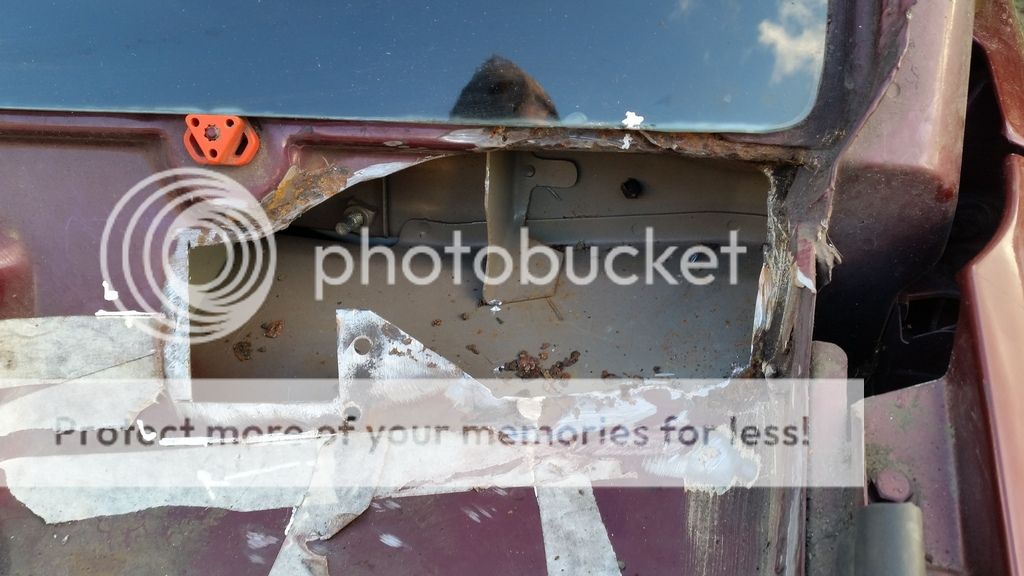
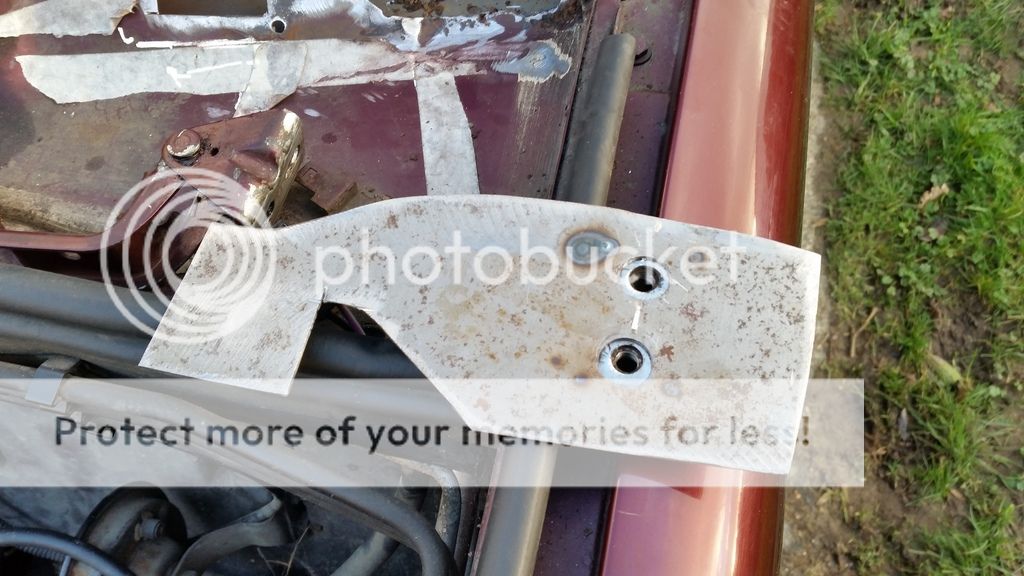
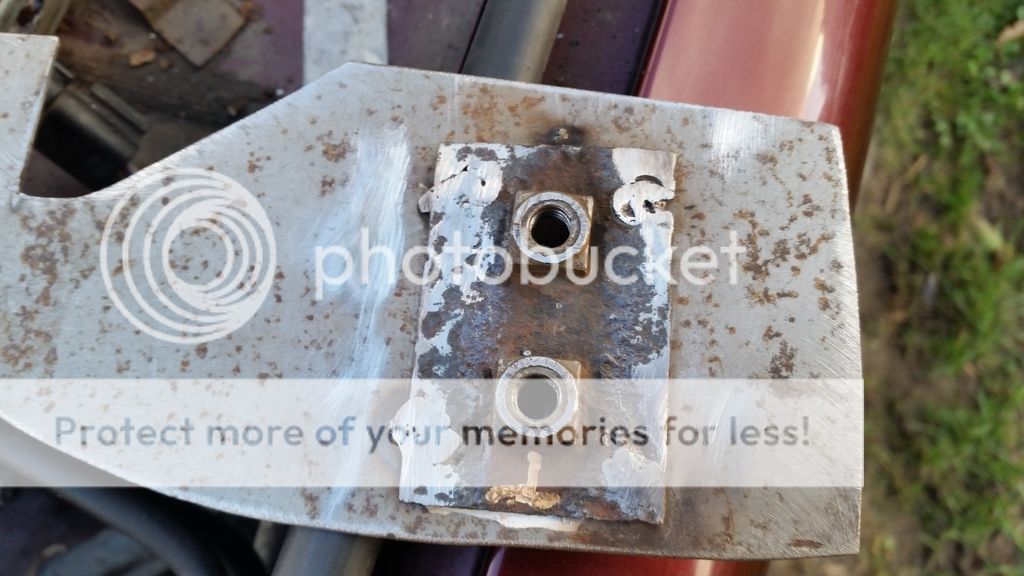
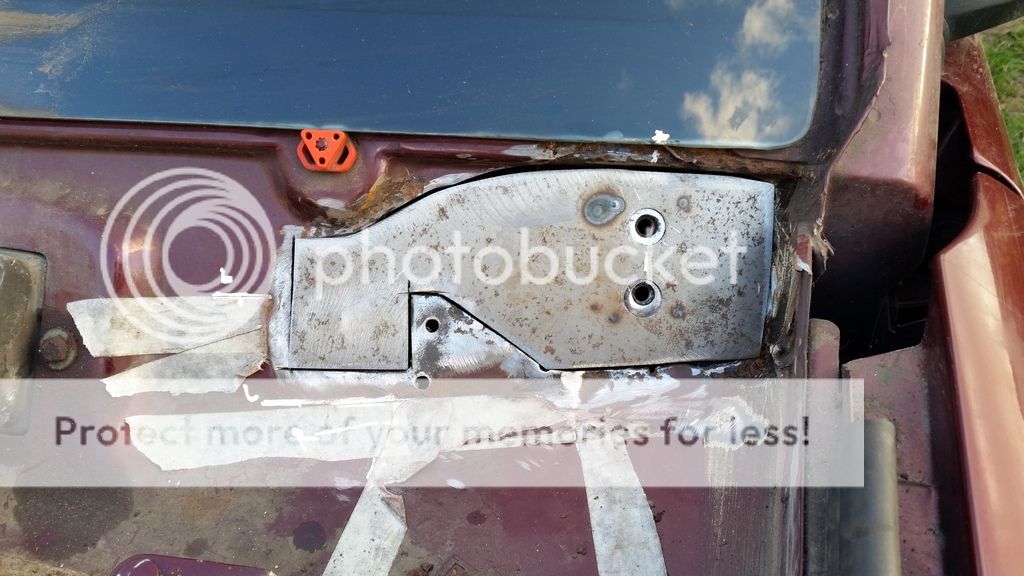
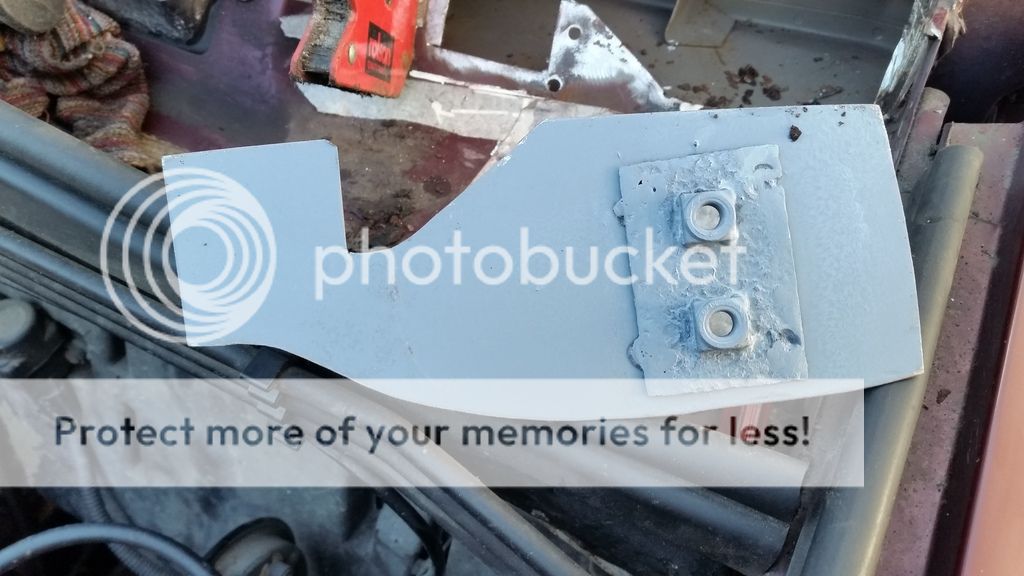
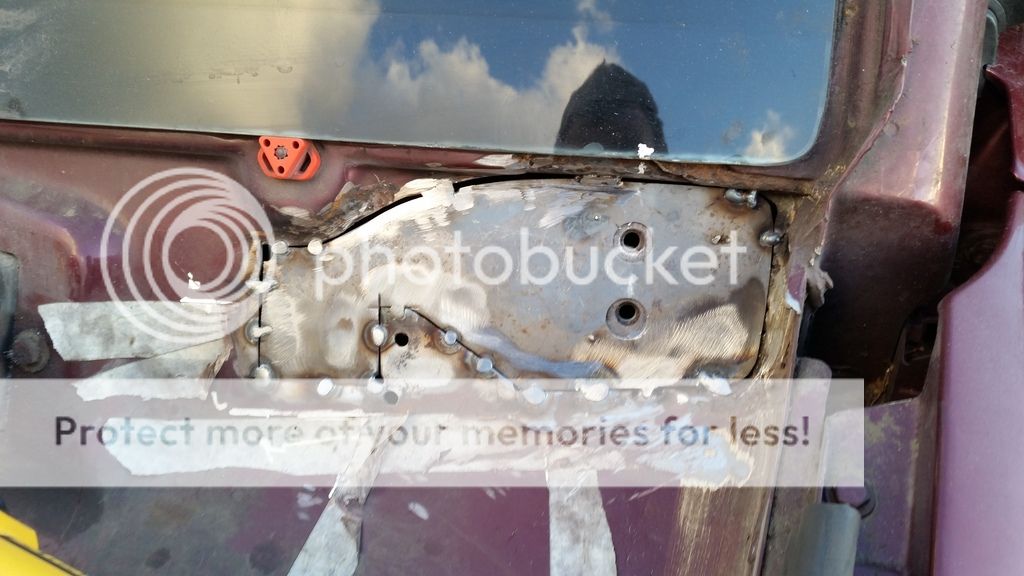
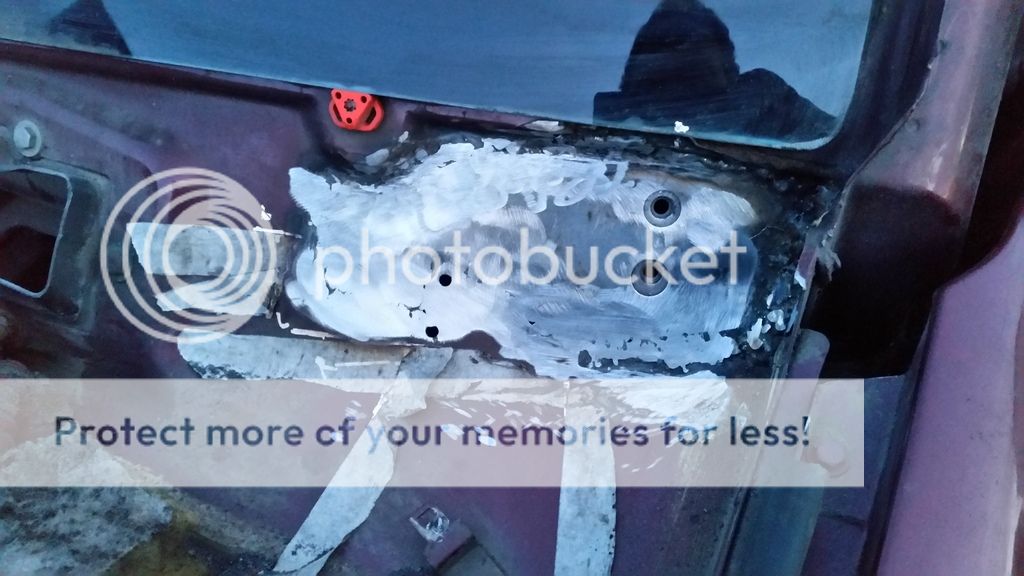
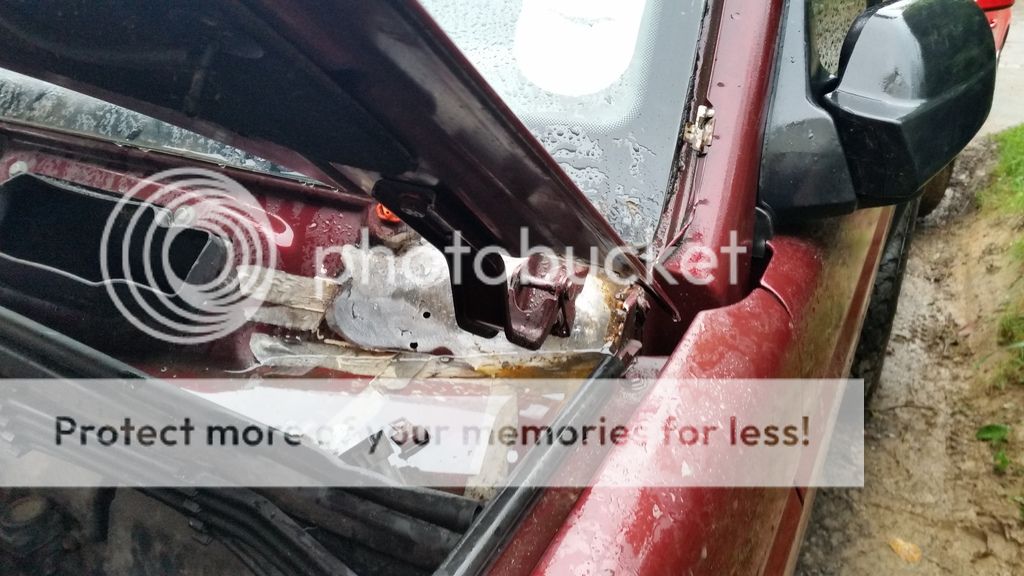
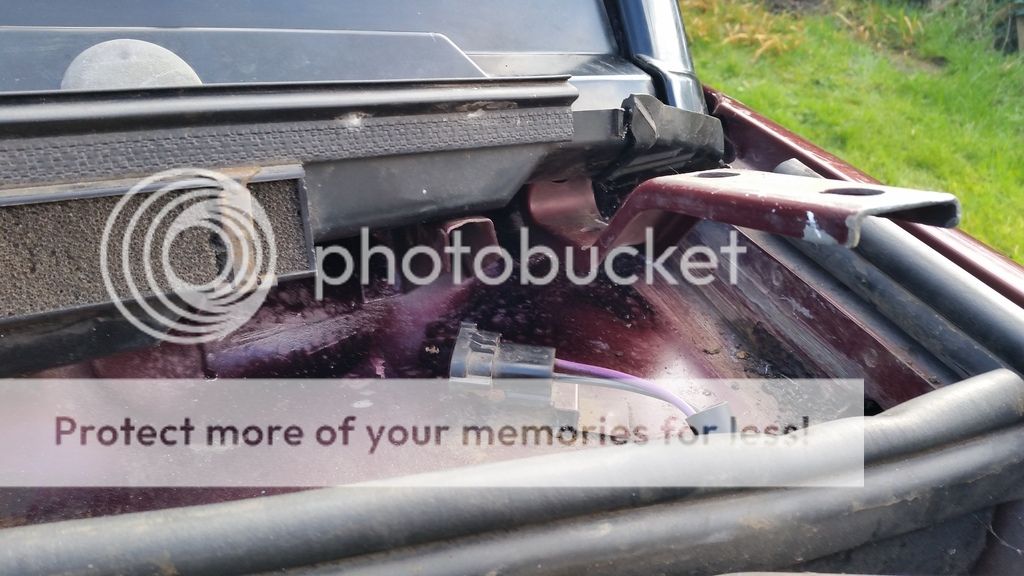
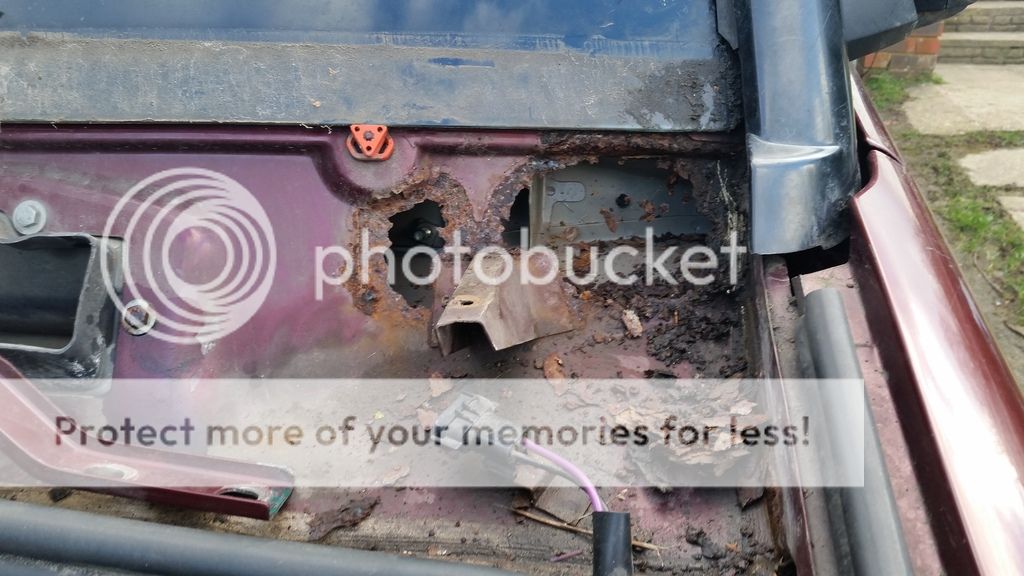
The latest challenge is the bonnet hinges have come off - well, more accurately, the steel they were bolted to has rusted away. I knew I was going to have to get around to dealing with a hole that was visible in the baulkhead under the plenum hood, but I hadn't realised just how extensive the rust actually was until I opened the bonnet and had it drop down as the hinge went.
It is criminal that the design of these beloved Land Rovers of ours is so poor in so many areas. This one's a classic as water from the screen and running down from the roof gutters, inevitably will run down right onto, over, and around, the bonnet hinge fixings. So that is where the rust gets in!

20160210_111121_zpsgqnwxhtn.jpg
 
Last edited:
20160211_153420_zpssnorwgdz.jpg

After a bit of 3 dimensional figuring out, I cut out the bad stuff. All very awkward with only a bloomin great angle grinder. Must put something smaller on my shopping list.
 
20160211_153424_zpsnqjhftpu.jpg

Made a plate to fill the hole. I retrieved the back nut plate and plug welded it in what I hope is the right place. This is the trickiest part of the whole exercise as far as I'm concerned, as getting those two bolt holes in exactly the right place to be able to reattach the bonnet correctly seems something of a challenge. Knowing the location if the top hole in 3 dimensional space was only partially helpful!
20160211_153429_zpsyvpvtn0q.jpg
 
And now for the bit where I fcuk it all up with my poor welding skills. A few tacks first.
20160211_162406_zpsssukf63j.jpg

And as expected, the non radiused corners suffered, but hey, remember the old rusty look!
 
Hi Clifford,
It's not clear on your pics but make sure the drain holes on the wings are clear so as to not allow the build up of water in the scuttle. I've also filled the drain holes at the top of the A pillar to stop the water running down there in the first place. You just get a bit more water running down the winscreed instead.
Griff
 
20160213_140231_zpsqmieuxq1.jpg

Phew! That's a relief; it fits. Just wait for it to stop raining now, take it back off and finish the job off properly. Then it's the other side.

On the subject of drainage. I may fit my own drain pipes to that water can escape when the vehicle is facing uphill (as in the photo). LR never really thought through the problems of water accumulation and provision of adequate and efficient drainage.
 
Last edited:
glad you managed to sort that. what a flippin awful place to have rot out. Well done for fixing it.
 
20160215_135248_zpsaeoyvpg0.jpg

Bracket welded back on. Plenum cover, trim, etc., refitted. Rust treated and painted. Do the other side when the weather warms up. ☀️
Just picked up your interesting thread, I have exact same problem both sides on my Disco 2 , was there any good reference points to get the bracket in the right place please. Im dreading this , asyou pointed out so any tips are invaluable.

If anyone reads this , perhaps they know of a repair plate that is available.
 
Last edited:
Just picked up your interesting thread, I have exact same problem both sides on my Disco 2 , was there any good reference points to get the bracket in the right place please. Im dreading this , asyou pointed out so any tips are invaluable.

If anyone reads this , perhaps they know of a repair plate that is available.
Only just seen this. Hope you got it sorted.
I cut my own steel from a sheet using angle grinder and cutting disc. Shaped to fit removed section. As for positioning, I used whatever reference points I could find and made up a template before cutting out. The template could be taped in place when new steel was tacked in, so hole positions could be marked. I then cut the tacks, tacked the nuts onto the replacement section, and then re- tacked in place. Checked with template, then welded her up.
 
Back
Top