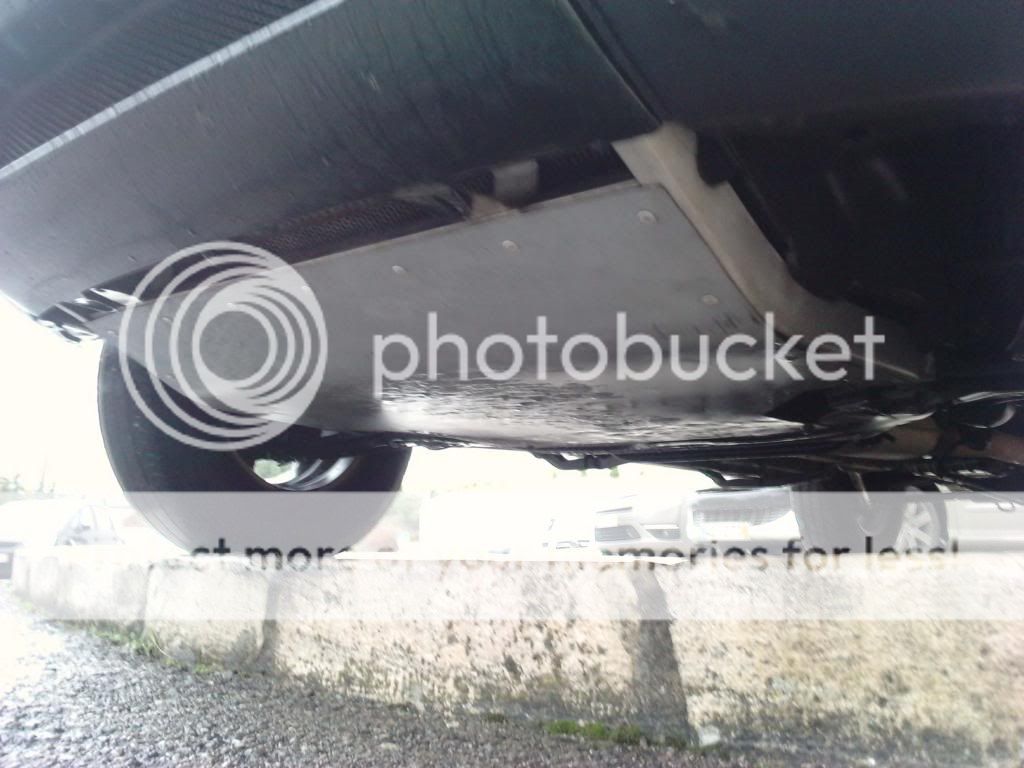
Freelander 1 Alloy sump guard/ undertray

This site contains affiliate links for which LandyZone may be compensated if you make a purchase.

rob_bell

Well-Known Member
Posts
2,907
Location
London
I spent a few hours over the weekend researching Freelander undertrays, and have found quite a bit of information posted by others regarding their solutions. So I thought I'd start my own thread on how I plan to do mine.

By way of background, my Hippo is a 1.8 Petrol, standard in everyway bar a set of Yoko Geolander AT-S tyres (standard size).

Ground clearance is therefore stadard. When I first got the car, the plastic insert of the undertray was held in by cable ties, and some master mechanic had cut slots in it to make oil changes more tricky (probably meant to be easier, but I haven't found removing the undertray too challenging). I replaced the cable ties with stainless bolts and nylocs.

On my first green lane session (organised by Dan - thanks!), we found a deep rutted track that Dan's D2 had no problem with, but I ran out of ground clearance (d'oh!). I extracated myself, but the plastic undertake came loose and eventually tore off.

By the days end, and after some biggest puddles, the engine started to misfire badly. Muddy water had managed to get in under the HT cover on the top of the engine! Nice.Drove better once the HT circuit dried out of course ;)

I would like to do more greenlanes. I don't really expect to take the car serious "off roading", so no plans for winches, massive lifts etc for this car. Well, none yet anyway.

The purpose of the replacement is something a little sturdier than the original, but the principle purpose is to function as a splash guard. Technically, not really a sump guard - the K-series sump is relatively high and out of the way I think?

Based on this brief, I am thinking of a relatively lightweight replacement of the plastic insert with 2mm alloy sheet, based on the dimensions of the plastic original, but extending a little further back so that the rear of the alloy tray is bolted directly to the cross member rather than via the little steel brackets of the original.

Without too much added weight, the undertray should then be easy to remove for later servicing.

It won't be a full-on hard core sump guard.

To this end, I have a 1000x700mm 2mm thick alloy sheet to play with.

What I need to decide is:
1. To use the original mounting backets as used by the plastic undertray.
2. Do away with the original plastic brackets, but bend the alloy such that it slots into the perimeter rail, and pop-rivet it from above.
3. Make the undertray a little wider, and pop-rivet it into place from below.

The majority of the sump guards I've seen are the latter. It looks like the easiest/simplest solution.

Any thoughts folks? Will come back later with the dimensions of the original plastic tray...
 
Hi @rob_bell ,

First thoughts, That rut was not that deep..................LOL.................:p:p:p

I think it was the reversing that did the damage and made it go all flappy :D, I would suggest making the front and rear end closed so it cannot catch when you reverse on the rough stuff in the future.

Bolt in place would be my preference , maybe using ali rivnuts.

As 2mm is quite lightweight and not that strong, maybe a few ali 20mm right angle strips bolted lengthwise to add reinforcement.

Cheers
 
:p:p:p If I'd gone the route you took, my Freelander would have floated!!! LOL

But you're absolutely right Neil - it was the reversing that did the damage to the 'tray - it was still in place, but the trailing edge had come loose when I got the Hippo out of the track. The idea of it extending backwards a little further is to avoid a similar "snagging" issue.

I like the idea of rivnuts - if I replace with something studier later, this would make the job a little easier I guess. Not enough depth to use counter sunk bolts - so may bolt it from the sides. Inside or outside of the perimeter frame? I am leaning towards the inside - should make it "smoother" and less likely to snag.

I too was thinking about some additional strenthenging - pretty much exactly as you describe. Would pop-rivet these - but would need a lot of pop rivets? Bond and rivet? Not tried bonding alloy before - but worth the effort?
 
I too was thinking about some additional strenthenging - pretty much exactly as you describe. Would pop-rivet these - but would need a lot of pop rivets? Bond and rivet? Not tried bonding alloy before - but worth the effort?

I would bolt it in place, then if you have a problem in the field it is strippable. If you bend it, you can take it apart, bend it straight and carry on.

I would not worry too much about bolt heads and countersinking etc, the chances of wiping them off are fairly low. keep it simple and if you need to modify after a few plays in the mud then you can do it.

cheers
 
Thanks Neil - good advice. Would therefore more sense for it to fit on the "outside" of the perimeter frame - either underneath, or on the outer-side return.

Thanks Gary, I've seen the pictures before, but not that particular thread. The dimensions shown would make removing the standard perimeter frame rather harder as it will reduce the working space around the rearmost retaining screws. I'll make mine more in line with the original dimensions. Having a little more free open space in this area isn't really too much of a problem - and should aid drainage/ ventillation. :)
 
hi rob

did u happen to see this

http://www.mlrc.org.uk/MLRCforum/index.php?topic=1146.0

don't know if it's any help

just scroll down abit on the page , will then see the pics
The VCU guard looks like a good idea - I hadn't come across that before? Much need? Generally the VCU seems pretty nicely tucked up and out of the way? Perhaps Ian was doing much more "aggressive" off roading than I am planning! LOL
 
Thanks Neil - good advice. Would therefore more sense for it to fit on the "outside" of the perimeter frame - either underneath, or on the outer-side return.

Thanks Gary, I've seen the pictures before, but not that particular thread. The dimensions shown would make removing the standard perimeter frame rather harder as it will reduce the working space around the rearmost retaining screws. I'll make mine more in line with the original dimensions. Having a little more free open space in this area isn't really too much of a problem - and should aid drainage/ ventillation. :)

no probs, plus if i may say don't forget drilling a hole for the engine drain plug ;);)

i also fitted some nice stainless steel bolts along with coppaslip , was so much easier undoing them each year for the service
 
The VCU guard looks like a good idea - I hadn't come across that before? Much need? Generally the VCU seems pretty nicely tucked up and out of the way? Perhaps Ian was doing much more "aggressive" off roading than I am planning! LOL

does seem that way , ref the vcu guard o_O
 
The VCU guard looks like a good idea - I hadn't come across that before? Much need? Generally the VCU seems pretty nicely tucked up and out of the way? Perhaps Ian was doing much more "aggressive" off roading than I am planning! LOL
Adding a guard to the VCU will reduce ground clearance in the centre of the vehicle. This will affect the already limited break over angle. The VCU is strong enough to shrug off a reasonable impact anyway.

A nice long smooth front belly pan that gives a flat sliding surface is what you want. Something similar to a ski but for the car. Then if the front runs out of clearance, the belly pan will slip across the surface, without digging in and turning it into a digger bucket.
You need an up turn front and back, so it works as a ski in both directions;)

better get some wax for the plates , wait till u get grounded onto some grass, slam the anchors on then slide on the plates and overtaking everyone , lol

IMG_0404.GIF
 
Adding a guard to the VCU will reduce ground clearance in the centre of the vehicle. This will affect the already limited break over angle. The VCU is strong enough to shrug off a reasonable impact anyway.

A nice long smooth front belly pan that gives a flat sliding surface is what you want. Something similar to a ski but for the car. Then if the front runs out of clearance, the belly pan will slip across the surface, without digging in and turning it into a digger bucket.
You need an up turn front and back, so it works as a ski in both directions;)
Yup, that's what I was thinking too - although the sheet of alloy I have is probably not long enough to extend beyond the front cross member. Will attach to this.
better get some wax for the plates , wait till u get grounded onto some grass, slam the anchors on then slide on the plates and overtaking everyone , lol

View attachment 118867
Hopefully while playing the Beachboys' "Let's go surfin' now"?:eek:
 
Yup, that's what I was thinking too - although the sheet of alloy I have is probably not long enough to extend beyond the front cross member. Will attach to this.

Hopefully while playing the Beachboys' "Let's go surfin' now"?:eek:

or surfing USA , lol
 
I was planning on making mine in a very similar way to yours - although I am thinking of running the front return behind the perimeter frame - as per the plastic original. The other option I was thinking of was to bend the longitudinal edges up, so that I don't need separate brackets.

I am planning some CAD prototypes. By CAD of course I mean Cardboard Aided Design ;)
 
If you can get heavier ally than 2mm it would make sense, mine is around 2mm and will probably end up being remade if I do any more off roading. Might as well future proof it by making it strong enough from the start.
 
Back
Top