Aaron's 90 rebuild (Round 2)

This site contains affiliate links for which LandyZone may be compensated if you make a purchase.
looking good.

£14 quid hey, might just leave it for the tat man for the agro of taking it to the scrap yard myself! :(

Cheers :)
Well I had the same thought. But decided against it.
The question I asked my self was do I trust the scrap man?
The answer - No.
I didn't like the thought of him knowing what else I've got.
But maybe I'm just paranoid.
 
Cheers. And yeah I new it wouldn't be a lot but £14.

£10 of that was mud

My only advice would be when you come to paint the body mix all the cans of paint together then split them

The last one isn't bad but there's a noticeable difference in the panels when the sun shines on it

That chassis looks nice, when can I drop mine off

How much was it
 
£10 of that was mud

My only advice would be when you come to paint the body mix all the cans of paint together then split them

The last one isn't bad but there's a noticeable difference in the panels when the sun shines on it

That chassis looks nice, when can I drop mine off

How much was it

To be fair there wasn't that much mud and crap on it. Cut a big hole in it before it went to the scrap yard and looked pretty clean inside aswell.

Only problem with mixing it all at once is that it's a chemical reaction that makes it go hard, So once it's mixed it has to be used.
So the only way around it is to paint it all in one go. But my compressor wouldn't keep up.
So the options I have are use cellulose and mix it all up at once.
Get a bigger compressor and paint it in one go.
Or get betterer at mixing/painting so they all come out the same.

At the end of the day it's never going to be mint. I have done them in my back garden and have tought my self every thing I know.

Drop it off when I've finished mine if yer want a galv :p
Oh and it was £1200 for cash ;)
 
Drop it off when I've finished mine if yer want a galv :p
Oh and it was £1200 for cash ;)

Fantastic, I didn't know it came with a lifetime warranty :D

To be fair as you've had mine all to bits a chassis swap would probably be fairy easy , no bolts to worry about undoing
 
Last edited:
Fantastic, I didn't know it came with a lifetime warranty :D

To be fair as you've had mine all to bits a chassis swap would probably be fairy easy , no bolts to worry about undoing

Yeah, Would be pretty easy if you did it again. Even easier still if you had a way of lifting the body off in one.
 
Well time for a small Saturday evening update :)

First job was to split the engine and gearbox. reason? Well I wanted to check the clutch was ok. Well it's like new to be fair so not sure weather to change it or not.
Also wanted to check rear crank oil seal. And that was dry as a bone as well :)

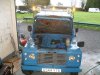
So engine in the air and chassis rolled forward :p

DSCF1783_zps912fc400.jpg
[/URL][/IMG]

And in. Yep its not sat level but that's because it's wedged up with a piece of box section to save it falling over :eek:

DSCF1785_zps43db8ca0.jpg
[/URL][/IMG]

Decided to split the gearbox and transfer box. When I came to unbolt it I noticed this :mad:
What do you think? Be ok?

DSCF1789_zpsf550be05.jpg
[/URL][/IMG]

Transfer box of. And the splines are in really good condition.

DSCF1790_zps59303db0.jpg
[/URL][/IMG]

Different storey when I took the hand brake drum of. Doesn't look like it's been working for a while.

DSCF1788_zpsd35cdd78.jpg
[/URL][/IMG]

Next I cleaned and painted a few bits.

DSCF1787_zps72582f32.jpg
[/URL][/IMG]

DSCF1782_zps976e4184.jpg
[/URL][/IMG]

DSCF1780_zps8086eed3.jpg
[/URL][/IMG]

And looking a bit better with a lick of paint :)

DSCF1792_zps572b0474.jpg
[/URL][/IMG]

DSCF1793_zpsaca6011f.jpg
[/URL][/IMG]

And the last thing I did was start striping the front end of the engine of. As I am going to do the timing belt and all the gaskets. Viscous fan put up a good fight. So I unbolted the fan from the viscous bit. Big pair of stillsons and a proper spanner and it came undone :p

DSCF1795_zps3f23f00b.jpg
[/URL][/IMG]

And a question for you gearbox bods :eek:
5th gear had a crunch every now and then. Not sure if I fancy tackling this my self.
Unless anyone who's done it before suggests other wise. As it might be easier than I'm thinking.
Ideally I would of liked a stumpy R380 but I just can't afford the sort of money ashcrofts ask :(
Advice please.
 
You will soon have the body on and driving this beast.What colour you going for by the way

Makes it sound easy when you put it like that. The likelihood is that it will probably be the end of the year.

And as for colour I like this that I painted last year for my brother. So may well go for the same. Although I'm not really sure.
The other problem is the neighbours. As they'll get all ****y again :( So it may be multi coloured :eek:

IMG_3466_zps4e4b98b6.jpg
[/URL][/IMG]
 
Why are you putting a mingin engine and gearbox into a nice shiny chassis ?

Painted mine:)
 

Attachments

  • SDC13319.JPG
    SDC13319.JPG
    394.5 KB · Views: 306
Anyway on to todays progress :)

This is were I started the day.

DSCF1796_zpsf97d9490.jpg
[/URL][/IMG]

DSCF1798_zpsea06d742.jpg
[/URL][/IMG]

Decided I wanted to give the block a spruce up and started striping it.
Appears it a factory rebuilt gold seal engine. Not that it makes any odds this many years down the line.

First job was to get the crank pully bolt undone. The impact gun wouldn't budge it. So as I haven't got a proper crank holding tool out came the stillsons again :D That coupled with a breaker bar and scaff bar. It came undone. Must admit I thought the bar was going to snap :eek:

DSCF1800_zps969165a1.jpg
[/URL][/IMG]

With that of the front cover came of easy.

DSCF1801_zps70164dbb.jpg
[/URL][/IMG]

Timing chest off.

DSCF1805_zpsa6f8aca1.jpg
[/URL][/IMG]

Injection pump and pipes etc. off. And cleaned up.

DSCF1806_zps25ee16eb.jpg
[/URL][/IMG]

Same for the other side. Turbo, intake manifold, alternator, pas pump etc. off and cleaned up :)

DSCF1807_zpsf7baa65a.jpg
[/URL][/IMG]

And dorbed it with some paint :D

DSCF1810_zpsfb26878b.jpg
[/URL][/IMG]

DSCF1811_zpsc4389452.jpg
[/URL][/IMG]

DSCF1812_zps8f6f460b.jpg
[/URL][/IMG]

Hmm were do all these go :D

DSCF1813_zps6d058a6f.jpg
[/URL][/IMG]

Just need to find the part numbers for all the gaskets and seals and it can go back together.

Oh and has anyone ever had any joy painting an exhaust manifold/turbo.
If so what did you use.
I've seen paints saying it can cope with the heat I'm just a little dubious.
 
stove paint good for 1200f

Cool stove paint it is then :)

arron that broke casting is repairable with a tig welder as is, no need to disassemble it.

Cheers, Took it of for a couple of reasons any way.
Gearbox need's work :(

And I can't decide weather to keep the 1.2 (The one that's in it now) or get a 1.4 transfer box. (As it would have had from factory)

Plus it's easier to lug about in two bits when you're built like a racing snake :eek:
 
Looking great, I'm hopefully gonna be banging a galv chassis on my D2 this year, thinking the engine might need a cleanup now so ta for the inspiration, I think :doh:

:D
 
Looking great, I'm hopefully gonna be banging a galv chassis on my D2 this year, thinking the engine might need a cleanup now so ta for the inspiration, I think :doh:

:D

Cheers :D

Cleaning the engine up is some thing of nothing as you can hardly see it when its in. Just seems a shame not to while it's easy.
I never bothered on the last one I built. But this time I want the best I can (Well within reason) Hence the galv chassis :)

Oh and don't forget to do a build thread ;) Don't see many D2's on galv's.
 
Looks great mate
Just stripped my down ready for the rebuild

I wanted to ask can you use the rustoleum paint on the chassis ??
 
Back
Top