wil2813
Well-Known Member
- Posts
- 2,324
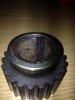
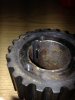
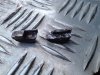
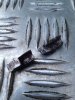
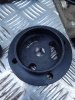
maybe pull it as forward as poss then chock it from behind with some wood, remove pulley above out your way & you may just get a grinder/cutter in there if you are steady with it. firstly cut 12 oclock vertically down as much as poss towards woodruff slot then 9oclock horizontal if your 90% through a good crack on the quarter cut section with hammer & chisel should sort it.or push right back & grind flat the halfmoon but getting the remains out later could be a issue. a quick pic below of one removed.
Attachments
![IMG_0967[1].JPG](/data/attachments/63/63064-4b1350b013a5d0000aa22d15ef1a4d85.jpg)
Last edited: