- Posts
- 16,475
With a young daughter who sits in a car seat in the back and the odd time when you have bags of shopping (which I find much easier just to bung on the back seat rather than flying around in the boot!!) having central locking is something I miss the virtues of in the 110.
The misses primarily drives the Range Rover now as it has all the mod cons of Air Con and climate control that makes the British weather with its constant changing temperatures and rain fall easier to cope with when you have a youngster, as she is with our daughter more often then me due to work commitments etc.
I don't mind at all, even though I am a dyed in the wool Range Rover fanatic, I adore my 110 almost just as much. (It helps it has P38 Range Rover seating which is more comfortable, albeit a couple of inches higher, than the standard seats!)
Anyhow, on the odd occasion when we take our Daughter out in the 110, it can be a faff carrying her, the nappy bag, any other bags or similar required and then unlock the passenger door, the reach round the pillar to unlock the rear door, all the while not trying to drop the baby, the bags or the keys!!!!
Having done much research, the Hawk system seemed to get the best write-ups and has been recommended on here previously.....I thought I'd see what the fuss was about.
Ordered the 4 door kit (a 5th actuator can be bought for the rear load space door - didn't bother at this stage - also it can be a faff to fit) and it arrived the next day - brillo pads!!
The instructions for fitting a tad vague, but it is actually dead simple, hardest parts are thinking where to put the actuator to not foul the window and regulator and then routing the wiring!!
Here we go!!
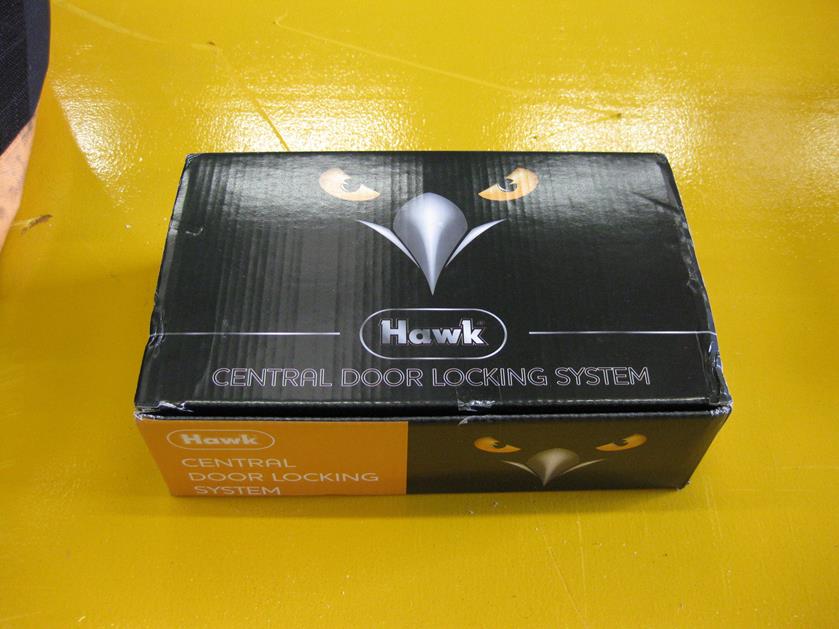
The box....
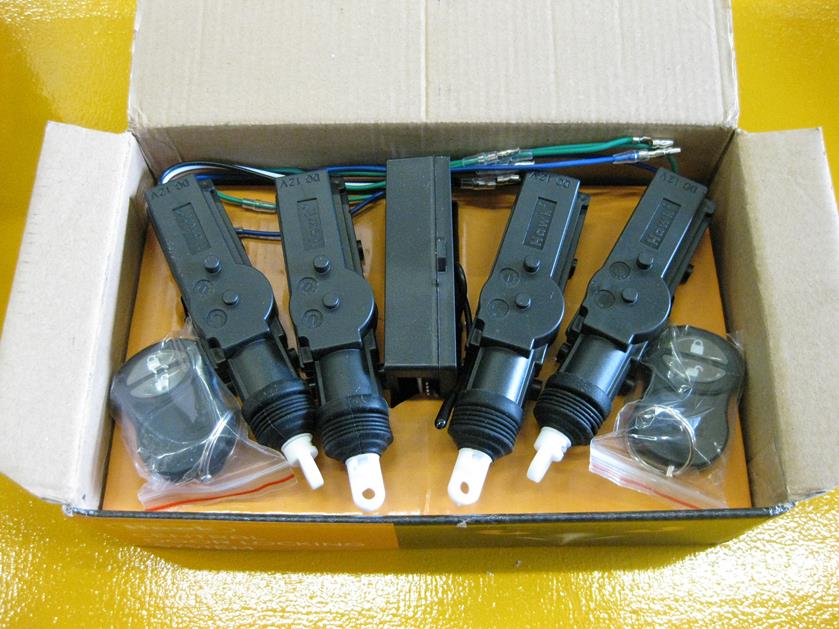
Inside the box....
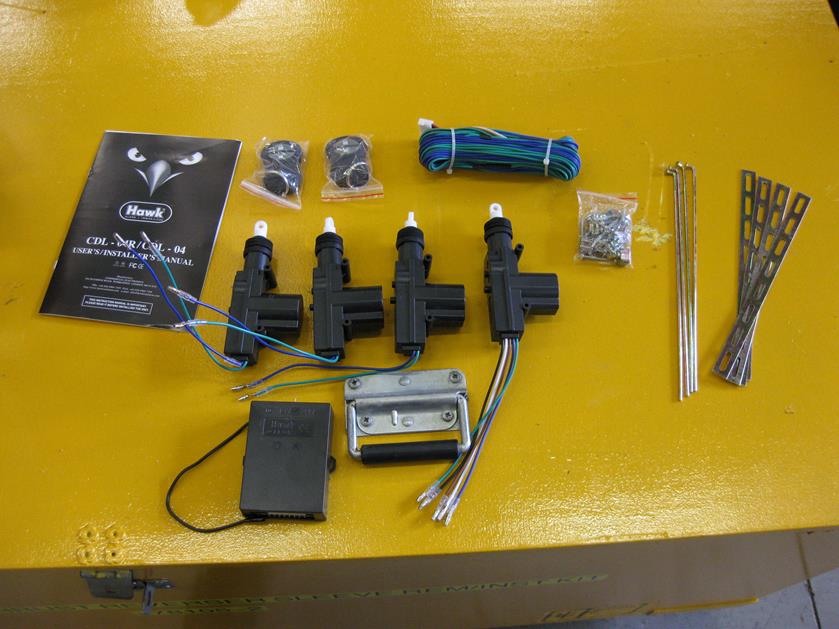
Contents of the box......(I have to pad this How To out some how as it is dead simple to fit!!)
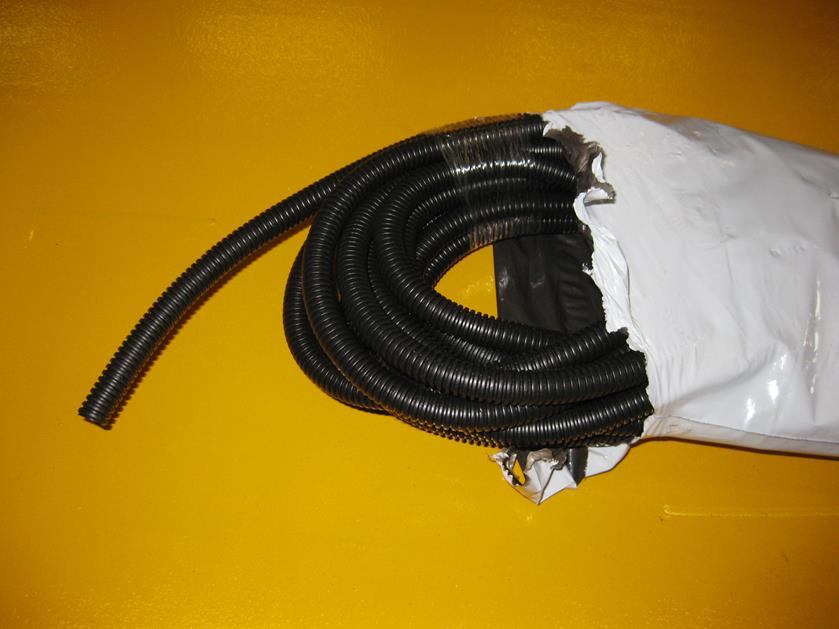
I also bought some 8mm split corrugated tubing from the online market store named after a South American River...
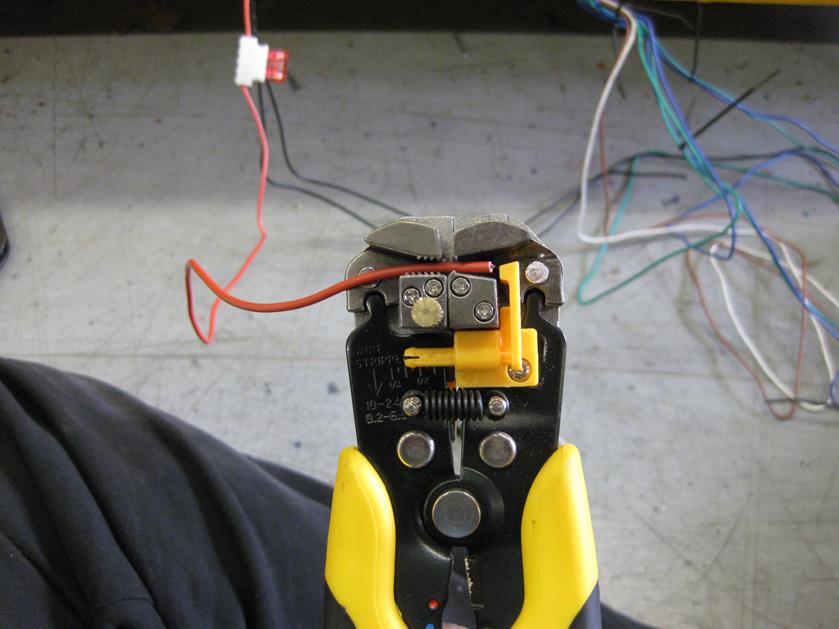
Stripped the ends of the red and black power wires and jury rigged to the car battery for a quick system test. (Video link attached too)
All working very well.
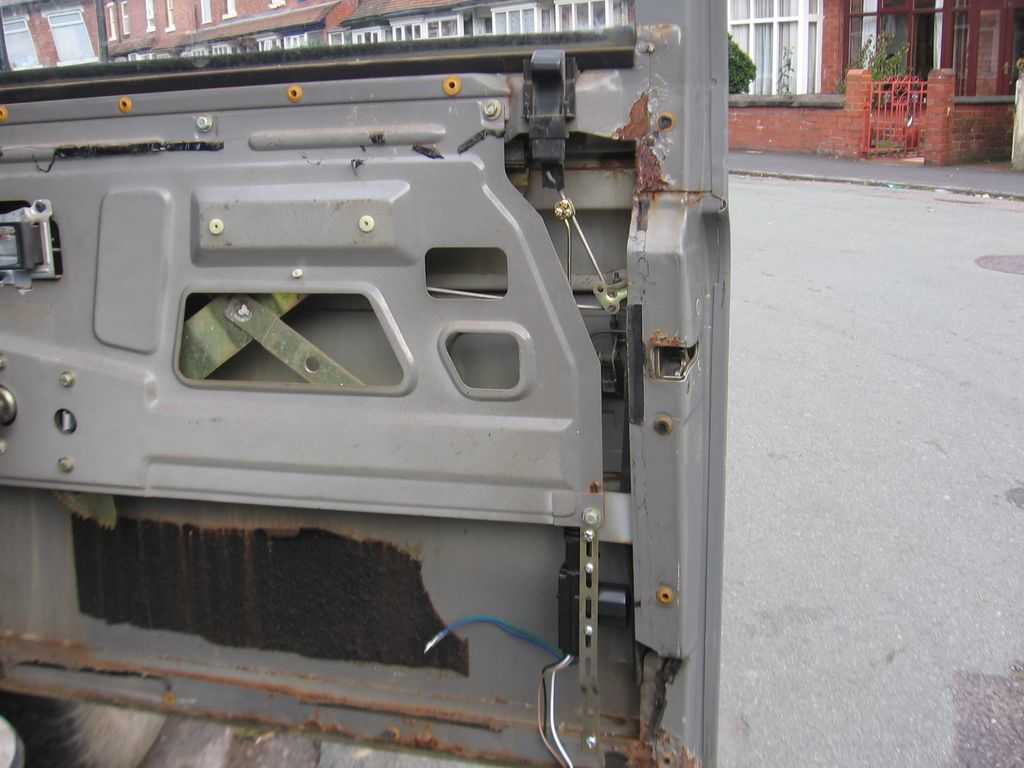
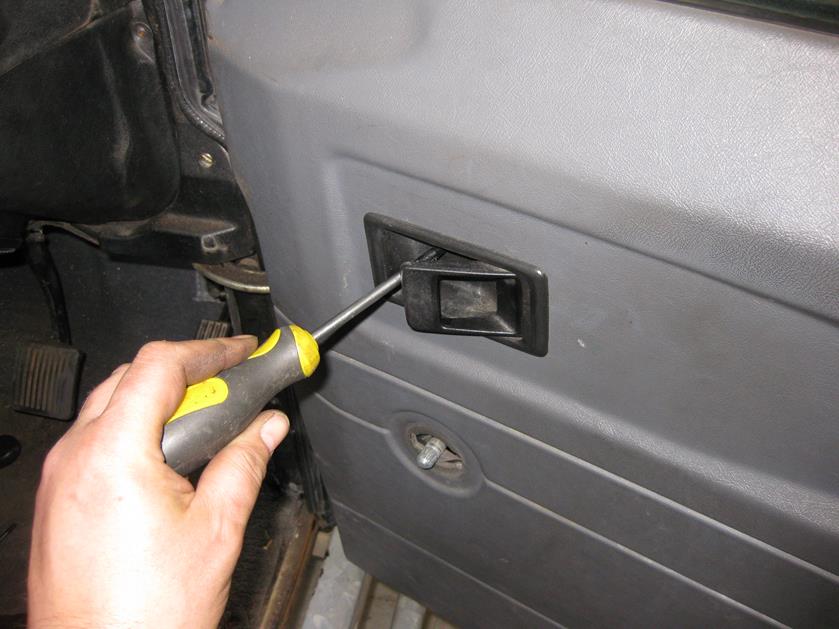
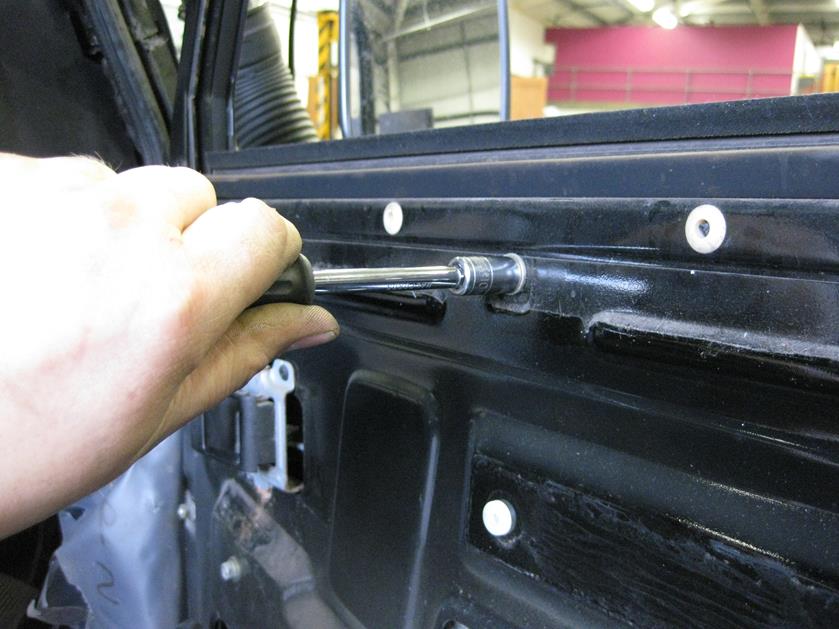
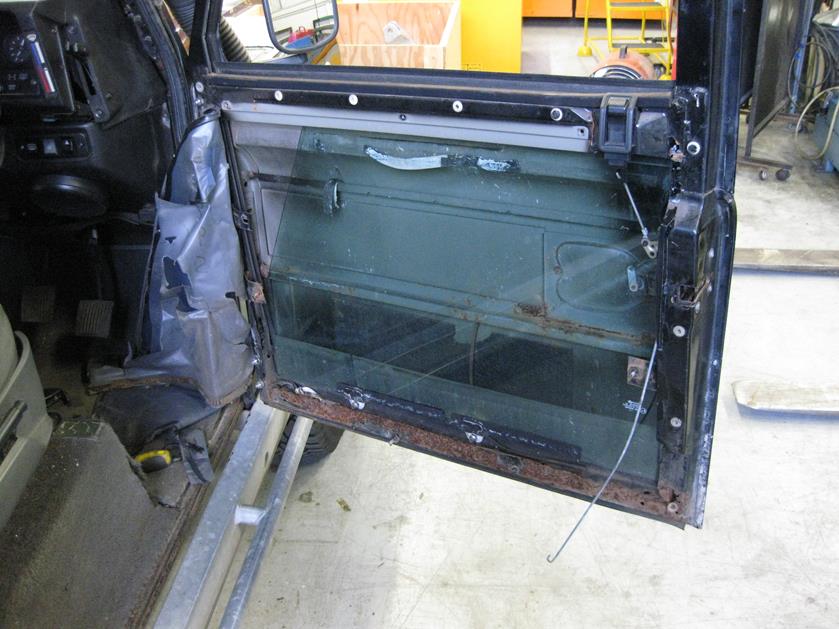
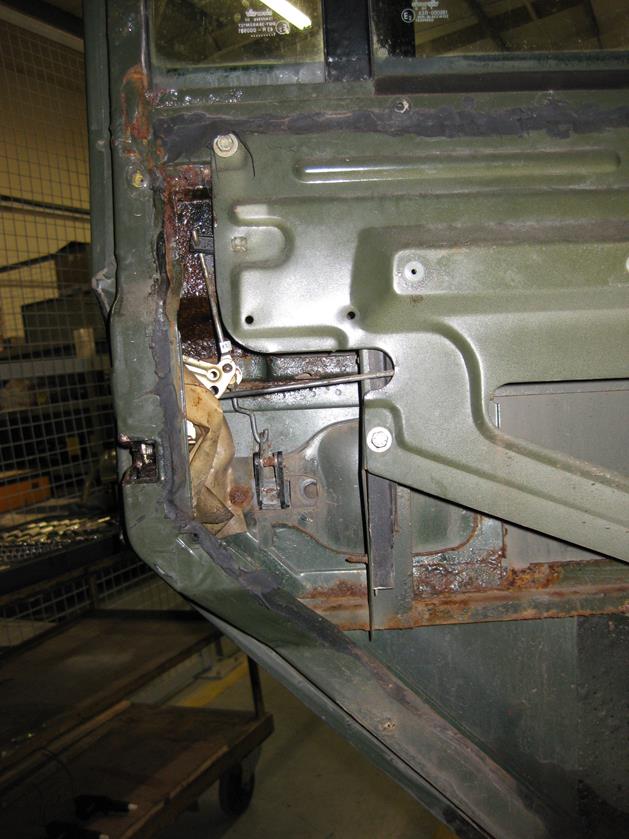
Now, on the front doors strip the door furniture off

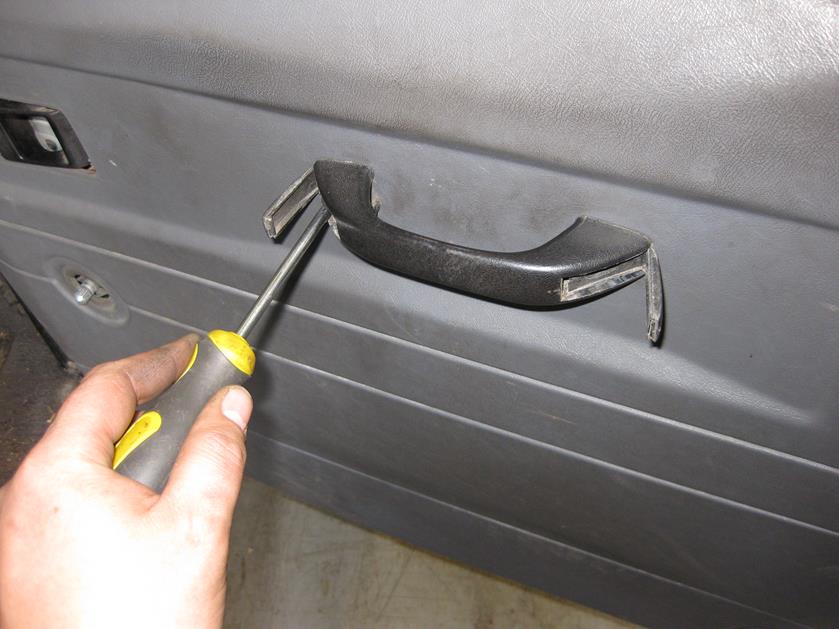
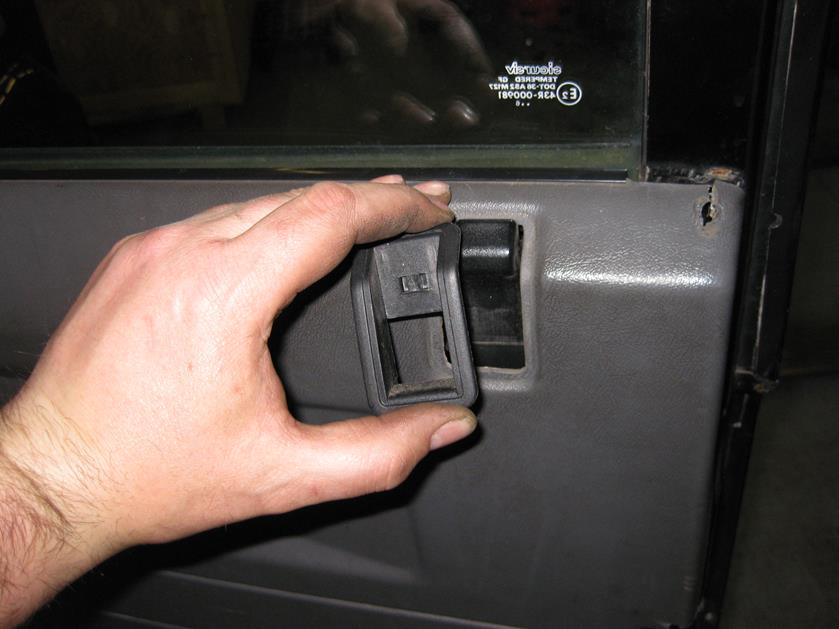
And remove the door card
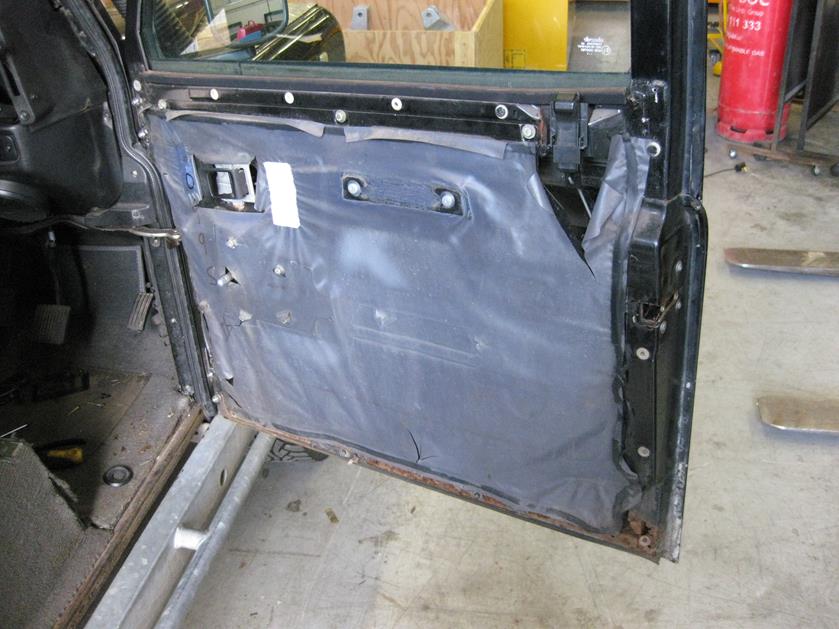
Carefully peel back the interior weather proofing
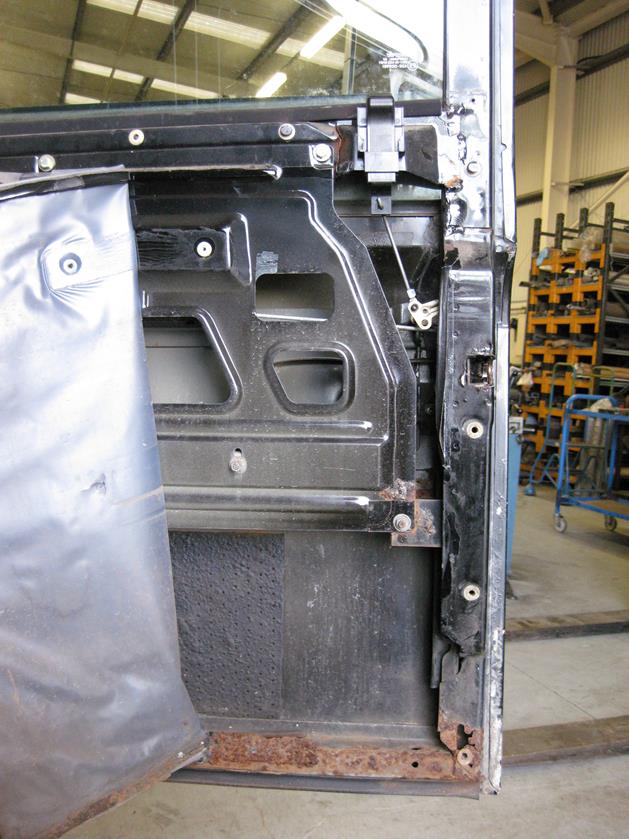
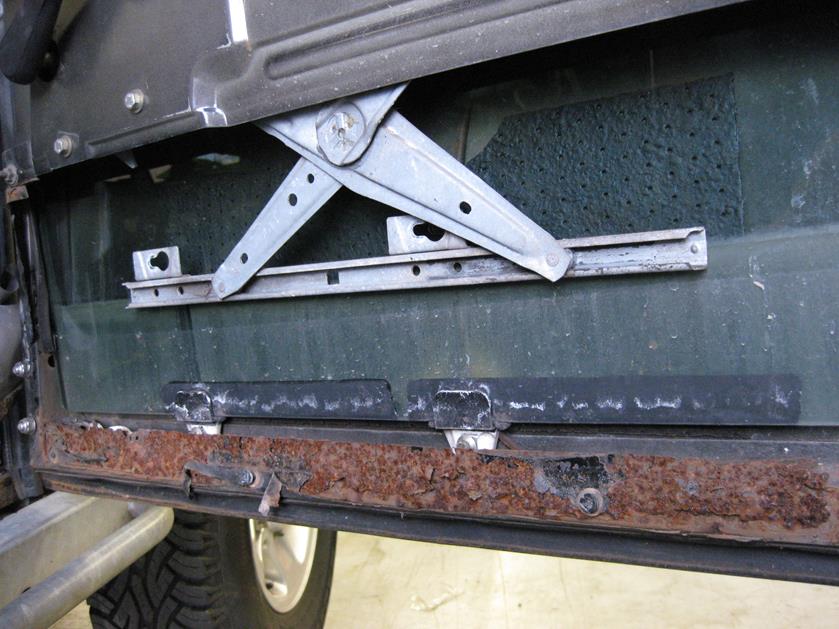
Lower the window to a point where you can get to the two lower clamp bolts (if yours hasn't got these fitted then follow RAVE to find out how to remove the door glass from the regulator)
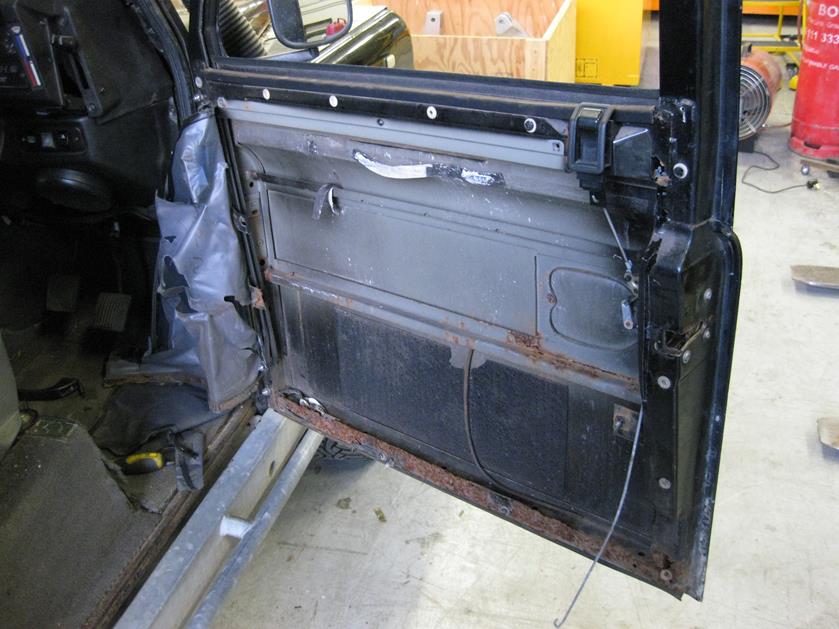
Slide the rail to the side
And carefully lower the glass to the bottom of the door
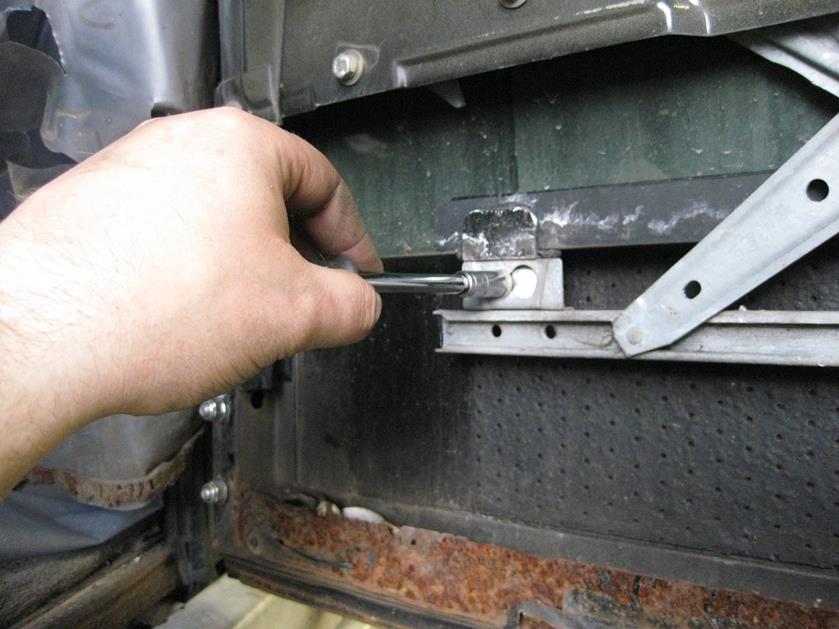
Now un-bolt and remove the regulator assembly, first by unscrewing the door release handle and then the bolts around the perimeter, lift off and pass handle through the aperture, unclipping the rod as you go!
Now, this is the tricky part....lift the wind glass up off the bottom of the door and very carefully pull the glass towards you and then slide down past the bottom of the door and with a wiggle and jiggle, remove the glass from the guides and out of the bottom of the door frame!
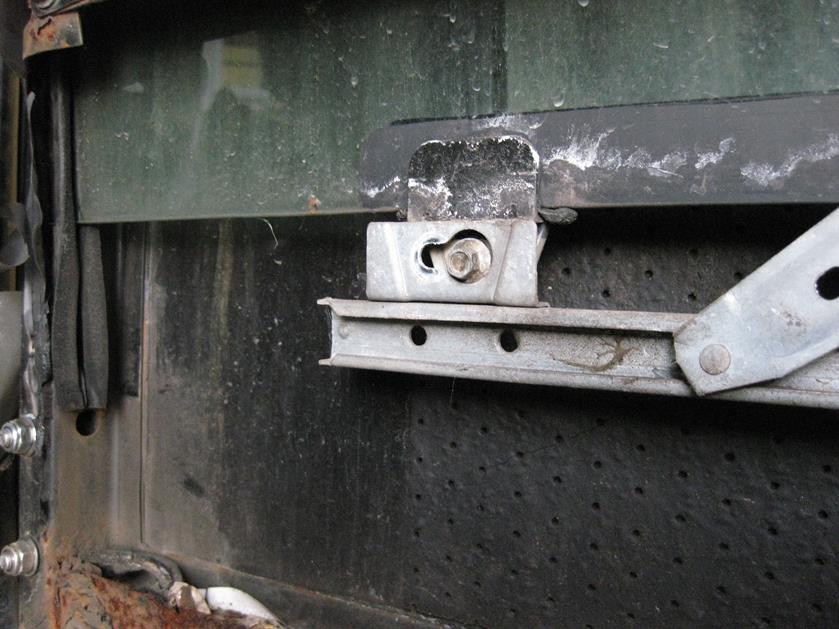
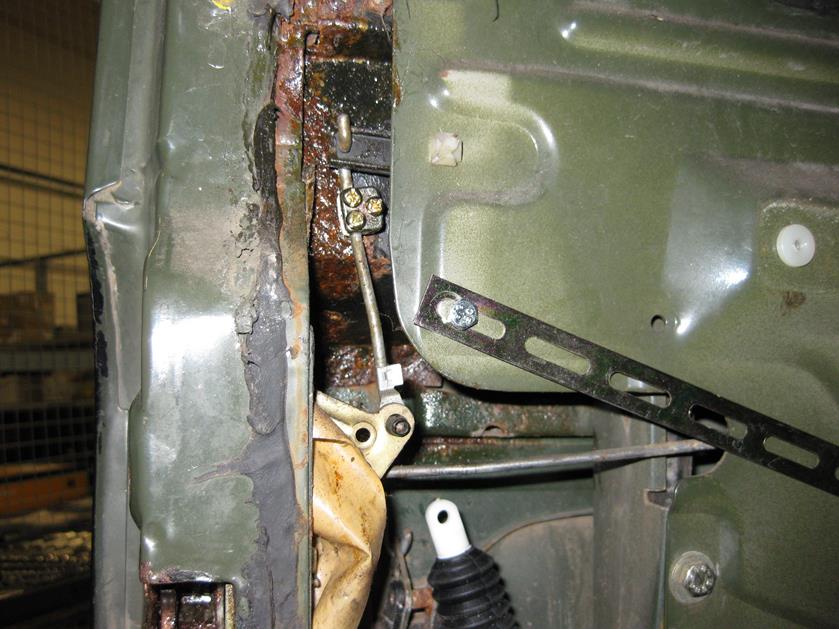
Next is to locate the door lock release rod and attach the Hawk rod clamp to it! Simple to do, the Hawk clamp has a cut out so you just slip it over the rod and do up the bolts, no need to remove the locking rod at all..!!! Brilliant!
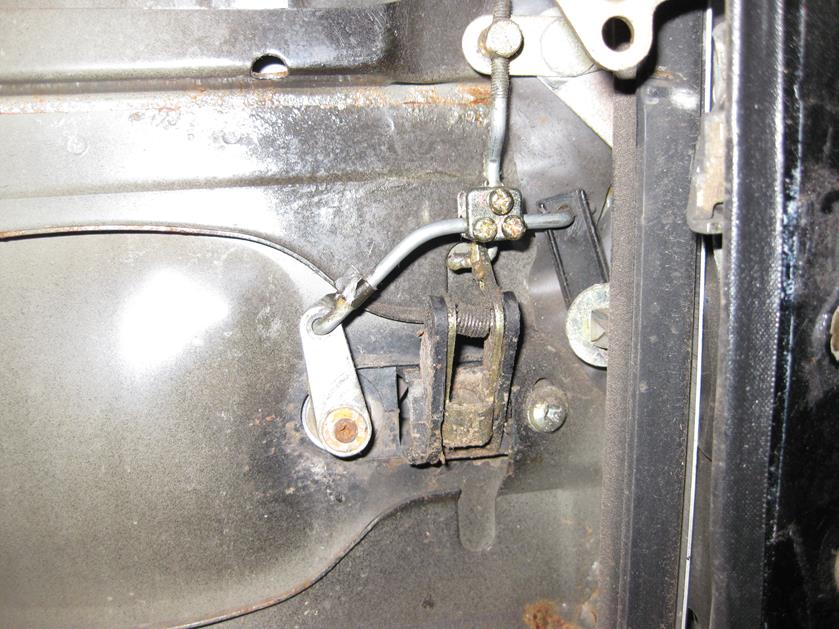
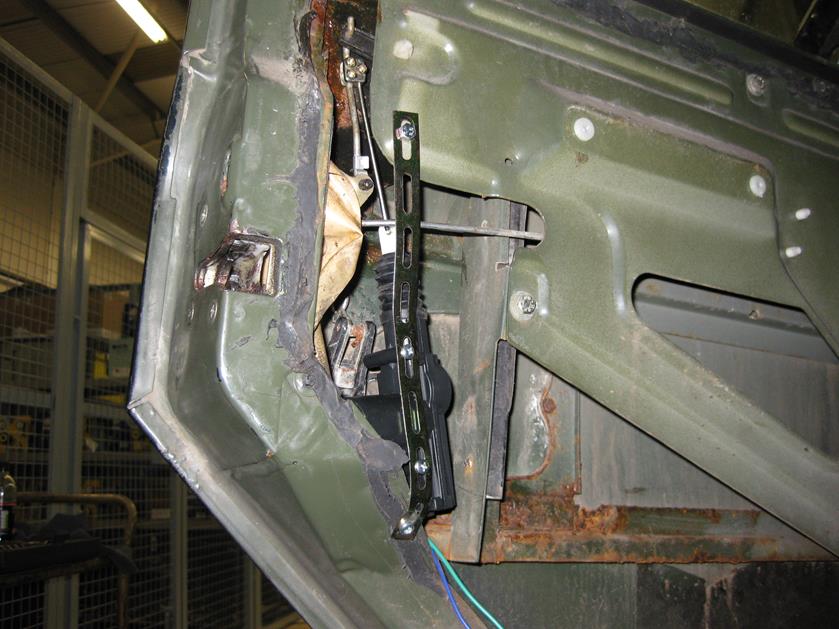
Now, you have to mount the actuator in a position to actuate the rod, and not be in the way of the door glass. The best place I found is up against the door outer skin under the strengthening rail.
I mounted the actuator as close as possible to the lock rod as it is best to try and keep the actuator rod as short as possible to prevent any bowing or bending when in use!
They only supply 4 fixing rails in the kit and I knew I would need the rest for the other door and the rears. I found some Aluminium sheet and cut a couple of extra strips and drilled to suit, thus allowing me to use one fixing strip per door!....they really need to supply extras in the kit, it would help a lot!
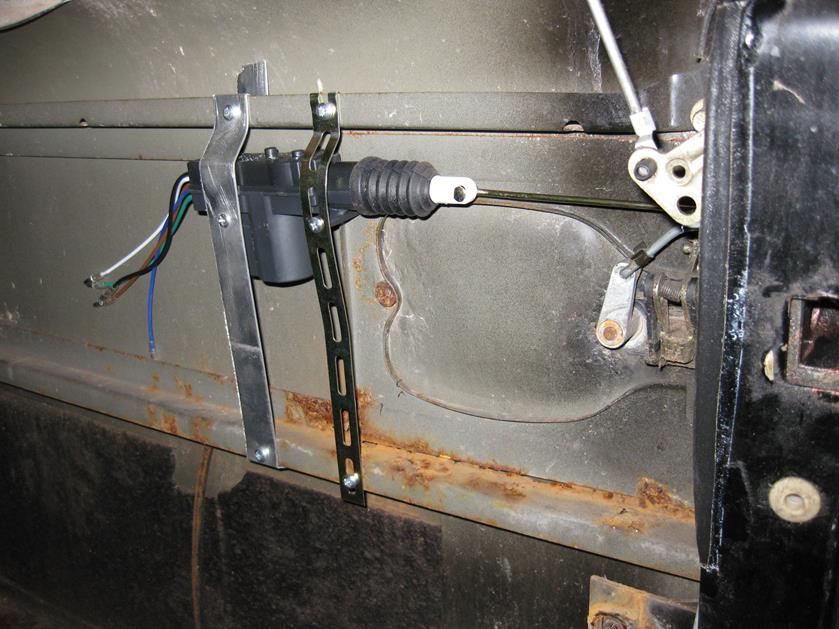
After a bit of thought, I had to reverse the blue and green wires and the brown and white wires as the actuator was working in reverse (not a Hawk issue - it is an issue caused by the way I mounted the actuator - instead of push to unlock, it was pull to unlock)
A quick test.....
Repeat on the other front door.
Now on to the rear doors....
Again remove the door furniture, the door card and the interior weather protection. Mine looks like the weather protection hasn't worked, my doors are looking a little worse for wear!
Anyhow, mount the actuator appropriately, I did mine vertically onto the lock rod, but it would even be possible to mount similarly to the front doors and clamp to the rod coming from the sill lock button, although this would mean removing the door glass again.
Repeat on the other door.....
Now that's the lock actuators fitted, now comes the wiring!!
I didn't take many photos (if at all) of this as you may need to route in accordance with your own vehicle, but I cable tied and ran the wires on the front doors along the upper strengthening bar and then using the tubing for protection from the door to the side of the instrument binnacle. The position allows the tubing to bend downwards and away from any crush point when the door is closed.
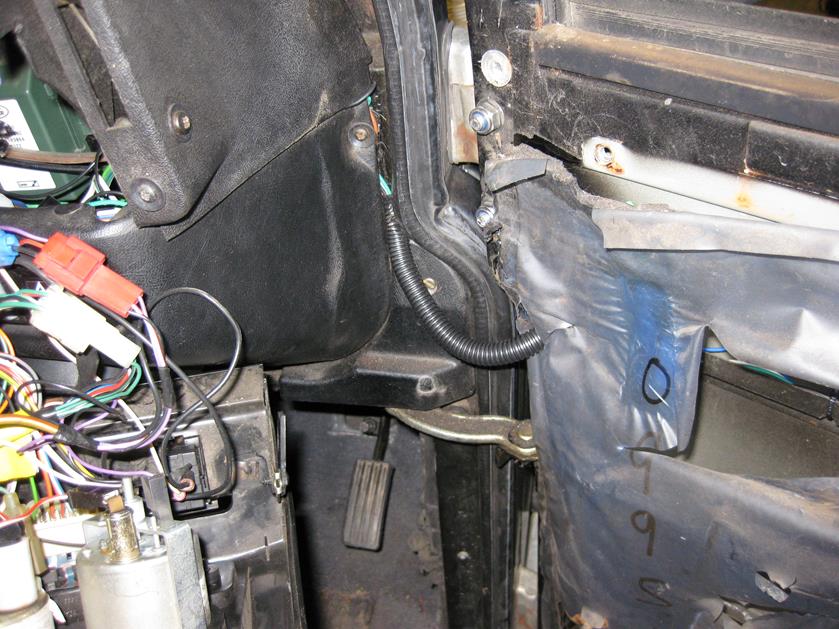
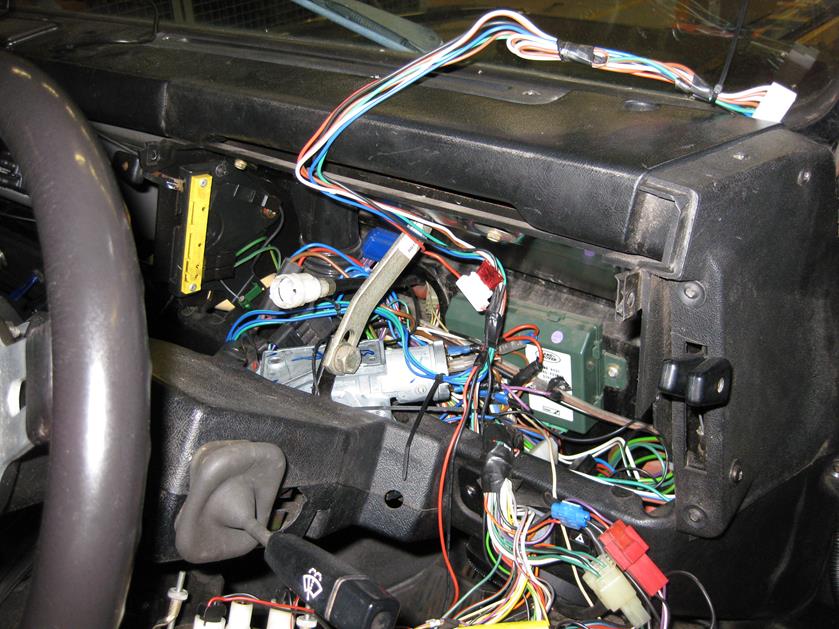
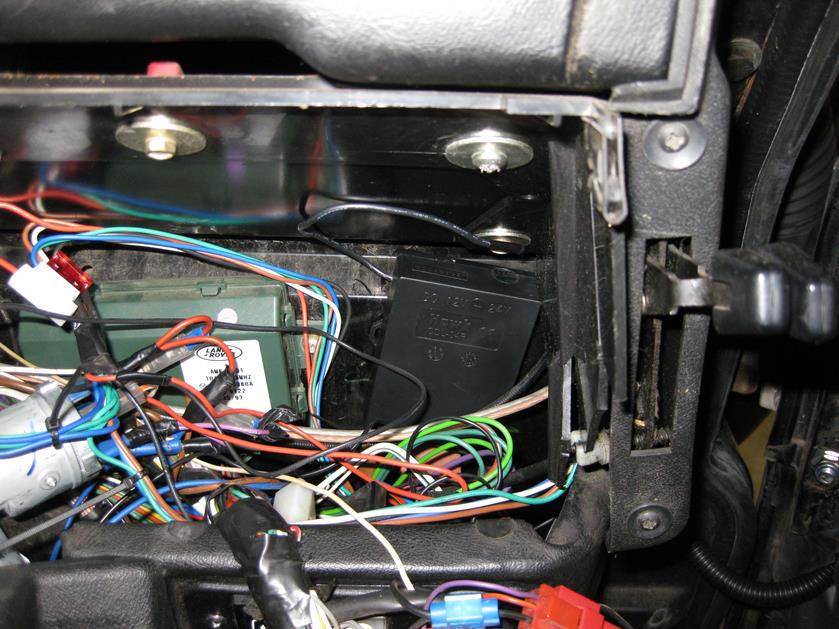
The wiring then comes up into the space behind the instruments and the ECU unit mounted on the bulkhead next to the 10AS alarm box.
The other front door is then routed along the bulkhead to the other door and the tubing again used for protection.
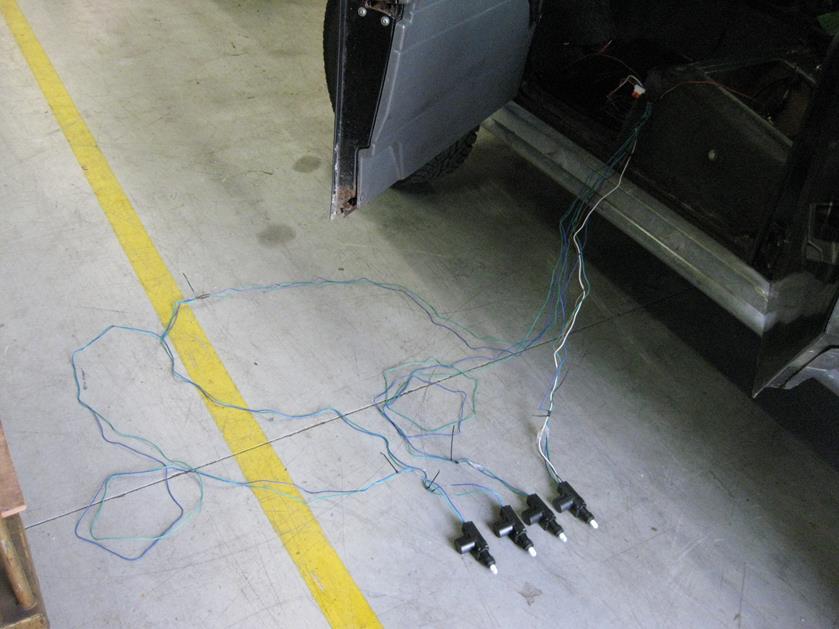
The rear doors I had to extend the rear wiring loom a little to make it fit. Now others have routed this down the main fuse box area, along the transmission tunnel (under the vehicle) then up the B pillars to the door, all run in the tubing for underbody protection.
I ran the rear doors internally, under the transmission tunnel carpet to the rear of the front seat boxes, then to each door from there, under the carpet and to the B pillar into the door.
For power, I grounded on a bolt under the dash and for the permenant live feed I used the spare spade connection on the back of the ignition switch where the thick brown live cable goes into the switch pack.
Before putting all the door cards and etc back on, give it a quick test.
Put the doors back together. To get the glass back in takes a bit of patience and wiggling to get it back in the guides and up from the bottom of the door.
Regulator back on, weather protection on, door card, door furniture, and test again...along with ensuring the windows work!!
Tidy up and job done.....
Took me about 7 hours, but I was lazy, had multiple cups of coffee, a bite to eat (Chicken Curry) and took some photos....others have fitted in a few hours, but taking your time never hurt anyone!
I have to say, this is the best retrofit you could do for you Landy....brilliant!
The misses primarily drives the Range Rover now as it has all the mod cons of Air Con and climate control that makes the British weather with its constant changing temperatures and rain fall easier to cope with when you have a youngster, as she is with our daughter more often then me due to work commitments etc.
I don't mind at all, even though I am a dyed in the wool Range Rover fanatic, I adore my 110 almost just as much. (It helps it has P38 Range Rover seating which is more comfortable, albeit a couple of inches higher, than the standard seats!)
Anyhow, on the odd occasion when we take our Daughter out in the 110, it can be a faff carrying her, the nappy bag, any other bags or similar required and then unlock the passenger door, the reach round the pillar to unlock the rear door, all the while not trying to drop the baby, the bags or the keys!!!!
Having done much research, the Hawk system seemed to get the best write-ups and has been recommended on here previously.....I thought I'd see what the fuss was about.
Ordered the 4 door kit (a 5th actuator can be bought for the rear load space door - didn't bother at this stage - also it can be a faff to fit) and it arrived the next day - brillo pads!!
The instructions for fitting a tad vague, but it is actually dead simple, hardest parts are thinking where to put the actuator to not foul the window and regulator and then routing the wiring!!
Here we go!!
The box....
Inside the box....
Contents of the box......(I have to pad this How To out some how as it is dead simple to fit!!)
I also bought some 8mm split corrugated tubing from the online market store named after a South American River...
Stripped the ends of the red and black power wires and jury rigged to the car battery for a quick system test. (Video link attached too)
All working very well.
Now, on the front doors strip the door furniture off
And remove the door card
Carefully peel back the interior weather proofing
Lower the window to a point where you can get to the two lower clamp bolts (if yours hasn't got these fitted then follow RAVE to find out how to remove the door glass from the regulator)
Slide the rail to the side
And carefully lower the glass to the bottom of the door
Now un-bolt and remove the regulator assembly, first by unscrewing the door release handle and then the bolts around the perimeter, lift off and pass handle through the aperture, unclipping the rod as you go!
Now, this is the tricky part....lift the wind glass up off the bottom of the door and very carefully pull the glass towards you and then slide down past the bottom of the door and with a wiggle and jiggle, remove the glass from the guides and out of the bottom of the door frame!
Next is to locate the door lock release rod and attach the Hawk rod clamp to it! Simple to do, the Hawk clamp has a cut out so you just slip it over the rod and do up the bolts, no need to remove the locking rod at all..!!! Brilliant!
Now, you have to mount the actuator in a position to actuate the rod, and not be in the way of the door glass. The best place I found is up against the door outer skin under the strengthening rail.
I mounted the actuator as close as possible to the lock rod as it is best to try and keep the actuator rod as short as possible to prevent any bowing or bending when in use!
They only supply 4 fixing rails in the kit and I knew I would need the rest for the other door and the rears. I found some Aluminium sheet and cut a couple of extra strips and drilled to suit, thus allowing me to use one fixing strip per door!....they really need to supply extras in the kit, it would help a lot!
After a bit of thought, I had to reverse the blue and green wires and the brown and white wires as the actuator was working in reverse (not a Hawk issue - it is an issue caused by the way I mounted the actuator - instead of push to unlock, it was pull to unlock)
A quick test.....
Repeat on the other front door.
Now on to the rear doors....
Again remove the door furniture, the door card and the interior weather protection. Mine looks like the weather protection hasn't worked, my doors are looking a little worse for wear!
Anyhow, mount the actuator appropriately, I did mine vertically onto the lock rod, but it would even be possible to mount similarly to the front doors and clamp to the rod coming from the sill lock button, although this would mean removing the door glass again.
Repeat on the other door.....
Now that's the lock actuators fitted, now comes the wiring!!
I didn't take many photos (if at all) of this as you may need to route in accordance with your own vehicle, but I cable tied and ran the wires on the front doors along the upper strengthening bar and then using the tubing for protection from the door to the side of the instrument binnacle. The position allows the tubing to bend downwards and away from any crush point when the door is closed.
The wiring then comes up into the space behind the instruments and the ECU unit mounted on the bulkhead next to the 10AS alarm box.
The other front door is then routed along the bulkhead to the other door and the tubing again used for protection.
The rear doors I had to extend the rear wiring loom a little to make it fit. Now others have routed this down the main fuse box area, along the transmission tunnel (under the vehicle) then up the B pillars to the door, all run in the tubing for underbody protection.
I ran the rear doors internally, under the transmission tunnel carpet to the rear of the front seat boxes, then to each door from there, under the carpet and to the B pillar into the door.
For power, I grounded on a bolt under the dash and for the permenant live feed I used the spare spade connection on the back of the ignition switch where the thick brown live cable goes into the switch pack.
Before putting all the door cards and etc back on, give it a quick test.
Put the doors back together. To get the glass back in takes a bit of patience and wiggling to get it back in the guides and up from the bottom of the door.
Regulator back on, weather protection on, door card, door furniture, and test again...along with ensuring the windows work!!
Tidy up and job done.....
Took me about 7 hours, but I was lazy, had multiple cups of coffee, a bite to eat (Chicken Curry) and took some photos....others have fitted in a few hours, but taking your time never hurt anyone!
I have to say, this is the best retrofit you could do for you Landy....brilliant!
Last edited: