1975 Series 3 Rebuild (The second time around)

This site contains affiliate links for which LandyZone may be compensated if you make a purchase.
Done some more work today!

First off I took my old exhaust off and fitted my new stainless system. £160 from Paddocks, including clamps and bolts and rubber mounts, excellent value I think for something that will last the vehicles lifetime.


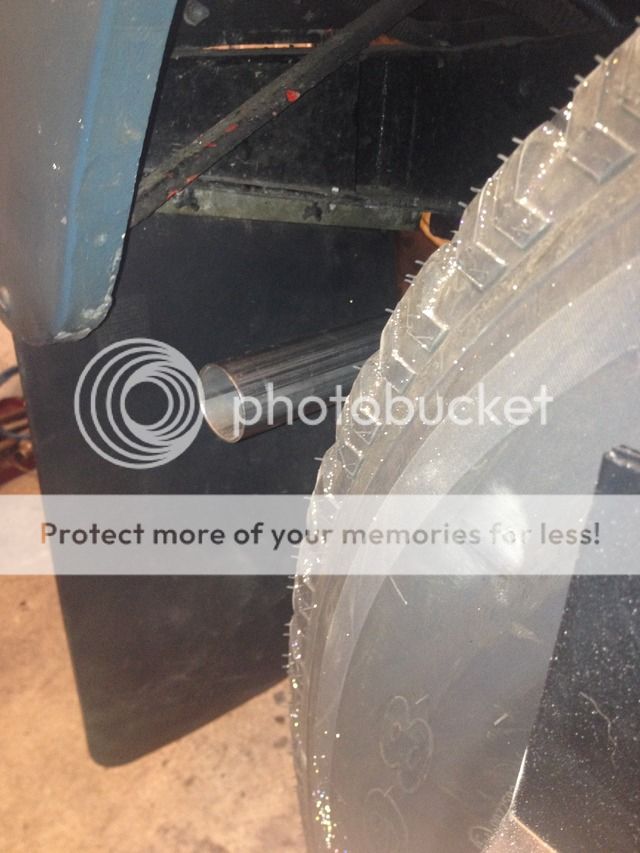
I still have the old mild steel exhaust if anyone needs one. Its in decent condition, I only swapped it due to just making this as future proof as possible whilst Im carrying out the work. Message me if interested

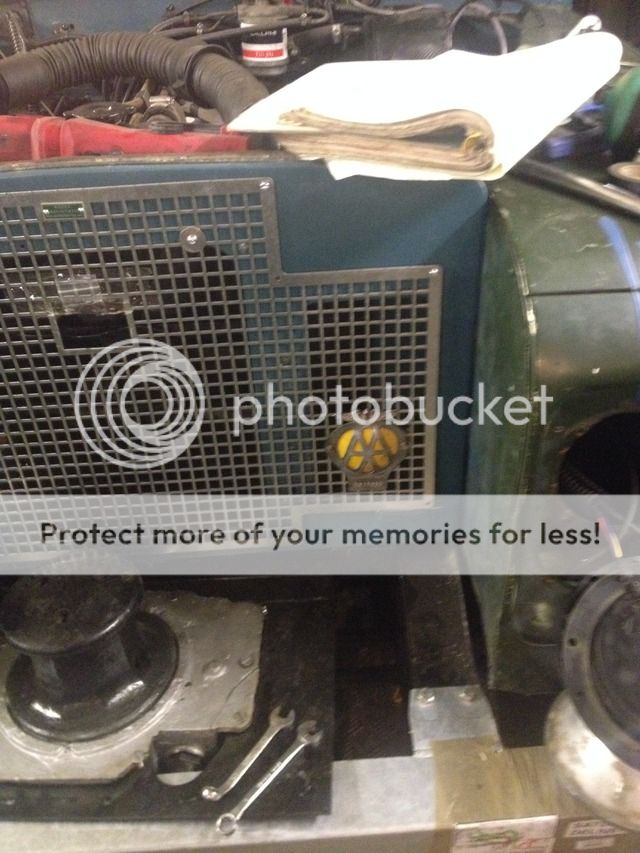
Next I began actually fitting my front grill after wiring up my horn. Also took the time to fit my old AA badge (I got this off a member on here who was de-badging his 109"). Make a good start until my little drill bit snapped and I havent got a replacement that small. (Capstan winch is only sat on loose for now, which is why it looks ****ed)


Then I set about sorting the electrics in the dash. My screenwash had stopped working and this was found to be the grub screw holding the spade connector in had loosened allowing the spade to fall out of the switch, this was tightened back up and everything was working again! Also took the time to fit my red dash LEDs.


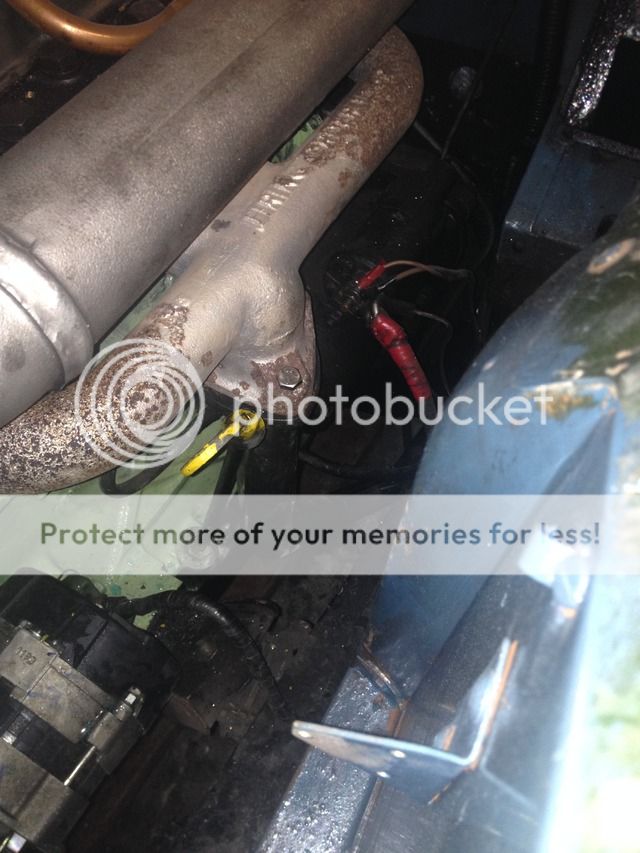
The only thing that doesnt work is the charge light. I've bypassed the earth and it flashes up then so Im assuming the issue is the connection at the alternator end (which would make sense as the alternator has been off

Will carry on tomorrow fitting lights to wings, etc. and may get a bit of painting done.

Will be taking the drivers wing off again tomorrow so will get a pic of the battery tray
 
Only managed a couple of hours today and was too cold and damp really for any painting so carried on sorting out electrics. The passenger sidelight hole needs work as the fixing holes have corroded away. My plan is to cut the old section from the old wing and rivet it behind using countersunk rivets so I can screw the sidelight in place. took the plastic bowl off the drivers side wing, I had to do a repair to the plastic bowl so will fit that tomorrow evening once the glue has dried


Made a bit more progress tonight, Got the drivers side headlamp in place along with its trim piece. Its not wired up yet as the wing needs to come back off to finish off the bulkhead. I also borrowed a 3mm drill from work which was used to finish drilling holes to fix the grill in place.


Whilst i had the drill out I decided to carry on drilling holes and fixed the screenwash bottle and pump in place (the cables and hose will be tidied up later on


also decided to fix the numberplate in place so shes got her identity back :) I will be getting some black and silver plates made up later in the year to be fitted once the tax class is changed to historic. I had to move it to the passenger side due to the winch being in the way of where it sat previously on the bracket in the middle and wasnt too keen on fixing to the grill.


Tomorrow I'll finish bolting up the passenger wing and look at the repair to the front panel to fit the sidelight
 
Is it old enough for the black and silver reg plates? I was looking to get them for mine as it is the same year as yours and I am sure it wasn't old enough. I think it is pre '73 for black and silver, have a look here http://www.tippersvintageplates.co.uk/phdi/p1.nsf/supppages/tippers?opendocument&part=3

Dvla states that once your vehicle falls into the tax exemption bracket you can fit black and white plates provided to make an application to do so to the DVLA
 
You have to re-tax the vehicle as a historic vehicle with the DVLA by sending logbook away. Once the tax class is changed to historic the vehicle is tax free and also is eligible to legally wear the older black and silver plates. So its basically on a 40 year rolling basis

I do have a screenshot on my phone of the DVLA site saying this, I'll post it up with my next update.
 
Did a bit more work on the bulkhead. We decided in the end to go for a different approach and replace the whole door pillar up to the top of the curve. This was due to even though we got it 99% straight, there was still quite a dish in the middle.

Taking the replacement piece to work tomorrow to drill some holes in during panad break so we can puddle weld where it joins on to the flat face of the footwell as we dont have a spot welder. Did a bit of fettling tonight getting it ready to weld and its pretty much there now, offered up the door and its got a better panel gap than it did before which is a good start :)

Oh LordOWar, this means the wings off so I can finally get pics of the battery tray tomorrow!
 
More progress! Got the welding all finished on Friday so mnaged to paint up the bulkhead a bit. First painted red oxide and then gave a coat of blue to bits I wouldnt be able to get at later on (Under door hinges and behind the wing etc.) so they all get good protection


I also found the time to fit my sunvisor


The view from inside with it fitted (please excuse the wrong sprung - thats my brothers project, an ex Gulf War 1 90FFR)


I then got my drivers wing fitted. Only stopped as I ran out of bolts to go through and hold the bonnet stay bracket. I also had to take the headlight out again as i was on my own and found it easier for pushing bolts through. If you'll notice Ive dug my checker plate out, which may yet be going on due to both battered wing tops and my habit of putting stuff on the wing top.


Also had a play around with my new arial I got from maplins, i screwed my old arial wire into the bottom.


Extends quite high up so ideal for when camping, gets an awesome signal


So thats as far as i got. tomorrow I'll fit the door and bonnet as well as refit my headlight. May even get the sill put on
 
Only managed a couple of hours today and was too cold and damp really for any painting so carried on sorting out electrics. The passenger sidelight hole needs work as the fixing holes have corroded away. My plan is to cut the old section from the old wing and rivet it behind using countersunk rivets so I can screw the sidelight in place. took the plastic bowl off the drivers side wing, I had to do a repair to the plastic bowl so will fit that tomorrow evening once the glue has dried


I don't suppose you could take some pictures and or give me some more detail about how you sorted your corrosion problem around your side lights?
mine are badly corroded i was going to buy whole new front wing panels but they are £66 each and i need two of them and the only problem with mine are the corroded bits around the side light and indicator. any help in fixing the originals would be hugely appreciated!
I havent done it yet but what im going to do is cut the old sidelight part out of my old wing and rivet that behind the current one for the sidelight to screw into
 
I see, might see if I can get my hands on some aluminium at the smiddy and see if it looks ok pop riveted behind the lights its quite bad so the lights might not cover the patch up completely, worth a shot I suppose.
 
Try and use countersunk rivets if you can. I have a tool that allows them to be made from normal pop rivets, much less noticeable as you can put filler over the top and you end with a perfectly smooth panel
 
Well did everything i set out to do tonight, got the door and the sill on. I was pleasantly suprised to find the door gaps are actually better than they were pre-accident and the door shuts much better now (albeit without a front bit of door seal). The sill needed a bit of fettling to get round the door pillar and the holes dont line up right with the replacement wing skin, bolted up as it is, it is too far inside the wing so looks like its been kicked in. To get around this I have clamped the sill flush with the wing skin and tomorrow I will drill up through the wing which will allow me to bolt it up in the correct location. Looks quite bad by the door but thats only because half of the seal is missing


This image also shows the tub dent that needs pulling out


Also re-fitted my headlamp


and pulled the conduit through the wing ready for wiring up, probably tomorrow evening


Found an issue with my replacement door in that the holes for the door top are half a hole out, i'll get around this by fiting the galv strip and drilling down through one of the holes to open it out enough to fit the door top. This I hope to do tomorrow as well as do some wiring and sort out the sill.
 
Progress progress progress:

Got all of my electrics working once more :)


My spots are adequate shall we say


got my bonnet on too,


I need to do some adjustment to the panel gap between the bonnet and wing top as there is quite a gap there.


My door top's on now too


For anyone wondering, the wheel carrier on the bonnet is one off aan ex moD 110, an easier thing to use than the series one i reckon.

Jobs to do now:

Adust panel gap,
Tidy up wiring in engine bay,
fit mudshield brackets,
Investigate why alternator isnt charging and charge light isnt wiring up (suspect the plug at the alternator is loose)
fit checkerplate to wing tops
Fit arial
Fit front mudflaps
Paint

(Not strictly in that order though haha)
 
Your on the home stretch now great work! Like the visor too need to get me one of those-might need sun first though ;)
 
Back
Top