1969 SR2A Rebuild

This site contains affiliate links for which LandyZone may be compensated if you make a purchase.

robbie8922

Member
Posts
52
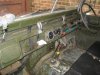
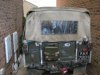
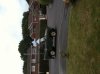
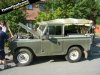
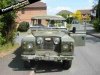
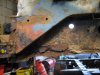
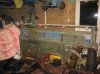
Eventually got round to starting my rebuilt. (Well mainly because the mot man wont pass it)

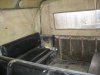
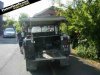
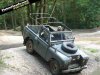
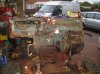
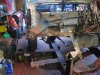
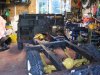
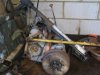
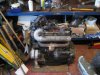
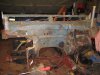
Ive stripped it back to the chassie now (Left the bulk head on tho. Going to repair that in place)

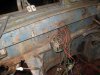
Whats the best thing to prime and paint the chassie with?

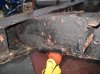
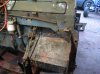
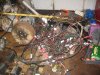
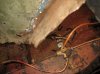
Can i change the oil seal on the rear axle where the drive shaft goes in with out stripping the whole unit down?

Thanks
Rob
 
Been working on the landy again today.

Lifted the engine and gearbox out, removed the bulkhead and pressure washed the chassie.

Pretty happy with it. The NSf dumbbell has some rot but i think ill cut it off and fit a new one.

Ill take the camera round tomorrow and get some pics. Wanted to take them from the start but didnt have it there and its now totaly stripped in a couple of days.

Looked into painting the chassis but a mate said about getting it galvanized.
I thought it would be expensive but its nearly as cheap as painting it.

Been quoted 60-80 quid to shot blast the chassis which i think is cheap. Even if i wasn't galvanizing it id do that. Saves a lot of time and work.

How much does the chassis weigh. Been quoted £100 up-to 125kg and £145 up-to 175kg to have it galvanized.

Going to have the chassis and bulk head shot blasted then repair the rot and have it dipped. Should last a good few year then.

Ill post some pics of the progress over the weekend.

Rob
 
18368_useless_thread.jpg


:boink:
:scratching_chin:
 
Heres a few pics i found on my lappy before i started the rebuild.
 

Attachments

  • 10425_171163615638_513695638_4214264_7697033_n.jpg
    10425_171163615638_513695638_4214264_7697033_n.jpg
    60.1 KB · Views: 377
  • 10425_171163620638_513695638_4214265_5590500_n.jpg
    10425_171163620638_513695638_4214265_5590500_n.jpg
    48.9 KB · Views: 347
  • 10425_171163625638_513695638_4214266_1291948_n.jpg
    10425_171163625638_513695638_4214266_1291948_n.jpg
    59.1 KB · Views: 346
  • 10425_171163635638_513695638_4214267_8356368_n.jpg
    10425_171163635638_513695638_4214267_8356368_n.jpg
    47.9 KB · Views: 321
  • 10425_171163645638_513695638_4214268_1624014_n.jpg
    10425_171163645638_513695638_4214268_1624014_n.jpg
    59.9 KB · Views: 329
Yea as far as i know. Dont really know any thing about it. Didnt get any paper work with it. Any info any one knows about it would be good.

Want to keep/ make it as original as poss when i put her back together.

Found these from the web site when i brought her.

Took the camera round yesterday. Nearly finished stripping the bulk head ready for shot blasting. Ill post the pics later.
 

Attachments

  • photo-10.jpg
    photo-10.jpg
    232.1 KB · Views: 286
  • photo-9.JPG
    photo-9.JPG
    36 KB · Views: 281
  • photo-8.JPG
    photo-8.JPG
    36 KB · Views: 316
  • photo-7.JPG
    photo-7.JPG
    38.6 KB · Views: 296
  • photo-4.JPG
    photo-4.JPG
    34.1 KB · Views: 318
Heres the pics of where i have got to now.

Nearly got the chassie and bulk head stripped ready for shot blasting.

When i un-wired it there was a bit of spagettie junction. I think every time somethig has stopped working a new wire has been run.

Not sure wether to make a new harness my self. Ive got a role of 5 or 7 core wire, heat shrink, crimps and outer brade so only need to buy some heavy wire for glow plugs, alternator, power feeds and a new fuse box.

Or the other option is a new harness for £180 and save a lot of time.

Im trying to find what the landy would have had fitted when built. and where it should be.

My dash has:

Wiper switch, washer bottle switch, panel lights swtich, key ignition switch.

I have a seperate button switch for the horn and glow plugs and then the dipped/ high beam foot switch.

Do i need or should i fit a hazzard light switch?

Rob
 

Attachments

  • IMG_0168.jpg
    IMG_0168.jpg
    246.2 KB · Views: 307
  • IMG_0167.jpg
    IMG_0167.jpg
    252 KB · Views: 337
  • IMG_0165.jpg
    IMG_0165.jpg
    223.4 KB · Views: 293
  • IMG_0164.jpg
    IMG_0164.jpg
    238.8 KB · Views: 292
  • IMG_0163.jpg
    IMG_0163.jpg
    232.4 KB · Views: 291
  • IMG_0162.jpg
    IMG_0162.jpg
    241.6 KB · Views: 328
  • IMG_0159.jpg
    IMG_0159.jpg
    231.1 KB · Views: 301
  • IMG_0158.jpg
    IMG_0158.jpg
    214.5 KB · Views: 310
  • IMG_0157.jpg
    IMG_0157.jpg
    221.7 KB · Views: 316
  • IMG_0156.jpg
    IMG_0156.jpg
    237.3 KB · Views: 330
A few more.
 

Attachments

  • IMG_0180.jpg
    IMG_0180.jpg
    256 KB · Views: 264
  • IMG_0181.jpg
    IMG_0181.jpg
    236.8 KB · Views: 263
  • IMG_0182.jpg
    IMG_0182.jpg
    243.4 KB · Views: 254
  • IMG_0183.jpg
    IMG_0183.jpg
    222.2 KB · Views: 282
  • IMG_0178.jpg
    IMG_0178.jpg
    243.9 KB · Views: 248
  • IMG_0174.jpg
    IMG_0174.jpg
    241.7 KB · Views: 300
  • IMG_0173.jpg
    IMG_0173.jpg
    247.9 KB · Views: 233
  • IMG_0172.jpg
    IMG_0172.jpg
    239.9 KB · Views: 257
  • IMG_0171.jpg
    IMG_0171.jpg
    250.6 KB · Views: 255
  • IMG_0170.jpg
    IMG_0170.jpg
    247.4 KB · Views: 245
SOO jealous - Wish my garage was that big :D

The woes of "repaired" Series wiring - it never seems to change.
Don't see owt wrong with making your own loom, i've done the same in the past, and at least you can add/modify/trunk wires where you want to.....


:hijacked:As you can see from the photo's a previous owner liked his blue wire and crimps.
May be a bit of a stupid question but would you just follow the original wiring diagram and just substitute the wire colours for what you can get making sure you can cross reference with the wiring diagram if that makes sense:doh:.
 

Attachments

  • PIC_0327.jpg
    PIC_0327.jpg
    222.8 KB · Views: 212
  • PIC_0328.jpg
    PIC_0328.jpg
    217.3 KB · Views: 220
  • PIC_0329.jpg
    PIC_0329.jpg
    223 KB · Views: 197
:hijacked:As you can see from the photo's a previous owner liked his blue wire and crimps.
May be a bit of a stupid question but would you just follow the original wiring diagram and just substitute the wire colours for what you can get making sure you can cross reference with the wiring diagram if that makes sense:doh:.

Im in two minds of what to do. I can buy a complete wiring loom ready made and adapted as mine has a alternator fitted now instead of a dynamo. Its £165 +vat from my local dealer and should be plug and play.

Or im going to run a piece of five/seven core trailer lighting cable to the back then do the same for the front lights and run any other wires as needed. I have some heat shrink brade that i could then put over the outside to give it a bit of protection.

When i unwired it i removed the old brade from the outside of the loom then split all the cables apart. Traced the wires and marked them all up on the back of the dash before i cut them. Doing it that way i understand hiw each circuit is wired up and works. Should be pretty easy to re-wire.

Ive just brought the Landrover operation repair manual £52 but seems to have a lot of well laid out information with enough pics to help you understand how to measure lash, timing marks etc. Looking at the wiring diagram its pretty simple and easy to follow. Just have to work out which diagram is for you vehicle.

If your going to re-wire it you could pretty much rip all your old loom out then run the cables for each circuit 1 at a time following the diagram. Then brade/ heat shrink it after you have checked that it all works.

Rob
 
After looking at the manual i think mine is ment to just have two head lights in the centre grill. None in the wings. Can some one confirm this for me.

Think the wings on it might be SR3 or butchered SR 2,

I want to make mine totally original again. Does anyone have some SR2a wings that they would sell and like wise does any one want mine?

Also my fuel tank does not have a filler tube. Just the big cap in the centre towards the front. Does anyone have a SR2a tank and does anyone want mine. If i cant find one ill weld a pipe to it and connect the filler tube.

I live in southampton but do drive around a fair bit with work.


Cheers
Rob
 

Attachments

  • photo-4.JPG
    photo-4.JPG
    34.1 KB · Views: 187
Back
Top