200 tdi Engine checking / refurb??

This site contains affiliate links for which LandyZone may be compensated if you make a purchase.
View attachment 184285

View attachment 184286
Painted block today with some Frosts Old Gold, 1st coat on
I noticed the cam can be pulled out by hand about 20mm or so, I have not removed it or the followers although I have rotated block while doing jobs can this move the followers tappets around leading to this end play
is the play taken up when the cam pulley is on or is it located by the skew gears vacuum pump to keep it in position

Been cleaning pistons and refitting the rings
it looks like the oil control can go on any way round
the middle ring I could see top marked on them all so that was ok the top ring in section is not rectangular but more wedge shaped but I cant work out if


one side is 90 deg (B) or both less than 90 deg (A) anyone had a very close look before
the upper side of the top ring is more stained than the shiny underside so this is my double check just incase I got mixed up while handling them

View attachment 184283


Nice, will be good to see it run.
 
I removed camshaft mainly to aid cleaning of the block but also to check bearings look ok, shells tight and oil holes still lined up. the tappet slide has a F marked on it
the book says this should face the front, on mine they all faced the rear where a painted F had been marked?

i read a horror story on another site today about fitting aftermarket tappet slides and rollers which collapsed after a few thousand miles. luckily mine look all ok
Th end of the oil pump shaft has a tooth missing (by design) this is matched in the skew gear it mates with which i think allows oil to be pumped up to lubricate skew gear and vacuum pump so care needed to ensure gaps line up , it does fit other ways too.
the cam bearing surfaces were cleaned with 1000 grit to remove staining , the teeth on the cam and skew gear had marks where they had been running against but no significant damage
about time to order parts and start cleaning all the bits

IMG_6404.JPG

IMG_6401.JPG
IMG_6407.JPG
 
Take the oil squirters out and check they are clear too. Two copper washers on each (again, from memory)
Just cleaned them tonite
No copper washers seems the squirter just tightens onto a shoulder , wasn’t expecting a spring inside must be to stop oil in passageways draining out
 
There always in the kits when I buy them along with others that don't go anywhere.
The washers were in the kit and ill prob have a few bits left
reading the manual and having a good look ive spotted where a few of the o rings go (I asked Turners but they don't a parts list of whats included)
I swapped the4 big one out of the vacuum pump which was flat and brittle it broke when I prised it out of groove, manual says you can lose oil pressure on that!
im guessing the 2 half moon bits are out of head -
I only bought 2 core plugs , having removed one it looked a bit pitted but plenty of meat still left on it so ill leave others alone. sealant rubber was in the coolant passage behind plug
when I drained sump there was a broken valve cap which had been punched through and damaged the rocker a bit on its wearing face( I had this on the 2286 and just smoothed them off with a mini grinder), in this case I bought a new rocker and caps
new main bearings in and checked the nip clearance which all within spec
then installed the crank and nipped up No3 and inserted replacement 0025 oversize thrust washers and followed up with caps 1 2 and 4 and 5 checking each time crank rotates freely, I have not fitted the T seals yet tomorrows job ,

IMG_6414.JPG IMG_6415.JPG IMG_6417.JPG sounds a bit tricky and tips for fitting welcome

I see the manual advises small chamfer on btm edge and use of guide blocks when inserting them which I don't have was thinking of thin feelers each side just to get them past the top edge
IMG_6412.JPG

IMG_6410.JPG
 
I use thin feelers but still find it a bugger. Trim excess as per the manual.
Replace the rear core plug regardless, it's the only one you can't renew with the engine in.

It’s the front one I changed to be fair they’re easy to change just a bit worried my new ones would leak, I did use a bit is sealer too, at the rear there’s 2 big core plugs and one small see pic a few posts earlier I would guess all 3 could not be changed with engine in ?
 
The highest large one is a waterway, I'm not sure of the others, maybe oil so don't rot?
A smear of red hermetite on a clean hole will ensure no leaks.
 
bit more progress this weekend and then tonite a problem,
crank in and then the T seals to do, I got the btm edges in using a steel rule for a start and then used a thin edge either side to keep the bulging seal in while tapping from above moving each side a bit at a time, it didn't shave any off but stretched the seals you can see at the top.
IMG_6419.JPG

Measurd the nip on the mains and con rods with one loose nut and all ok , pistons went in good using
IMG_6427.JPG
the compressor tool, set gaps to avoid thrust sides and gudgeon pin area
replaced the two o rings on vacuum pump the inner shaft one was a pig, but hard and brittle and eventually it snapped and got it out with a cod hook,
oil pump end float ok, small amount of scoring on gears bIMG_6439.JPG IMG_6440.JPG ut will replace the plunger and spring with genuine LR bits

cleaned oil filter hIMG_6442.JPG IMG_6443.JPG IMG_6445.JPG ousing
IMG_6434.JPG
I replaced the rear core plug it was good condition but surprised now much rust is in the passageways , plan now to remove the 3 on the side to jet wash out, ladder frame on with some blue hylomar, sounds good stuff as you can pull it apart and stick it back on

oil pump on with a small amount of stud lock if youre lucky when you drop a bolt it may fall behind the side cover plate and you can get it with a piece of wire :) ive put the sump on loose to keep dust out until oil pump bits come

next problem was how to get the dowty seal on that I fitted a year ago, I made a seal inserter out of an ice cream tub and cut the rounded ends off push thin end through seal and fat end on crank end went on a doddle. :)
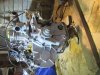
flywheel on and turned engine round and had a go at timing
IMG_6455.JPG IMG_6448.JPG IMG_6453.JPG

This is the problem
IMG_6457.JPG


and im not quite sure where I went wrong I had flywheel locking pin in, and timing pin in pump, the crank key in line with arrow and the cam dot in line with marker
I believe I tensioned up but had the 3 bolts loose and things moved a bit , the pin got tight I pulled it out with pliers and removed belt
as you can see no way to get the pin ion now and turning the pulley wheel a bit does not sort it
ive got the other cogs back where they should go but how do I get this sorted to get the pin back in @jamesmartin
thanks
apart form this hiccup next job is start stripping the head down now the workbench a bit cleaner
 
slack bolts turn center nut till pin fits, pulley will rotate back and forth ensure pulley isnt at the anti clockwise end of the slots when fitting the belt
 
upload_2019-7-30_20-37-27.png


Started to look at head, injectors came out easily, i was expecting a fancy washer rather than a plain copper one
All valves were in spec, and i checked for play by having them in the guide but about 8-10mm from the seat and no side movement
the seats in the head were mostly ok , Valve 5 was the one that has punched through a valve cap to for a time it must have had a big gap , perhaps that was the reason for the dull looking seat
its probably the only one i will bother to lap with fine paste
it has the genuine oil seals which i may fit again they seem to grip the stems ok , there was a 2-3 loose with one halfway up the valve , ill put some studlock on them to keep them i
IMG_6459.JPG
IMG_6462.JPG
IMG_6467.JPG
upload_2019-7-30_20-37-27.png
n place
I need to check spring lengths but keen to keep originals if poss, manual says discard , but what do you do

the old bits of gasket came off nicely with a bit of 15mm copper pipe flattened, end filed and used like a chisel copper supposed to be softer than aluminium. The carbon round the valves i used a paint stripper wheel in the drill worked well and finished with some fine emery
 
IMG_6470.JPG
IMG_6471.JPG
IMG_6472.JPG
IMG_6473.JPG
IMG_6475.JPG
IMG_6477.JPG
IMG_6479.JPG
IMG_6480.JPG
IMG_6481.JPG
IMG_6483.JPG


Been working on the head last couple of days.
I noticed at both ends of rocker shaft it had picked up some ally from the bottom pedestals enough so the rockers would not come off the shaft without a fight , this removed quite easily with some 1000 grit wet and dry with oil I cleaned up the rest of shaft where there was some staining.
I cleaned all the rocker oil holes out with 1.5 and I think 2.5mm drills , I have some new caps to go on as one punched through on valve 5 , you can see the damage so replaced with a Turners one.
after the first set of collets which took an age I used some grease and pre installed them on the haft this speeded things up nicely,
on the last photo if you look closely the middle couple of valves not sitting in the recess properly I just wedged these back in with a block of wood and a screwdriver. I came across the date stamp on the head too which confirms it was cast 07/93 there are a few dots too which might define the day or week not sure.
Ive cleaned the injectors a bit and will prob use a bit of copper grease on the sides
need to get some more parts ordered now
 
IMG_6484.JPG
IMG_6485.JPG
IMG_6486.JPG
IMG_6487.JPG
IMG_6488.JPG


I borrowed a torque gauge to help tension the pulley, I was concerned about the rust inside the block so removed the 3 side core plugs , they had years left in them but this allows raking crud out a bit , I was planning to jet wash inside but unsure whether to do this with head on or not at it might blast it into head , with head removed it might go in the bores
I put some chainsaw oil in the bores as this clings more than engine oil

the tappet securing screws I used dowty washers (there was none on previously) and a drop of medium studlock

I pulled out the vacuum pump 4 things to remember here
  • the slot in body goes to front
  • the spline missing on the oil pump drive mates to a gap in the vacuum pump
  • the vacuum pipe faces the front too
  • new o ring
    IMG_6484.JPG
    IMG_6485.JPG
    IMG_6486.JPG
    IMG_6487.JPG
    IMG_6488.JPG
    IMG_6490.JPG
    IMG_6491.JPG


  • IMG_6492.JPG
    IMG_6493.JPG
Used an Elring 3 hole gasket same as before
new injector washers but not sure which is proper way round some say makes no difference
got the new heater plugs in so come full circle as this is why this rebuild started as I could not get old ones out!
so nearly there the eagle eyed might have noticed a bolt left over this some times happens but this one the threads are damaged so waiting for new one coming, along with new core plugs and oil pump parts
so nearly there and now thinking about aesthetics
considering blinging up the rocker cover and timing cover with some paint


Nice, will be good to see it run

it would too so when it gets back together id like to get in going on the floor

jobs to do
oil pump and spring
sump on
head torqued up
flush engine out of crud - but will this just introduce more water to start rusting again
rockershaft and tappets


the guide below has been very useful


https://www.turnerengineering.co.uk/Article-200TDIEngineRebuild
 
Torqued head up to 40Nm and then two sets of 60deg further turns using a borrowed angle gauge, I removed the 3 remaining block water core plugs and flushed out with hose getting rid of some of the crud
I got the front cover , water pump and thermostat housing sand blasted (thanks Ray) and then 2 coats of etch primer and some top coat spray paint I had in the garage from Aldi or Lidl supposed to be petrol resistant , the rocker cover and inlet manifold I used a cup brush on which gave a nice looking finish.

New valve caps greased to stop them falling away and a lot of care to make sure the push rods were properly engaged , a bit of oil on the end and you can lift the tappet slide with suction shows its proper in.
learning point here make sure the blind holes are clean before bolts go in doh
ive fitted the diesel filter mainly to keep the dirt out of holes not sure if ive got it on the correct side of lift pump

Im more used to 2286 diesel, do you need to bleed the pump on this motor and how is it done?

I got a couple of M20 x 1.5mm blanking plugs for the oil filter housing unfortunately they bottom out in the hole, they cant be cut down so either 6mm fat washers or thread sealant/PTFE tape perhaps
IMG_6494.JPG

IMG_6501.JPG
IMG_6502.JPG
IMG_6503.JPG
IMG_6504.JPG
IMG_6507.JPG
IMG_6508.JPG
 

Attachments

  • IMG_6505.JPG
    IMG_6505.JPG
    323 KB · Views: 255
Back
Top